BenQ Joybee 100 User manual

BenQ Joybee
User's Guide
©2002. BENQ Corporation. All rights reserved. No part of this publication may be reproduced, transmitted,
transcribed, stored in a retrieval system or translated into any language or computer language, in any form or by
any means, electronic, mechanical, magnetic, optical, chemical, manual or otherwise, without the prior written
permission of BENQ Corporation.
BENQ Corporation reserves the right to modify the contents of this guide without prior notice.

BENQ Corporation
Digital Media Business Group
18 JiHu Road, Neihu, Taipei 114, Taiwan, R.O.C.
Tel: +886-2-2799-8800
Fax: +886-2-2799-8332
http://www.BenQ.com
*Please note that Joybee’s plug’n’play feature is applicable only on Windows®2000, Windows®ME and
Windows®XP. If you are using Windows®98 or Windows®98 SE, you will have to install an extra driver to use
Joybee. The driver is in this CD-ROM.
Please use extension cable, USB hub, or docking station to connect Joybee to your computer. This
is to avoid any direct damage to Joybee if your computer suffers from electricity leak.

Table of Contents
WELCOME! ..............................................................................................................1
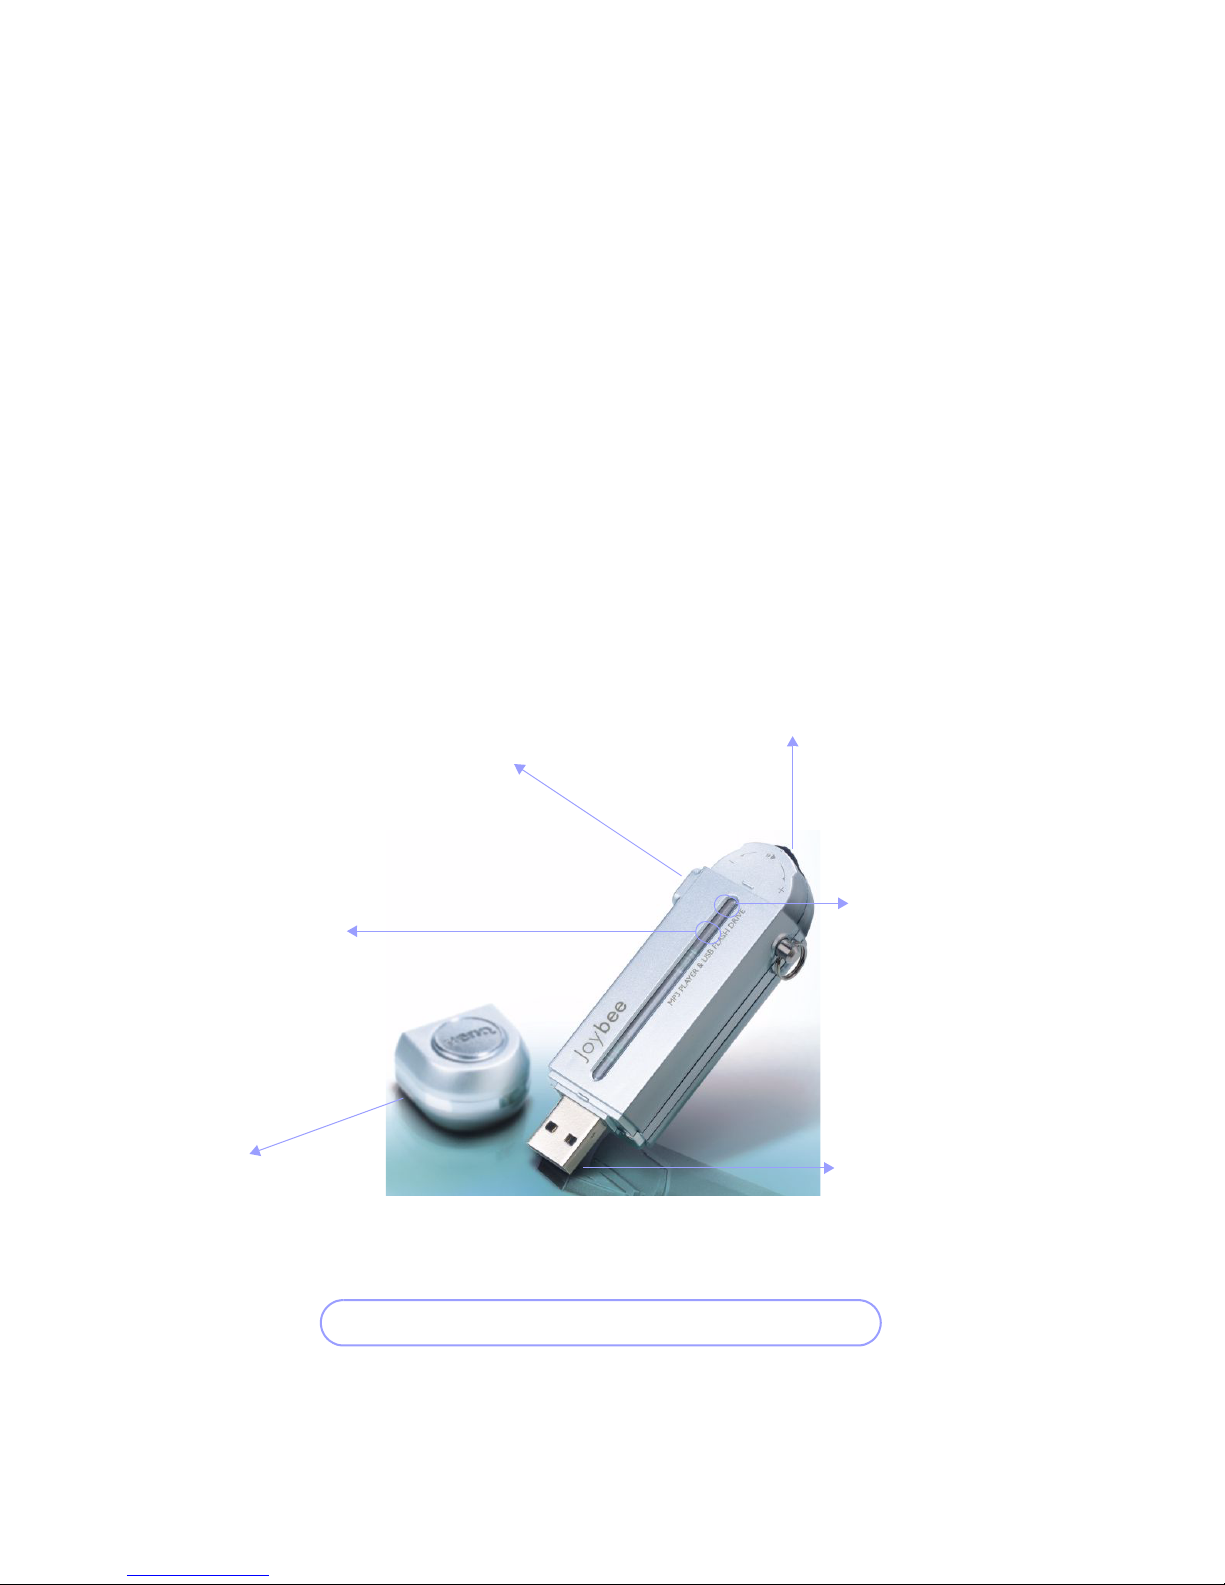
JOYBEE AT AGLANCE............................................................................................................ 2
HOW TO INSTALL THE BATTERY......................................................................................... 3
HOW TO CHARGE JOYBEE ................................................................................................... 4
HOW TO USE JOYBEE AS A MP3 PLAYER ....................................................5
QMUSIC.................................................................................................................. 10
QMUSIC APPEARANCE ........................................................................................................11
INSTALL QMUSIC .................................................................................................................12
ADD SONGS TO JOYBEE......................................................................................................13
ADD SONGS TO JOYBEE WITHOUT QMUSIC..................................................................22
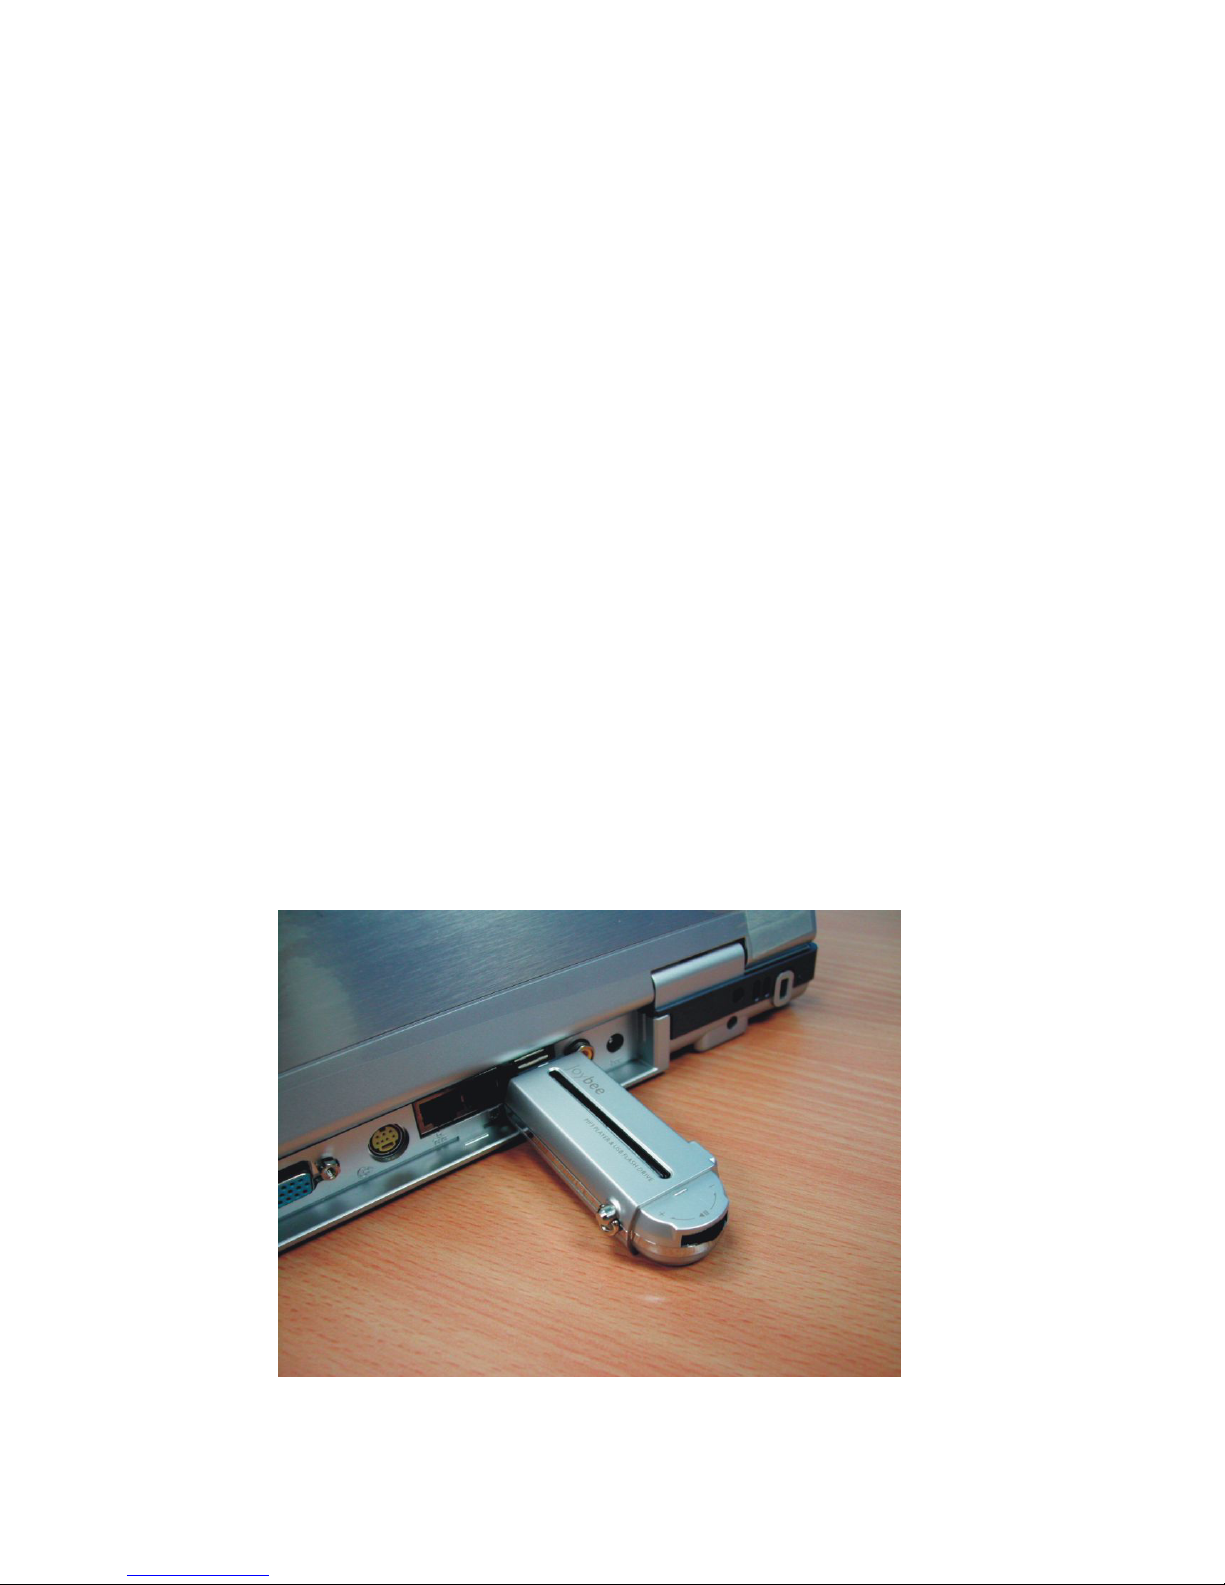
HOW TO USE JOYBEE AS A FLASH DRIVE................................................ 24
REMOVE JOYBEE FROM YOUR COMPUTER............................................. 25
TROUBLESHOOTING ....................................................................................... 27

1
Welcome!
Enjoyment matters!
Thank you for choosing
Joybee. Joybee is a
plug’n’play device that
enhances your digital life
experiences. Joybee can
serve as your personal
MP3 player*, and USB
Flash Drive.
* In this CD-ROM you can find QMusic software. It
is the only software that can help you arrange
music in Joybee, enabling you to decide the playing
order of the songs. QMusic can only be installed
on Windows®XP. If you are not using Windows®XP,
you can still play music with Joybee (see page 22), but
you will not be able to use QMusic to manage the
songs.

2
Joybee at a Glance
User-friendly interface makes it simple and fun to use Joybee!
Control switch: see page 7.Earphone jack: plug your earphone
in here. See page 6.
Play LED: see page 8.
USB port connector: use this
connector to connect Joybee to your
computer. See page 4.
Protection lid: cover either the
control switch or the USB port
connector when the other side is
in use.
Power LED: see page 8.

3
How to Install the Battery
1Press on the circled arrow area
and push the back lid upward.
2Connect the battery’s cord to the power port.
3Put back the back lid.

4
How to Charge Joybee
❖To charge the battery, connect Joybee to your computer’s USB port. When you
are using Joybee for the first time, charge the battery for 1 hour and 45
minutes. When plugged to the computer, Joybee can still function as a MP3
player: you only need to plug the earphone to Joybee to enjoy the songs.

5
How to Use Joybee as a MP3 Player
Let’s rock’n’roll!
As a MP3 player, Joybee
can store and play your
favorite tunes. You can
enjoy music anytime,
anywhere. With help
from QMusic, the superb
media software from
BenQ, importing and
arranging your music has
never been easier.

6
❖When the ear phone is plugged
in, the power automatically
turns on.
XPower on/off
❖Long press the control switch to
turn the power on/off when the
earphone is plugged.
* Note that below when “press” is mentioned,
it means press for about one second. When
“long press” is mentioned, it means press and
hold for about three seconds.

7
❖Turn right: next song.
Turn right and hold: volume up.
❖Press the control switch: play/pause..
❖Turn left: previous song.
Turn left and hold: volume down.
XControl switch

8
❖Power LED:
■Orange: battery in charge.
■Green: battery is fully charged.
❖Play LED:
■Red: MP3 player mode in use.
■Fast red flashes: no MP3 file
found.
■Slow red flashes: pause.
■Green: USB Flash Drive mode
in use.
■Green flashes: reading/writing
USB Flash Drive.
XLED Display (1)

9
❖More on Play LED:
■When you are using the MP3 player function, and you want to
switch between volume control and song control, you should
check the Play LED for status.
■When you turn the control switch to either direction and
hold, the LED will blink for one second, and then proceed to
increase/decrease volume.
■When you reach the volume you want, and stop adjusting the
volume, the LED will blink again after two seconds of inaction.
After the blink, the control switch goes back to song control
mode. If you try song control before the blink, you will end up
adjusting the volume again instead.
XLED Display (2)

10
QMusic
To arrange music for your
Joybee, you need the powerful
media software from BenQ.
QMusic* can also help you
manage music in your hard disk.
QMusic fever!
* QMusic can only be installed on
Windows®XP. If you are not using
Windows®XP, you can still add music to
Joybee (see page 22), but you will not be
able to use QMusic and decide the
playing order of the songs.

11
QMusic Appearance
After you plug Joybee to
your computer, you will
see it show up on
QMusic automtically.
You can arrange the
playing order of the
songs in your computer
using the play list
function.
Under this section you
can create different play
lists.
From left to right:
Update Action;
Add Song;
Option
general status bar
song list window
search
volume control
play status bar
Next visualization effect;
Equalizer;
Play list
Play; stop; next song;
previous song
repeat;
random play

12
Install QMusic
1If you do not want to install the program in the default folder,
please click “Browse...” to choose a preferred destination.
When you are ready, click on Next to continue.
2Choose a name for the
QMusic folder that will
show up on the
program bar. Click
Next when ready. You
will then see QMusic being
installed. 3After QMusic is installed, click Finish to
complete the installation process. Now
you can start to use QMusic!
To install QMusic, first please find the CD-ROM attached to the box, then insert the CD-ROM in your CD-ROM drive. The CD-
ROM will run automatically. It is very simple to start the QMusic setup program: you just need to click on the installation option.

13
Add Songs to Joybee
To add songs to Joybee, first you have to plug the device to your computer’s USB port.
You will then see the device show up on QMusic. Now you can add songs to Joybee.
Please follow the steps below:
1Select Joybee.
2Select Add Song.3A dialogue box will then pop up. Choose as many
songs (MP3 format only) as you want. Click Open
when ready.

14
4Now you can see songs in
Joybee.
5To arrange the order of the song(s), simply
click on the song(s) you want to re-
arrange, and drag it/them to the desired
position on the list.
6To delete a song, click on it and press
Delete key on the keyboard. You can delete
as many songs as you want at one time.
Simply select as many songs as you want
and press Delete.

15
1Select Music Library first.
2Click Add List. Next you will be asked to key in a list name.
Type whatever name you want.
There is also another way to add songs to Joybee:

16
3After a list is created, you
can add songs you want
to put in Joybee on this
list. Select the list and
press Add Song to do so.
4A dialogue box will pop up. Choose as many
songs (MP3 format only) as you want to add
to the list. Click Open when ready.

17
5Now you can see songs in
the list.
6To arrange the songs in the list, click on the song(s) you want, and drag
it/them to the desired position in the list. To delete songs, select ones
you want to delete and press Delete key on the keyboard.
You can also use the same way to create
lists in My Play Lists.
This manual suits for next models
1
Table of contents
Other BenQ MP3 Player manuals

BenQ
BenQ Joybee 120 User manual

BenQ
BenQ Joybee 200 User manual

BenQ
BenQ Joybee 180 User manual

BenQ
BenQ C110 User manual

BenQ
BenQ Joybee 102R User manual

BenQ
BenQ Joybee 120 User manual

BenQ
BenQ Joybee 102R User manual

BenQ
BenQ Joybee 720 User manual

BenQ
BenQ Joybee 120 User manual

BenQ
BenQ Joybee 110 User manual
Popular MP3 Player manuals by other brands

British Wireless for the Blind Fund
British Wireless for the Blind Fund Sonata installation manual

Samsung
Samsung Yepp Sports YP-60 H Service manual

Sony
Sony MAP-S1 operating instructions

Gogen
Gogen MX 868 FM user manual

Sony
Sony Walkman NWZ-A726B Troubleshooting

Audible
Audible Creative Zen Mozaic user guide