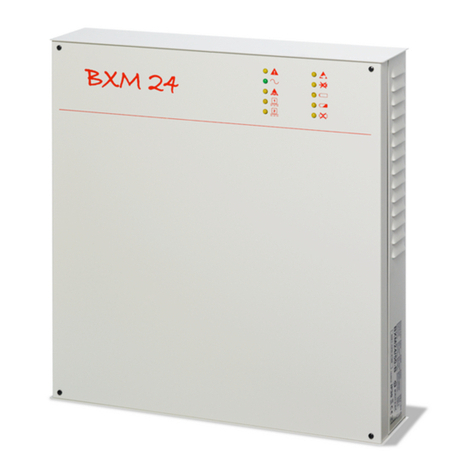
Bentel Security BXM12/30-U User manual

STAZIONI DI ALIMENTAZIONE
MANUALE DI INSTALLAZIONE
POWER SUPPLY STATIONS
INSTALLATION MANUAL
®
FUENTES DE ALIMENTACIÓN COFFRET CHARGEUR SUPERVISÉ
MANUAL DE INSTALACIÓN MANUEL D’INSTALLATION
BXM12/50-B
BXM12/50-U

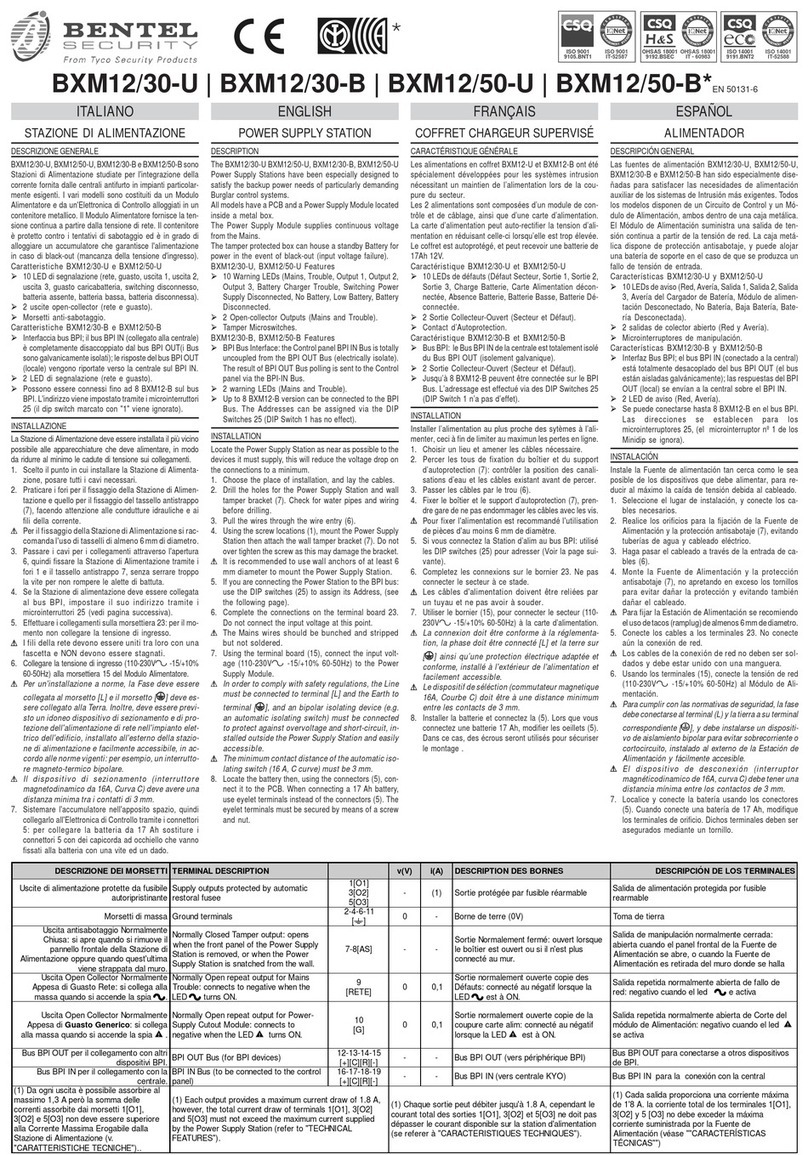
Descrizione
BXM12/30-U, BXM12/50-U, BXM12/30-B e
BXM12/50-B sono Stazioni di Alimentazione
studiate per l’integrazione della corrente fornita
dalle centrali antifurto in impianti particolar-
mente esigenti.
I vari modelli sono costituiti da un Modulo Alimen-
tatore e da un’Elettronica di Controllo alloggiati in
un contenitore metallico. Il Modulo Alimentatore
fornisce la tensione continua a partire dalla tensio-
ne di rete. Il contenitore è protetto contro i tentativi
di sabotaggio ed è in grado di alloggiare un Accu-
mulatore che garantisce l’alimentazione in caso di
black-out (mancanza della tensione d’ingresso).
Caratteristiche: BXM12/30-U e BXM12/50-U:
Ø10 LED di segnalazione (rete, guasto, usci-
ta 1, uscita 2, uscita 3, guasto caricabatte-
ria, switching disconnesso, batteria
assente, batteria bassa, batteria discon-
nessa);
Ø2 uscite open-collector (rete e guasto);
ØMorsetti anti-sabotaggio;
Caratteristiche: BXM12/30-B e BXM12/50-B:
ØInterfaccia bus BPI; il bus BPI IN (collegato
alla centrale) è completamente disaccop-
piato dal bus BPI OUT(i Bus sono galvani-
camente isolati); le risposte del bus BPI
OUT (locale) vengono riportate verso la
centrale sul BPI IN.
Ø2 LED di segnalazione (rete e guasto);
Description
The BXM12/30-U, BXM12/50-U, BXM12/30-B,
BXM12/50-B Power Supply Stations have
been especially designed to satisfy the backup
power needs of particularly demanding Bur-
glar control systems.
All models have a PCB and a Power Supply
Module located inside a metal box. The Power
Supply Module supplies continuous voltage
from the Mains.
The tamper protected box can house a
standby Battery for power in the event of
black-out (input voltage failure).
BXM12/30-U, BXM12/50-U Features
Ø10 Warning LEDs (Mains, Trouble, Output
1, Output 2, Output 3, Battery Charger
Trouble, Switching Power Supply Discon-
nected, No Battery, Low Battery, Battery
Disconnected.
Ø2 Open-collector Outputs (Mains and Trouble)
ØTamper Microswitches
BXM12/30-B, BXM12/50-B Features
ØBPI Bus Interface: the Control panel BPI IN
Bus is totally uncoupled from the BPI OUT
Bus (electrically isolate). The result of BPI
OUT Bus polling is sent to the Control panel
via the BPI-IN Bus.
Ø2 warning LEDs (Mains and Trouble)
IDENTIFICAZIONE DELLE PARTI PARTS IDENTIFICATION
Fori (4) per il fissaggio della Stazione di Ali-
mentazione (∅4 mm). 14 wall-mount screw locations (∅4 mm)
Elettronica di Controllo. 2PCB
Deviatore antistrappo. 3Snatch microswitch
Alloggiamento per un accumulatore da 12 V,
17Ah (a) oppure da 12V, 7Ah (b). 412 V, 17 Ah (a) or 12 V, 7 Ah (b) battery
housing
Connettori per l’accumulatore. 5Battery connectors
Foro per il passaggio dei cavi. 6Wire entry
Tassello antistrappo. 7Snatch bracket
Modulo Alimentatore 8Power Supply Module
Sonda termica KST per l’ottimizzazione della
ricarica della batteria. (Opzionale) V. manuale
specifico.9KST Thermal probe (accessory item) for
optimization of the battery charge process
Led di segnalazione della presenza della
tensione di uscita del Modulo Alimentatore 10 Power Module output voltage LED

-
SW1
1234
ON
NTC
SW
O2 O3 AS RETE RCR
12V
2 3 8 11 14 17 18
OUT
5V
O1 GCBPI IN
+
IN
12V
LB105-P
5V
116 19
5V
BPI OUT
4 75 6 9 10 13 1512
1
2
3
4a
4b
11
5
6
7
8
1
9
1234
ON
NTC
SW
O2 O3 AS RETE RCR
12V
2 3 8 11 14 17 18
OUT
5V
O1 GCBPI IN
+
IN
12V
LB105-P
5V
1 16 19
5V
BPI OUT
4 75 6 9 10 13 1512
14
11
12
13
15 16 17 (a)
(b)
1918 20 23 25 27 2821 2422 26 29 30
23a
10
23b
Fig. 1Identificazione delle parti -Parts

IDENTIFICAZIONE DELLE PARTI PARTS IDENTIFICATION
Connettore sul modulo di alimentazione per
il collegamento al circuito di controllo
tensione di uscita, posto sulla scheda. 11 Connector ---- to be used for the connection
of the Power Supply Module to the on-
board output voltage control circuit
Trimmer di regolazione fine della tensione
di uscita (NON MODIFICARE). 12 Power Supply output voltage trimmer (DO
NOT ADJUST)
Uscita ausiliaria. 13 Auxiliary output
Connettore per il collegamento del Modulo
Alimentatore all’Elettronica di Controllo. 14 Connector ---- to be used for the connection
of the Power Supply Module to the PCB
Morsettiera per il collegamento della
Tensione di Ingresso (230 V , 50 Hz). 15 Terminal board for the input voltage
connection (230V , 50 Hz)
Vite da rimuovere per aprire il Modulo
Alimentatore. 16 Screws (to be removed when the Power
Supply Module is opened)
Fusibile di protezione del Modulo Alimentatore 17 Power Supply Module fuse
Chiodino da rimuovere per aprire il Modulo
Alimentatore. 18 Pin (to be removed when the Power Supply
Module is opened)
Fusibile (T 8A 250V)contro l’inversione
accidentale delle polarità dell’accumulatore 19 Fuse (T 8A 250V) ---- protects against
unintentional battery polarity inversion
Connettore per il collegamento del Modulo
Alimentatore 20 Power Supply Module connector
Connettore per il collegamento al circuito di
controllo tensione di uscita 21 Connector ---- to be used for the connection
to the output voltage control circuit
Connettore per il collegamento della sonda
termica 22 Thermal Probe connector
Morsettiera per i collegamenti (Entrambe le
versioni). 23 Terminal board (for both models)
Morsetti antisabotaggio e uscite Open
Collector (solo versione -U)23a Tamper Microswitches and Open-collector
outputs (only for -U version)
Morsetti BPI (solo versione-B)23b BPI Terminals (only for -B version)
Deviatore antisabotaggio. 24 Tamper microswitch
Microinterruttori per l’impostazione
dell’indirizzo (solo versione -B). 25 Address DIP Switches (only for -B version)
LED giallo: guasto; LED verde: rete (Unici
due LEDs presenti nella versione -B)26 Amber LED = Trouble; Green LED = Mains
(on -B version)
Connettore per il collegamento microswitch
antisabotaggio . 27 Tamper Microswitch connector
Ponticello per l’impostazione del livello BPI in
uscita > 5 V; >12 V(preimpostazione) 28 BPI OUT Level Jumper
> 5 V ; >12 V (at default)
Ponticello per l’impostazione del livello BPI in
entrata > 5 V ; >12 V
(preimpostazione) 29 BPI IN Level Jumper
> 5 V; >12 V (at default)
Ponticello da impostare se il livello
BPI in entrata è 5V; (preimpostazione) 30 BPI IN Level Jumper : to be inserted
when the BPI IN Level is set at 5V; (at
default)

ØPossono essere connessi fino ad 8 BXM12
versione -B sul bus BPI. L’indirizzo viene
impostato tramite i microinterruttori 25 (il
dip switch marcato con "1" viene ignorato).
Installazione
La Stazione di Alimentazione deve essere in-
stallata il più vicino possibile alle apparecchia-
ture che deve alimentare, in modo da ridurre al
minimo le cadute di tensione sui collegamenti.
ØScelto il punto in cui installare la Stazione di
Alimentazione, posare tutti i cavi necessari.
ØPraticare i fori per il fissaggio della Stazione di
Alimentazione e quello per il fissaggio del tas-
sello antistrappo (7), facendo attenzione alle
condutture idrauliche e ai fili della corrente.
ØPassare i cavi per i collegamenti attraverso l’apertu-
ra 6, quindi fissare la Stazione di Alimentazione tra-
mite i fori 1e il tassello antistrappo 7, senza serrare
troppolavitepernonromperelealettedibattuta.
ØSe la Stazione di alimentazione deve essere col-
legata al bus BPI, impostare il suo indirizzo trami-
te i microinterruttori 25:
ØEffettuare i collegamenti sulla morsettiera
23: per il momento non collegare la tensio-
ne di ingresso (230 V). I fili della rete de-
vono essere uniti tra loro con una
fascetta e NON devono essere stagnati.
ØCollegare la tensione di ingresso (230 V
+/−10% 50/60 Hz) alla morsettiera 15 del
Modulo Alimentatore.
ATTENZIONE Per un’installazione a norme, la
Fase deve essere collegata al morsetto [L] e il
morsetto [] deve essere collegato alla Terra.
Inoltre, deve essere previsto un idoneo dispositivo
di sezionamento e di protezione dell’alimentazione
di rete nell’impianto elettrico dell’edificio, in accordo
alle norme vigenti (legge 46/90): per esempio, un
interruttore magneto-termico bipolare.
ØSistemare l’accumulatore nell’apposito spazio, quindi
collegarlo all’Elettronica di Controllo tramite i connet-
tori 5. Per collegare la batteria da 17 Ah sostiture i
connettori 5con dei capicorda ad occhiello che van-
nofissatiallabatteriaconunaviteedundado.
+Fare attenzione a non invertire le polarità
dei collegamenti; se ciò si dovesse verifi-
care, sostituire il fusibile 19 (T 8A 250 V).
Up to 8 BXM12, -B version, can be connected
to the BPI Bus. The Addresses can be as-
signed via the DIP Switches 25 (DIP Switch 1
has no effect).
Installation
Locate the Power Supply Station as near as
possible to the devices it must supply, this will
reduce the voltage drop on the connections to
a minimum.
ØChoose the place of installation, and lay the
cables.
ØDrill the holes for the Power Supply Station
and snatch bracket (7). Check for water
pipes and wiring before drilling.
ØPull the wires through the wire entry (6).
ØUsing the screw locations (1), mount the
Power Supply Station then attach the snatch
bracket (7). Do not to over tighten the screw
as this may damage the bracket.
ØIf you are connecting the Power Station
to the BPI bus: use the DIP switches (25)
to assign its Address.
ØComplete the connections on the terminal
board 23. Do not connect the input voltage
(230 V) at this point. The Mains wires
should be bunched and stripped but not
soldered.
ØUsing the terminal board (15), connect the
input voltage (230 V ±10% 50/60 Hz) to
the Power Supply Module.
IMPORTANT In order to comply with safety
regulations, the Line must be connected to
terminal [L] and the Earth to terminal [],
and an bipolar isolating device (e.g. an auto-
matic isolating switch) must be connected to
protect against overvoltage and short-circuit .
ØLocate the battery then, using the connec-
tors (5), connect it to the PCB. When con-
necting a 17 Ah battery, use eyelet
terminals instead of the connectors (5). The
eyelet terminals must be secured by means
of a screw and nut.
+Ensure the connection polarity is cor-
rect. In the event of unintentional inver-
sion, change the fuse 19 (T 8A 250 V).
This manual suits for next models
3
Table of contents
Other Bentel Security Power Supply manuals
Popular Power Supply manuals by other brands

Videx
Videx 520MR Installation instruction

Poppstar
Poppstar 1008821 Instructions for use

TDK-Lambda
TDK-Lambda LZS-A1000-3 Installation, operation and maintenance manual

TDK-Lambda
TDK-Lambda 500A instruction manual

Calira
Calira EVS 17/07-DS/IU operating instructions

Monacor
Monacor PS-12CCD instruction manual


