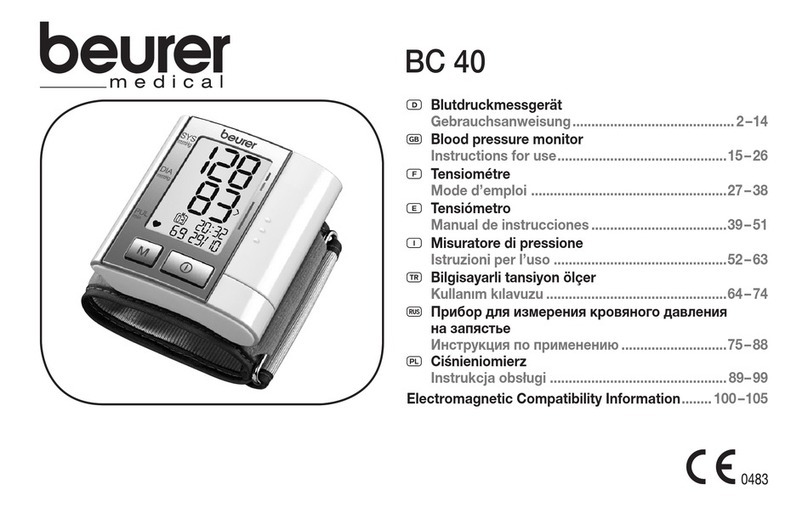
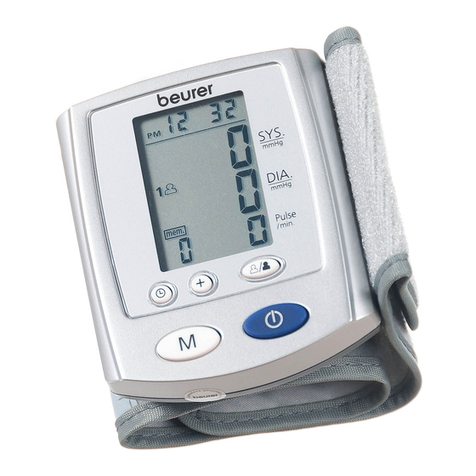
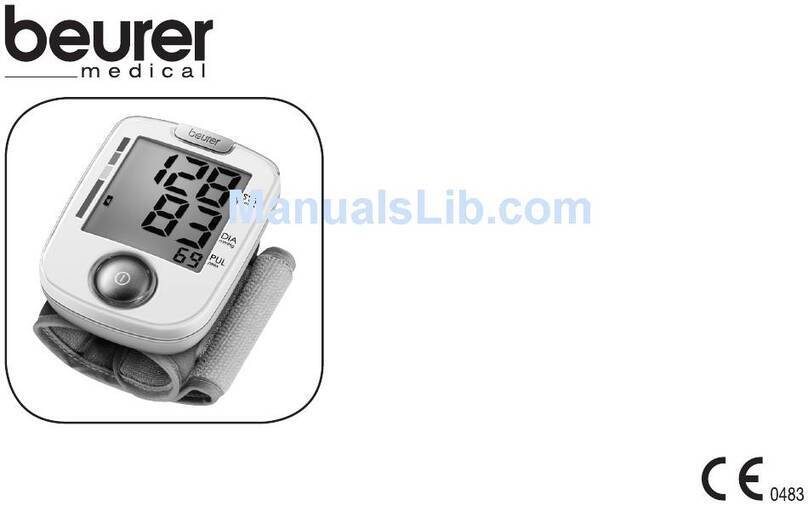
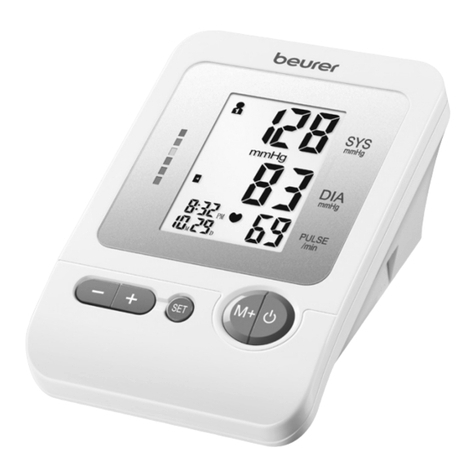
Beurer BC 42 User manual

BEURER GmbH & Co. KG • Söflinger Str. 128D 89077 Ulm (Germany)
BC 42
Gebrauchsanleitung
Operating Instructions
Mode d´emploi
Modo de empleo
Istruzioni per l’uso
Gebruiksaanwijzing
Instruções de utilização
Οδηγίες χρήσεως
Brugsanvisning
Bruksanvisning
Brukerveiledning
Kullanma Talimat∂
Handgelenks-Blutdruckcomputer
Blood pressure wrist computer
Tensiomètre de poignet électronique
Computadora de medición de presión de
sangre para la muñeca
Sfigmocomputer
Elektronische polsbloeddrukmeter
Medidor de tensão arterial de pulso
Ηλεκτρονικ πιεσµετρο καρπού
Håndleds-blodtrykscomputer
Blodtrycksdator för handled
Håndledds-blodtrykkscomputer
Bileklik Tansiyon Bilgisayar∂
0344
GA BC 42_multi.qxp3 27.04.2001 17:20 Uhr Seite 1

2
123
4
5
6
Kurzbeschreibung:
1. Display
2. Speicherplatzwahl-Schalter: -
3. Speicherplatzwahl-Schalter: +
4. Menü-Taste
5. START/STOP-Taste: I/O
6. Manschette: 12,5 – 20,5 cm
Descripción breve:
1. Display
2. Selector del puesto de
memoria: -
3. Selector del puesto de
memoria: +
4. Tecla menú
5. Tecla START/STOP: I/O
6. Puño: 12,5 – 20,5 cm
Brief description:
1. Display
2. Memory allocation switch: -
3. Memory allocation switch: +
4. Menu button
5. START/STOP button: I/O
6. Cuff: 12.5 – 20.5 cm
Description sommaire
1. Affichage
2. Sélecteur de position mémoire : -
3. Sélecteur de position mémoire : +
4. Touche Menu
5. Touche MARCHE/ARRÊT : I/O
6. Manchette : 12,5 – 20,5 cm
Breve descrizione:
1. Display
2. Selettore zona memoria: -
3. Selettore zona memoria: +
4. Tasto menu
5. Tasto START/STOP: I/O
6. Polsino: 12,5 – 20,5 cm
Korte beschrijving:
1. Display
2. Keuzeknop geheugenplaats: -
3. Keuzeknop geheugenplaats: +
4. Menutoets
5. START/STOP-toets: I/O
6. Manchet: 12,5 – 20,5 cm
Kort beskrivelse:
1. Display
2. (-) tast til valg af lagerplads
3. (+) tast til valg af lagerplads
4. Menutast
5. START/STOP-tast: I/O
6. Manchet: 12,5 – 20,5 cm
Breve descrição:
1. Display
2. Selector de memória: -
3. Selector de memória: +
4. Tecla de menu
5. Tecla START/STOP: I/O
6. Braçadeira: 12,5 – 20,5 cm
Kort beskrivning:
1. Display
2. Minnesplatsknapp: -
3. Minnesplatsknapp: +
4. Menyknapp
5. START/STOP-knapp
(Start/stopp): I/O
6. Manschett: 12,5 – 20,5 cm
Συνοπτική περιγραφή:
1. Οθόνη
2. ∆ιακόπτης επιλογής θέσης µνήµης: -
3. ∆ιακόπτης επιλογής θέσης µνήµης: +
4. Πλήκτρο επιλογ ν
5. Πλήκτρο ΕΝΑΡΞΗ/ΠΕΡΑΤΩΣΗ: Ι/Ο
6. Μανσέτα: 12,5 –20,5 εκ.
K∂sa tan∂m:
1. Ekran
2. Hafıza yeri seçme şalteri: -
3. Hafıza yeri seçme şalteri: +
4. Menü düğmesi
. START/STOP düğmesi: I/O
6. Manşet: 12, - 20, cm
Kort beskrivelse:
1. Display
2. Stedsvalg for lagring-bryter: -
3. Stedsvalg for lagring-bryter: +
4. Meny-tast
5. START/STOPP-tast: I/O
6. Mansjett: 12,5 – 20,5 cm
GA BC 42_multi.qxp3 27.04.2001 17:20 Uhr Seite 2

3
Deutsch
1. Kennenlernen
Mit dem Blutdruckcomputer für das Handgelenk können Sie schnell und einfach Ihren Blutdruck messen,
die Messwerte abspeichern – und den Verlauf und Durchschnitt der Messwerte anzeigen lassen. Das Gerät
dient zur nichtinvasiven Messung und Überwachung Ihrer arteriellen Blutdruckwerte.
Das Gerät entspricht den Anforderungen der europäischen Richtlinie für Medizinprodukte, dem Medizin-
produktegesetz, sowie den europäischen Normen EN1060-1 (nichtinvasive Blutdruckmessgeräte Teil 1:
Allgemeine Anforderungen) EN1060-3 (nichtinvasive Blutdruckmessgeräte Teil 3: Ergänzende Anfor-
derungen für elekromechanische Blutdruckmesssysteme). Entsprechend der „Betreiberverordnung für
Medizinprodukte“ sind regelmäßige messtechnische Kontrollen durchzuführen, wenn das Gerät zu gewerb-
lichen oder wirtschaftlichen Zwecken eingesetzt wird. Auch bei privater Benutzung empfehlen wir Ihnen
eine messtechnische Kontrolle in 2-Jahres-Abständen beim Hersteller.
Bewahren Sie diese Gebrauchsanleitung für weitere Benutzung auf und machen sie diese auch anderen
Benutzern zugänglich.
Vorsicht – Zu Ihrer Sicherheit!
• Messen Sie Ihren Blutdruck immer zu gleichen Tageszeiten, um eine Vergleichbarkeit der Werte zu
gewährleisten
• Ruhen Sie sich vor jeder Messung ca. 3 – 5 Minuten aus!
• Zwischen zwei Messungen sollten Sie 5 Minuten warten!
• Die von Ihnen selbst ermittelten Messwerte können nur zu Ihrer Information dienen – sie ersetzen
keine ärztliche Untersuchung! Besprechen Sie Ihre Messwerte mit dem Arzt, begründen Sie daraus auf
keinen Fall eigene medizinische Entscheidungen (z.B. Medikamente und deren Dosierungen)!
• Bei Einschränkungen der Durchblutung an einem Arm aufgrund Chronischer oder akkuter
Gefäßerkrankungen (unter anderem Gefäßverengungen), ist die Genauigkeit der Hangelenksmessung
eingeschränkt. Weichen Sie in diesem Fall auf ein am Oberarm messendes Blutdruckmessgerät aus
(z.B. das DC 55 von Beurer).
• Es kann zu Fehlmessungen bei Erkrankungen des Herz-Kreislaufsystems kommen, ebenso bei sehr
niedrigem Blutdruck, Durchblutungs- und Rhytmusstörungen sowie bei weiteren Vorerkrankungen.
Das Blutdruck-Messgerät besteht aus Präzisions- und Elektronik-Bauteilen. Die Genauigkeit der
Messwerte und Lebensdauer des Gerätes hängt ab vom sorgfältigen Umgang:
- Sie sollten das Gerät vor Stößen schützen und nicht fallen lasssen,
- Vor Feuchtigkeit, Schmutz, starken Temperaturschwankungen und direkter Sonneneinstrahlung
schützen,
- Nicht in der Nähe von starken elektromagnetischen Feldern benutzen, also fernhalten von
Funkanlagen oder Mobiltelefonen
• Drücken Sie nicht auf Tasten, solange die Manschette nicht angelegt ist.
• Verwenden Sie das Gerät nur bei Personen mit dem für das Gerät angegebenen Umfangbereich des
Handgelenks
• Falls das Gerät über einen längeren Zeitraum nicht benutzt wird, wird empfohlen die Batterien zu
entfernen.
• Batterien dürfen nicht in die Hände von Kindern gelangen und gehören nicht in den Hausmüll.
• Bitte entsorgen Sie die verbrauchten Batterien an den dafür vorgesehenen Sammelstellen.
• Öffnen Sie nicht das Gerät. Bei nichtbeachten erlischt die Garantie. Das Gerät darf nicht selbst
repariert oder justiert werden. Eine einwandfreie Funktion ist in diesem Fall nicht mehr gewährleistet.
GA BC 42_multi.qxp3 27.04.2001 17:20 Uhr Seite 3
4
2. Batterien einsetzen / wechseln
• Entfernen Sie den Batteriefachdeckel in Pfeilrichtung: 2
• Legen Sie die beiden Batterien gemäß der Polung in das Batteriefach ein: 3
• Verwenden Sie ausschließlich Markenbatterien vom Typ:
2x1,5V Micro (Alkali Typ LR03)
• Schließen Sie anschließend das Batteriefach, indem Sie den Deckel aufsetzen und
einrasten lassen.
• Sind die Batterien fast verbraucht, erscheint folgendes Display und die Batterien
müssen ausgetauscht werden: 1
• Zudem funktioniert dann nur noch die START/STOP-Taste (I/O) bis neue
Batterien eingelegt wurden:
3. Erste Einstellungen
Nach dem Einlegen der Batterien erscheint im Display automatisch die Einstellung für
Sprache und Uhrzeit/Datum:
Sprache:
• auf dem Display können Sie nun mit der + und - Minus-Taste die von Ihnen
gewünschte Sprache wählen
• Mit der Taste MENU oder START/STOP (I/O) bestätigen Sie die gewünschte
Sprache und kommen dann automatisch zur Einstellung von Datum/Uhrzeit
• Die Sprache können Sie über die MENU-Taste später wieder ändern, siehe Seite 7
Datum/Uhrzeit:
Die Einstellung von Datum/Uhrzeit ist notwendig, um Ihre Messwerte korrekt mit
Uhrzeit und Datum zu speichern und später wieder abzurufen
• Sie geben nun wiederum mit der + und - Taste das Jahr, den Monat, den Tag und
die Uhrzeit ein
• Die Stelle, die verändert werden kann blinkt,
• nach der richtigen Einstellung bestätigen Sie immer mit der MENU -Taste und
verändern die nächste blinkende Stelle
Nach Einstellung von Datum und Uhrzeit können Sie bestimmen, ob das Gerät
Datum und Uhrzeit ständig anzeigen soll:
• Hierzu können Sie automatisch mit den + und - Tasten zwischen „ANZEIGE EIN
oder ANZEIGE AUS“ wählen (bei EIN wird Datum und Uhrzeit ständig angezeigt,
aber die Lebensdauer der Batterien ist wesentlich kürzer)
• Bestätigen Sie Ihre Eingaben zum Schluss mit der START/STOP-Taste (I/O)
4. Anlegen des Gerätes
• Legen Sie den Blutdruckcomputer am linken Handgelenk auf der Innenseite
an
• Achten Sie darauf, dass das Handgelenk unbekleidet ist
• Schließen Sie die Manschette mit dem Klettverschluss, so dass die
Oberkante des Gerätes ca. 10 mm unter dem Handballen sitzt (siehe Abb)
• Die Manschett muss eng um das Handgelenk anliegen, darf aber nicht
einschnüren
FEB 15 2001
20:21
ANZEIGE
EIN
FEB 15 2001
20:21
ANZEIGE
AUS
1 cm
BATTERIEN
AUSWECHSELN
1
2
3
GA BC 42_multi.qxp3 27.04.2001 17:20 Uhr Seite 4

5
5. Blutdruck messen
•Setzen Sie sich ruhig hin
•Stützen Sie Ihren Arm unbedingt ab und winkeln ihn an, so dass sich das Gerät auf
Herzhöhe befindet (siehe Abb)
• Halten Sie vor der Messung eine ausreichende Ruhezeit von 3 – 5 Minuten ein
• Wählen Sie den gewünschten Speicher: M1, M2 (siehe Seite 5)
• Drücken Sie nun die Starttaste um die Messung zu starten und auf dem Display
erscheint eine Begrüßung.
• Die Manschette wird nun automatisch auf 180 mmHg
aufgepumpt und das Display zeigt folgende Darstellungen:
• Nach Erreichen der 180 mmHg startet der
Messvorgang und auf dem Display erscheint ein
pochendes Herz:
• Sollte der voreingestellte Druck von
180 mmHg beim Aufpumpen nicht genügen,
pumpt das Gerät automatisch auf einen höheren Druck auf
• Anschließend erscheinen auf dem Display Ihre Blutdruckwerte und Ihre
Pulsfrequenz:
• Zum Abschalten drücken Sie erneut START/STOP (I/O)
• Sollten Sie vergessen das Gerät abzuschalten, schaltet sich dieses automatisch nach
3 Minuten ab
6. Speicherwahl
Sie haben die Möglichkeit mit dem Gerät 2 x 30 Werte zu speichern, um den Trend
Ihres Blutdrucks zu kontrollieren.
• Nach Einsetzen der Batterien werden Ihre Werte immer automatisch in Speicher
M1 gespeichert,
• Bei Entnahme der Batterien bleiben alle Speicherwerte vorhanden
• Über die MENU-Taste gelangen Sie zur SPEICHERWAHL
• Durch nochmaliges Drücken der MENU-Taste kommen Sie in die Speicherwahl:
• Mit den + und - Tasten können Sie zwischen Speicher M1, Speicher M2 oder kein
Speicher AUS wählen und mit der MENU-Taste diesen bestätigen
• Während der Messung wird der gewählte Speicherplatz angezeigt
• Wählen Sie die Funktion AUS wird der gemessene Wert nicht gespeichert
• Der einmal eingegebene Speicher ändert sich nur durch die Eingabe eines anderen,
oder die Entnahme der Batterien
7. Anzeige der gespeicherten Werte
Sie haben die Möglichkeit den jeweiligen Speicher M1 oder M2 auf 4 verschiedene
Arten abzurufen:
a) Einzeldarstellung
• Drücken Sie in ausgeschaltetem Zustand die + oder - Taste erscheint der letzte
gemessene Wert
• Durch weiteres Drücken der + oder - Taste können Sie alle gespeicherten Werte
einzeln abrufen
• • • • • • • • • • • • •
HALLO
MODELL BC-42
ENTSPANN.ENTSPANN.
NICHT
BEWEGEN
NICHT
BEWEGEN
RUHIG
SPEICHERWAHL
AUS M1 M2
GA BC 42_multi.qxp3 27.04.2001 17:20 Uhr Seite 5

6
• Sie erkennen im Display die Speicherplatznummer, Datum und Uhrzeit wann
gemessen wurde
• Die Nummer 1 (No1) ist immer der älteste Speicherwert und bei erreichen der
30 Plätze fällt immer der älteste Wert aus dem Speicher
b) Durchschnittswert
• Sehen Sie auf dem Display den letzten gemessenen Wert erhalten Sie durch drücken
der + Taste den Durchschnittswert aller gespeicherten Werte:
c) Speicherliste
Sie haben außerdem die Möglichkeit sich alle gespeicherten Werte in einer Liste
anzeigen zu lassen:
• Wenn Sie sich in der Einzeldarstellung der Speicherwerte befinden, drücken Sie
einfach erneut die MENU-Taste und erhalten dann automatisch die Auflistung aller
Speicherwerte
• Sie können auf dem Display 5 Speicherwerte auf einmal sehen
• Der Wert, den Sie als letztes bei der Einzeldarstellung gesehen haben ist in der Liste
durch ein Kästchen gekennzeichnet
• Durch drücken der + oder - Taste können Sie die Liste durchblättern:
d) Trendgrafik der Speicherwerte
Hier können Sie sich in einer Grafik alle gespeicherten Werte ansehen und auf einen
Blick den Trend Ihres Blutdrucks erkennen
• In der Darstellung der Speicherliste drücken Sie nochmals die MENU-Taste und
erhalten dann automtisch die Trendgrafik Ihrer gespeicherten Blutdruckwerte
• Der Wert, der in der Speicherliste gekennzeichnet war blinkt und zusätzlich werden
auf der rechten Seite die entsprechenden Messwerte angezeigt
• Durch drücken der + oder - Taste können Sie sich alle Werte nochmals in Zahlen
rechts neben der Grafik anzeigen lassen
• Ganz rechts in der Grafik (dickster Strich) können Sie den Durchschnittswert als
Graph erkennen:
• Zum Beenden der Speicheranzeige drücken Sie die START/STOP-Taste (I/O),
ansonsten schaltet sich das Gerät automatisch nach 30 Sekunden ab
8. MENU
Um in das Menü zu gelangen drücken Sie die Taste MENU und Sie können mit der
(+) oder (-) Taste zwischen folgenden Punkten wählen:
Durch erneutes Drücken der MENU-Taste gelangen Sie in den jeweiligen MENU-
Punkt zur Bearbeitung
Mit den (+) und/oder (-) Tasten können Sie innerhalb der einzelnen MENU-Punkte
Einstellungen vornehmen:
a) Speicherwahl: siehe Seite 5
b) Einstelldruck:
• hier sind automatisch vom Hersteller 180 mmHg vorgegeben
• Sie können die den Einstelldruck selbst mit der (+) oder (-) Taste im 10 mmHg-
Schritten zwischen 150 und 300 mmHg verändern
• Mit dieser Einstellung können Sie, den für Sie optimalen Einstelldruck erreichen
und damit ein Nachpumpen unterbinden
• Faustformel: Einstelldruck = Systolischer Druck + 30 mmHg
• Zur Bestätigung drücken Sie erneut die MENU-Taste und das Gerät schaltet ab
DURCH
EINSTELLDRUCK
WECHSELN= -] +]
EINSTELL.= MENU]
MENU
SPEICHERWAHL
EINSTELLDRUCK
SPEICHER LOESCH
SPRACHEN
UHR STELLEN
KONTRAST
GA BC 42_multi.qxp3 27.04.2001 17:20 Uhr Seite 6

7
c) Speicher löschen:
• Mit der (+) oder (-) Taste wählen Sie den Wert, den Sie löschen wollen
• Durch erneutes Drücken der MENU-Taste löschen Sie den gewählten Wert aus
dem Speicher
d) Sprachen
• Mit der (+) oder (-)Taste können Sie eine der 5 Sprachen für das Display auswählen
oder ändern
e) Uhr stellen
• Hier können Sie Datum und/oder Uhrzeit des Gerätes einstellen
oder verändern
f) Kontrast
• Hier können Sie die Helligkeit des LCD-Displays bestimmen
• Die Einstellung erfolgt mit (+) oder (-) zwischen Werten von 1 – 10
• Mit der Einstellung 1 erreichen Sie den stärksten Kontrast
• Zur Bestätigung drücken Sie MENU
Zur Bestätigung bei einer Veränderung innerhalb der Menü-Punkte drücken Sie
immer die MENU-Taste
Das Gerät schaltet automatisch ab, wenn Veränderungen mit MENU-Taste bestätigt
wurden
Ansonsten schalten Sie mit der START/STOP-Taste (I/O) aus
Wenn das Gerät 30 Sekunden nicht genutzt wurde schaltet es automatisch ab
9. Fehlermeldungen erscheinen im Display wenn:
• das Aufpumpen länger als 25 Sekunden dauert
• Sie sich während der Messung bewegen und nicht ruhig halten
• nicht genügend aufgepumpt wurde, trotz Nachpumpen
• die Blutdruckwerte außergwöhnlich hoch oder niedrig sind
• der Aufpumpdruck höher als 330 mmgH ist
Im Fall von Fehlermeldungen warten Sie kurz und messen erneut:
10. Reinigung
• Reinigen Sie Ihren Blutdruckcomputer vorsichtig nur mit einem leicht angefeuchteten
Tuch
• Verwenden Sie keine Reinigungs- oder Lösungsmittel
• Sie dürfen das Gerät auf keinen Fall unter Wasser halten, da sonst Flüssigkeit
eindringen kann und das Gerät beschädigt
KONTRAST
FEHLER
ERNEUT
MESSEN
SPEICHER LOESCH
FEB 15 2001
20:21
JAN 1 2001
0:00
SPRACHEN
ENGLISCH
DEUTSCH
FRANCAIS
ITALIANO
ESPANOL
GA BC 42_multi.qxp3 27.04.2001 17:20 Uhr Seite 7

8
11. Tabelle zur Klassifikation von Blutdruckwerten (Maßeinheit mmHg) für
Erwachsene:
Bereich Systolischer Blutdruck Diastolischer Blutdruck Maßnahme
Hypotonie niedriger als 105 niedriger als 60 Kontrolle bei Ihrem Arzt
Normalbereich zwischen 105 und 140 zwischen 60 und 90 Selbstkontrolle
Grenzwerthypertonie zwischen 140 und 160 zwischen 90 und 95 Kontrolle beim Arzt
Milde Hypertonie höher als 160 zwischen 95 und 105 Konsultation Ihres Arztes
Mittelschwere Hypertonie höher als 160 zwischen 105 und 115 Konsultation Ihres Arztes
Schwere Hypertonie höher als 160 höher als 115 Konsultation Ihres Arztes
12. Garantie:
• Die Garantiezeit beträgt 12 Monate und beginnt mit dem Zeitpunkt der Übergabe des Gerätes
• Dies ist durch Rechnung oder andere Unterlagen eindeutig zu belegen
• Die Gewährleistung umfasst die innerhalb der Garantiezeit auftretenden Mängel des Gerätes, die
nachweislich auf Material- oder Fertigungsfehler beruhen
• Gewährleistung ist ausgeschlossen, wenn die Mängel auf unsachgemäße Handhabung, auf
Nichtbeachtung der Gebrauchsanleitung oder auf Eingriff von Dritten beruht
• Erfolgt die Beanstandung zu unrecht, sind wir berechtigt, für Prüfung und Versand des Gerätes eine
angemessene Vergütung per Nachnahme zu verlangen
• Senden Sie bei Kundendienstarbeiten bitte das Gerät zusammen mit abgestempelter Garaniekarte oder
dem Kaufbeleg an unsere Servicestelle. Nachgereichte Belege können nicht akzeptiert werden
13. Technische Daten:
Typ: BC 42
Messmethode: nichtinvasive, oszillometrische Blutdruckmessung am
Handgelenk
Für Handgelenksumfang 12,5 – 20,5 cm
Anzeigebereich: 0 – 300 mmHg
Messbereich: systolisch: 50 – 250 mmgH / diastolisch: 40 – 180 mmHg /
Puls: 40 – 160/min
Genauigkeit der Druckanzeige: systolisch ± 3 mmHg / diastolisch: ± 3 mmHg / Puls: ± 5% des
angezeigten Wertes
Messunsicherheit: (max. zulässige Standardabweichung gemäß klinischer Prüfung
nach DIN 58130):
systolisch: 8 mmHg / diastolisch: 8 mmHg
Stromversorgung: 2 x 1,5 V Micro (Alkaline Typ LR 03)
Klassifikation: Anwendungsteil Typ B
Umgebungsbedingungen: 10 – 40 °C max. 85% Luftfeuchtigkeit
Lagerung/Transport: -5 °C – 50 °C max. 85% Luftfeuchtigkeit
Zeichenerklärung: Anwendungsteil Typ B
Achtung! Gebrauchsanleitung lesen
GA BC 42_multi.qxp3 27.04.2001 17:20 Uhr Seite 8

9
English
1. Familiarization
You can measure your blood pressure quickly and easily with the blood pressure wrist computer, save the
readings – and display the progress and average of the readings. The computer is used for non-invasive
measurement and monitoring of your arterial blood pressure levels.
The computer complies with the requirements of the European Directive for Medical Products, the
German Medical Product Act as well as the European standards EN1060-1 (Non-invasive blood pressure
measuring devices Part 1: General requirements) EN1060-3 (Non-invasive blood pressure measuring
devices Part 3: Supplementary requirements for electromechanical blood pressure measuring systems).
Regular checks on measuring accuracy are necessary according to the “Directive for users of medical
products” when the computer is used for industrial or commercial purposes. For private use also, we
recommend that you have the measuring accuracy checked by the manufacturer at 2-yearly intervals.
Keep these operating instructions available for further use and also make them available to other users.
Caution – For Your Safety!
• Always measure your blood pressure at the same time of day in order to ensure comparability of the
readings
• Relax for about 3 – 5 minutes before every measurement!
• Wait 5 minutes between successive measurements!
• The measurements you make yourself are only for your information – they are no substitute for a
medical examination! Discuss your readings with your doctor and on no account make your own
medical decisions (e.g. drugs and their dosages)!
• The wrist measurement will be less accurate if an arm suffers from restricted blood circulation resulting from
chronic or acute vascular diseases (including vasoconstrictions). In this case, use a sphygmomanometer for
measurements on the upper arm (e.g. the DC 55 from Beurer).
• Measuring errors can occur in diseases of the cardiovascular system, as well as with very low blood
pressure, irregular blood circulation and arrhythmia and also in the case of other symptoms.
The blood pressure computer consists of precision-made electronic components. The measuring
accuracy and life of the computer depend on the care with which it is treated:
- Protect the computer from shocks and be careful not to drop it,
- Protect it against moisture, dirt, wide fluctuations in temperature and the direct rays of the sun,
- Do not use it in areas where there are strong electromagnetic fields, i.e. keep it away from
transmitters and mobile phones
• Do not press buttons without the cuff fitted.
• Use the computer only on persons for whose wrist size the computer is intended
• If the computer is not used for a lengthy period of time, it is advisable to remove the batteries.
• Keep the batteries out of reach of children. Batteries do not belong in domestic waste.
• Dispose of batteries at the appropriate collection points.
• Do not open the computer. Failure to comply invalidates the warranty. You must not adjust or repair the
computer yourself or its correct function will no longer be guaranteed.
GA BC 42_multi.qxp3 27.04.2001 17:20 Uhr Seite 9

10
2. Inserting / changing batteries
• Remove the battery cover in the direction of the arrow: 2
• Insert the two batteries into the battery compartment ensuring correct polarity: 3
• Use exclusively brand-name batteries of the type:
2x1.5V Micro (Alkali Type LR03)
• Then close the battery compartment by fitting the cover and clicking it in position.
• When the batteries are almost exhausted, the following display appears and the
batteries must be exchanged: 1
• Only the START/STOP button (I/O) will then operate until new batteries are fitted:
3. Initial settings
When the batteries are inserted, the display will automatically show the settings for
language and time/date:
Language:
• You can now select the language you require on the display with the + and - buttons
• Confirm the language you have selected with the MENU or START/STOP (I/O)
button and this will take you automatically to the date/time setting
• You can alter the language again later via the MENU button, see Page 13
Date/time:
The date/time setting is necessary, so that you can save your readings correctly with the
date and time and call them up again later
• You now enter the year, month, day and time with the + and - buttons
• The position which can be changed flashes,
• After making the correct setting, always confirm it with the MENU button and
change to the next flashing position
After setting the date and time, you can select whether the computer is to display the
date and time constantly:
• For this you can automatically select between “DISPLAY ON or DISPLAY OFF”
with the + and - buttons (with ON, the date and time are shown constantly, but the
life of the batteries will be much shorter)
• Finally, confirm your entries with the START/STOP button (I/O)
4. Applying the blood pressure computer
• Apply the blood pressure computer to the inside of the left wrist
• Ensure that the wrist is unclothed
• Close the cuff with the Velcro fastener, so that the top margin of the
computer is about 10 mm below the ball of the thumb (see illustration)
• The cuff must be placed tightly around the wrist but must not constrict
FEB 15 2001
20:21
DISPLAY
ON
FEB 15 2001
20:21
DISPLAY
OFF
1 cm
REPLACE
THE BATTERIES
1
2
3
GA BC 42_multi.qxp3 27.04.2001 17:20 Uhr Seite 10

11
5. Measuring blood pressure
•Sit in a relaxed position
•Ensure that your arm is supported and bend it so that it is at the level of your heart
(see illustration)
•Before measurement allow an adequate relaxation time of 3 – 5 minutes
•Now select the memory location: M1, M2 (see Page 11)
•Now press the Start button to start the measurement. A greeting will appear on the
display.
• The cuff will inflate automatically to 180 mmHg and the
following displays will appear:
• When the 180 mmHg pressure is reached, the
measurement will start and a beating heart will
appear on the display:
• If the preset pressure of 180 mmHg is
inadequate during inflation, the device
automatically pumps up to a higher pressure
• Your blood pressure readings and pulse rate will then appear on the display:
• To switch off, press START/STOP (I/O) again
• If you forget to switch off the computer, it will switch off automatically after
3 minutes
6. Memory selection
The computer allows you to save 2 x 30 readings, so that you can check the trend of
your blood pressure.
• After insertion of the batteries, your readings will automatically be saved in memory
M1,
• All readings are preserved on removal of the batteries
• The MENU button now takes you to MEMORY SELECTION
• Pressing the MENU button again takes you to memory selection:
• The + and - buttons allow you to select between memory M1, memory M2 or no
memory OFF and you can confirm this with the MENU button
• The memory location selected is displayed during the measurement
• If you select the OFF function, the reading is not saved
• Once entered, the memory is changed only by entering another one or by removal of
the batteries
7. Display of the readings saved
You have the facility for displaying the relevant memory M1 or M2 in 4 different ways:
a) Individual display
• If you press the + or - button with the computer switched off, the last measurement
made appears
• You can call up all saved measurements individually by repeatedly pressing the + or -
button
• The display shows the memory location number and the date and time when you
made the measurement
• • • • • • • • • • • • •
HELLO
MODELL BC-42
RELAXRELAX
DO NOT
MOVE
DO NOT
MOVE
QUIET
MEMORY SELECT
OFF M1 M2
GA BC 42_multi.qxp3 27.04.2001 17:20 Uhr Seite 11

12
• Number 1 (No.1) is always the oldest reading saved and when 30 readings are
reached, the oldest value always drops out of the memory
b) Mean value
• When you see the last value measured on the display, you can get the mean value of
all readings saved by pressing the + button:
c) Memory list
You also have the possibility of displaying all readings saved in a list:
• When you are in the Individual display mode, simply press the MENU button again
and you will then automatically display a list of all readings saved
• You can see a total of 5 saved readings at one time
• The last value which you have seen in the Individual display is identified in the list by
a box
• You can page through the list by pressing the + or - button:
d) Trend graph of the saved values
This displays a graph of all the readings saved showing you the trend of your blood
pressure at a glance
• With the Memory List displayed, press the MENU button again to automatically
get a trend graph of your stored blood pressure readings
• The value identified in the Memory List flashes and in addition the relevant readings
are displayed on the right-hand side
• You can display all the readings once more in numerals on the right next to the
graph by pressing the + or - button
• The average value is shown as a graph at far right on the graph (thickest line):
• To end the memory display, press the START/STOP button (I/O), otherwise the
computer will switch off automatically after 30 seconds
8. MENU
To call up the menu, press the MENU button and you can then select from the
following items with the (+) or (-) button:
Press the MENU button again to enter the MENU item concerned for processing
You can make settings within the individual MENU items with the (+) and/or (-)
buttons:
a) Memory selection: see Page 11
b) Pressure setting:
• The manufacturer’s default setting is 180 mmHg
• You can vary the pressure setting yourself in 10 mmHg steps between 150 and
300 mmHg with the (+) or (-) button
• With this setting you can obtain the best pressure setting and thus avoid extra
inflation
• Rule of thumb: Pressure setting = Systolic pressure + 30 mmHg
• Confirm by pressing the MENU button again. The computer then switches off
AVERAGE
PRESET PRESSURE
CHANGE = -] +]
SET = MENU]
MENU
MEMORY SELECT
PRESET PRESSURE
MEMORY CLEAR
LANGUAGE
CLOCK SET
CONTRAST
GA BC 42_multi.qxp3 27.04.2001 17:20 Uhr Seite 12

13
c) Memory deletion:
• Use the (+) or (-) button to select the reading you want to delete
• Delete the reading selected from the memory by pressing the MENU button again
d) Languages
• You can select or change one of the 5 languages for the display with the (+) or (-)
button
e) Setting the clock
• Here you can set or change the date and/or time on the computer
f) Contrast
• Here you can set the brightness of the LCD display
• Adjustment between the values from 1 to 10 is made with (+) or (-)
• Setting 1 gives you the strongest contrast
• Press MENU to confirm
Always press the MENU button to confirm settings in the various menu items
The computer switches off automatically when you confirm changes with the MENU
button
Otherwise switch off with the START/STOP button (I/O)
If the computer is not used for 30 seconds, it switches off automatically
9. Error messages appear in the display when:
• cuff inflation takes longer than 25 seconds
• you move during the measurement instead of relaxing quietly
• insufficient pressure is reached despite extra inflation
• the blood pressure readings are extremely high or low
• the inflation pressure is higher than 330 mmgH
In the event of error messages, wait for a short time and measure again:
10. Cleaning
• Clean your blood pressure computer carefully only with a slightly moistened cloth
• Do not use detergents or solvents
• On no account must you immerse the computer in water, otherwise liquid can enter it
and cause damage
CONTRAST
ERROR
MEASURE
AGAIN
MEMORY CLEAR
FEB 15 2001
20:21
JAN 1 2001
0:00
LANGUAGE
ENGLISH
DEUTSCH
FRANCAIS
ITALIANO
ESPANOL
GA BC 42_multi.qxp3 27.04.2001 17:20 Uhr Seite 13

14
11. Table for classification of blood pressure values (unit of measurement mmHg) for
adults:
Range Systolic blood pressure Diastolic blood pressure Action
Hypotonia lower than 105 lower than 60 Check with your doctor
Normal range between 105 and 140 between 60 and 90 Self check
Borderline hypertonia between 140 and 160 between 90 and 95 Check with doctor
Mild hypertonia higher than 160 between 95 and 105 Consult your doctor
Moderately severe hypertonia higher than 160 between 105 and 115 Consult your doctor
Severe hypertonia higher than 160 higher than 115 Consult your doctor
12. Warranty:
• The warranty period covers 12 months and commences from the time the computer is handed over
• This must be clearly supported by an invoice or other documents
• The warranty covers deficiencies occurring during the warranty period which are demonstrably due to
material or manufacturing nonconformities
• The warranty does not cover improper use, deficiencies due to noncompliance with the operating
instructions or intervention by third parties
• In the event that a complaint is not genuine, we shall be entitled to make an appropriate charge for each
collection to cover testing and dispatch of the device
• Please send the device together with a stamped warranty card or the purchase receipt to our service
point. Receipts submitted later cannot be accepted
13. Technical data:
Type: BC 42
Measuring method: non-invasive, oscillometric blood pressure measurement at the
wrist
For wrist circumferences of 12.5 – 20.5 cm
Display range: 0 – 300 mmHg
Measuring range: systolic: 50 – 250 mmgH / diastolic: 40 – 180 mmHg / pulse:
40 – 160/min
Accuracy of the pressure reading: systolic ± 3 mmHg / diastolic: ± 3 mmHg / pulse: ± 5% of the
displayed value
Measuring uncertainty: (max. permissible standard deviation according to clinical
testing in accordance with DIN 58130):
systolic: 8 mmHg / diastolic: 8 mmHg
Power supply: 2 x 1.5 V Micro (Alkaline Type LR 03)
Classification: Application part Type B
Ambient conditions: 10 – 40 °C max. 85% atmospheric humidity
Storage/transport: -5 °C – 50 °C max. 85% atmospheric humidity
Key to symbols: Application part Type B
Important! Read the operating instructions
GA BC 42_multi.qxp3 27.04.2001 17:20 Uhr Seite 14

15
Français
1. Présentation
Ce tensiomètre électronique de poignet vous permet de prendre votre tension rapidement et facilement,
d’enregistrer les mesures et d’afficher le graphique et la moyenne des mesures. Cet appareil sert à mesurer et à
contrôler de façon externe (non invasive) les valeurs de votre tension artérielle.
Cet appareil répond aux exigences de la directive européenne sur les dispositifs médicaux, à la loi sur les
dispositifs médicaux et aux normes européennes EN1060-1 (Tensiomètres non invasifs, partie 1 : exigences
générales), EN1060-3 (Tensiomètres non invasifs, partie 3 : exigences complémentaires concernant les
systèmes électromécaniques de mesure de la pression sanguine). Conformément à la « Directive d'utilisation
des dispositifs médicaux », des contrôles réguliers de technique des mesures doivent être entrepris si l’appareil
est utilisé à des fins professionnelles ou commerciales. En cas d’utilisation de l’appareil par un particulier,
nous recommandons de faire réaliser un contrôle de technique des mesures auprès du fabricant tous les deux
ans.
Gardez ce mode d’emploi pour un usage ultérieur et faites en sorte que les autres utilisateurs éventuels
puissent le consulter.
Attention — pour votre sécurité !
• Mesurez toujours votre tension à la même heure afin de pouvoir comparer les valeurs.
• Avant chaque mesure, accordez-vous 3 à 5 minutes de repos !
• Laissez s’écouler un laps de temps de 5 minutes entre deux mesures !
• Les mesures que vous obtenez n’ont qu’une valeur informative – elles ne sauraient remplacer un
examen médical ! Tenez votre médecin au courant des mesures ; en aucun cas, ne prenez vous-même
des décisions d’ordre médical (concernant la prise de médicaments, par exemple) !
• En cas de circulation irrégulière ou d’artériosclérose chronique ou aiguë, l’exactitude de la mesure de la
tension au poignet est limitée. Dans ce cas, il convient d’utiliser un tensiomètre qui s’applique à la partie
supérieure du bras (le tensiomètre DC 55 de Beurer, par exemple).
• Des valeurs erronées peuvent être obtenues en cas de maladies du système circulatoire, d’hypotension
prononcée, de troubles de la vascularisation et du rythme cardiaque, ainsi que d’autres troubles.
Le tensiomètre est composé de modules de précision et de modules électroniques. Il faut manier
l’appareil avec précaution pour garantir l’exactitude des mesures et préserver la durée de vie de
l’appareil :
- Évitez de heurter l’appareil et ne le laissez pas tomber.
- Protégez-le de l’humidité, de la poussière, des fortes variations de température et de l’exposition
directe aux rayons du soleil.
- Ne l’utilisez pas à proximité de puissants champs électromagnétiques ; maintenez-le à distance des
installations radio et des téléphones mobiles.
• N’appuyez pas sur les touches avoir d’avoir mis la manchette sur votre poignet.
• N’utilisez l’appareil que sur des personnes dont la taille du poignet correspond aux caractéristiques de la
manchette.
• En cas d’inutilisation prolongée de l’appareil, il est recommandé de retirer les piles.
• Laissez les piles hors de portée des enfants et lorsqu’elles sont usées, ne les jetez pas à la poubelle.
• Débarrassez-vous des piles usagées en les déposant aux lieux ou points de collecte appropriés.
• N’ouvrez pas l’appareil, sous peine de rendre la garantie caduque. Ne réparez ni n’ajustez l’appareil vous-
même. Vous pourriez perturber son bon fonctionnement.
GA BC 42_multi.qxp3 27.04.2001 17:20 Uhr Seite 15

16
2. Insertion et remplacement des piles
• Retirez le couvercle du compartiment des piles en suivant le sens de la flèche : 2
• Placez les deux piles dans le compartiment en respectant la polarité : 3
• Utilisez exclusivement des piles de marque de type :
2x1,5V micro (alcalines, type LR03)
• Pour refermer le compartiment des piles : remettez le couvercle en place et
encliquetez-le.
• Quand les piles sont presque usées, l’affichage suivant apparaît ; il est alors temps de
remplacer les piles : 1
• En outre, il n’y a que la touche MARCHE/ARRÊT (I/O) qui fonctionne jusqu’à
l’insertion des piles neuves.
3. Premiers réglages
Après l’insertion des piles, les paramètres de la langue, de l’heure et de la date s’affichent
automatiquement :
Langue :
• les touches + et - permettent de sélectionner la langue voulue pour l’affichage
• Grâce aux touches MENU ou MARCHE/ARRÊT (I/O), vous pouvez confirmer la
langue voulue et accéder ensuite automatiquement au réglage de la date et de l’heure
• Par la suite, vous pouvez sélectionner une autre langue en utilisant la touche MENU –
voir la page 19
Date/Heure :
Le réglage de la date/de l’heure est nécessaire pour que l’heure et la date de
l’enregistrement des mesures soit correctes et que vous puissiez les appeler
ultérieurement.
• En utilisant la touche + et -, vous pouvez à nouveau entrer l’année, le mois, le jour et
l’heure
• L’élément à modifier clignote
• Vous devez confirmer tout réglage effectué en appuyant sur la touche MENU. Vous
pouvez alors modifier l’élément clignotant suivant
Après avoir réglé la date et l’heure, vous pouvez déterminer si l’appareil doit afficher la
date et l’heure en permanence :
• en utilisant les touches + et -, vous pouvez choisir l’option AFFICHAGE ON ou
AFFICHAGE OFF (avec l’option AFFICHAGE ON, l’affichage de la date et de
l’heure est permanent, mais tenez compte du fait que ceci réduit considérablement la
durée de vie des piles)
• Confirmez vos choix en appuyant sur la touche MARCHE/ARRÊT (I/O)
4. Pose de l’appareil
• Placez le tensiomètre sur votre poignet gauche, à l’intérieur du bras
• Veillez à ce que le poignet soit dénudé
• Fermez la manchette avec la fermeture Velcro, de sorte que le bord supérieur
de l’appareil soit à environ 1 cm de distance des éminences thénar et
hypothénar (voir fig.).
• La manchette doit entourer étroitement le poignet, mais elle ne doit pas
serrer.
FEB 15 2001
20:21
AFFICUAGE
ON
FEB 15 2001
20:21
AFFICUAGE
OFF
1 cm
REMPLACEZ
LES PILES
1
2
3
GA BC 42_multi.qxp3 27.04.2001 17:20 Uhr Seite 16

17
5. Mesure de la tension
• Asseyez-vous et détendez-vous
• Posez le bras sur un appui quelconque et pliez-le afin que l’appareil se trouve à
hauteur du cœur (voir fig.).
• Avant toute mesure, laissez s’écouler un temps de repos suffisant : 3 à 5 minutes
• Choisissez la mémoire voulue : M1, M2 (voir la page 17)
• Appuyez sur la touche de départ pour commencer la mesure : l’écran affiche alors un
message d’accueil.
• La manchette se gonfle automatiquement à 180 mmHg et l’écran
affiche les dessins suivants
• Après obtention d’une pression de 180 mmHg,
la mesure démarre et un cœur battant apparaît à
l’écran :
• Si le préréglage de la pression à 180 mmHg
s’avérait insuffisant lors du gonflage, l’appareil
pomperait automatiquement afin d’obtenir une pression supérieure
• Votre tension et votre fréquence de pouls s’affichent alors :
• Pour éteindre l’appareil, appuyez à nouveau sur MARCHE/ARRÊT (I/O)
• Si vous oubliez d’éteindre l’appareil, celui-ci s’éteindra automatiquement au bout de
3 minutes
6. Sélection de mémoire
Cet appareil vous permet d’enregistrer 2 x 30 valeurs afin de contrôler la tendance de
votre tension artérielle.
• Quand les piles sont en place, les valeurs sont automatiquement enregistrées dans la
mémoire M1.
• Lors du retrait des piles, toutes les valeurs mémorisées sont conservées
• La touche MENU permet d'accéder à la fonction SELEC MEMOIRE
• En appuyant une nouvelle fois sur la touche MENU, vous accédez à l’option de
sélection de la mémoire :
• Les touches + et - vous permettent de choisir la mémoire M1, la mémoire M2 ou
aucune mémoire OFF ; pour confirmer votre choix, appuyez sur la touche MENU
• Pendant la mesure, la position mémoire choisie s’affiche
• Si vous sélectionnez l'option OFF, la valeur mesurée n’est pas enregistrée
• Pour changer de mémoire, il faut en entrer une autre ou retirer les piles
7. Affichage des valeurs mémorisées
Vous avez la possibilité d’appeler la mémoire M1 ou M2 de 4 façons différentes :
a) Représentation individuelle
• À l’arrêt, appuyez sur la touche + ou - : la valeur mesurée en dernier s’affiche
• En continuant à appuyer sur la touche + ou -, vous pouvez appeler individuellement
toutes les valeurs mémorisées
• Vous distinguez à l’écran le numéro de position mémoire, la date et l’heure de la
mesure
• • • • • • • • • • • • •
BONJOUR
MODELL BC-42
RELAXRELAX
NE PAS
DEPLACER
NE PAS
DEPLACER
DU CALME
SELEC MEMOIRE
OFF M1 M2
GA BC 42_multi.qxp3 27.04.2001 17:20 Uhr Seite 17

18
• Le numéro 1 (No1) est toujours la plus ancienne valeur mémorisée ; lorsque les 30
positions sont occupées, la valeur la plus ancienne sort de la mémoire
b) Valeur moyenne
• Vous voyez sur l’écran la valeur mesurée en dernier : en appuyant sur la touche +,
vous obtenez la valeur moyenne de toutes les valeurs enregistrées :
c) Liste des valeurs mémorisées
Vous avez en outre la possibilité d’afficher dans une liste toutes les valeurs mémorisées :
• Quand vous vous trouvez dans la représentation individuelle des valeurs mémorisées,
il suffit d’appuyer à nouveau sur la touche MENU ; vous obtiendrez
automatiquement la liste de toutes les valeurs mémorisées
• L’écran affiche simultanément 5 valeurs mémorisées
• La dernière valeur que vous ayez vue dans la représentation individuelle est encadrée
dans la liste
• Pour faire défiler la liste, appuyez sur la touche + ou - :
d) Graphique de tendance des valeurs mémorisées
Ici, vous pouvez voir dans un graphique toutes les valeurs mémorisées et reconnaître en
un coup d’œil la tendance de votre tension
• Dans la représentation de la liste des valeurs mémorisées, appuyez à nouveau sur la
touche MENU ; vous obtiendrez automatiquement le graphique de tendance des
valeurs de tension enregistrées
• La valeur identifiée dans la liste des valeurs mémorisées clignote et les valeurs
mesurées correspondantes s’affichent en outre sur la page de droite
• En appuyant sur la touche + ou -, vous pouvez appeler l’affichage numérique de
toutes les valeurs, à droite du graphique
• Vous reconnaîtrez la valeur moyenne (trait le plus épais) tout à fait à droite du
graphique :
• Pour mettre fin à l’affichage des valeurs mémorisées, appuyez sur la touche
MARCHE/ARRÊT (I/O) ; sinon, l’appareil se met automatiquement hors circuit au
bout de 30 secondes
8. MENU
Pour accéder au menu, appuyez sur la touche MENU ; vous pourrez sélectionner les
éléments suivants avec la touche (+) ou (-) :
En appuyant à nouveau sur la touche MENU, vous accéderez à l’élément de menu
correspondant
Les touches (+) et/ou (-) permettent de faire des réglages dans les éléments individuels
du menu :
a) Sélection de mémoire : voir la page 17
b) Pression préréglée :
• Ici, 180 mmHg est le préréglage effectué par le fabricant
• En utilisant les touches (+) et (-), vous pouvez modifier vous-même la pression
préréglée, par incréments de 10 mmHg dans une plage de 150 à 300 mmHg
• Cette fonction de réglage permet de définir une pression préréglée qui est optimale
pour vous et de mettre ainsi un terme au regonflage
• Formule générale : pression préréglée = pression systolique + 30 mmHg
• Pour confirmer, appuyez à nouveau sur la touche MENU et l’appareil se met hors
circuit
MOYENNE
PRES PREREG
CHANGEZ = -] +]
REGLE = MENU]
MENU
SELEC MEMOIRE
PRES PREREG
EFFAC. MEMOIRE
LANGUES
REGL. HORLOGE
CONTRASTE
GA BC 42_multi.qxp3 27.04.2001 17:20 Uhr Seite 18

19
c) Suppression d’une valeur mémorisée :
• La touche (+) ou (-) permet de sélectionner la valeur à supprimer
• En rappuyant sur la touche MENU, vous supprimez de la mémoire la valeur
sélectionnée
d) Langues
• La touche (+) ou (-) permet de sélectionner ou de modifier l’une des 5 langues de
l’affichage
e) Réglage de l’heure
• Ici, vous pouvez régler ou modifier la date et/ou l’heure de l’appareil
f) Contraste
• Ici, vous pouvez définir la luminosité de l’écran à cristaux liquides
• Le réglage s’effectue grâce aux touches (+) ou (-), entre des valeurs
de 1 à 10
• Un réglage à 1 permet d’obtenir le contraste le plus fort
• Pour confirmer, appuyez sur la touche MENU
Pour confirmer une modification d’un élément de menu, appuyez toujours sur la
touche MENU
L’appareil se met automatiquement hors circuit après que vous ayez confirmé les
modifications par la touche MENU
Sinon, vous pouvez éteindre l’appareil en utilisant la touche MARCHE/ARRÊT (I/O)
Si l’appareil est inutilisé pendant un laps de temps de 30 secondes, il se met
automatiquement hors circuit
9. Des messages d’erreurs s’affichent si :
• Le gonflage dure plus de 25 secondes
• Vous bougez et êtes dans un état d’agitation pendant la mesure
• Si le gonflage a été insuffisant, malgré le regonflage
• Les valeurs de la tension artérielle sont exceptionnellement hautes ou basses
• La pression de gonflage est supérieure à 330 mmHg
En cas de message d’erreur, attendez un peu et faites une nouvelle mesure :
10. Nettoyage
• Nettoyez avec soin votre tensiomètre électronique en n’utilisant qu’un chiffon
légèrement humide
• N’utilisez ni détergent ni produit abrasif
• Ne placez en aucun cas l’appareil sous l’eau courante, car du liquide pourrait pénétrer
dans l’appareil et l’endommager
CONTRASTE
ERREUR
MESUREZ
A NOVV.
EFFAC. MEMOIRE
FEB 15 2001
20:21
JAN 1 2001
0:00
LANGUAGE
ENGLISH
DEUTSCH
FRANCAIS
ITALIANO
ESPANOL
GA BC 42_multi.qxp3 27.04.2001 17:20 Uhr Seite 19

20
11. Tableau de classification des valeurs de la tension artérielle (unité de mesure, mmHg)
pour adultes :
Plage Pression sanguine Pression sanguine Mesure
systolique diastolique
Hypotension inférieure à 105 inférieure à 60 Contrôle médical
Plage normale entre 105 et 140 entre 60 et 90 Auto-contrôle
Hypertension limite entre 140 et 160 entre 90 et 95 Contrôle médical
Hypertension modérée supérieure à 160 entre 95 et 105 Consultation chez le médecin
Hypertension modérée supérieure à 160 entre 105 et 115 Consultation chez le médecin
Hypertension sévère supérieure à 160 supérieure à 115 Consultation chez le médecin
12. Garantie :
• La garantie est de 12 mois ; elle entre en vigueur lors de la remise de l’appareil
• Ceci doit être justifié sans équivoque par présentation de la facture ou d’autres documents
• La garantie couvre les défauts de l’appareil survenant pendant la période de garantie, à condition qu’il
soit prouvé qu’ils sont dus à un vice de matière ou un défaut de fabrication
• La garantie est exclue si les défauts sont dus à un maniement non conforme, au non-respect du mode
d’emploi ou à l’intervention de tiers
• En cas de réclamation indue, nous sommes en droit d’exiger un dédommagement adéquat contre
remboursement, qui couvrira nos frais de vérification et d’expédition de l’appareil
• Pour toute opération de service après-vente, veuillez envoyer à notre SAV l’appareil accompagné de la
carte de garantie estampillée ou du justificatif d’achat. Nous ne pouvons accepter les documents qui
nous parviendront après l’appareil
13. Données techniques :
Type : BC 42
Méthode de mesure : mesure de la tension artérielle non invasive, oscillométrique et
prise au poignet
Pour un tour de poignet de 12,5 à 20,5 cm
Plage d'affichage : 0 à 300 mmHg
Plage de mesure : systolique : 50 – 250 mmHg / diastolique : 40 – 180 mmHg /
pouls : 40 – 160/min
Exactitude de l’affichage de la tension : systolique ± 3 mmHg / diastolique : ± 3 mmHg / Pouls : ± 5%
de la valeur affichée
Incertitude de la mesure : (écart type maximum autorisé conformément à un contrôle
clinique effectué selon la norme DIN 58130) :
systolique : 8 mmHg / diastolique : 8 mmHg
Alimentation en courant : 2 x 1,5 V micro (alcaline, type LR 03)
Classification : appareil de type B
Conditions environnementales : 10 à 40 °C, humidité de l’air max. de 85%
Stockage/transport : -5 °C à 50 °C, humidité de l’air max. de 85%
Explication du symbole : appareil de type B
Attention ! Lire le mode d’emploi
GA BC 42_multi.qxp3 27.04.2001 17:20 Uhr Seite 20
Table of contents
Languages:
Other Beurer Blood Pressure Monitor manuals

Beurer
Beurer BM 58 User manual

Beurer
Beurer BM 75 User manual

Beurer
Beurer 800W Series User manual

Beurer
Beurer BM 75 User manual

Beurer
Beurer BC 16 User manual

Beurer
Beurer BM 35 User manual

Beurer
Beurer BM 28 User manual

Beurer
Beurer BM 58 User manual

Beurer
Beurer BC 19 User manual

Beurer
Beurer BM 49 User manual

Beurer
Beurer BC 28 User manual

Beurer
Beurer BC 54 User manual

Beurer
Beurer BM 55 User manual

Beurer
Beurer BC 44 User manual

Beurer
Beurer SR-BM788 User manual

Beurer
Beurer BC 60 User manual

Beurer
Beurer BM 20 User manual

Beurer
Beurer BGL40 User manual

Beurer
Beurer BM 95 User manual

Beurer
Beurer BM 45 User manual