8
Cleaning the air humidifier inside and out
•
E
mpty the water from the base unit via the side edge.
•
W
ipe the air humidifier with adamp cloth inside and out.
•
O
nly use amild flushing agent or vinegar/vinegar-based cleaner to perform cleaning work.
Descaling
Descaling the ultrasound membrane
Hard water can cause limescale to build up in the device and, especially, on the ultrasound membrane. This forms
white deposits. Descale the device regularly.
•
D
rop some descaler onto the ultrasound membrane.
•
L
eave it to take effect for two to five minutes.
•
C
lean the ultrasound membrane using the cleaning brush.
•
R
inse the base unit twice with clean, fresh water.
Cleaning inside the base unit
•
D
ip adamp, soft cloth briefly in descaling solution.
•
U
se the cloth to wipe the inside of the base unit.
•
C
arefully pour some clean, fresh water into the base unit.
•
E
mpty the water from the base unit via the side edge.
•
R
epeat the process using clean, fresh water.
Descaling the water tank
•
H
alf-fill the water tank with water.
•
A
dd asmall quantity of descaler.
•
T
ightly close the water tank using the screwed plug.
•
S
hake the water tank by rocking it back and forth several times.
•
E
mpty the descaling solution completely.
•
R
epeat the process twice using clean, fresh water.
9. Accessories and replacement parts
Tip!
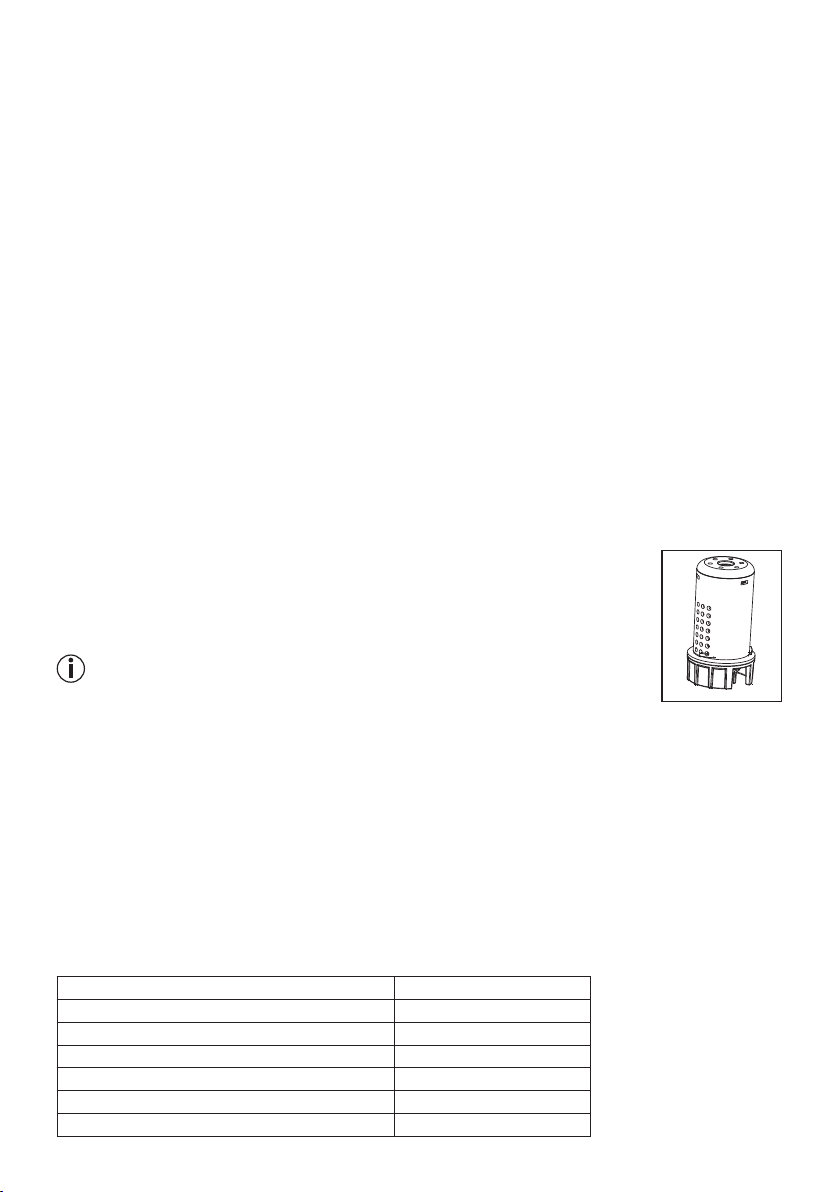
If the water is hard, we recommend using the optional anti-limescale filter.
Anti-limescale filter (optional).
Note
•
I
f the anti-limescale filter does not prevent limescale build-up, or if white deposits form on or
in the device, the anti-limescale filter should be replaced.
•
T
he service life of the anti-limescale filter is around two to three months at most.
•
I
f the device is not used for arelatively long time, the anti-limescale filter must be removed from the water tank
and dried out.
Fitting the anti-limescale filter
•
L
ift the water tank and rotate it.
•
O
pen the screwed plug on the water tank.
•
S
crew the anti-limescale filter onto the screwed plug on the inside.
•
T
ightly close the water tank using the screwed plug.
Replacement items
For replacement parts and additional items visit www.beurer.com or contact the corresponding service address in
your country (according to the service address list).
Replacement parts and additional items are also available from retailers.
Item Item number
Beurer by Taoasis “Vitality” aroma oil (10 ml) 681.30
Beurer by Taoasis “Harmony” aroma oil (10 ml) 681.31
Beurer by Taoasis “Relax” aroma oil (10 ml) 681.32
Beurer by Taoasis “Sleep Well” aroma oil (10 ml) 681.33
10 aroma pads 163.801
Anti-limescale filter (optional) 163.803