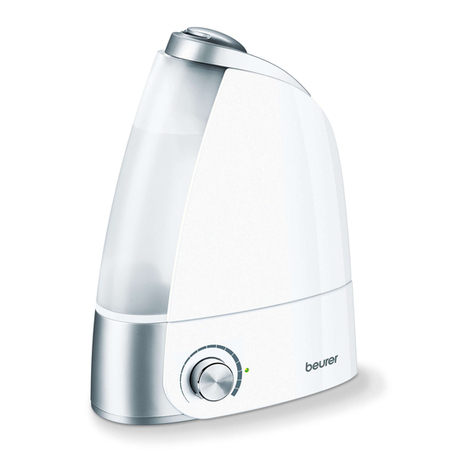
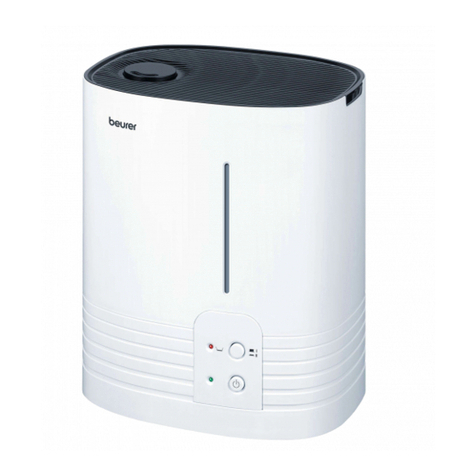
Beurer LB 50 User manual

LB 50
EN Air humidifier
Instructions for use

2
Scope of supply
• A
ir humidifier
• T
en replacement pads
• I
nstructions for use
WARNING
•This device may be used by children over the age of eight and by peo-
ple with reduced physical, sensory or mental skills or a lack of expe-
rience or knowledge, provided that they are supervised or have been
instructed on how to use the device safely, and are fully aware of the
consequent risks of use.
•Children must not play with the device.
•Cleaning and user maintenance must not be performed by children
unless supervised.
•Disconnect the device from the mains supply during filling or cleaning.
•When the water evaporation is activated, the escaping steam is hot –
risk of scalding.
•Do not use any solvent-based cleaning products.
•
If the mains connection cable of this device is damaged, it must be dis-
posed of. If it cannot be removed, the device must be disposed of.
1. Getting to know your appliance
Benefits of humidification
Humans spend a large proportion of their time indoors. For ideal ambient air, a humidity level of between
40% and 60% is recommended. This value is often not reached, particularly in winter, when cold, dry air
enters living spaces that are being aired and is then warmed up.
This dry ambient air draws in moisture, drying out mucous membranes and skin, but also furniture.
Ambient air that is too dry has a number of negative effects:
•
Mucous membranes and lips dry out
•
E
yes become irritated
•
I
nfections and respiratory diseases are more likely to occur
•
E
xhaustion, tiredness and difficulty concentrating
•
P
ets and plants are put under unnecessary strain
•
D
ust forms more quickly
•
E
lectrostatic charging of textiles and synthetic fibres, such as carpets and plastic floor coverings
ENGLISH
1. Getting to know your appliance ....................... 2
2. Intended use..................................................... 3
3. Instrument functions......................................... 3
4. Safety information ............................................ 4
5. Appliance description....................................... 6
6. Start-up ............................................................ 6
7. Operation........................................................ 7
8. Care ................................................................ 8
9. In the event of problems............................... 10
10. Technical details ........................................... 10
11. Replacement parts ....................................... 11
12. Warranty/service........................................... 11
Contents

3
•
W
ooden furniture, and especially parquet floors, are damaged
•
M
usical instruments go out of tune.
It is advisable to start operating the air humidifier right at the start of the heating period. The existing humid-
ity inside the room and in the furniture can then be kept constant. During the first few weeks of the heating
period, the appliance should be used in such a way that you achieve at least 50 %.
Note that with this air humidifier, it also possible to over-humidify the room, e.g.
• i
f you operate the appliance at a high setting,
• t
he humidity that is generated cannot escape from the room,
• t
he air is already very humid.
It is best to check humidity with a hygrostat.
2. Intended use
This electric air humidifier is used for hygienic, odourless and bacteria-free humidification of living and work
areas for private use.
WARNING
–
If you suffer from a severe respiratory or lung disease, consult your doctor before using the air
humidifier.
–
The device is only intended for the purpose described in these instructions for use. The manufac-
turer is not liable for damage resulting from improper or careless use.
3. Instrument functions
Besides the evaporator system recommended by doctors, your air humidifier has the following additional
functions:
•
Choice of two evaporation rates: 150 ml/h and 400 ml/h
•
Removable water tank, volume 5 litres
•
Straightforward control panel
•
Overheating protection
•
Automatic switch-off function when tank is empty. Fan continues running in order to cool system (safguard
against running dry)
•
Water level indicator
•
Green indicator illuminated: appliance in operation
•
Red indicator illuminated: empty water tank
Explanation of symbols
The symbols in the instructions for use denote the following:
WARNING
Warning of possible risks of injury or health hazards.
IMPORTANT
Safety information about possible damage to appliance/accessories.
Note
Important information.

4
4. Safety information
Read the instructions for use carefully. Failure to observe the following information can cause injuries or
damage to property. Keep the instructions carefully and also make them accessible to other users. Always
pass on these instructions together with the appliance.
WARNING
Keep packaging material away from children! There is a choking hazard.
Electric shock
WARNING
A
s with every electrical device, use this air humidifier carefully and cautiously, in order to avoid haz-
ards due to electric shock.
•
Therefore, observe the following instructions for use:
– Only use this device with the voltage specified on the device
– Never use the device if it or its accessories show visible signs of damage
– Do not use the device during a thunderstorm
•
In the case of defects or operational faults, switch the device off immediately and disconnect the
device from the mains socket. Do not pull on the mains cable or on the device to disconnect the
plug from the socket. Never hold or carry the device by the mains cable. Keep the cables away
from hot surfaces.
•
Only use the device in dry rooms (e.g. never in the bath, sauna).
•
Never reach for a device that has been submerged in water. Disconnect the mains plug immediately.
•
Do not use the device if it or its accessories are visibly damaged.
•
Do not drop the device or subject it to any impacts.
•
D
o not clamp or pinch the mains cable.
•
E
nsure that the mains cable and plug do not come into contact with water, steam or other liquids.
Risk of fire
WARNING
T
here is a risk of fire if the device is used improperly or these instructions for use are ignored.
T
herefore, never use the air humidifier
•Underneath a cover, such as blanket, pillow, etc.
•
Near petrol or other highly flammable substances.
Risk of scalding
WARNING
•
The exiting steam is hot!
•
Never hold your hands or face over the rotary steam nozzle during operation [2].
•
Avoid contact with hot surfaces.
•
Never try to remove the steam tower [3], steam nozzle [2] or pad [4] during operation or within 15
minutes of switching off and unplugging the appliance from the mains. These parts may only be
removed for cleaning purposes.
•
As there are high temperatures inside this air humidifier, please take appropriate precautions, espe-
cially in the presence of children, and install the appliance in a location inaccessible to children.
Handling
IMPORTANT
The device must be switched off and disconnected from the mains every time after use and before
cleaning.
•
T
he device is only intended for the purpose described in these instructions for use. The manufac-
turer is not liable for damage resulting from improper or careless use.

5
•
T
his device is not intended for use by people (including children) with restricted physical, sensory
or mental skills or a lack of experience and/or a lack of knowledge, unless they are supervised by a
person who has responsibility for their safety or they receive instructions from this person on how
to use the device.
•
C
hildren should be supervised around the device to ensure they do not play with it.
•
E
nsure that the mains cable does not pose a trip hazard.
•
D
o not insert any objects into openings on the device.
•
D
o not place any objects on the device.
•
D
o not expose the device to high temperatures.
•
A
void water damage by handling the device carefully (e.g. water damage from splashing in the
vicinity of wooden floors).
•
I
f the device should accidentally tip over, water may escape, even if the device is switched off and
unplugged.
•
T
he immediate vicinity of the air humidifier may become damp.
•
C
alcareous water can leave white deposits.
•
D
o not place the device on the floor, but in a raised position (e.g. on a table or chest of drawers).
•
P
osition the device so that the mist outlet is not directed towards objects.
•
E
mpty any remaining water when the device is not in use.
Storage and care
IMPORTANT
•
Only clean the appliance in the manner specified.
•
Make sure that no water gets inside the appliance or onto the cable [14] or mains plug.
•
Always switch off the appliance if the tank [8] is empty or the appliance is not in use.
•
If you are not going to use the appliance for some time, pull out the plug [14] from the mains and
clean the appliance.
•
Make sure that the appliance is not too close to heat sources such as ovens, radiators or direct sun-
light.
•
Do not store petrol or any other highly flammable substances near the appliance.
Repair
WARNING
•
Repairs to electrical appliances may only be carried out by specially trained persons. Incorrect repairs
can lead to considerable danger for the user. In the event of repairs, please contact customer service
or an authorised dealer.
Disposal
ACHTUNG
For environmental reasons, do not dispose of the device in the household waste at the end of
its useful life. Dispose of the unit at a suitable local collection or recycling point. Dispose of the
device in accordance with EC Directive – WEEE (Waste Electrical and Electronic Equipment).
If you have any questions, please contact the local authorities responsible for waste disposal.

6
5. Appliance description
Air humidifier
1 Cover
2 Steam nozzle
3 Steam tower
4 Pad
(beneath the steam tower in the
hot water chamber)
5 Hot water chamber
(beneath the steam tower, not illustrated)
6 Air humidifier casing
7 Water tank handles
8 Water tank, volume 5 litres
9 Tank catch, with valve
10 Water level indicator
11 Air filter flap (back of appliance)
12 Black air filter (back of appliance)
13 Control panel (see diagram below)
14 Cable with mains plug
(back of appliance)
Control panel
A Red indicator illuminated when
water tank is empty
B Green indicator illuminated when
air humidifier is switched on
C Steam button for regulating humidity
• Button depressed: 400 ml/h (maximum steam)
• Button released: 150 ml/h (minimum steam)
D ON/OFF button for switching
air humidifier on and off
• Button depressed: Appliance is switched on
• Button released: Appliance is switched off
6. Start-up
Unpacking
• C
heck contents: If any parts are missing, please contact your authorized dealer.
• R
emove all packaging and transport locks.
Clean before using for the first time
For reasons of hygiene, we recommend rinsing the air humidifier, water tank and pad [4] thoroughly with
cold water before using for the first time. Proceed as described in chapter 8 ‘Care’, in the section on ‘Cle-
aning the Appliance’.
1
2
3
4
5
6 12
11
10
9
8
7
13
14
OFF
ON
I
II
A
B
C
D

7
Air humidifier placement
Caution
Place the appliance so that the steam nozzle is not pointing directly at a wall. The exiting moisture might
otherwise cause damage to walls, particularly to wallpaper.
•
Place the air humidifier on a firm, even, water-resistant surface.
•
Position the mains cable [14] so that the appliance cannot be knocked over.
Connecting mains cable
WARNUNG
•
Before putting the appliance into operation, make sure that the cable [14] is not damaged. Never
operate the appliance if the mains cable is damaged.
•
The appliance may only be operated with the voltage indicated on the rating plate.
Connect your air humidifier to the mains by plugging the mains plug [14] into the wall socket.
Filling the tank
Before using the appliance for the first time, the tank must be filled. See chapter 7 ‚Operation‘, in the section
on ‚Filling the Tank‘.
7. Operation
1. Filling the tank
Fill the tank when putting the appliance into operation for the first time or if the red indicator [A] is illuminated,
indicating that the water level is too low.
IMPORTANT
•
Only ever use fresh tap water to fill the tank.
•
Never put any additives into the water.
•
Make sure that the tank catch with seal on the base of the water tank is tightly fastened before put-
ting the appliance into operation.
• R
emove the cover [1] from the air humidifier.
•
P
ull the water tank out of the air humidifier using the handles [7]. Unscrew the tank catch [9] from the tank.
• R
inse out the water tank with clean water.
• F
ill the water tank with cold tap water.
• S
crew the tank catch onto the water tank. Place the water tank in the air humidifier.
• P
lace the cover [1] on top of the air humidifier.
2. Switching on the appliance
IMPORTANT
•
Never switch on the air humidifier without the water tank or steam tower [3].
• P
ress the ON/OFF button [D] in order to switch on the air humidifier. The green indicator [B] is illuminated.
•
B
efore the steam starts exiting: Rotate the steam nozzle [2] so that the steam exits in the required direction.
After a few minutes, the appliance starts to give off steam. The green indicator [B] is illuminated while the
appliance is switched on and connected to the mains.
3. Selecting the amount of steam
•
Select the amount of steam using the steam button [C] .
Level 1: minimum steam (approx. 150 ml/h)
Level II: maximum steam (approx. 400 ml/h)
After a few minutes, the appliance alters the amount of steam generated.

8
4. Switching off the appliance
Note
•
The appliance is suitable for continuous operation. We recommend, however, that it is not operated
for any length of time without supervision (night operation).
•
The appliance has an automatic switch-off function when the tank is empty.
Press the ON/OFF button [D] in order to switch off the appliance. The green indicator light [B] goes out.
8. Care
Overview
Your air humidifier should be cleaned and descaled regularly in order to ensure that residue from the water
such as limescale does not accumulate in the appliance. Only if the air humidifier is carefully maintained
can we guarantee maximum steam output, hygiene and a long service life. The following table lists all the
measures necessary:
WARNING
Before you clean or descale your air humidifier:
•
be absolutely sure to pull out the plug [14] from the wall socket,
•
wait until the appliance has entirely cooled down.
IMPORTANT
Never clean the air humidifier or individual parts in the dishwasher.
When to do what ... to which part ... how?
Once a week Inside appliance
See Chapter 8 in the section on
‘Cleaning the appliance’.
• Cover [1]
• Steam nozzle [2] and
steam tower [3]
• Tank and tank catch
Outside of casing [6]
Depending on soiling, but at least
once a week
Pad [4]
See Chapter 8 in the section on
‘Cleaning the appliance’.
Depending on water hardness, but at
the latest after each humid season
Pad [4]
See Chapter 8 in the section on
‘Cleaning the appliance’.
Every week Black air filter [12]
See Chapter 8 in the section on
‘Cleaning the air filter’.
With a water hardness up to II (7 to
14° dH), we recommend cleaning the
appliance every week. The appliance
must be cleaned, at the very latest,
if the hotwater chamber is covered
with a layer of limescale.
Instrument
See Chapter 8 in the section on
‘Descaling the appliance’..
Before cleaning and descaling
1. Unplug the appliance
• S
witch off the appliance with the ON/OFF button [D]. The green indicator light [B] goes out.
• P
ull the plug [14] out from the wall socket and wait at least 15 minutes until the air humidifier has entirely
cooled.

9
2. Disassemble the appliance
• R
emove the cover [1] from the air humidifier.
•
P
ull the water tank out of the air humidifier using the handles [7]. Unscrew the tank catch [9] from the tank.
•
P
ull up the steam tower [3] out of the air humidifier. Remove the steam nozzle [2] from the steam tower [3].
• R
emove the pad [4] from the hotwater chamber.
Cleaning the appliance
1. Clean the inside and outside of the appliance
WARNING
•
Electrical parts must never come into contact with water.
•
Never hold the appliance under running water or immerse in water.
• I
f there is any water left in the appliance, pour it away. To do this, hold the appliance with both hands and
tip the water out from the side of the base unit.
• R
inse out the inside of the appliance thoroughly with clean water.
• W
ipe the outside of the air humidifier casing [6] with a damp cloth and mild cleaning agent.
2. Clean individual parts
•
W
ash the pad [4] with clean water. You can remove stubborn limescale by first putting the pad [4] in a weak
vinegar solution. If the pad [4] is hard and rigid, it must be replaced (see next section 3 ‘Changing the pad’).
• C
lean the following individual parts of the appliance thoroughly with washing-up liquid and warm water.
Any residue from cleaning agents should be thoroughly removed.
•
Tank [8] and tank catch [9]. When cleaning the tank catch [9], do not damage the valve.
•
Steam tower [3] and steam nozzle [2].
•
Cover [1].
3. Changing the pad
Note
•
Pads are obtainable from the service address or from the authorised dealer.
•
Remove the worn pad [4] from the hotwater chamber. Dispose of the pad in the household refuse.
•
If there is any water left in the appliance, pour it out.
•
Use a new pad [4].
•
Wash out the new pad [4] with clean water and put in the hotwater chamber.
D
escaling the appliance
Descale the air humidifier
Note
•
Never try to remove any limescale deposit with pointed or sharp objects. This might damage the air
humidifier or cause it to leak.
•
You should also note the manufacturer’s advice for the descaling agent which you are using.
• U
se a standard commercial descaling agent.
• F
ill the hotwater chamber up to the brim with descaling solution.
• L
eave the descaling solution to work until the limescale has dissolved.
• P
our away the descaling solution. Tip the appliance sideways to remove the descaling solution.
• R
inse out the appliance thoroughly with clean water.

10
After cleaning and descaling
1. Insert the pad
• P
ut the cleaned pad or replacement pad [4] into the hotwater chamber.
2. Assemble the appliance
• P
ut the steam tower [3] back into the air humidifier. Press the steam nozzle [2] into the opening at the top
of the steam tower [3].
• S
crew the tank catch [9] onto the water tank [8]. Place the water tank [8] in the air humidifier.
• P
lace the cover [1] on top of the air humidifier.
Cleaning the air filter
We recommend cleaning the air filter every week.
• T
urn the air humidifier so that the air filter flap [11] at the back of the appliance is facing you. Undo the
catch on the flap and remove the air filter flap [11].
• R
emove the black air filter [12] and rinse it thoroughly with clean water.
•
O
nce the filter is dry you can reassemble the air filter. Insert the black air filter [12] inside the air filter flap [11].
• I
nsert the two small hooks of the air filter flap [11] into the right of the air filter opening. Press the filter flap
firmly until it clicks into place.
9. In the event of problems
Problem Cause Remedy
No steam exiting Appliance not connected to power. Insert the plug [14] into the mains and
switch on the appliance.
Water tank [8] empty. Replenish water.
Water tank [8] not fitted correctly. Fit tank properly.
Appliance leaking Water tank [8] leaking. Replace tank.
Water tank [8] not shut properly. Fasten the catch properly.
Steam tower [3] not installed or not
installed correctly.
Install steam tower [3] properly.
Delay in steam output
Very cold water in tank. Use warmer water.
Appliance heavily scaled. Descale the appliance.
Red indicator [A] illu-
minated
Water tank [8] empty. Replenish water.
Valve on tank catch [9] is covered with
dirt.
Clean the valve.
Appliance heavily scaled. Descale the appliance.
Water tank [8] not shut properly. Close the catch properly.
Water tank [8] not fitted correctly. Fit tank properly.
If the problem persists, please contact customer service.
10. Technical details
Rated output 380 W
Nominal voltage 230 V / 50 Hz
Water tank volume approx. 5 litres
Evaporation rate Level I: 150 ml/h
Level II: 400 ml/h

11
Overheating protection Through thermostat
Safeguard against
running dry
If there is not enough water in the heater unit, the appliance switches off auto-
matically. The appliance has a sensor which detects the water level.
Switching 2-stage
Weight 2.8 kg
Dimensions (W / H / D) 235 / 315 / 280 mm
Connection Fixed cable, approx. 2 m in length
11. Replacement parts
You can obtain the following replacement parts directly from Customer Services:
• 10 replacement pads (item no. 066.99)
12. Warranty/service
In case of a claim under the warranty please contact your local dealer or the local representation which is
mentioned in the list “service international”.
In case of returning the unit please add a copy of your receipt and a short report of the defect.
The following warranty terms shall apply:
1. The warranty period for BEURER products is either 3 years or- if longer- the country specific warranty
period from date of Purchase.
In case of a warranty claim, the date of purchase has to be proven by means of the sales receipt or invoice.
2. Repairs (complete unit or parts of the unit) do not extend the warranty period.
3. The warranty shall not be valid for damages because of
a. improper treatment, e.g. nonobservance of the user instructions.
b. repairs or tampering by the customer or unauthorised third parties.
c. transport from the manufacturer to the consumer or during transport to the service centre.
d. The warranty shall not be valid for accessories which are subject to normal wear and tear (cuff, bat-
teries etc.).
4. Liability for direct or indirect consequential losses caused by the unit are excluded even if the damage to
the unit is accepted as a warranty claim.
Subject to errors and changes

12
681.10_LB50_2018-05-09_01_IM2_BEU_EN
Beurer GmbH •Söflinger Str. 218 •89077 Ulm, Germany
www.beurer.com •www.beurer-gesundheitsratgeber.com •www.beurer-healthguide.com
Other manuals for LB 50
2
Table of contents
Other Beurer Humidifier manuals
Beurer
Beurer LB 300 Plus User manual

Beurer
Beurer LB12 User manual

Beurer
Beurer LB 88 User manual

Beurer
Beurer LW 110 User manual

Beurer
Beurer LW 220 User manual

Beurer
Beurer LB 37 User manual

Beurer
Beurer maremed MK 500 User manual

Beurer
Beurer LW 110 User manual

Beurer
Beurer LW 110 User manual

Beurer
Beurer LB 37 User manual