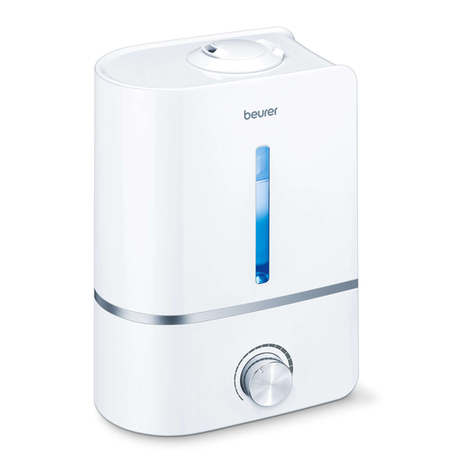
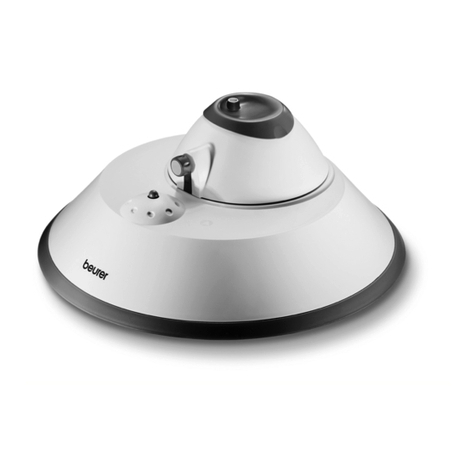
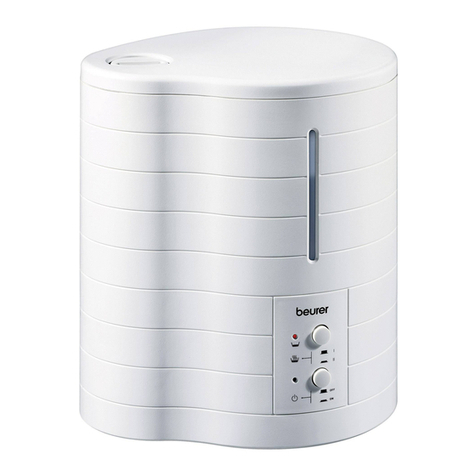
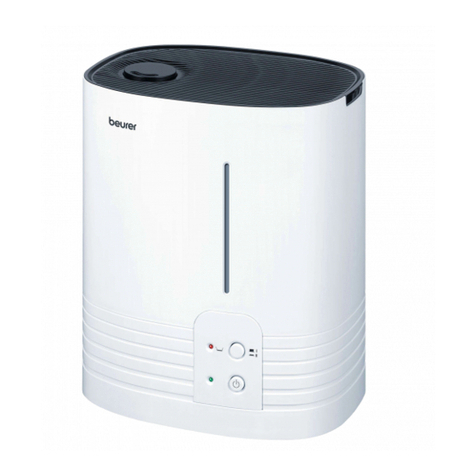
Beurer LB 88 User manual

Beurer GmbH •Söflinger Str. 218 •89077 Ulm, Germany
Tel.: +49 (0)731 / 39 89-144 •Fax: +49 (0)731 / 39 89-255
D
Luftbefeuchter
Gebrauchsanweisung............2–12
G
Humidifier
Instructions for use .............13–23
F
Humidificateur d´air
Mode d’emploi .....................24–34
E
Humidificador
Instrucciones de uso...........35–45
I
Umidifficatore dell´aria
Istruzioni per l’uso ...............46–55
T
Hava nemlendirici
Kullanım Kılavuzu ................56– 65
r
Увлажнитель воздуха
Инструкция по
применению ........................66–76
Q
Nawilżacz powietrza
Instrukcja użytkowania .......77– 87
LB 88

13
ENGLISH
Dear Customer
Thank you for choosing one of our products. Our name stands for high-quality, thoroughly tested products
for applications in the areas of heat, weight, blood pressure, body temperature, pulse, gentle therapy, mas-
sage, beauty, baby and air.
Please read these instructions for use carefully and keep them for later use, be sure to make them accessible
tootherusersandobservetheinformationtheycontain.
With kind regards
Your Beurer team
Included in delivery
•
Base unit for air humidifier
•
Water tank for air humidifier
•
15 aroma pads
•
15 anti-lime pads
•
Cleaning brush
•
These instructions for use
WARNING
•Thisdevicemaybeusedbychildrenovertheageofeightandbypeo-
plewithreducedphysical,sensoryormentalskillsoralackofexperi-
enceorknowledge,providedthattheyaresupervisedorhavebeen
instructedonhowtousethedevicesafely,andarefullyawareofthe
consequent risks of use.
•Childrenmustnotplaywiththedevice.
•Cleaningandusermaintenancemustnotbeperformedbychildrenun-
lesssupervised.
•Disconnectthedevicefromthemainssupplyduringfillingorcleaning.
•Whenthewaterevaporationisactivated,theescapingsteamishot–
risk of scalding.
•Donotuseanysolvent-basedcleaningproducts.
•Ifthemainsconnectioncableofthisdeviceisdamaged,itmustbe
replacedbythemanufacturer,itscustomerservicedepartmentora
similarlyqualifiedpersontoavoidanyrisk.

14
1. Signs and symbols
Thefollowingsymbolsappearintheinstructionsforuseandonthetypeplate:
WARNING Warning notice indicating a risk of injury or damage to health.
IMPORTANT Safetynoteindicatingpossibledamagetothedevice/accessoryormaterial
damage,
e.g. through escaping water.
Note Note on important information.
Thedeviceisdoubleprotectedandcorrespondstoprotectionclass2.
2. Getting to know your instrument
Humansspendalargeproportionoftheirtimeindoors.Foridealambientair,ahumiditylevelofbetween
40%and60%isrecommended.Thisvalueisoftennotreached,particularlyinwinter,whencold,dryair
enterslivingspacesthatarebeingairedandisthenwarmedup.
This dry ambient air draws in moisture, drying out mucous membranes and skin, but also furniture.
Ambientairthatistoodryhasanumberofnegativeeffects:
•
Mucous membranes and lips dry out
•
E
yes become irritated
•
I
nfections and respiratory diseases are more likely to occur
•
E
xhaustion,tirednessanddifficultyconcentrating
•
P
ets and plants are put under unnecessary strain
•
D
ust forms more quickly
•
E
lectrostaticchargingoftextilesandsyntheticfibres,suchascarpetsandplasticfloorcoverings
•
W
ooden furniture, and especially parquet floors, are damaged
•
M
usical instruments go out of tune
TheLB88airhumidifier:
–
Workswiththedualtechnologyfunctionforultrasonicnebulisationandwaterevaporation
–
Boastshighhumidifyingperformance,max.550ml/hour
–
Issuitableforroomsofupto48m²
–
Humidifies the air particularly hygienically – bacteria can be killed by heating
–
Is suitable for use with aromas
–
Canbeusedwithanti-limepadsdependingonwaterhardness,toavoidheavycalcifications
–
Makes little noise
–
Switches off automatically if the water runs out
–
Is easy to clean with a cleaning brush
3. Intended use
This air humidifier is intended for humidifying ambient air.
Thedeviceisintendedforprivateuse.
WARNING
–
Ifyousufferfromasevererespiratoryorlungdisease,consultyourdoctorbeforeusingtheair
humidifier.
–
Thedeviceisonlyintendedforthepurposedescribedintheseinstructionsforuse.Themanufacturer
is not liable for damage resulting from improper or careless use.

15
4. Safety notes
Readtheseinstructionsforusecarefully.Non-observanceofthefollowinginformationmayresultinpersonal
injury or material damage. Store these instructions for use and make them accessible to other users. Make
sureyouincludetheseinstructionsforusewhenhandingoverthedevicetothirdparties.
WARNING
Keep packaging material away from children! There is a choking hazard.
Electric shock
WARNING
A
switheveryelectricaldevice,usethisairhumidifiercarefullyandcautiously,inordertoavoidhazards
due to electric shock.
•
Therefore,observethefollowinginstructionsforuse:
–Onlyusethisdevicewiththevoltagespecifiedonthedevice
–Neverusethedeviceifitoritsaccessoriesshowvisiblesignsofdamage
–Donotusethedeviceduringathunderstorm
•
Inthecaseofdefectsoroperationalfaults,switchthedeviceoffimmediatelyanddisconnectthe
devicefromthemainssocket.Donotpullonthemainscableoronthedevicetodisconnectthe
plugfromthesocket.Neverholdorcarrythedevicebythemainscable.Keepthecablesaway
from hot surfaces.
•
Onlyusethedeviceindryrooms(e.g.neverinthebath,sauna).
•
Neverreachforadevicethathasbeensubmergedinwater.Disconnectthemainsplugimmediately.
•
Donotusethedeviceifitoritsaccessoriesarevisiblydamaged.
•
Donotdropthedeviceorsubjectittoanyimpacts.
•
D
onotusethedeviceduringastorm.
•
D
o not clamp or pinch the mains cable.
•
E
nsure that the mains cable and plug do not come into contact with water, steam or other liquids.
Repairs
WARNING
•
Onlyspecialistpersonnelmayperformrepairsonelectricaldevices.Improperrepairsmaysubject
userstoconsiderabledanger.Forrepairs,pleasecontactCustomerServicesoranauthorisedretailer.
Risk of fire
WARNING
T
hereisariskoffireifthedeviceisusedimproperlyortheseinstructionsforuseareignored.
T
herefore,neverusetheairhumidifier
• Underneathacover,suchasblanket,pillow,etc.
•
Near petrol or other highly flammable substances.
Risk of scalding
WARNING
W
henusingthedevicewiththewaterevaporationactivated,theescapingsteamishot.
•
Undernocircumstancesshouldyouputyourhandsorfaceabovethemistingoutletnozzlesduring
operation.
•
Avoidcontactwithhotsurfaces.
•
Donottrytoremovethemistingoutletnozzlesortheanti-limepadduringoperationorforupto
15minutesafterswitchingoffandunpluggingthedevice.Thesepartsmayonlyberemovedfor
cleaning purposes.
•
Ashightemperaturesprevailinthisairhumidifier,pleasetaketheappropriatesafetyprecautions,
particularlywherechildrenarepresent,andsituatethedevicesomewhereinaccessibletochildren.

16
Handling
IMPORTANT
T
hedevicemustbeswitchedoffanddisconnectedfromthemainseverytimeafteruseandbefore
cleaning.
•
T
hedeviceisonlyintendedforthepurposedescribedintheseinstructionsforuse.Themanufacturer
is not liable for damage resulting from improper or careless use.
•
T
hisdeviceisnotintendedforusebypeople(includingchildren)withrestrictedphysical,sensory
ormentalskillsoralackofexperienceand/oralackofknowledge,unlesstheyaresupervisedbya
personwhohasresponsibilityfortheirsafetyortheyreceiveinstructionsfromthispersononhow
tousethedevice.
•
C
hildrenshouldbesupervisedaroundthedevicetoensuretheydonotplaywithit.
•
E
nsure that the mains cable does not pose a trip hazard.
•
D
onotinsertanyobjectsintoopeningsonthedevice.
•
D
onotplaceanyobjectsonthedevice.
•
D
onotexposethedevicetohightemperatures.
•
A
voidwaterdamagebyhandlingthedevicecarefully(e.g.waterdamagefromsplashinginthe
vicinityofwoodenfloors).
•
I
fthedeviceshouldaccidentallytipover,watermayescape,evenifthedeviceisswitchedoffand
unplugged.
•
T
heimmediatevicinityoftheairhumidifiermaybecomedamp.
•
C
alcareouswatercanleavewhitedeposits.
•
D
onotplacethedeviceonthefloor,butinaraisedposition(e.g.onatableorchestofdrawers).
•
P
ositionthedevicesothatthemistoutletisnotdirectedtowardsobjects.
•
E
mptyanyremainingwaterwhenthedeviceisnotinuse.
•
D
onotexposethedevicetohightemperatures.
Disposal
PleasedisposeofthedeviceinaccordancewithECDirective–WEEE(WasteElectricalandElec-
tronic Equipment).
Ifyouhaveanyqueries,pleasecontacttheappropriatelocalauthorities.

17
5. Unit description
1. Control dial
1
11
2
3
12
45
7
8
15
14
9
10
13
6
2.
Illuminated operating loop for dis-
playing the operation
3.
Buttonforactivatingthewater
evaporation
4.
LEDdisplaywaterevaporation
level1
5.
LEDdisplaywaterevaporation
level2(if4+5,level3lightsup)
6. Waterlevelindicator
7.
Recessedgrip(whenremoving
the mist outlet)
8. Water tank
9. Base unit for air humidifier
10. Water tank screwed plug
11. Filllevelsensor
12. Air outlet
13. Aroma compartment
14. Mist outlet with two nozzles
15. Pad
Functional layout
A High-frequencyvibrationsreleasetinydropsfromthesurfaceofthe
water.
B The fan air flow transports the humid air out into the room.
C Waterevaporationcanalsobeswitchedon.
D Ifyouwish,thedevicecanbeusedwitharomas.
6. Initial use
•
Open the cardboard packaging.
•
Nowremoveallplasticfilms.
•
Checkthedevice,mainsplugandcablefordamage.
Fill with water
• When filling the tank with water, disconnect the plug from the mains.
• Removethemistingoutletnozzles.
• Lift the water tank by the recessed grip and turn it upside down.
• To fill the tank, open the screwed plug underneath it.
• Nowfillthetankwithwater.Thewatertankholdsamaximumofsixlitres,andthewaterlevelisvisible
from the outside.
• Lock the water tank with the screwed plug.
• Youmaynowoptionallyinserttheanti-limepad(15)intotheevaporatorpan.Werecommenddoingsoif
youliveinahardwaterarea.
• The tank should sit tightly on the base unit.
• Check whether the misting outlet nozzle is positioned correctly on the water tank.
AB
C
D

18
IMPORTANT
•
Donotaddanyessentialoilsorfragrancestothewater.Ifotheradditivesareused,theplastic
material and the ultrasound membrane may become discoloured and damaged.
•
Usefreshdrinkingwaterinthedevice.
Positioning the device
•
Placetheairhumidifieronafirm,levelandwater-resistantsurface.
•
Positiontheairhumidifierinthevicinityofaheatingpadtoimproveevaporationoutput,particularlyin
largerooms(donotexceedamax.temperatureof50°C).Alwaysensurethattheairinletandairoutlet
remain clear and that the air flows freely.
7. Operation
IMPORTANT
Checkthehumidityofyourambientairregularly.Intensivecontinuousoperationcancausetheam-
bientairtobecomeexcessivelyhumid.Therelativeairhumidityshouldnotexceed60%.
Switching on the device
•
I
nsert the plug into the mains socket.
•
F
rom the min./ position, turn the control dial to the right. The blue illuminated operating loop lights
up.Ifthereisnotenoughwaterornowateratallinthewatertank,aredLEDlightsup.Thedevicehas
switched off for safety reasons.
•
U
sethecontroldialtosetthedesiredevaporationoutput.Evaporationoutputislimitedtoamaximum
of550mlperhour.
• Whenthedeviceisswitchedon,thewaterevaporationlevelisalreadysetto1;asingleblueLEDshows
the operation. By pushing the middle control knob ( ),thewaterevaporationlevelincreasesto2(second
blueLEDlightsup).Bypressingitagain,bothLEDsturnon–level3.(Evaporationlevel).Theevaporation
process is switched off completely when the button is pressed again (no LED on).
•
C
heckthewaterlevelregularlyduringoperationandrefillthetankifnecessary.
Note
You may optionally add drops of aroma/scented oils to the aroma compartment (13). These will lend
a pleasant odour to the room.
8. Cleaning and storage
Regular cleaning is a prerequisite for hygienic and fault-free operation.
The air humidifier can be dismantled easily and without tools for cleaning.
Alwaysemptyandthoroughlycleantheairhumidifierifthedevicecontainswaterandhasnotbeenoperated
for longer than 3 days.
A lack of cleaning and hygiene can cause bacteria, algae and fungi to form in the water.
Inanycase,werecommendthefollowingcleaningintervals.
Everythree
days
As required
xCleaning the ultrasound membrane with a brush, rinsing the base
xRinsing the water tank, replacing the water
xClean the air humidifier inside and out
xDescaling
NOTE
•
C
leanthedeviceusingonlythemethodsspecified.
•
U
nder no circumstances may liquid enter the base unit.
•
D
onotuseanysolvent-basedcleaningproducts.

19
•
O
nlyuseamildflushingagentorvinegar/vinegar-basedcleanertoperformcleaningordisinfec-
tion work.
Cleaning the ultrasound membrane with a brush, rinsing the base
NOTE
Emptythewaterfromthebaseunitviathesiderim.
•
Cleantheultrasoundmembranewiththecleaningbrushprovided.
Should dirty residue remain in the base unit, pour some clean, fresh water
intothebaseunitandemptyitoutviathesideedge.
Clean the water evaporation pan
NOTE
•
T
heevaporationpanishotduringoperation.Allowthedevicetocoolsufficientlybeforecleaningit.
1) Hold the air outlet in one hand and turn it gently
backwards.
2) Holdtheairoutletfirmlyandremoveit.
3) Ifnecessary,removetheanti-limepad.
4) Cleantheevaporationpanwiththecleaning
brush.
Forheavycontamination,usea
mild cleaning product, and allow it to work together
withwaterinthepanfor10-15minutes.Thenclean
again with the cleaning brush.

20
5) Shoulddirtyresidueremainintheevaporation
pan, pour some clean, fresh water into the base unit
andemptyitoutviathesideedge.
6) Rinse the anti-lime pad in clear water.
7) Reinsert the anti-lime pad and position the air outlet back on the base unit.
Rinsing the water tank, replacing the water
•
C
lean the water tank regularly, at least once a week if using daily.
•
U
seamildcleaningproductorvinegar/vinegar-basedcleaner.
•
C
lean the thread of the screwed plug using the brush.
•
F
ill the water tank halfway with water.
•
T
ightly close the water tank using the screwed plug.
•
S
hakethewatertankbyrockingitbackandforthseveraltimes.
•
E
mpty out the water completely.
•
R
epeat the process using clean, fresh water.
Clean the air humidifier inside and out
•
E
mptythewaterfromthebaseunitviathesideedge.
•
W
ipe the air humidifier with a damp cloth inside and out.
O
nlyuseamildflushingagentorvinegar/vinegar-basedcleanertoperformcleaningwork.
Descaling
Descaling the ultrasound membrane
Hardwatercancauselimescaletobuildupinthedeviceandespeciallyontheultrasoundmembrane.This
formswhitedeposits.Descalethedeviceregularly.
•
D
rop some descaler onto the ultrasound membrane.
•
L
eaveittotakeeffectfortwotofiveminutes.
•
C
lean the ultrasound membrane using the cleaning brush.
•
R
inse the base unit twice with clean, fresh water.
Cleaning inside the base unit
•
D
ip a damp, soft cloth briefly in descaling solution.
•
U
se a damp cloth to wipe the inside of the base unit.
•
C
arefully pour some clean, fresh water into the base unit.
•
E
mptythewaterfromthebaseunitviathesideedge.
•
R
epeat the process using clean, fresh water.

21
Descaling the water tank
•
F
ill the water tank halfway with water.
•
A
dd a small quantity of descaler.
•
T
ightly close the water tank using the screwed plug.
•
S
hakethewatertankbyrockingitbackandforthseveraltimes.
•
E
mpty the descaling solution completely.
•
R
inse the base unit twice with clean, fresh water.
Storage
Ifyoudonotplantousethedeviceforarelativelylongperiodoftime,werecommendthatyouthoroughly
empty,cleananddrythedeviceandstoreitintheoriginalpackinginadryenvironment,ensuringitisnot
weighed down by additional items.
9. Replacement parts
TIP!
If the water is hard, we recommend using the optional anti-limescale filter in addition to the anti-lime pads
supplied.
Anti-limescale filter (optional)
Ordernumber162.843.Pleasecontactthenationalserviceaddress.
NOTE
•
I
ftheanti-limescalefilterdoesnotpreventlimescalebuild-up,orifwhite
depositsformonorinthedevice,theanti-limescalefiltershouldbereplaced.
•
T
heservicelifeoftheanti-limescalefilterisaroundtwotothreemonthsat
most.
•
I
fthedeviceisnotusedforarelativelylongtime,theanti-limescalefiltermust
beremovedfromthewatertankanddriedout.
Fitting the anti-limescale filter
•
L
ift the water tank and rotate it.
•
O
pen the screwed plug on the water tank.
•
S
crew the anti-limescale filter onto the screwed plug on the inside.
•
T
ightly seal the water tank using the screwed plug.

22
10. What if there are problems?
Problem Cause Solution
The operating loop
does not light up.
The mains cable is not plugged in. Connect the plug.
The control dial is at its minimum
position.
Turn the control dial clockwise towards the ma-
ximumposition.
No LED display. The mains cable is not plugged in. Connect the plug.
The control dial is at its minimum
position.
Turn the control dial clockwise towards the ma-
ximumposition.
Red LED display.
Thewaterlevelistoolow;thewater
tank is empty.
Fillthewatertank.
No mist is produced.
The LED display lights up red. Fillthewatertank.
The LED display does not light up. Connect the plug.
The mist has a
strange smell.
Thedeviceisnew. Removethewatertank,turnthescrewedplug
andremoveit.
Air the open, empty water tank in a cool, dry
placefortwelvehours.
Stale or dirty water. Empty the base unit and the water tank and
clean them thoroughly.
Fillthewatertankwithfreshwater.
Strange noise. The water tank is not positioned
correctly on the base unit.
Lift up the water tank and position it correctly
on the base unit.
The tank should sit tightly on the base unit.
Strange noise. There is too little water in the water
tank.
Fillthewatertank.
Thedeviceisnotlevelandunstable.
Placethedeviceonafirm,levelsurface.
Mist escapes from
underneath the
water tank.
The water tank is not positioned
correctly on the base unit.
Lift up the water tank.
Check whether the join between the base unit
and water tank is clean.
Clean if required.
Position the water tank correctly on the base
unit.
The tank should sit tightly on the base unit.
11. Technical data
Dimensions(LxWxH) Approx.29.5cmx19.5cmx28cm
Cable length Approx.1.4m
Weight when empty Approx.2.24kg
Mainsvoltage/frequency 220-240VAC/50/60Hz
Nominal power 280W
Room size Upto48m2
Maximumcapacity Approx.6litres
Evaporationoutput 550ml/hour
Signs and symbols The unit is double-protected and thus corresponds to protec-
tion class 2.

23
12. Replacement items
Name Material REF.
10anti-limepads Dacron 163.141
10aromapads. Dacron 163.142
Other manuals for LB 88
1
Table of contents
Other Beurer Humidifier manuals

Beurer
Beurer LB12 User manual

Beurer
Beurer LW 110 User manual

Beurer
Beurer LW230 White User manual

Beurer
Beurer LB12 User manual

Beurer
Beurer LW 110 User manual

Beurer
Beurer LB 300 Plus User manual

Beurer
Beurer LB 50 User manual

Beurer
Beurer LB44 User manual

Beurer
Beurer LB 27 User manual

Beurer
Beurer LB 37 User manual
Popular Humidifier manuals by other brands

Neptronic
Neptronic SK300 series Installation instructions and user manual

ResMed
ResMed H5i Welcome guide

Venta
Venta COMFORT PLUS LW15 Instructions for use

Comfort Zone
Comfort Zone CZHD60 instruction manual

Johnson Controls Unitary Products
Johnson Controls Unitary Products 8000 Residential Steam Humidifier owner's manual

Vicks
Vicks Mini Cool Mist User instructions