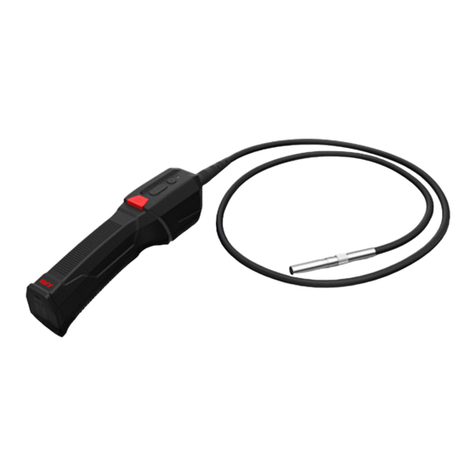
BGS technic 9853 User manual

BGS technic KG
Bandwirkerstr. 3
42929 Wermelskirchen
Tel.: 02196 720480
Fax.: 02196 7204820
mail@bgs-technic.de
www.bgstechnic.com
© BGS technic KG, Vervielfältigung und Weiterverwendung verboten
Art. 9853
WiFi Farb-Endoskop mit LED-Beleuchtung
KOMPONENTEN
1 Kamerakopf
2 Endoskopkabel
3 LED Helligkeitsregler
4 Aufnahmetaste (ohne Funktion)
5 Micro-USB-Anschluß
6 Ladekabel
7 WiFi-box mit Akku
8 Magnet
9 Haken
10 Haltehülse für Haken & Magnet
11 Spiegel 90°
12 Saugnäpfe für WiFi-Box
Vielen Dank, dass Sie sich für unsere Wifi-Farb-Endoskopkamera entschieden haben.
Bevor Sie dieses Produkt verwenden, lesen Sie bitte diese Bedienungsanleitung sorgfältig durch und
bewahren Sie sie gut auf.
SPEZIFIKATIONEN
WiFi Reichweite:
10 Meter
Objektiv F/NO:
2.8
Spannungsversorgung:
3.7V 800 mAh
Kamera-Aussen-Ø:
5.5 mm
Akkulaufzeit:
2 Stunden
Betrachtungswinkel:
60°
Akkuladezeit:
1 Stunde
Brennweite:
3 bis 10 cm
Ladebuchse:
Micro USB
Unterstützt Aufnehmen von Bildern & Videos
WiFi-Box-Größe:
70 x 35 x 10 mm
Zusatzlichtquelle:
6 Stück helle LED
Kamera:
2.0 Megapixel
Kabeltyp:
Halbstarr
Auflösung:
640 x 480
Kabellänge:
1 Meter
EIGENSCHAFTEN
•WiFi-Box für die kabellose Verbindung von bis zu 4 Geräten gleichzeitig.
•WiFi-Box mit eingebautem Akku zur Stromversorgung.
•Unterstützt Geräte mit den Betriebssystemen Android, iOS und Windows.
•Unterstützt das Aufnehmen von Bildern und Videos sowie das Speichern auf dem Mobiltelefon oder
Computer.
•Wasserdichter Kamerakopf mit 6 LED-Leuchten hoher Helligkeit.
WiFi BOX
1 WiFi-Box
2 An/Aus-Schalter
3 Ladebuchse (Micro USB)
4 Kamerabuchse (Micro USB)
5 Einschaltkontrolle
6 Ladekontrolle

BGS technic KG
Bandwirkerstr. 3
42929 Wermelskirchen
Tel.: 02196 720480
Fax.: 02196 7204820
mail@bgs-technic.de
www.bgstechnic.com
© BGS technic KG, Vervielfältigung und Weiterverwendung verboten
LADEN
•Laden Sie die WiFi-Box spätestens auf, wenn die WiFi-Box sich bei Verwendung abschaltet.
•Verwenden Sie zum Laden des Akkus nur ein 5V / 1A Ladegerät.
•Während des Ladevorgangs leuchtet die LED für Ladekontrolle.
•Die Ladezeit beträgt ca. 1 Stunde.
BENUTZERHINWEISE
Windows Computer
1. Laden Sie die Software von folgender Adresse: http://download.bgstechnic.com/HTwifi.zip
2. Die Antivirensoftware muss zum Installieren beendet werden.
Die Software kann nach der Installation mit eingeschalteter Antivirensoftware verwendet werden.
3. Schließen Sie das Endoskop an die WiFi-Box an und drücken Sie den An/Aus-Schalter der WiFi-Box
für 3 Sekunden, bis die blaue Anzeige leuchtet.
4. Öffnen Sie das drahtlose Netzwerk des Computers und suchen Sie den WLAN-Namen
"HTendoscope_xx: xx: xx". Klicken Sie darauf, um eine Verbindung herzustellen und geben Sie
folgendes Kennwort ein: 88888888
5. Öffnen Sie die Software, schließen Sie die Kamera an. Sie können Fotos und Videos jetzt aufnehmen,
diese werden automatisch auf dem Computer gespeichert. Es können auch andere Formate und
Auflösungen eingestellt werden.
Mac Computers
MacBook OS, bitte verwenden Sie "Photo Booth", "Quick Time Player", "VLC (Video Lan Client)"
Smart Phones / Tablets
1. Installieren Sie die App "HT mirror"
Für Android-Geräte die App "HT mirror" aus dem Google Play Store herunterladen.
Für iOS-Geräte die App "HT mirror" aus dem App Store herunterladen.
2. Schließen Sie das Endoskop an die WiFi-Box an und drücken Sie den An/Aus-Schalter der WiFi-Box
für 3 Sekunden. Eine rote LED blinkt und zeigt dadurch die Bereitschaft zum Verbinden an.
3. Klicken Sie auf der Hauptoberfläche des Mobilgerätes auf das Symbol "Einstellung", klicken Sie auf
"WLAN", um den Namen der WiFi-Endoskopkamera "HTendoscope_xx: xx: xx" zu suchen. Klicken
Sie darauf, um eine Verbindung herzustellen und geben Sie folgendes Kennwort ein: 88888888
4. Öffnen Sie nach dem Verbindungsaufbau die App "HT mirror", klicken Sie dazu auf das HT mirror
Symbol.
5. Klicken Sie auf den Pfeil (G), um eine Verbindung zur App “HT mirror“ herzustellen. Das Livebild wird
nun auf Ihrem Mobilgerät wiedergegeben.
G

BGS technic KG
Bandwirkerstr. 3
42929 Wermelskirchen
Tel.: 02196 720480
Fax.: 02196 7204820
mail@bgs-technic.de
www.bgstechnic.com
© BGS technic KG, Vervielfältigung und Weiterverwendung verboten
VERWENDUNG der App “HT mirror”
A Programmebene verlassen
B Foto abspeichern; Abspeichern durch Symbol anklicken.
C Video speichern; Starten der Aufnahme durch Symbol anklicken, zum Abspeichern erneut anklicken.
D Gespeicherte Medien aufrufen. D1 für Fotos und D2 für Videos.
E Darstellung um 90 Grad drehen.
F Einstellen der Auflösung, bei diesem Endoskop ist ausschließlich 640x480 Pixel möglich.
ZUBEHÖR-INSTALLATION
Spiegelmontage
Drehen Sie den Spiegel im Uhrzeigersinn, um den Spiegel auf der Kamera zu installieren.
Magnet- oder Hakenmontage
1. Schieben Sie die Haltehülse (9) über die Kamera (1) auf das Kamerakabel.
2. Führen Sie das Ende des Magneten (7) oder Hakens (8) in die Bohrung (rot markiert) des
Kamerakopfes ein.
3. Richten Sie die Nut in der Haltehülse an der Bohrung aus (rot markiert), und schieben Sie die
Haltehülse über den Kamerakopf, bis der Magnet oder Haken fixiert ist.
UMWELTSCHUTZ
Recyceln Sie unerwünschte Stoffe, anstatt sie als Abfall zu entsorgen. Alle Werkzeuge,
Zubehörteile und Verpackungen sind zu sortieren, einer Wertstoffsammelstelle zuzuführen
und umweltgerecht zu entsorgen.
ENTSORGUNG
Entsorgen Sie den Batterien und Akkus nicht im Hausmüll.
Akkus und Batterien sollten auf verantwortungsvolle Weise entsorgt werden. Geben Sie
Akkus und Batterien an einer geeigneten Sammelstelle ab.
Entsorgen Sie dieses Produkt am Ende seiner Lebensdauer gemäß der EU-Richtlinie über
Elektro- und Elektronikaltgeräte. Erkundigen Sie sich bei Ihrer örtlichen Abfallbehörde über
Recyclingmaßnahmen oder geben Sie das Produkt zur Entsorgung an die BGS technic KG
oder einen Elektrofachhändler.

BGS technic KG
Bandwirkerstr. 3
42929 Wermelskirchen
Tel.: 02196 720480
Fax.: 02196 7204820
mail@bgs-technic.de
www.bgstechnic.com
© BGS technic KG, Vervielfältigung und Weiterverwendung verboten
BGS 9853
WiFi Color Borescope with LED lighting
COMPONENTS
1 Camera head
2 Borescope cable
3 Brightness regulator
4 Screenshot button (without function)
5 Micro-USB
6 Charging cable
7 WiFi box with batterie
8 Magnet
9 Hook
10 Retaining sleeve for Hook & Magnet
11 Mirror 90°
12 Suction cups for WiFi box
Thank you for choosing our Wifi Color Borescope Camera.
Before using this product please read this manual instruction carefully and keep it well for future reference
SPECIFICATIONS
WiFi distance:
10 meters
Lens F/NO:
2.8
Power supply:
3.7V 800 mAh
Camera outer Ø:
5.5 mm
Battery usage time:
2 hours
Angle of view:
60°
Battery charging time:
1 hour
Focal distance:
3 cm to 10 cm
Charging connector:
Micro USB
Supports taking pictures & videos
WiFi box size:
70 x 35 x 10 mm
Auxiliary light source: 6 pcs. bright LED
Camera:
2.0 mega pixel
Cable type:
Semi-rigid cable
Resolution:
640 x 480
Cable length:
1 meter
FEATURES
•WiFi box for wireless connecting of up to 4 devices at the same time.
•WiFi box with built in battery for power supply.
•Supports devices with operating systems Android, iOS and Windows.
•Supports taking pictures and videos and save in the mobile phone or computer.
•Waterproof camera head with 6 pcs. of high brightness LED lights.
WiFi BOX
1 WiFi Box
2 On/Off Switch
3 Charging connector (Micro USB)
4 Camera connector (Micro USB)
5 Charging indicator
6 On/Off indicator

BGS technic KG
Bandwirkerstr. 3
42929 Wermelskirchen
Tel.: 02196 720480
Fax.: 02196 7204820
mail@bgs-technic.de
www.bgstechnic.com
© BGS technic KG, Vervielfältigung und Weiterverwendung verboten
CHARGING
•Charge the WiFi box at the latest, when it turns off during use.
•Please only use a 5V/1A charger to charge the battery
•The charging indicator lights up during the charging process.
•The charging time is about 1 hour.
USER GUIDE
Windows Computer
1. Download the software from website: http://download.bgstechnic.com/HTwifi.zip
2. The anti-virus software must be exit for installing the software.
3. The software can be used with anti-virus software after installation.
4. Plug the endoscope camera into the WiFi box and press the power button of the WiFi box for 3
seconds until the On/Off indicator lights.
5. Open the computer's wireless network and find the WiFi name "HTendoscope_xx:xx:xx" on the
computer, click it to connect and enter the password: 88888888
6. Open the software, connect the camera, then you can take photos and videos and it will be saved in
computer automatically. Also it can be set format and resolution.
Mac Computer
MacBook OS, please use "Photo Booth", "Quick Time Player", "VLC (Video Lan Client)"
Smart Phone / Tablet
1. Install the App "HT mirror"
For Android user, search the App "HT mirror" in Google Play Store.
For iOS user, search the App "HT mirror" in App Store.
2. Plug the endoscope camera into the WiFi box, press the power button of the WiFi box for 3 seconds
until the red indicator lights.
3. Click on the "Setting" icon on main interface of smart phone, click on the "WLAN" to find the name of
WiFi endoscope camera "HTendoscope_xx:xx:xx", click on it to connect and enter the password:
88888888
4. After connection success, click on “HT mirror” icon to open the App "HT mirror", then click on the
arrow (G) to connect the borescope with the App. Now it is possible to take live pictures and videos.
G

BGS technic KG
Bandwirkerstr. 3
42929 Wermelskirchen
Tel.: 02196 720480
Fax.: 02196 7204820
mail@bgs-technic.de
www.bgstechnic.com
© BGS technic KG, Vervielfältigung und Weiterverwendung verboten
USING “HT mirror” APP
A Leave the program level
B Click on it to take a photo
C Click on it to start video, click on it again to save the video.
D Showing stored media. D1 for photos and D2 for videos
E Rotate the display by 90 degrees
F Setting of resolution. Click on it to set resolution, possible setting of this borescope is 640x480 pixel.
G Take photos: click on it to take photos, it will be saved in smart phone automatically.
INSTALLING ACCESSORIES
Mounting the mirror
Turn the mirror in clockwise direction for installing.
Mounting the magnet or hook
1. Slide the retaining sleeve (9) over the camera (1) onto the camera cable.
2. Insert the end of the magnet (7) or hook (8) into the bore (red marked) of the camera head.
3. Align the groove in the retaining sleeve to the bore (marked in red) and slide the retaining sleeve over
the camera head until the magnet or hook is fixed.
ENVIRONMENTAL PROTECTION
Recycle unwanted materials instead of disposing of them as waste. All tools, accessories and
packaging should be sorted, taken to a recycling centre and disposed of in a manner which is
compatible with the environment.
DISPOSAL
Do not dispose battery in household waste.
Batteries should be disposed of in a responsible manner, they must be disposed at
appropriate collection point.
Dispose of this product at the end of its working life in compliance with the EU Directive on
Waste Electrical and Electronic Equipment. Contact your local solid waste authority for
recycling information or give the product for disposal to BGS technic KG or to an electrical
appliances retailer.

BGS technic KG
Bandwirkerstr. 3
D-42929 Wermelskirchen
Tel.: 02196 720480
Fax.: 02196 7204820
mail@bgs-technic.de
www.bgstechnic.com
BGS 9853
Endoscope couleur WiFi avec éclairage LED
COMPOSANTS
1 Tête de caméra
2 Câble de l’endoscope
3 Réglage de la luminosité des LED
4 Touche (sans fonction)
5 Micro-USB
6 Câble de chargeur
7 Box WiFi avec batterie
8 Aimant
9 Crochet
10 Douille de fixation pour crochet et aimant
11 Miroir 90°
12 Ventouses pour box WiFi
Merci d’avoir choisi notre caméra couleur endoscopique WiFi.
Avant d’utiliser ce produit, veuillez lire attentivement ce mode d’emploi et le conserver précieusement.
SPÉCIFICATIONS
Portée WiFi :
10 mètres
F/NO de l’objectif:
2,8
Alimentation en courant:
3,7 V – 800 mAh
Ø extérieur de la caméra:
5.5 mm
Autonomie de la batterie:
approx. 2 heures
Angle de vue:
60°
Temps de charge:
1 heure
Distance focale:
3 à 10 cm
Port de charge:
Micro-USB
Prise en charge de l’enregistrement d’images et de vidéos
Taille du box WiFi:
70 x 35 x 10 mm
Source lumineuse supplémentaire: 6 unités LED claires
Caméra:
2.0 mégapixels
Type de câble:
semi-rigide
Résolution:
640 x 480
Longueur du câble:
1 mètre
PROPRIÉTÉS
•Box WiFi pour la connexion sans fils simultanée de jusqu’à 4 appareils.
•Box WiFi avec batterie intégrée en tant qu’alimentation électrique.
•Prise en charge de périphériques avec systèmes d’exploitation Android, iOS et Windows.
•Prise en charge de la capture d’images et de vidéos et de leur stockage sur téléphone mobile ou
ordinateur.
•Tête de caméra étanche avec 6 LED de haute luminosité.
BOX WiFi
1 BOX WiFi
2 Commutateur MARCHE/ARRÊT
3 Port de charge (micro USB)
4 Port de caméra (micro USB)
5 Commande de mise en marche
6 Ladekontrolle Contrôle de la charge

BGS technic KG
Bandwirkerstr. 3
D-42929 Wermelskirchen
Tel.: 02196 720480
Fax.: 02196 7204820
mail@bgs-technic.de
www.bgstechnic.com
CHARGEMENT
•Chargez le box WiFi au plus tard lorsque celle-ci s’éteint pendant l’utilisation.
•Utilisez uniquement un chargeur de 5V/1A pour charger la batterie.
•Pendant le processus de charge, la LED de contrôle de charge s’allume.
•Le temps de charge est d’environ 1 heure.
INSTRUCTIONS AUX UTILISATEURS
Ordinateurs Windows
1. Téléchargez le logiciel à l’adresse suivante :http://download.bgstechnic.com/HTwifi.zip
2. Votre logiciel antivirus doit être désactivé pour que le logiciel puisse être installé.
Après son installation, le logiciel peut être utilisé avec le logiciel antivirus activé.
3. Connectez l’endoscope au box WiFi et appuyez sur le commutateur marche/arrêt du boîtier WiFi
pendant 3 secondes, jusqu’à ce que le témoin bleu s’allume.
4. Ouvrez la vue d’ensemble du réseau sans fil de votre ordinateur et recherchez le nom WLAN
« HTendoscope_xx : xx : xx ». Cliquez dessus pour établir une connexion et saisissez le mot de
passe suivant : 88888888
5. Lancez le logiciel, connectez la caméra et commencez à prendre des photos et des vidéos. Les
images seront automatiquement enregistrées sur l’ordinateur. D’autres formats et résolutions peuvent
également être définis.
Ordinateurs Mac
Pour MacBook OS, veuillez utiliser « Photo Booth », « Quick Time Player » ou « VLC (Video Lan Client) »
Smartphones/Tablettes
1. Installez l’application « HT mirror »
Pour les appareils Android, téléchargez l’application « HT mirror » dans la boutique Google Play.
Pour les appareils iOS, téléchargez l’application « HT mirror » dans l’App Store.
2. Connectez l’endoscope à la boîte WiFi et appuyez sur le commutateur marche/arrêt du box WiFi
pendant 3 secondes. Une LED rouge clignote pour indiquer que l’appareil est prêt à être connecté.
3. Cliquez sur l’icône « Paramètres » de l’interface principale du téléphone mobile, cliquez sur « WLAN »
pour rechercher le nom de la caméra endoscopique WiFi « HTendoscope_xx : xx : xx ». Cliquez
dessus pour établir une connexion et saisissez le mot de passe suivant : 88888888
4. Une fois la connexion établie, ouvrez l’application « HT mirror » en cliquant sur l’icône
correspondante.
5. Cliquez sur la flèche (G) pour établir une connexion avec l’application « HT mirror ». L’image en direct
est maintenant affichée à l’écran de votre appareil mobile.
G

BGS technic KG
Bandwirkerstr. 3
D-42929 Wermelskirchen
Tel.: 02196 720480
Fax.: 02196 7204820
mail@bgs-technic.de
www.bgstechnic.com
UTILISATION de l’application « HT mirror »
A Quittez la page des applications
B Enregistrer une photo ; cliquez sur l’icône pour mémoriser.
C Enregistrez une vidéo ; cliquez sur l’icône pour lancer l’enregistrement, cliquez à nouveau pour le
mémoriser.
D Accéder aux médias mémorisés. D1 pour les photos et D2 pour les vidéos.
E Faire pivoter l’affichage de 90 degrés.
F Réglage de la résolution ; cet endoscope ne prend en charge qu’une seule résolution : 640x480
pixels.
INSTALLATION D’ACCESSOIRES
Montage du miroir
Tournez le miroir dans le sens des aiguilles d’une montre pour l’installer sur la caméra.
Montage sur aimant ou crochet
1. Glissez la douille de retenue (9) par-dessus la caméra (1) sur le câble de caméra.
2. Insérez l’extrémité de l’aimant (7) ou du crochet (8) dans le trou (marqué en rouge) de la tête
de caméra.
3. Alignez la rainure de la douille de retenue avec le trou (marqué en rouge) et faites glisser la
douille de retenue par-dessus la tête de caméra jusqu’à ce que l’aimant ou le crochet soient
fixés.
PROTECTION DE L’ENVIRONNEMENT
Recyclez les matières indésirables au lieu de les jeter comme déchets. Tous les outils,
accessoires et emballages doivent être triés, envoyés à un point de collecte de recyclage et
éliminés dans le respect de l’environnement.
ÉLIMINATION
Ne jetez pas la batterie avec les ordures ménagères.
Les batteries doivent être éliminées de manière responsable. Déposez les piles et les
batteries dans un point de collecte agréé.
Éliminez ce produit à la fin de son cycle de vie conformément à la directive européenne
relative aux déchets d’équipements électriques et électroniques. Contactez votre instance
locale d’élimination des déchets pour obtenir des informations sur les mesures de recyclage
à appliquer ou remettez le produit à BGS technic ou à votre fournisseur d’appareils
électriques.

BGS technic KG
Bandwirkerstr. 3
D-42929 Wermelskirchen
Tel.: 02196 720480
Fax.: 02196 7204820
mail@bgs-technic.de
www.bgstechnic.com
© BGS technic KG, Copying and further use not allowed
BGS 9853
Endoscopio en color WIFI con iluminación LED
COMPONENTES
1 Cabezal de la cámara
2 Regulador de intensidad de luz LED
3 Cable endoscopio
4 Botón (sin función)
5 Micro USB
6 Cable de carga
7 Caja WiFi con batería
8 Imán
9 Gancho
10 Manguito de sujeción para gancho e imán
11 Espejo de 90°
12 Ventosas para caja WiFi
Muchas gracias por elegir nuestra cámara de endoscopio WIFI en color.
Antes de usar este producto, lea atentamente este manual y manténgalo bien guardado.
ESPECIFICACIONES
Alcance WiFi:
10 metros
Objetivo F/NO:
2.8
Alimentación eléctrica:
3.7V 800 mAh
Diámetro exterior de la cámara:
5.5 mm
Duración de la batería:
2 horas
Ángulo de visión:
60°
Tiempo de recarga:
1 hora
Distancia focal:
3 – 10 cm
Toma de carga:
Micro USB
Soporta la toma de fotos y vídeos
Dimensiones de la caja WiFi:
70 x 35 x 10 mm
Fuente de luz adicional: 6 piezas de LED luminosas
Cámara:
2.0 Megapíxeles
Tipo de cable:
Semirígido
Resolución:
640 x 480
Longitud del cable:
1 metro
PROPIEDADES
•Caja WiFi para la conexión inalámbrica de hasta 4 dispositivos simultáneamente.
•Caja WiFi con batería incorporada para la alimentación.
•Es compatible con dispositivos que funcionan con los sistemas operativos Android, iOS y Windows.
•Admite la captura de imágenes y vídeos, además de guardarlos en teléfonos móviles o
computadoras.
•Cabezal de cámara impermeable con 6 LEDs de alta luminosidad.
BOX WiFi
1 BOX WiFi
2 Commutateur MARCHE/ARRÊT
3 Port de charge (micro USB)
4 Port de caméra (micro USB)
5 Control de encendido
6 Control de carga

BGS technic KG
Bandwirkerstr. 3
D-42929 Wermelskirchen
Tel.: 02196 720480
Fax.: 02196 7204820
mail@bgs-technic.de
www.bgstechnic.com
© BGS technic KG, Copying and further use not allowed
CARGAR
•Cargue la caja WiFi a más tardar cuando la caja WiFi se apague durante el uso.
•Utilice únicamente un cargador de 5V / 1A para cargar la batería.
•Durante el proceso de carga, el LED de control de carga se ilumina.
•El tiempo de carga es de aproximadamente 1 hora.
INDICACIONES PARA EL USUARIO
Ordenador con Windows
1. Descargue el software desde la siguiente dirección: http://download.bgstechnic.com/HTwifi.zip
2. El software antivirus debe ser detenido para la instalación.
El software se puede utilizar después de la instalación con el software antivirus activado.
3. Conecte el endoscopio a la caja WiFi y presione el interruptor de ON/OFF de la caja WiFi durante 3
segundos hasta que se encienda el indicador azul.
4. Abra la red inalámbrica de la computadora y busque el nombre de WiFi "HTendoscope_xx: xx: xx".
Haga clic para conectarse e introduzca la siguiente contraseña: 88888888
5. Abra el software, conecte la cámara y podrá tomar fotos y vídeos. Estos se guardan automáticamente
en la computadora. También es posible configurar otros formatos y resoluciones.
Computadoras Mac
MacBook OS, por favor utilice "Photo Booth", "Quick Time Player", "VLC (Video Lan Client)"
Smart Phones / Tabletas
1. Instale la aplicación "HT mirror"
Para los dispositivos Android, descarga la aplicación "HT mirror" de Google Play Store.
Para los dispositivos iOS, descargue la aplicación "HT mirror" de la App Store.
2. Conecte el endoscopio a la caja WiFi y pulse el interruptor de encendido/apagado de la caja WiFi
durante 3 segundos. Un LED rojo parpadea para indicar que el dispositivo está listo para la conexión.
3. Haga clic en el icono "Configuración" de la interfaz principal del dispositivo móvil, haga clic en
"WLAN" para buscar el nombre de la cámara del endoscopio WiFi "HTendoscope_xx: xx: xx". Haga
clic en él para establecer una conexión e introduzca la siguiente contraseña: 88888888
4. Una vez establecida la conexión, abra la aplicación "HT mirror" haciendo clic en el icono de HT
mirror.
5. Haga clic en la flecha (G) para establecer una conexión con la aplicación "HT mirror". La imagen en
vivo se reproduce ahora en su dispositivo móvil.
G

BGS technic KG
Bandwirkerstr. 3
D-42929 Wermelskirchen
Tel.: 02196 720480
Fax.: 02196 7204820
mail@bgs-technic.de
www.bgstechnic.com
© BGS technic KG, Copying and further use not allowed
USO de la aplicación "HT mirror"
A Salir del nivel de programa
B Guardar foto; haga clic en el icono para guardar.
C Guarde el vídeo; haga clic en el icono para iniciar la grabación, haga clic de nuevo para guardar.
D Recuperar los medios guardados. D1 para fotos y D2 para videos.
E Girar la imagen en 90 grados.
F Ajuste de la resolución, con este endoscopio solo son posibles 640x480 píxeles.
INSTALACIÓN DE ACCESORIOS
Montaje de espejo
Gire el espejo hacia la derecha para instalar el espejo en la cámara.
Montaje del imán o del gancho
1. Deslice el manguito de sujeción (9) por encima de la cámara (1) sobre el cable de la cámara.
2. Introduzca el extremo del imán (7) o el gancho (8) en el orificio (marcado en rojo) del cabezal
de la cámara.
3. Alinee la ranura del manguito de sujeción con el orificio (marcado en rojo) y deslice el
manguito de sujeción sobre el cabezal de la cámara hasta que el imán o el gancho estén
fijados.
PROTECCIÓN AMBIENTAL
Recicle las sustancias no deseadas, en lugar de tirarlas a la basura. Todas las herramientas,
accesorios y embalajes deben clasificarse, llevarse a un punto de recogida de residuos y
desecharse de manera respetuosa con el medio ambiente.
ELIMINACIÓN
No deseche la batería con la basura doméstica.
Las baterías deben desecharse de manera responsable. Deseche las baterías y las pilas en
un punto de recogida de residuos adecuado.
Deseche este producto al final de su vida útil de acuerdo con la Directiva de residuos de
aparatos eléctricos y electrónicos en desuso de la UE. Infórmese en su administración local
acerca de las medidas de reciclado o entregue el producto para que sea desechado por
BGS technic KG o un distribuidor especializado en productos eléctricos.

Table of contents
Languages:
Other BGS technic Diagnostic Equipment manuals
Popular Diagnostic Equipment manuals by other brands

Subaru
Subaru GR8-1100 EST instruction manual
PCE Instruments
PCE Instruments PCE-VE 100N4 user manual
NeuroMetrix
NeuroMetrix DPNCheck 2.0 NC-040 reference guide

MAHA Maschinenbau Haldenwang
MAHA Maschinenbau Haldenwang MBT Series Original operating instructions
PercuVision
PercuVision DirectVision Technical reference manual
Foxwell
Foxwell NT414 manual
