Biamp NPX H1040 Original operating instructions

A: 9300 S.W. Gemini Drive Beaverton, OR 97008 USA W: www.biamp.com
DEC 2021
NPX H1040/G1040
Paging Stations
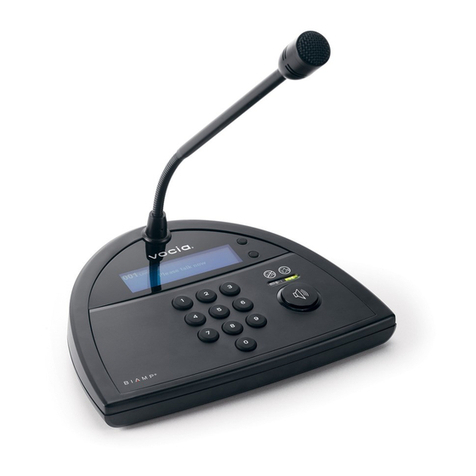
The NPX H1040/G1040 are 4-button convenience paging stations with a
handheld or gooseneck microphone for use in Tesira®and Qt® X systems. Each
features embedded DSP and on-board memory to support stored message
playback and customized preambles. NPX paging stations can be set up to
utilize AVB or Dante®paths for paging content. The NPX H1040/G1040 store
up to four user-configurable page codes and up to 10 prerecorded messages.
NPX H1100/G1100
Paging Stations
The NPX H1100/G1100 are 10-button convenience paging stations with a
handheld or gooseneck microphone for use in Tesira and Qt X systems.
The H1100/G1100 feature embedded DSP and on-board memory to support
standard and advanced public address functionalities. NPX paging stations can
be set up to utilize AVB or Dante®paths for paging content. The NPX H1100/
G1100 store up to 999 user-configurable page codes and up to 10 prerecorded
messages.
Setup and Use
The Tesira software provides an intuitive interface for setup and programming
of the NPX paging stations. The information supplied by this manual relates to
physical connections and device setup. For more details on software, please
consult the Tesira Help File.
NPX may be integrated into a Qt X sound masking system as an audio source
via the Con iguration Tab in the Qt X design software. Click here for
information on the web-based device and system management for the Qt X.
Installation
Each model supports both tabletop and wall mounting with a removable “foot”
that allows the paging station to be mounted flat against any surface. Click
here for installation details.
Biamp NPX Convenience Paging Stations
NPX H1040/G1040/H1100/G1100
NPX H1040/G1040 NPX H1100/G1100
Installation & Operation Guide
Connecting people through extraordinary audiovisual experiences TM

page 2 Installation and Operation Guide NPX
Figure 3: NPX Back Panel
Figure 1: NPX G1100 Front Panel
Front
1. LCD Menu Navigation Buttons
Up, Down and Select buttons allow the user to
navigate the LCD menu.
2. LCD
Allows the user to view menus and functions. See
Operation for more details.
3. Page Code Selection Buttons
Defines a voice-paging operation including its
type, destination and priority.
4. Microphone
5. Page Status LED Indicators
Indicates if the user is in Talk/Don’t Talk modes:
6.Press-to-Talk (PTT)
Allows the user to initiate announcements while
holding the PTT button is down. The page ends
when the PTT button is released.
6a. Latching Button (gooseneck only)
Keeps a page active until the button is pressed
again or the PTT button is pressed.
NPX HANDHELD/GOOSENECK FRONT & BACK
Back
7. Removable Foot
The removable foot allows for flat surface and
wall mounting.
8. Back Plate
The removable back plate supports wall
mounting.
NOTE: Marking plate (regulatory label) located at the
bottom of the unit.
1
6
4
5
2
3
4
8
1
2
3
5
7
6
6a
Status LED Indicator
Talk Now PTT Right LED Green Solid
Talk Now Latching Right LED Green Pulsing
No Talk Left LED Red Solid
Wait Left LED Yellow Solid
Figure 2: NPX H1100 Front Panel

NPX Installation and Operation Guide page 3
4. Secure the foot to a at surface. Cut a hole into the surface, below or
just beyond, where the RJ-45 port at the back of the NPX will be located.
Route RJ-45 up through the hole as shown in Figure 6.
5. Insert the RJ-45 into the port at the back of the NPX as shown in Figure 7.
6. Install the NPX onto the foot by pressing down and sliding to the right as
shown in Figure 8.
PRODUCT INSTALLATION
Install away from heat sources such as vents, radiators, heat registers and
stoves or near water or steam. Do not exceed the maximum ambient operating
temperature of 32-104° F (0-40° C).
The two types of devices (handheld and gooseneck) may be installed in almost
any location that is convenient for the room design requirements. This includes
setting or attaching the device on a flat surface or to a wall. A Kensington lock
can be used for added security while still allowing the NPX to be moved around.
Surface-Mount Installation
1. Determine where the NPX is to be located.
2. Remove the foot from the NPX by inserting a small Philips screwdriver
or similar tool, with a maximum 3/16” (4.7mm) diameter, into the hole as
shown in Figure 4.
3. While pressing and holding the tool in the hole, slide the foot to the left and
lift it away from the device as shown in Figure 5.
Figure 8: NPX Installation
1
2
A security slot can accommodate a
Kensington®lock (not included) Figure 9.
Figure 4: Foot Release
Figure 5: Foot Removal
2
1
Figure 6: Foot Installation
Figure 7: NPX Connection
Figure 9: Security Slot

page 4 Installation and Operation Guide NPX
An optional wall-mounting bracket is clipped to the back of the NPX but must
be removed and flipped for installation.
1. Determine the location where the NPX is to be located. The unit must be
no higher than 6’ 7” (2 m) above the oor.
2. Remove the foot from the NPX by inserting a small Philips screwdriver or
similar tool (maximum 3/16” (4.7mm) diameter) into the hole as shown in
Figure 8.
3. While pressing and holding the tool into the hole, slide the foot to the left
and lift it away from the device as shown in Figure 10.
4. Slide the back plate slightly to the left and lift it away from the device. Turn
the bracket 180 degrees as shown in Figure 12.
5. Attach the bracket to a single or double gang box with at-head screws as
shown in Figure 13. (screws and gang box not included).
6. Connect the RJ-45 to the port at the back of the NPX and attach the NPX
to the back plate by placing and sliding it to the left until it clicks into place
as shown in Figure 14.
7. Removing the NPX from the back plate is the opposite of step 6. Insert a
tool into the release hole and slide the device to the right (instead of the
left) and lift it o of the bracket.
PRODUCT INSTALLATION (CONTINUED)
Wall-Mount Installation
#6-32 x .5” (typical)
Figure 11: Foot Removal
1
2
Figure 10: Foot Release
Figure 12: Back-Plate Removal
Figure 13: Back Plate Installation
Figure 14: NPX Installation

NPX Installation and Operation Guide page 5
Function Navigation LCD Description
Splash Screen • N/A Displays when NPX device is powering on.
PIN Authentication • N/A Displays the PIN Authentication screen if a
PIN code is required. There may be a brief
delay before the next screen displays.
System Alerts • Press and hold
3
and then press
2
to go to
Device Information.
• Press and hold
3
and then press
1
to go to
Recordings.
A System Alerts (Host Communication
Fault) screen will appear until the NPX
device is discovered and has established
communication with the system it is
operating with (either Tesira or Qt X).
See System Alerts for information.
Page Code Screen • Press to go to previous page code.
• Press
2
to go to next page code.
• Press and hold
3
and then press
2
to go to
Device Information.
• Press and hold
3
and then press
1
to go to
Recordings.
• Press
3
to return to Page Code.
The default Page Code screen displays
after the launch of the NPX device.
This screen allows the user to enter a
specic page code from the keyboard or
scroll through the page codes to send a live
page or play a recorded message. Click
here for paging details.
Device Information
Screen • Press and hold
3
and then press
1
to go to
Recordings.
• Press
3
to return to Page Codes.
Displays the Device Model, IP Address, Net
Mask, Serial # and Firmware Version of the
NPX.
Up, Down and Select navigation buttons adjacent to the LCD allow the user to navigate the system of menus for the NPX device.
OPERATION
Up
Down
Select
1
LCD Button Navigation
1
2
3
The table below shows the screens and navigation during and after powering up the NPX device:
2
1
3
2
1
3
1
2
1
3

page 6 Installation and Operation Guide NPX
OPERATION (CONTINUED)
Paging and Message Playback Instructions
Make a live page
1. At the Page Code screen press the top or middle LCD buttons next to
to navigate to and highlight a specic page code. The user may also
type the appropriate page code number on the keypad (10-key only).
2. Press and hold the PTT button, speak into the microphone and release
the button when done. On gooseneck models the user may also tap the
latching button, speak into the microphone and tap the button when done.
Target rings around the microphone icon allow the user to see when the
optimal speaking level is reached:
Levels Status
The microphone icon displays when the user presses and
holds the PTT button or taps the latching button. The green ring
displays and ashes until the user speaks into the microphone.
When the user speaks into the microphone, the outer green ring
displays once the optimal speaking level is reached. The user
may need to move closer to the microphone or speak louder.
If the speaking level gets too loud the outer ring turns red. The
user must move away from the microphone or speak more
quietly to get to an acceptable level.
Playback a recorded message
3. At the Page Code screen press the top or middle LCD buttons next to
to navigate to and highlight a specic page code. The user may also
type the appropriate page code number on the keypad (10-key only).
4. Press and hold the PTT button, speak into the microphone to record the
message and release the button when done. On gooseneck models the
user may also tap the latching button, speak into the microphone to record
the message and tap the button when done.
Preambles
Live page and recorded message playbacks can be preceded by a preamble.
The preamble plays rst when the user presses and holds the PTT button or
taps the latching button. The user can then make the live page or the recorded
message plays back immediately after.
Figure 16: Live Page after Preamble
Page Failed
When a higher priority page code is already in progress. If any zones dened in
the page zone are available (even if some zones are busy) the paging station
will allow the page to the available zones.
Playback Failed
The playback failed screen displays when the user tries to playback a message
with a non-existent recording.
Navigation
See the Navigation Table for LCD navigation during paging activities and LCD
Icons for descriptions.
Figure 15: Preamble Playing
NPX Installation and Operation Guide page 7
Function Navigation LCD Description
Select a Page Code • Press
1
or
2
to navigate to appropriate page
code or type the page code number on the
keypad (10-key only).
Displays the current page code and allows
the user to scroll to select a page code.
Establish Message
Playback
• N/A Displays when the unit is establishing a
message playback.
Preamble in Progress • Press
3
to cancel preamble. Displays when preamble is in progress.
Note that this cancels the preamble and
the following action (either live page or
prerecorded message playback).
Message Playback in
Progress
• Press
3
to cancel playback. Displays when a message playback is in
progress.
Live Page in Progress • N/A Displays when a live page is in progress.
Page Failed • N/A Displays briey when a user attempts to
make a page while a higher priority page
code is already in progress.
OPERATION (CONTINUED)
Paging and Message Playback LCD Button Navigation
2
1
3
2
1
3
2
1
3
2
1
3

page 8 Installation and Operation Guide NPX
Function Navigation LCD Description
Playback Failed • N/A Displays briey when the user tries to
play back a message with a non-existent
recording.
Destination Busy • Press
1
to go to previous page code.
• Press
2
to go to next page code.
Displays when at least two paging stations
are connected to the same network and a
message is already playing on one of them.
-OR-
A high priority page code interrupts the
lower priority page code.
OPERATION (CONTINUED)
Paging and Message Playback LCD Button Navigation
Message Recording Instructions
Record a message
1. From the Page Code (default) screen, press and hold the bottom LCD
screen button and then press the top button to go to the Recordings
screen.
2. Press the top or middle LCD buttons next to to navigate to and
highlight a specic recording slot.
3. Press the bottom LCD button next to to enter the selected Message
Slot screen.
4. Press the top LCD button next to the record button to go to the
Record Message screen.
5. Press and hold the PTT button, speak into the microphone to record the
message and release the button when done. On gooseneck models the
user may also tap the latching button, speak into the microphone to record
the message and tap the button when done.
6. Press the top LCD screen button next to to save the recording.
7. Press the middle LCD screen button next to to delete a recording.
Press Yes or No to continue.
Navigation
See the navigation table for LCD navigation during recording activities
and LCD icons for descriptions.
2
1
3

NPX Installation and Operation Guide page 9
OPERATION (CONTINUED)
Function Navigation LCD Description
Recordings Screen • Press
1
to go to previous recording slot.
• Press
2
to go to next recording slot.
• Press
3
to go to Page Code screen if slot is
not selected.
Displays the list of assigned and unassigned
message slots.
Select Recording Slot • Press
3
to go to Message Operations from
the selected recording slot.
Message Operations
Screen • Press
1
to go to Record Message.
• Press
2
to go to Delete Message.
• Press
3
to return to Recordings.
Displays the message slot with record or
delete options.
Message Recording
Screen • Press
3
to go to Message Operations. Displays when the user is about to record a
message.
Recording Message
Screen
• N/A Displays when the message is being
recorded from the microphone.
Message Recorded
Screen • Press
1
to save message and return to
Recordings.
• Press
2
to delete message.
• Press
3
to return to Recordings.
Displays once the recording is complete.
Record a Message LCD Button Navigation
2
1
3
2
1
3
2
1
3
2
1
3
2
1
3

NPX Installation and Operation Guide page 10
OPERATION (CONTINUED)
LCD Icons and Fault Codes
Fault Code Description
DEVICE_TEMPERATURE Device exceeded maximum
temperature
HOST_COMMUNICATION_FAULT Host communication fault
MESSAGE_MEMORY_FULL Message memory full
FIRMWARE_UPDATE_FAILURE Firmware update failure
AVB_STREAM_ERROR AVB stream error
DANTE_STREAM_ERROR Dante stream error
DANTE_LICENSE_ERROR No Dante license found
Icon Function
Paging microphone is active (unmuted) - Talk now
Paging microphone is inactive (muted)
Recorded announcement is being played to the destination zones
Destination zones are busy. Page will fail.
Please wait
Return to the home screen
Return to message slot screen
Display the record message screen
Selection arrows for page codes and recordings screens (previous/
next)
Cancel preamble or recorded message playback already in
progress
Station is locked
Delete the selected message
Save a recent recording
The icons below represent the LCD functions on the NPX device to help the
user to navigate the function menus:
System Alerts displays a list of current faults on the NPX device:

NPX Installation and Operation Guide page 11
OPERATION (CONTINUED)
Keypad
NPX H1040/G1040 4-Key Keypad
Type Buttons Function
10-Key Keypad 0,1,2,3,4,5,6,7,8,9 Page Code Assignments
4-Key Keypad A,B,C,D
0,1,2,3,4,5,6,7,8,9
Page Code Assignments (Letters)
PIN Code (numbers)
NPX supports 10 push buttons for the 10-key and 14 push buttons for the
4-key as shown in the table below:
Keypad Functionality
The 10-button station allows up to 999 page codes to be assigned. Users can
search for a page code by typing in the page code number on the keypad,
or by navigating to the next/previous page code with the top two navigation
buttons. A 4-digit PIN is required if the station is locked.
Page codes must be entered as 3 digits. For example, to show page code
nine, the user would enter 0-0-9. For page code 20 the user would enter 0-2-0.
The 4-button station allows up to four page codes to be assigned (one for each
of the four buttons A,B,C,D).
• To unlock a station that has a PIN authorization, the user must repeatedly
press the same key to cycle through the numbers for that key and then
stop for 1.5 seconds until the displayed number is locked in.
Button ‘A’ : is used to enter the number 1, 2 or 3
Button ‘B’ : is used to enter the number 4, 5 or 6
Button ‘C’ : is used to enter the number 7, 8 or 9w
Button ‘D’ : is used to enter the number 0
• To enter the PIN 4289 the user types the following sequence:
B, <wait>, A, A, <wait>, C, C, <wait>, C, C, C, <wait>
NPX H1100/G1100 10-Key Keypad
4-Button 10-Button

page 12 Installation and Operation Guide NPX

NPX Installation and Operation Guide page 13

page 14 Installation and Operation Guide NPX
This manual suits for next models
3
Table of contents
Other Biamp Microphone manuals

Biamp
Biamp Tesira TCM-1 User manual

Biamp
Biamp DCM-1 User manual

Biamp
Biamp Vocia PSKIT-1 User manual

Biamp
Biamp Vocia PSKIT-1 User manual

Biamp
Biamp Vocia WS-10 User manual

Biamp
Biamp Vocia DS-4 User manual

Biamp
Biamp Tesira TCM-1 User manual

Biamp
Biamp Vocia VAM-1 User manual

Biamp
Biamp Parlé TTM-X Original operating instructions

Biamp
Biamp Vocia WS-4 User manual