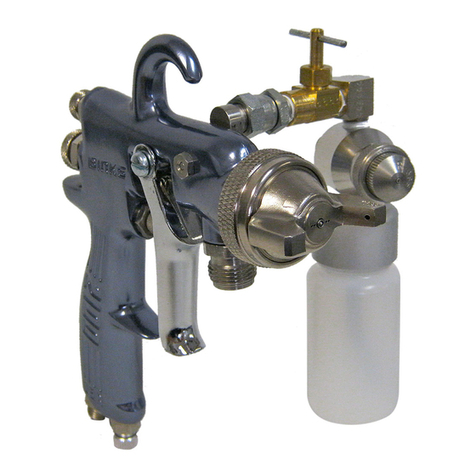
Binks 2001SS Manual

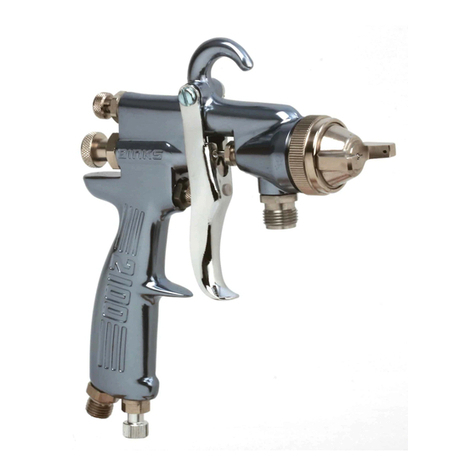
Model 2001SS Spray Gun
OPERATION AND MAINTENANCE INSTRUCTIONS
CONTROLLING THE FAN SPRAY:
The fan spray for an external mix nozzle
set-up is easily controlled by means of
the Side Port Control 54-3347. Turning
this control to the right, or clockwise,
until it is closed will give a round spray;
turning it to the left, or counterclockwise,
will widen the spray into a fan shape of
any width desired. The direction of the
fan spray, either horizontal or vertical, is
obtained by turning the air nozzle to the
desired position, then tightening the
retainer ring.
CONTROLLING THE FLUID: If a fluid
pressure tank is used, the amount of fluid
can be controlled by regulating the
pressure on the tank. The amount of fluid
can also be controlled by means of the
Fluid Control 54-1007. Turning this screw
to the right, or clockwise, reduces the
amount of fluid; to the left, or counter-
clockwise, increases the amount of fluid.
FAULTY SPRAY: A faulty spray is
caused by improper cleaning or dried
material around the fluid nozzle tip or in
the air nozzle. Soak these parts in a sol-
vent that will soften the dried material
and remove with a brush or cloth. Never
use metal instruments to clean the air or
fluid nozzles. These parts are carefully
machined and any damage to them will
cause a faulty spray. If either the air
nozzle or fluid nozzle is damaged, the
part must be replaced before a perfect
spray can be obtained.
TO REPLACE THE FLUID PACKING:
Remove the Fluid Control Screw 54-1007,
Spring 54-1347 and needle. Then remove
the Fluid Packing Nut 56-164 and take
out the old packing with a small stiff
wire. Replace with new Packing 2-28.
To set packing, insert needle, tighten nut
until the needle begins to be too stiff for
the spring to move needle. Then loosen
nut 1/2 to 3/4 turn.
CORRECTING AIR LEAK
THROUGH GUN: Air leaking through
the gun is caused by the Valve Stem
Assembly 54-1025, not seating properly
against the Valve Body 54-1010.
Remove the Valve Body 54-1010 and
Valve Stem Assembly 54-1025.
Thoroughly clean parts and inspect for
damage. Replace worn or damaged parts
and assemble in reverse order.
CORRECTING AIR LEAK AROUND
AIR VALVE STEM: Air leaking around
the Air Valve Stem 54-1025 may be caused
by worn Packings 8-158 or damaged
Air Valve Stem 54-1025. Remove Trigger
54-1050, Packing Nut 82-135 and Packings
82-158. Clean extended portion of
Air Valve Stem 54-1025 and inspect
for damage; if stem is damaged, replace
same as above, insert new packings and
assemble in reverse order.
(Order Separately)
SPECIAL NOZZLES
SPECIAL EFFECT NOZZLES
FLUID NOZZLE
(See Chart)
#794 FLUID NOZZLE
#590
NEEDLE
VALVE
VEILING
DISTRESSING
AIR NOZZLE
(See Chart)
#797 AIR NOZZLE
#793
AIR NOZZLE
#54-2065
RING
#790
CORE
#792
SPIRAL
CORE
#54-1583
BASE
#559 NEEDLE
ASSEMBLY
#54-1227 GUIDE
#54-1584 RING
*NOZZLE TIP:
200 SERIES, NITRALLOY
#20-2093 SCREW
INTERNAL MIX HEAVY MATERIAL
Replaces
Part Sheet
2354R-3
Part
Sheet
77-2354R-4
6/05 © 2005 Illinois Tool Works Inc. All rights reserved. Printed in U.S.A.
ITW Industrial Finishing
Binks has authorized distributors throughout the world. For technical
assistance or the distributor nearest you, see listing below.
U.S./Canada Technical Service Office:
195 Internationale Blvd., Glendale Heights, IL 60139
Toll-Free Telephone: 1-888-992-4657 (U.S.A. and Canada only)
Toll-Free Fax: 1-888-246-5732
ITW Automotive Refinishing
Binks has authorized distributors throughout the world.
For equipment, parts and service, check the Yellow Pages
under “Automotive Body Shop Equipment and Supplies.”
For technical assistance, see listing below.
U.S./Canada Customer Service Office:
1724 Indian Wood Circle, Suite J-K, Maumee, OH 43537
Toll-Free Telephone: 1-800-445-3988 (U.S.A. and Canada only)
Toll-Free Fax: 1-800-445-6643
2354R-4 Revisions: Changes made to text and illustrations related
to new 1-piece fluid needle design.
Binks Worldwide Sales and Service Listing: www.binks.com
WARRANTY This product is covered by Binks’ 1 Year Limited Warranty.

CLEANING THE GUN—WHEN
USED WITH PRESSURE TANK:
Shut off the air supply to the Pressure
Tank and release the pressure in the tank.
Hold a piece of cloth over the gun nozzle
and pull the trigger, the air will back up
through the fluid nozzle and force the
fluid out of the hose and into the tank.
Remove paint from tank, clean tank and
put enough compatible solvent into the
tank to clean the hose and gun thoroughly.
Spray this through the gun until it is clean,
then blow out the fluid hose to dry it and
remove all traces of materials by attaching
it to the air line.
WHEN USED WITH A CUP:
A compatible solvent should be siphoned
through gun by inserting tube from siphon
cup in an open container of solvent.
Trigger gun intermittently to thoroughly
flush passageways and internal parts.
HOW TO USE THE CHART
A.MATERIAL TO BE SPRAYED
Select the type of fluid you want to
spray or a fluid which has the same
characteristics as one of those listed.
B.METHOD OF FEEDING MATERIAL
TO THE GUN
Fluid Nozzle—Consider the speed of
application and the viscosity of the fluid
to be sprayed. Refer to the Fluid Nozzle
Orifice Size Chart, below.
Air Nozzle—Choice is determined by
the type of fluid to be sprayed and the
volume of air available for the gun.
• External Mix Nozzles, which are
generally used, accomplish atomiza-
tion outside the nozzle. Spray patterns
are adjustable from round to fan
with all intermediate patterns.
(Designated by the letter “E”).
• Siphon Type External Mix Nozzles,
designated by the letter “S”, will
siphon the material from a cup.
Used generally for refinished and
touch-up work which does not
require large quantities of paint.
• Pressure Type External Mix Nozzles,
designated by the letter “P”, require
pressure to feed the material to the
nozzle. A pressure cup, pressure
tank or pump is necessary. Used for
production work and where large
quantities of fluid are handled. This
type of nozzle has a greater range of
fluid flow and does not limit the size
of the paint container.
• Internal Mix Nozzles mix the air and
fluid within the air nozzle. The spray
pattern is determined by the shape of
the nozzle and cannot be changed.
Internal mix nozzles require less air
and produce slightly less fog. Pressure
equipment must be used with this type
of nozzle. Recommended for mainte-
nence spraying of heavy materials
where a fine finish is not required.
(Designated by the letter “I”).
C. VOLUME OF AIR (CFM REQUIRED)
The cubic feet per minute (CFM) listed
at 30, 50 and 70 PSI is the actual air
used by the air nozzle. increase of pres-
sure subsequently increases volume of
air required by air nozzle, or vice versa.
Assume that a compressor will produce
3-5 CFM per horsepower.
It is extremely poor practice to mount the
oil and water extractor on or even near
the compressor unit. The temperature of
the air is greatly increased as it passes
through the compressor and this com-
pressed air must be cooled before the
moisture in it will condense. if the air
from the compressor is still warm when
it passes through the oil and water extrac-
tor, moisture will not be effectively
removed, but will remain in suspension.
Then, when the air cools in the hoe beyond
the extractor, the moisture will condense
into drops of water and cause trouble.
Air lines must be properly drained.
Pitch all air lines back towards the
compressor so that condensed moisture
will flow back into the air receiver where
it can be removed by opening a drain.
Every low point on an air line acts as a
water trap. Such points should be fitted
with an easily accessible drain.
See diagram above.
PITCH PIPE AWAY
FROM AIR RECEIVER
COMPRESSOR
UNIT
OIL AND WATER
EXTRACTOR
INSTALL
DRAIN
AT EACH
LOW
POINT
DRAIN DRAIN
25 FEET OR MORE
Oil and Water Extractor should be at least 25 ft. from the compressor. Further if possible.
PIPE SIZE, I.D. (inches)
Length of Pipe (feet)
50 100 150 200
1/2" 3/4" 3/4"
3/4" 3/4" 3/4" 3/4"
3/4" 3/4" 1" 1"
1" 1" 1" 1"
1" 1" 1" 1"
1" 1" 1-1/4" 1-1/4"
Air Flow
CFM
10
20
30
40
50
70
2
NOTE
The greater the air consumption, the
faster the fluid may be applied or the
finer a given amount of fluid can be
atomized.

TEFLONS
HAMMERS
SPECIAL EFFECT
FINISHES
HEAVY (CREAM-LIKE)
FLUID NOZZLE ORIFICE SIZES
59ASS 63BSS 66SS 67SS 68 794
.171 .046 .070 .086 .110 .040
ADHESIVES
MULTICOLOR PAINTS
VERY HEAVY
MEDIUM
THIN
VERY THIN
TYPE OF FLUID
TO BE SPRAYED
CFM AT
FLUID
NOZZLE AIR
NOZZLE TYPE
*30
PSI 50
PSI 70
PSI
MAX.
PAT.
(inches)
AT 8 in.
FLUID
Needle
No.★
14–16 SECS.—NO. 2 ZAHN
WASH PRIMERS
DYES, STAINS
SOLVENTS, WATER, INKS
16–20 SECS.—NO. 2 ZAHN
SEALERS, PRIMERS
LACQUERS
ACRYLICS
63BSS 63P PE 4.5 7.5 10.0 5.0 563
63BSS 63PB PE 9.0 14.3 20.0 14.0 563A
66SS 66SD SE 7.9 12.1 10.5 565
66SS 66SK SE 11.0 15.2 19.5 13.0 565
63BSS 63PB SE 9.0 14.3 20.0 14.0 563A
66SS 66S SE 7.0 12.0 565
66SS 66SK SE 11.0 15.2 19.5 13.0 565
19–30 SECS.—NO. 2 ZAHN
LACQUERS, SYN. ENAMELS
VARNISHES, SHELLACS
FILLERS, PRIMERS
URETHANES, LUBRICANTS
63BSS 63PB PE 9.0 14.3 20.0 14.0 563A
66SS 66SD SE 7.9 12.0 11.0 565
66SS 66SK SE 11.0 15.2 19.5 13.0 565
OVER 28 SECS.—NO. 4 FORD
HOUSE PAINT
WALL PAINT (OIL, LATEX)
BLOCK SEALERS, MILL WHITES
VINYLS, ACRYLICS, EPOXIES
67SS 67PB PE 9.5 14.1 19.1 12.0 567
68SS 68PB PE 9.5 14.1 19.1 12.0 568
67SS 201 PI 4.6 6.8 9.1 11.0 568
UNAGGREGATED
BLOCK FILLERS
TEXTURED COATINGS
FIRE RETARDANTS
ROAD MARKING PAINT
BITUMASTICS
CELLULAR PLASTISOLS
UNDERBODY
ROOF COATINGS
68SS 68PB PE 9.5 14.1 19.1 12.0 568
59ASS 244 PI 7.8 11.5 15.2 12.0 559
WATERBASE
WHITE VINYL GLUE
SOLVENT BASE
NEOPRENES
(CONTACT CEMENTS)
66SS 66SD-3 PE 7.9 12.1 16.2 15.0 565
67SS 67PB PE 9.5 14.1 19.1 12.0 567
63 66SD PE 7.9 12.1 16.2 15.0 563
66SS 200 PI 3.1 5.2 12.0 565
63BSS 63PB PE 9.0 14.3 20.0 10.0 563A
66SS 66SD SE 7.9 12.1 7.0 565
VEILING
DISTRESS FINISH
SPATTER FINISH
SOLD ONLY AS ACCESSORIES, ORDER SEPARATELY.
794 793 PE 3 AT 15 PSI 590
794 797 PE 3 AT 15 PSI 590
66 66PD PE 3 AT 15 PSI 565
*See text Section B, page 2, for type code. ★All needles listed are hardened stainless steel. 3

PARTS LIST
❍Available only as 5-pack
•Indicates parts in Repair Kit 6-229
▲Available only as 10-pack
❋Accessory Item
Accessories: 56-126 Plug may replace the 54-3347 Assembly when using
internal mix nozzles.
#54-1780 QUICK CHANGE
SIDE PORT CONTROL
#54-1789 STEM
#20-3593 SCREW
#54-1790 SCREW
#54-1804 SPRING
#55-634 RING
#55-541 PACKING
#55-1794
BODY
#84-95 PIN #82-126 SCREW
#54-710 SCREW
#54-3368 HEAD
#54-918 GASKET
*FLUID
NOZZLE
AIR NOZZLE*
#82-135 NUT
#82-158 PACKING
#54-1010 VALVE BODY
#54-1025 VALVE STEM
ASSEMBLY
#2-28 FLUID
PACKING
#56-164 NUT
#54-750
SPRING
#54-1050
TRIGGER
#54-1236 AIR VALVE
ASSEMBLY
#54-768 CONNECTION
#54-3349 BODY
#54-1020 STUD
#54-1347 SPRING
**FLUID NEEDLE
#54-1007 CONTROL SCREW
#54-5285 “O” RING
#54-1013 BODY
#54-3347
SIDE PORT
CONTROL
#54-1023 SCREW
#54-1063 BODY
#54-1016 WASHER
#54-738 PACKING
#54-304 SPRING
#54-1015 WASHER
#54-1014 PIN
#20-3757
“O” RING
Binks MODEL 2001SS SPRAY GUN
*Be sure to specify number stamped on Air Nozzle
and Fluid Nozzle, or see Nozzle Selection Chart.
**
Be sure to specify number stamped on Needle
Valve Stem and Gun Model when ordering.
PART
NO. DESCRIPTION QTY.
See Note *Above
AIR NOZZLE ........................................ 1
See Note *Above
FLUID NOZZLE.................................... 1
See Note ** Above
FLUID NEEDLE.................................... 1
•20-3757 “O” RING .............................................. 1
❍•20-5285-5 “O” RING .............................................. 1
❍•54-304-5 SPRING................................................ 1
54-710 SCREW................................................ 1
❍•54-738-5 PACKING ............................................ 2
❍•54-750-5 SPRING................................................ 1
▲•2-28-10 FLUID PACKING.................................. 1
54-768 CONNECTION .................................... 1
❍•54-918-5 GASKET .............................................. 1
54-1007 CONTROL SCREW ............................ 1
54-1010 VALVE BODY ...................................... 1
54-1013 BODY .................................................. 1
❍•54-1014-5 PIN........................................................ 1
54-1015 WASHER.............................................. 1
PART
NO. DESCRIPTION QTY.
54-1016 WASHER.............................................. 2
•54-1020 STUD.................................................... 1
54-1023 SCREW................................................ 1
•54-1025 VALVE STEM ASSEMBLY .................. 1
54-1050 TRIGGER ............................................ 1
54-1063 BODY .................................................. 1
54-1236 AIR VALVE ASSEMBLY ...................... 1
❍•54-1347-5 SPRING................................................ 1
❋54-1780 QUICK CHANGE SIDE PORT
CONTROL (Optional)........................ 1
54-3347 SIDE PORT CONTROL ...................... 1
54-3368 HEAD.................................................... 1
54-3349 BODY (NOT FOR SALE) .................... 1
56-164 NUT...................................................... 1
❍•82-126-5 SCREW................................................ 1
❍82-135-5 NUT...................................................... 1
❍•82-158-5 PACKING ............................................ 1
4
Table of contents
Other Binks Paint Sprayer manuals

Binks
Binks TROPHY SERIES User manual

Binks
Binks TROPHY SERIES User manual

Binks
Binks Signature Series User manual

Binks
Binks Mach 1SLA User manual

Binks
Binks 7N User manual

Binks
Binks AA1600M User manual

Binks
Binks 400-HF0000 HVLP AA10 AIR CAP User manual

Binks
Binks Cub SLG User manual

Binks
Binks Mag II User manual

Binks
Binks HAP 50 Series User manual

Binks
Binks 2100 SERIES User manual

Binks
Binks 102-2400 FRP User manual

Binks
Binks M1-G HVLP User manual

Binks
Binks 21 User manual

Binks
Binks MACH 3SL User manual

Binks
Binks 7042-6931-4 User manual

Binks
Binks STEADI-GRIP SG-2 User manual

Binks
Binks SV100 User manual

Binks
Binks AA4400A User manual

Binks
Binks TROPHY 2465 Series User manual