Binks TROPHY SERIES User manual

EN
77-3043-R1.3 1 / 14
BINKS “TROPHY” SERIES
GRAVITY FEED HVLP & LVMP
TOUCH-UP SPRAY GUNS
(1466-XXXX-XXX)
READ ALL INSTRUCTIONS BEFORE OPERATING THIS BINKS PRODUCT.
IMPORTANT! DO NOT DESTROY
It is the customer's responsibility to have all operators and service personnel read and understand this manual.
Contact your local Binks representative for additional copies of this manual.
The Trophy HVLP Series of Spray
Guns can be used to operate
at high transfer efficiencies in
compliance with “California South
Coast Air Quality Management
District” regulations as a High
Volume, Low Pressure spray gun.
II 2 G X
SERVICE MANUAL
Binks Trophy Series Touch-up Gravity Spray
Gun is the premier spray gun for use in gravity
feed touch-up and light production spray
applications and sets a new standard in
durability, ergonomics, and atomization.
The lightweight ergonomic design offers
unsurpassed comfort and control. The latest
advanced atomization technology has been
incorporated for achieving consistent, fine
finishes when spraying a wide range of
industrial coating applications.
Binks Trophy Series Touch-up Gravity Spray
Guns are offered in two different atomization
technologies: HVLP and LVMP.
SPECIFICATIONS
Maximum Air Pressure 100 psi / 6.9 bar (P-1)
Gun Body Anodized Aluminum
Fluid Path Stainless Steel
Fluid Inlet Size 7/16 – 14(f)
Air Inlet Size 1/4" NPS / BSP(m)
Gun Weight (less cup) 12 oz. / 348 grams
Wetted Parts (gun) Stainless Steel & PTFE
Wetted Parts (cup) Aluminum and Plated Brass

EN
77-3043-R1.32 / 14
Binks reserves the right to modify equipment specification without prior notice.
EC Declaration of Conformity
Manuf. By: Finishing Brands
195 Internationale Blvd.
Glendale Heights, IL 60139
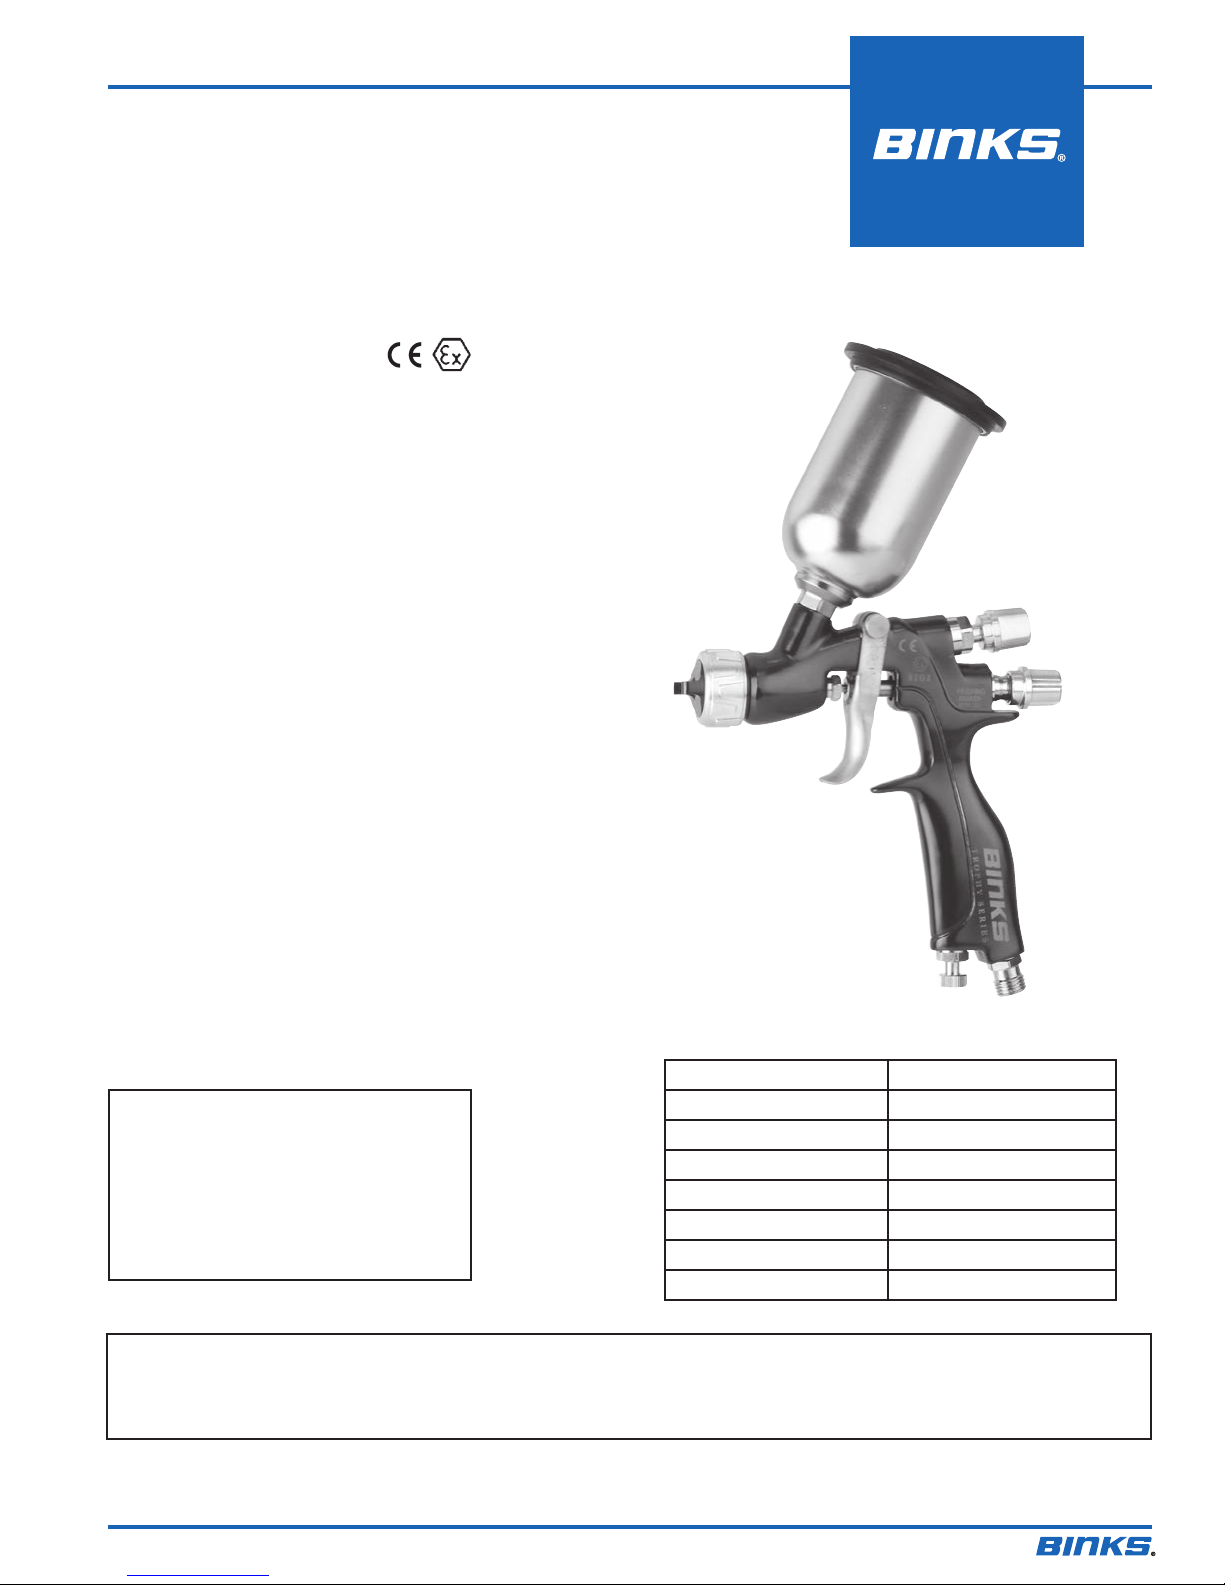
Type/Series: Handheld Spray Guns
Model: Binks “Trophy” Series
The equipment to which this document relates is in conformance with the following standards or other normative references:
BS EN IS0 12100:2010 and BS EN 1953:1998 + A1:2009 and thereby conform to the protection requirements of Council
Directive 2006/42/EC relating to Machinery Safety Directive, and;
BS EN 13463-1:2009, Council Directive 94/9/EC relating to Equipment and Protective Systems for use in Potentially Explosive
Atmospheres, protection level II 2 G X.
Approved By: _____________________________ Date: ______________
Binks
Marvin Burns August 1, 2013
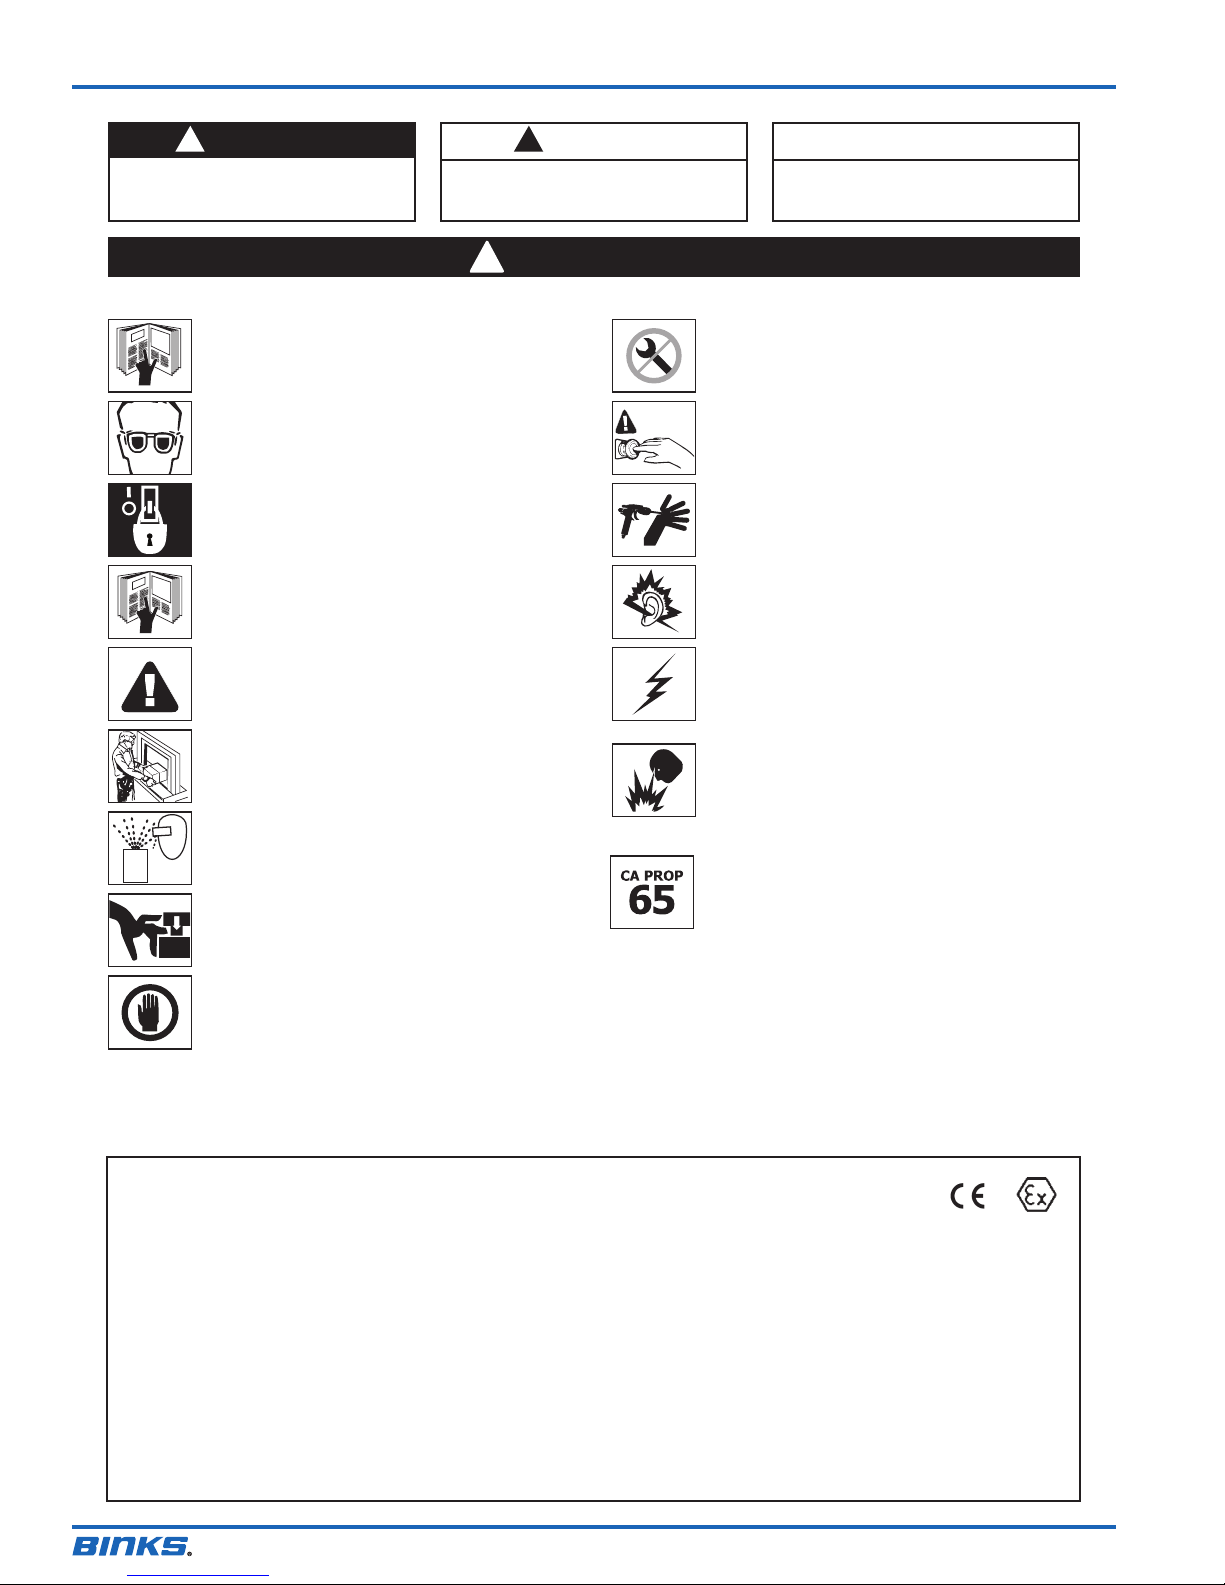
WARNING
!
In this part sheet, the words WARNING, CAUTION and NOTE are used to emphasize important safety information as follows:
!
CAUTION
Hazards or unsafe practices which could
result in minor personal injury, product
or property damage.
!
WARNING
Hazards or unsafe practices which could
result in severe personal injury, death or
substantial property damage.
NOTE
Important installation, operation or
maintenance information.
Read the following warnings before using this equipment.
FOR FURTHER SAFETY INFORMATION REGARDING BINKS AND DEVILBISS EQUIPMENT,
SEE THE GENERAL EQUIPMENT SAFETY BOOKLET (77-5300).
IT IS THE RESPONSIBILITY OF THE EMPLOYER TO PROVIDE THIS INFORMATION TO THE OPERATOR OF THE EQUIPMENT.
READ THE MANUAL
Before operating finishing equipment, read and understand all
safety, operation and maintenance information provided in the
operation manual.
WEAR SAFETY GLASSES
Failure to wear safety glasses with side shields could result in
serious eye injury or blindness.
DE-ENERGIZE, DEPRESSURIZE, DISCONNECT AND LOCK OUT ALL
POWER SOURCES DURING MAINTENANCE
Failure to De-energize, disconnect and lock out all power
supplies before performing equipment maintenance could cause
serious injury or death.
OPERATOR TRAINING
All personnel must be trained before operating finishing
equipment.
EQUIPMENT MISUSE HAZARD
Equipment misuse can cause the equipment to rupture,
malfunction, or start unexpectedly and result in serious injury.
KEEP EQUIPMENT GUARDS IN PLACE
Do not operate the equipment if the safety devices have been
removed.
PROJECTILE HAZARD
You may be injured by venting liquids or gases that are released
under pressure, or flying debris.
PINCH POINT HAZARD
Moving parts can crush and cut. Pinch points are basically any
areas where there are moving parts.
INSPECT THE EQUIPMENT DAILY
Inspect the equipment for worn or broken parts on a daily basis.
Do not operate the equipment if you are uncertain about its
condition.
NEVER MODIFY THE EQUIPMENT
Do not modify the equipment unless the manufacturer provides
written approval.
KNOW WHERE AND HOW TO SHUT OFF THE EQUIPMENT IN CASE
OF AN EMERGENCY
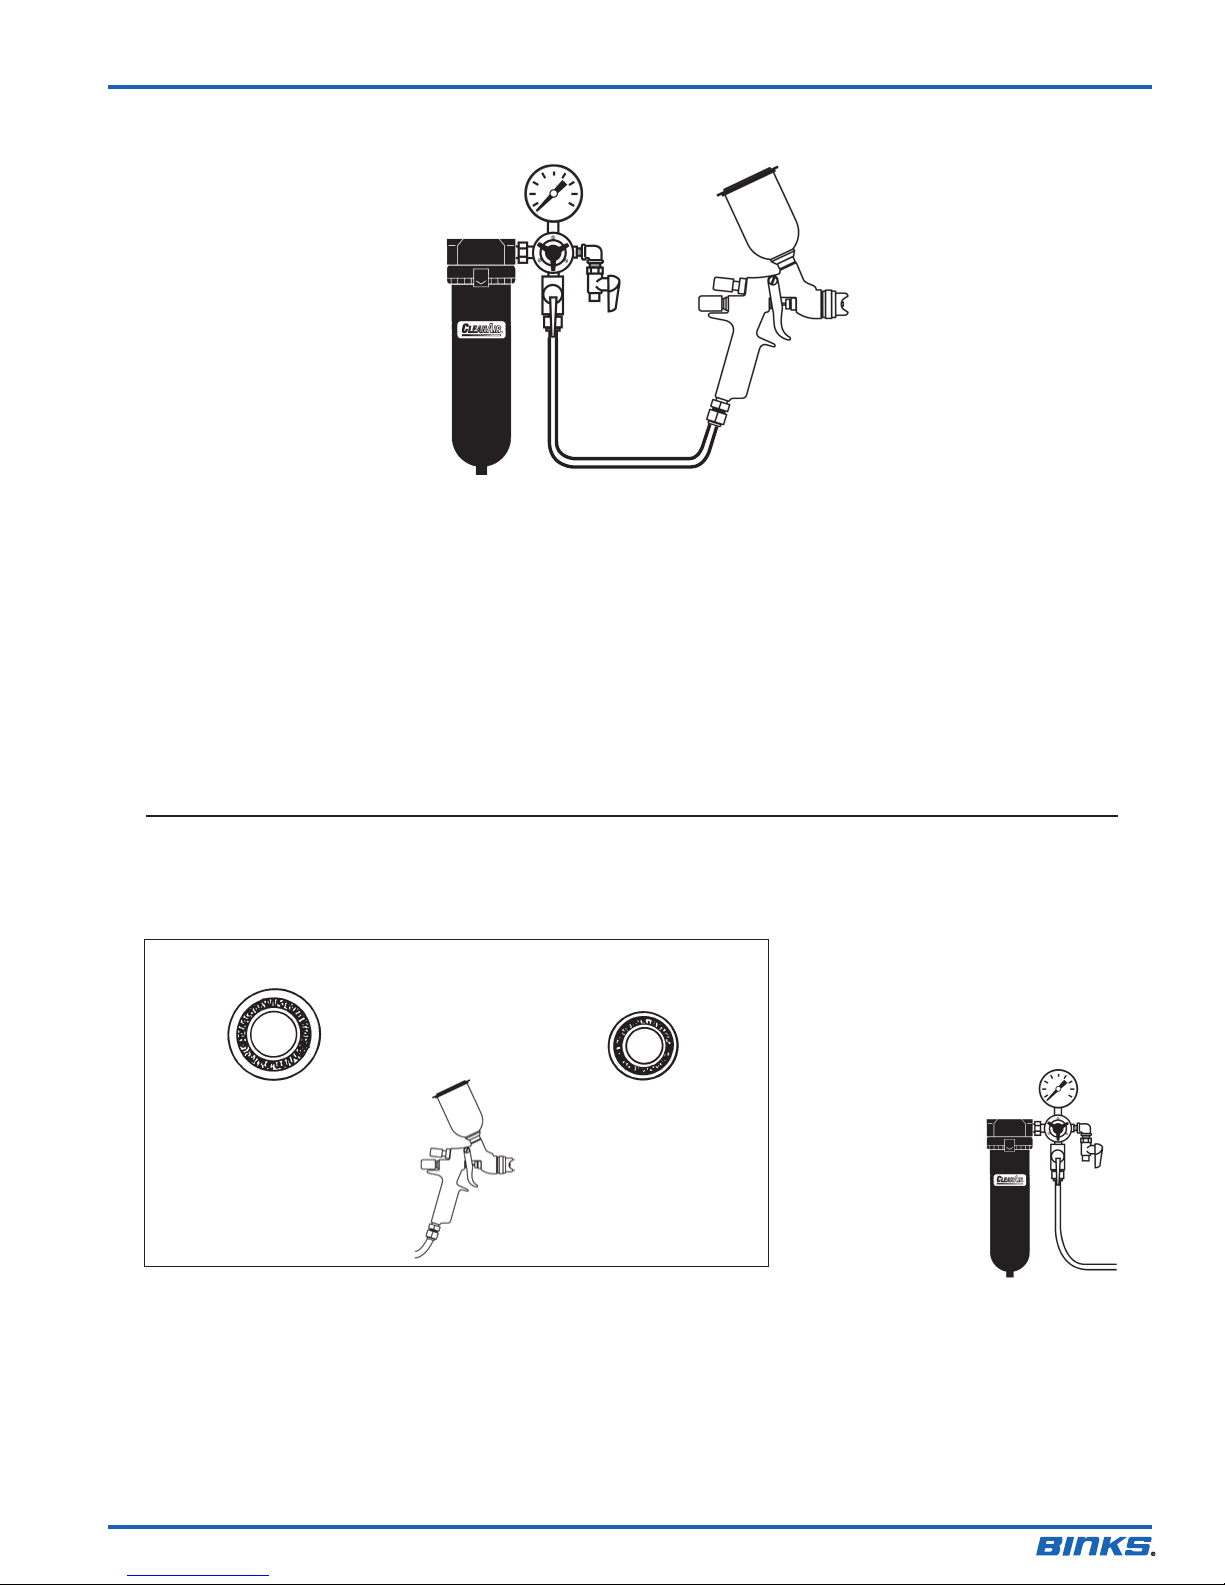
PRESSURE RELIEF PROCEDURE
Always follow the pressure relief procedure in the equipment
instruction manual.
NOISE HAZARD
You may be injured by loud noise. Hearing protection may be
required when using this equipment.
STATIC CHARGE
Fluid may develop a static charge that must be dissipated through
proper grounding of the equipment, objects to be sprayed and all
other electrically conductive objects in the dispensing area. Improper
grounding or sparks can cause a hazardous condition and result in
fire, explosion or electric shock and other serious injury.
PROP 65 WARNING
WARNING: This product contains chemicals known to the
State of California to cause cancer and birth defects or other
reproductive harm.
FIRE AND EXPLOSION HAZARD
Never use 1,1,1-trichloroethane, methylene chloride, other
halogenated hydrocarbon solvents or fluids containing such solvents
in equipment with aluminum wetted parts. Such use could result in
a serious chemical reaction, with the possibility of explosion. Consult
your fluid suppliers to ensure that the fluids being used are
compatible with aluminum parts.

EN
77-3043-R1.3 3 / 14
TYPES OF INSTALLATION
5/16" 1/4"
NOT RECOMMENDED
Only 34 PSI at gun inlet
25 feet of 1/4" I.D. hose causes
a drop of 26 PSI between the air
supply and the gun.
RECOMMENDED
48 PSI at gun inlet
25 feet of 5/16" I.D. hose causes
a drop of 12 PSI between the air
supply and the gun. For this
reason Binks recommends the use
of 5/16" hose.
WITH 60 PSI APPLIED AT AIR SUPPLY
AIR PRESSURE
Atomizing pressure must be set properly to allow for the drop in air pressure
between the regulator and the spray gun.
Cross section view
showing comparison of inside
hose diameters (actual size).
60 lbs. regulated pressure
An oil and water extractor
is important.
Achieving a fine spray finish without
the use of a good oil and water
extractor is virtually impossible.
A regulator/extractor serves a double
purpose. It eliminates blistering and
spotting by keeping air free of oil and
water, and it gives
precise air pressure
control at the gun.
Use DeVilbiss oil
and water extractors
and regulators.
See your local
distributor for
models.
Air pressure for atomization is regulated at the extractor. The flow of the fluid is adjusted by the fluid valve control
knob on gun, viscosity of paint and air pressure.
GRAVITY FEED HOOKUP
On gravity-feed spray guns the cup is located above the gun. The force of gravity pushes the fluid into the gun.
Advantages: this method offers quick color changes and convenience on small jobs or touch-up applications. Gravity
spray guns are able to use all of the coating—reducing waste.
Gravity
Feed Cup
Gun
Air
Air
Supply
Oil & Water
Extractor

EN
77-3043-R1.34 / 14
BINKS “TROPHY” SERIES GRAVITY SPRAY GUN
SELECTION GUIDE FOR BINKS “TROPHY” SERIES TOUCH-UP GRAVITY SPRAY GUNS
TYPE OF FLUID TO BE SPRAYED
COMPLETE GUN
ASSEMBLY PART
NUMBER
FLUID NOZZLE AND
AIR CAP
SPRAY
TECHNOLOGY
LIGHT/MEDIUM
15 - 20 seconds, Zahn 2
Stains, varnishes, thin lacquers,
automotive refinishing materials
1466-10LV-A1S 1.0 mm X A1 ROUND
1466-10LV-B1S 1.0 mm X B1 LVMP
1466-10HV-C1S 1.0 mm X C1 HVLP
MEDIUM
20 - 30 seconds, Zahn 2
General industrial coatings, enamels,
epoxies, fine grit ceramics
1466-12LV-B1S 1.2 mm X B1 LVMP
1466-12HV-C1S 1.2 mm X C1 HVLP

EN
77-3043-R1.3 5 / 14
ITEM
NO. PART
NUMBER DESCRIPTION QTY.
1 54-6211 AIR CAP RETAINING RING
ASSEMBLY 1
5
SEE CHARTS
BELOW AIR CAP
1
7SEE CHARTS
BELOW
FLUID NOZZLE 1
8 54-6215-K5 BAFFLE/SEPARATOR (KIT OF 5) 1
9 54-6216 SIDE PORT VALVE ASSEMBLY 1
10 ------ +
∆RETAINING CLIP 1
11 ------ +BODY BUSHING 1
12 ------ +
∆O-RING 1
13 ------ +SIDE PORT STEM 1
14 ------ +
∆PIN 1
15 54-6131-K ❏AIR VALVE SERVICE KIT 1
16 ------ •FRONT SEAL – AIR VALVE 1
17 ------ •FRONT AIR VALVE SEAL 1
18 54-6220 ❏AIR VALVE SPINDLE 1
19 ------ •AIR VALVE SPRING 1
20 ------ •REAR SEAL – AIR VALVE 1
21 SN-66 HOUSING
22 47-6851 NEEDLE – STAINLESS STEEL (STD.) 1
47-6852 NEEDLE – PLASTIC TIP 1
ITEM
NO. PART
NUMBER DESCRIPTION QTY.
23 54-6223-K ❏SPRING/PAD ASSEMBLY 1
24 54-6111 KNOB – NEEDLE ADJUSTING 1
25 54-6130-K ❏
NEEDLE PACKING KIT
1
26 ------ nNUT – PACKING 1
27 ------ nSPRING FOR PACKING 1
28 ------ n
tNEEDLE PACKING 1
29 54-6218 TRIGGER 1
30 54-6228-K TRIGGER SCREW NUT KIT 1
31 ------ VTRIGGER SCREW 1
32 ------ VTRIGGER NUT 1
33 54-3513 SPINDLE CAP 1
34 JJ-42 AIR ADJUSTING VALVE ASSEMBLY 1
35 JJ-30 FITTING – AIR INLET 1
36 ------ GUN BODY 1
37 ------ TOOL – SEAL INSERTION 1
38 ------ GUNNER'S MATE (3 CC TUBE) 1
39 54-4458 4 OZ. GRAVITY CUP ASSEMBLY 1
40 54-4459 kLID ASSEMBLY 1
41 ------ CUP LID 1
42 ------ CUP LID 1
CHART 1: BINKS “TROPHY” SERIES TOUCH-UP GRAVITY SPRAY GUN PARTS LIST
CHART 4: LVMP AIR PRESSURES AND FLOWS
GUN INLET PRESSURE
(PSI)
AIR CAP AIR FLOW
(SCFM)
15 4.7
20 5.8
25 6.9
30 7.8
CHART 3: HVLP AIR PRESSURES AND FLOWS
GUN INLET PRESSURE
(PSI)
AIR CAP AIR FLOW
(SCFM)
AIR CAP ATOMIZING
PRESSURE (PSI)
5 2.5 2
10 4.0 4
15 5.1 7
21 6.4 10
GUN INLET PRESSURE IS MEASURED AT THE GUN INLET FITTING WITH THE
GUN TRIGGERED.
CHART 2: AIR CAP OPTIONS
DESIGNATION ATOMIZATION
TECHNOLOGY PART NUMBER
A1 Round Spray 46-10020
B1 LVMP 46-10010
C1 HVLP 46-10000
HVLP TEST KIT FOR C1 AIR CAP: 54-6226
+ PARTS INCLUDED IN 54-6216
n PARTS INCLUDED IN 54-6130-K
• PARTS INCLUDED IN 54-6131-K
V PARTS INCLUDED IN 54-6228-K
∆ GTI-428-K5 SIDE PORT REPAIR KIT
t ALSO AVAILABLE IN KIT OF 3: SN-2-K3
k AVAILABLE IN KIT 54-4539 (SET OF 3)
❏ PARTS INCLUDED IN 54-6136
CHART 5:
HARDENED STAINLESS STEEL FLUID NOZZLE OPTIONS
MATERIAL PART NO. / ORIFICE
VERY LIGHT / REDUCED FLOW
45-12080
0.8mm (.030")
LIGHT/MEDIUM
15 - 20 seconds, Zahn 2
Stains, varnishes, thin lacquers,
automotive refinishing materials
45-12100
1.0mm (.040")
MEDIUM
20 - 30 seconds, Zahn 2
General industrial coatings, enamels,
epoxies, fine grit ceramics
45-12120
1.2mm (.047")
HEAVY
Greater than 30 seconds, Zahn 2
Low VOC coatings, adhesives,
fine grit ceramics
45-12140
1.4mm (.055")

EN
77-3043-R1.36 / 14
INSTALLATION INSTRUCTIONS
For maximum transfer efficiency, do not use more pressure
than is necessary to atomize the material being applied.
NOTE
When using HVLP do not exceed inlet pressures
listed on page 5.
1. Connect the gun to a clean, moisture and oil free air
supply using a conductive hose of at least 5/16 in I.D.
NOTE
Depending on hose length, larger I.D. hose may be required. Install
an air gauge at the gun handle. See page 5 for operating pressures.
Do not use more pressure than is necessary to atomize the material
being applied. Excess pressure will create additional overspray and
reduce transfer efficiency.
NOTE
If quick connect couplings are required, use only high flow quick
connects approved for HVLP use. Other types will not flow
enough air for correct gun operation.
NOTE
If an air adjusting valve is used at the gun inlet, use HAV-501
adjusting valve.
OPERATION
GRAVITY MODELS
1. Mix coating material to manufacturer’s instructions and
strain material.
2. Fill the cup to no more than 3/4 inch from the top of the
cup. DO NOT OVERFILL.
3. Attach to cup lid.
4. Turn fluid adjusting knob (24) clockwise to prevent fluid
needle movement.
5. Turn sideport control (9) counter clockwise to fully open.
6. Adjust inlet air pressure if required.
7. Turn fluid adjusting knob counter clockwise until first
thread shows.
8. Test spray. If the finish is too dry, reduce airflow by
reducing air inlet pressure.
9. If finish is too wet, reduce fluid flow by turning fluid
adjusting knob (24) clockwise. If atomization is too
coarse, increase inlet air pressure. If too fine, reduce inlet
pressure.
10. The pattern size can be reduced by turning sideport
control (9) clockwise.
11. Hold gun perpendicular to surface being sprayed. Arcing
or tilting may result in uneven coating.
12. The recommended spray distance is 8 inches.
13. Spray edges first. Overlap each stroke a minimum of
75%. Move gun at a constant speed.
14. Always turn off air supply and relieve pressure when gun
is not in use.
PREVENTIVE MAINTENANCE
AND CLEANING
To clean air cap and fluid nozzle, brush exterior with a stiff
bristle brush. If necessary to clean cap holes, use a broom
straw or toothpick if possible. If a wire or hard instrument is
used, extreme care must be used to prevent scratching or
burring of the holes which will cause a distorted spray pattern.
To clean fluid passages, remove excess material from gun,
then flush with gun wash solution. Wipe the gun exterior with
a dampened cloth. Never completely immerse in any solvent
or cleaning solutions as this is detrimental to the lubricants
and life of the spray gun.
NOTE
When replacing the fluid nozzle (7) or fluid needle (22), replace
both at the same time. Using worn parts can cause fluid leakage.
See page 4. Also, replace the needle packing at this time. Torque
the fluid nozzle to 170–180 inch-lbs. Do not over tighten.
!
CAUTION
To prevent damage to fluid nozzle (7) or fluid needle (22), be sure
to either 1) pull the trigger and hold while tightening or loosening
the fluid nozzle, or 2) remove fluid adjusting knob (24) to relieve
spring pressure against needle collar.
GRAVITY CUP. Empty excess material and clean the cup.
Make sure the vent hole in the lid is clear.
NOTE
Before using the spray gun, flush it with solvent to ensure that
the fluid passages are clean.

EN
77-3043-R1.3 7 / 14
FIG.13
FIG.17
FIG.2
FIG.4
FIG.5
FIG.6
FIG.7
FIG.8
FIG.10
FIG.11
FIG.12
FIG.14
DISASSEMBLY
FIG.3
6mm
FIG.15
6mm
150 – 170 in-lbs
(16.9 – 19.2 Nm)
FIG.9
ASSEMBLY
FIG.16
FIG.1
NEEDLE AND VALVE DISASSEMBLY AND ASSEMBLY
REMOVAL AND INSTALLATION PROCEDURES

EN
77-3043-R1.38 / 14
MAINTENANCE – FLUID NOZZLE AND BAFFLE REMOVAL AND INSTALLATION
FIG.1 FIG.2 FIG.3
FIG.4 FIG.5 FIG.6
FIG.7 FIG.8
3/8"
3/8"
170–180 in-lbs.
(19 – 20 Nm)

EN
77-3043-R1.3 9 / 14
MAINTENANCE – NEEDLE PACKING REMOVAL AND INSTALLATION
MAINTENANCE – SIDEPORT REMOVAL AND INSTALLATION
FIG.1
FIG.2 FIG.3
FIG.4 FIG.5
FIG.1 FIG.2 FIG.3
FIG.4 FIG.6
FIG.5
FIG.6
3/8"
3/8"
14 mm
14 mm

EN
77-3043-R1.310 / 14
CONDITION CAUSE CORRECTION
Heavy top or
bottom pattern
Horn holes plugged.
Obstruction on top or bottom of uid tip.
Cap and/or tip seat dirty.
Clean. Ream with non-metallic point.
Clean.
Clean.
Heavy right or left
side pattern
Left or right side horn holes plugged.
Dirt on left or right side of uid tip.
Clean. Ream with non-metallic point.
Clean.
Remedies for the top-heavy, bottom-heavy, right-heavy, and left-heavy patterns:
1. Determine if the obstruction is on the air cap or the uid tip. Do this by making a test
spray pattern. Then, rotate the cap one-half turn and spray another pattern. If the defect
is inverted, obstruction is on the air cap. Clean the air cap as previously instructed.
2. If the defect is not inverted, it is on the uid tip. Check for a ne burr on the edge of the
uid tip. Remove with #600 wet or dry sand paper.
3. Check for dried paint just inside the opening; remove by washing with solvent.
Heavy center pattern
Fluid ow too high for atomization air.
Material ow exceeds air cap's capacity.
Spreader adjustment valve set too low.
Atomizing pressure too low.
Material too thick.
Balance air pressure and uid ow. Increase
spray pattern width with spreader
adjustment valve.
Thin or lower uid ow.
Adjust.
Increase pressure.
Thin to proper consistency.
Split spray pattern
Atomization air pressure too high.
Fluid ow too low.
Spreader adjusting valve set too high.
Reduce at transformer or gun.
Increase uid ow (increases gun handling
speed).
Adjust.
Jerky or uttering spray
*Loose or damaged uid tip/seat.
Material level too low.
Container tipped too far.
Obstruction in uid passage.
Dry or loose uid needle packing nut.
Tighten or replace.
Rell.
Hold more upright.
Backush with solvent.
Lubricate or tighten.
Unable to get round
spray
Spreader adjustment screw not seating
properly.
Air cap retaining ring loose.
Clean or replace.
Tighten.
Will not spray
No air pressure at gun.
Fluid needle adjusting screw not open
enough.
Fluid too heavy for gravity feed.
Check air supply and air lines, blow out gun
air passages.
Open uid needle adjusting screw.
Thin material and/or change to larger tip size.
Paint bubbles in cup
Fluid tip not tight. Tighten tip.
Fluid leaking or
dripping from cup lid
Cup lid loose.
Dirty threads on cup or lid.
Cracked cup or lid.
Tighten lid.
Clean.
Replace cup and lid.
TROUBLESHOOTING
*Most common problem.

EN
77-3043-R1.3 11 / 14
CONDITION CAUSE CORRECTION
Starved spray pattern
Inadequate material ow.
Low atomization air pressure.
Back uid adjusting screw out to rst thread,
or change to larger tip size.
Increase air pressure and rebalance gun.
Excessive overspray
Too much atomization air pressure.
Gun too far from work surface.
Improper stroking (arcing, gun motion too
fast).
Reduce pressure.
Adjust to proper distance.
Move at moderate pace, parallel to work
surface.
Excessive fog
Too much or too fast-drying thinner.
Too much atomization (air pressure.)
Remix properly.
Reduce air pressure.
Dry spray
Air pressure too high.
Gun tip too far from work surface.
Gun motion too fast.
Gun out of adjustment.
Reduce air pressure.
Adjust to proper distance.
Slow down.
Adjust.
Fluid leaking from
packing nut
Packing nut loose.
Packing worn or dry.
Tighten, do not bind needle.
Replace or lubricate.
Fluid leaking or
dripping from front of
gun
Packing nut too tight.
Dry packing.
Fluid tip or needle worn or damaged.
Foreign matter in tip.
Fluid needle spring broken.
Wrong size needle or tip.
Adjust.
Lubricate.
Replace tip and needle.
Clean.
Replace.
Replace.
Fluid dripping or
leaking from bottom of
cup
Cup loose on gun.
Cup gasket worn or missing below cup.
Cup threads dirty.
Tighten.
Replace cup gasket.
Clean.
Runs and sags
Too much material ow.
Material too thin.
Gun tilted on an angle, or gun motion too
slow.
Adjust gun or reduce uid ow.
Mix properly or apply light coats.
Hold gun at right angle to work and adapt to
proper gun technique.
Thin, sandy coarse nish
drying before it ows
out
Gun too far from surface.
Too much air pressure.
Improper thinner being used.
Check distance. Normally approximately 8".
Reduce air pressure and check spray pattern.
Follow paint manufacturer's mixing
instructions.
Thick, dimpled nish
"orange peel"
Gun too close to surface.
Too much material coarsely atomized.
Air pressure too low.
Improper thinner being used.
Material not properly mixed.
Surface rough, oily, dirty.
Check distance. Normally approximately 8".
Follow paint manufacturer's mixing
instructions.
Increase air pressure or reduce uid ow.
Follow paint manufacturer's mixing
instructions.
Follow paint manufacturer's mixing
instructions.
Properly clean and prepare.
TROUBLESHOOTING

EN
77-3043-R1.312 / 14
HAV-500 OR HAV-501
Adjusting Valve
(HAV-501 SHOWN)
HAV-500 does not have
pressure gauge. Use to control
air usage at gun.
6-429 Binks
Gunners
Mate Lube
(Twenty
2 oz. bottles)
Compatible with all
paint materials; con-
tains no silicone or
petroleum distillates
to contaminate paint.
MSDS available upon
request.
HC-4419 Stem
1/4" NPT(F)
Gun End
HC-4719 Coupler
1/4" NPT(M)
Hose End
NIOSH-Certied, for respiratory protection
in atmospheres not immediately danger-
ous to life.
Small Medium Large
40-141 40-128 40-143
Millennium 3000
Twin Cartridge
Paint Spray Respirator
192212 Professional Spray Gun
Cleaning Kit
Contains six precision tools designed to eectively clean
all DeVilbiss, Binks, Finishline and other brand spray guns.
ACCESSORIES
HAF-507-K12
Whirlwind™
In-Line Air Filter
Kit of 12
Removes water, oil, and debris
from the air line.
Quick Connects for
HVLP Guns (Air)
High Flow Type
29-3100 Scrubs®
Hand Cleaner Towels
Scrubs®are a premoistened
handcleanertowelforpainters,
body men and mechanics that
go where you go and no water
is needed.
DPC-60-K10
9oz Universal
x10
DPC-607
x2
DPC-59-K10
24oz Universal
x10
DPC-61-K10
34oz Universal
x10
DPC-606
x2
DPC-608
x2
DPC-22-K24
x24
DPC-6-K10
x10
DPC-44
DPC-23
DPC-66-K24
x24
DPC-67-K24
x24
DPC-42-K24
x24
DPC-65-K24
x24
9 FL
265 mL
DPC-602
x32
24 FL
710 mL
DPC-601
x32
34 FL
1000 mL
DPC-600
x32
125 µm
125 µm
200 µm
200 µm
DeKups®Accessories for gravity feed cups
SHELLS LINERS
Optional Gravity Cups
81-381
8 oz. Aluminum Cup
(shown)
SRI-510
4 oz. Acetal Cup

EN
77-3043-R1.3 13 / 14
NOTES

EN
77-3043-R1.314 / 14
Finishing Brands reserves the right to modify equipment specications without
prior notice. DeVilbiss, Ransburg, BGK, and Binks are registered trademarks of
Finishing Brands. ©2014 Finishing Brands. All rights reserved.
WARRANTY POLICY
Binks products are covered by Finishing Brands one year materials and workmanship limited warranty.
The use of any parts or accessories, from a source other than Finishing Brands, will void all warranties.
For specic warranty information please contact the closest Finishing Brands location listed below.
Binks is part of Finishing Brands, a global leader in innovative spray nishing
technologies. For technical assistance or to locate an authorized distributor,
contact one of our international sales and customer support locations below.
USA/Canada
www.binks.com
info@nishingbrands.com
Tel: 1-800-992-4657
Fax: 1-888-246-5732
United Kingdom
www.nishingbrands.eu
info@nishingbrands.eu
Tel: +44 (0)1202 571 111
Fax: +44 (0)1202 573 488
China
www.nishingbrands.com.cn
mkt@nishingbrands.com.cn
Tel: +8621-3373 0108
Fax: +8621-3373 0308
Mexico
www.nishingbrands.com.mx
sales@nishingbrands.com.mx
Tel: 011 52 55 5321 2300
Fax: 011 52 55 5310 4790
France
www.nishingbrands.eu
info@nishingbrands.eu
Tel: +33(0)475 75 27 00
Fax: +33(0)475 75 27 59
Japan
www.ransburg.co.jp
Tel: 081 45 785 6421
Fax: 081 45 785 6517
Brazil
www.devilbiss.com.br
Tel: +55 11 5641 2776
Fax: 55 11 5641 1256
Germany
www.nishingbrands.eu
info@nishingbrands.eu
Tel: +49 (0) 6074 403 1
Fax: +49 (0) 6074 403 281
Australia
www.nishingbrands.com.au
sales@nishingbrands.com.au
Tel: +61 (0) 2 8525 7555
Fax: +61 (0) 2 8525 7500

ES
77-3043-R1.3 1 / 14
LEA TODAS LAS INSTRUCCIONES ANTES DE OPERAR ESTE PRODUCTO BINKS.
¡IMPORTANTE! NO DESTRUIR
Es responsabilidad del cliente que todos los operadores y miembros del personal de servicios lean y comprendan este
manual. Para obtener copias adicionales de este manual, favor ponerse en contacto con un representante de Binks de
su localidad.
Las pistolas pulverizadoras Serie
HVLP “Trophy” se pueden usar
para operar con altas eficiencias de
transferencia en cumplimiento con
las regulaciones del “Distrito para
el control de la calidad del aire de
la Costa Sur de California” como
una pistola pulverizadora de alto
volumen, baja presión.
PISTOLAS PULVERIZADORAS HVLP Y LVMP
PARA RETOQUES ALIMENTADAS
POR GRAVEDAD
SERIE “TROPHY” DE BINKS
(1466-XXXX-XXX)
II 2 G X
MANUAL DE SERVICIO
La pistola pulverizadora para retoques alimentada
por gravedad Serie “Trophy” de Binks es la
principal pistola pulverizadora para uso en
aplicaciones de atomización para retoques y
producción ligera alimentadas por gravedad que fija
nuevos estándares de durabilidad, ergonomía y
atomización. El diseño ergonómico liviano ofrece
comodidad y control insuperables. Se ha
incorporado la más avanzada tecnología de
atomización para lograr acabados finos consistentes
al atomizar una amplia gama de aplicaciones de
recubrimiento industrial.
Las pistolas pulverizadoras para retoques
alimentadas por gravedad Serie “Trophy” de Binks
se ofrecen en dos diferentes tecnologías de
atomización: HVLP y LVMP.
ESPECIFICACIONES
Presión máxima del aire 100 psi / 6.9 bar (P-1)
Cuerpo de la pistola Aluminio anodizado
Conducto del fluido Acero inoxidable
Tamaño del orificio de entrada del fluido 7/16 – 14(pie)
Tamaño del orificio de entrada del aire 1/4” NPS / BSP(m)
Peso de la pistola (menos la cubeta) 12 oz. / 348 gramos
Partes humedecidas (pistola) Acero inoxidable y PTFE
Partes humedecidas (cubeta) Aluminio y latón enchapado

ES
77-3043-R1.32 / 14
Binks se reserva el derecho de modificar la especificación del equipo sin aviso previo.
Declaración de conformidad de CE
Fabricado por: Finishing Brands
195 Internationale Blvd.
Glendale Heights, IL 60139
Tipo/Serie: Pistolas pulverizadoras de mano
Modelo: Serie “Trophy” de Binks
El equipo con el cual se relaciona este documento cumple con las siguientes normas u otras referencias normativas:
BS EN IS0 12100:2010 y BS EN 1953:1998 + A1:2009 y por consiguiente cumple con los requisitos de protección de la Directiva
del Consejo 2006/42/CE relacionada con la Directiva de Seguridad de Maquinaria, y;
BS EN 13463-1:2009, Directiva del Consejo 94/9/CE relacionada con Equipos y Sistemas de Protección para ser usados en el
nivel de protección II 2 G X para Atmósferas Potencialmente Explosivas.
Aprobado por: _____________________________ Fecha: _________________
Binks
Marvin Burns 1 de agosto de 2013
ADVERTENCIA
!
En esta Hoja de piezas, las palabras ADVERTENCIA, PRECAUCIÓN y NOTA se emplean para enfatizar información de seguridad importante de la siguiente forma:
!
PRECAUCIÓN
Prácticas peligrosas o inseguras que pueden
ocasionar lesiones personales leves, la
muerte, daño al producto o a la propiedad.
!
ADVERTENCIA
Prácticas peligrosas o inseguras que pueden
ocasionar lesiones personales graves, la
muerte o daño substancial a la propiedad.
NOTA
Información importante de instalación,
operación o mantenimiento.
Lea las siguientes advertencias antes de usar este equipo.
PARA MÁS INFORMACIÓN DE SEGURIDAD ACERCA DE LOS EQUIPOS BINKS Y DEVILBISS, CONSULTE EL FOLLETO DE
SEGURIDAD GENERAL DE LOS EQUIPOS (77-5300).
ES RESPONSABILIDAD DEL EMPLEADOR SUMINISTRAR ESTA INFORMACIÓN AL OPERADOR DEL EQUIPO.
LEA EL MANUAL
Antes de operar los equipos de acabado, lea y comprenda toda la
información de seguridad, operación y mantenimiento incluida
en el manual de operaciones.
USE GAFAS PROTECTORAS
No usar gafas protectoras con resguardos laterales puede
ocasionar lesiones graves en los ojos o ceguera.
DESACTIVE, DESPRESURICE, DESCONECTE Y BLOQUEE TODAS LAS
FUENTES DE ENERGÍA DURANTE EL MANTENIMIENTO.
No desactivar, desconectar ni bloquear todas las fuentes de suministro
de energía antes de realizar operaciones de mantenimiento en los
equipos puede ocasionar lesiones graves o la muerte.
CAPACITACIÓN DE LOS OPERADORES
Todos los miembros del personal deben ser capacitados antes de
operar los equipos de acabado.
PELIGRO POR USO INDEBIDO DEL EQUIPO
El uso indebido del equipo puede ocasionar averías, mal
funcionamiento o activación imprevista lo que a su vez puede
producir lesiones graves.
MANTENGA LAS DEFENSAS DEL EQUIPO EN SU LUGAR.
No operar los equipos si los dispositivos de seguridad
fueron retirados.
PELIGRO DE PROYECTILES
Usted puede resultar lesionado por dar salida a líquidos o gases
liberados bajo presión o por restos que vuelan.
PELIGRO DE PUNTOS DE PRESIÓN
Las partes móviles pueden aplastar y ocasionar cortaduras. Los
puntos de presión son básicamente todas las áreas donde haya
partes móviles.
INSPECCIONE LOS EQUIPOS DIARIAMENTE
Inspeccione diariamente los equipos para verificar que no tengan
piezas gastadas o rotas. No opere los equipos si no está seguro de
esta condición.
NUNCA MODIFIQUE LOS EQUIPOS
No modifique el equipo sin la autorización escrita del fabricante.
SEPA CÓMO Y DÓNDE DESACTIVAR LOS EQUIPOS EN CASO
DE EMERGENCIA.
PROCEDIMIENTO DE LIBERACIÓN DE PRESIÓN
Siga siempre el procedimiento de liberación de presión que
aparece en el manual de instrucciones del equipo.
PELIGRO DE RUIDO
Usted puede resultar lesionado por el ruido muy fuerte. Podría
necesitar protección de los oídos al usar este equipo.
CARGA ESTÁTICA
Los fluidos pueden generar una carga estática que debe ser disipada mediante
la debida conexión a tierra del equipo, los objetos que van a ser atomizados y
todos los demás objetos electroconductores en el área de aplicación. La conexión
a tierra indebida o las chispas pueden ocasionar condiciones de peligro y
producir incendios, explosiones o descargas eléctricas y otras lesiones graves.
ADVERTENCIA PROP 65 DE CA
ADVERTENCIA: Este producto contiene sustancias químicas que
según información en poder del estado de California producen
cáncer, defectos de nacimiento y otros daños al sistema
reproductor.
PELIGRO DE INCENDIO Y EXPLOSIÓN
Nunca use 1, 1,1-tricloroetano, cloruro de metileno, otros disolventes con
hidrocarburos halogenados o fluidos que contengan dichos disolventes
en equipos con piezas de aluminio humedecidas. Tales usos pueden
producir una reacción química peligrosa con posibilidades de explosión.
Consulte con sus proveedores de fluidos para asegurarse de que los
fluidos que se vayan a usar sean compatibles con las piezas de aluminio.

ES
77-3043-R1.3 3 / 14
TIPOS DE INSTALACIÓN
La presión de aire para atomización se regula en el extractor. El flujo del fluido es ajustado por la perilla de control de
la válvula de fluido en la pistola, la viscosidad de la pintura y la presión de aire.
ENGANCHE DE LA ALIMENTACIÓN A GRAVEDAD
En las pistolas de alimentación por gravedad de la copa se encuentra por encima de la pistola. La fuerza de la gravedad
empuja el fluido en la pistola.
Ventajas: Este método ofrece cambios rápidos de color y la comodidad en trabajos pequeños o retoque aplicaciones.
Pistolas de pulverización por gravedad son capaces de utilizar todos los residuos de revestimiento de reducción.
Taza de
alimentación
a gravedad
Pistola
Aire
Suministro
de aire
Extractor de
aceite-agua
5/16" 1/4"
NO RECOMENDADO
Sólo 34 PSI en el orificio de
entrada de la pistola
Una manguera de 25 pies con
D.I. de 1/4" causa una caída de
presión de 26 PSI entre el
suministro de aire y la pistola.
RECOMENDADO
48 PSI en orificio de entrada de la pistola
Una manguera de 25 pies con D.I. de
5/16" causa una caída de presión de 12
PSI entre el suministro de aire y la pistola.
Por este motivo Binks recomienda el uso
de una manguera de 5/16".
CON PRESIÓN DE AIRE DE 60 PSI APLICADA EN EL
SUMINISTRO DE AIRE
PRESIÓN DEL AIRE
La presión de atomización se debe ajustar debidamente para permitir la caída
de la presión de aire entre el regulador y la pistola pulverizadora.
Vista en corte transversal que
ilustra una comparación de los
diámetros internos de la manguera
(tamaño real). Presión regulada de
60 lbs.
Un separador de agua y
aceite es importante.
Lograr un acabado de rociado fino sin el
uso de un buen extractor de aceite-agua
es prácticamente imposible.
Un regulador/extractor permite lograr un
doble propósito. Elimina la formación de
burbujas y las manchas manteniendo el
aire libre de aceite y agua y permitiendo
un control preciso de
la presión de aire en
la pistola.
Use extractores y
reguladores de agua
y aceite DeVilbiss.
Consulte la
disponibilidad de
modelos con el
distribuidor de su
localidad.

ES
77-3043-R1.34 / 14
PISTOLA PULVERIZADORA ALIMENTADA POR GRAVEDAD SERIE “TROPHY” DE BINKS
GUÍA DE SELECCIÓN PARA LAS PISTOLAS PULVERIZADORAS PARA RETOQUES ALIMENTADAS POR GRAVEDAD SERIE “TROPHY” DE BINKS
TIPO DE FLUIDO QUE VA A SER
ATOMIZADO
NÚM. DE PIEZA DEL
CONJUNTO COMPLETO
DE LA PISTOLA
BOQUILLA DE FLUIDO
Y CUBIERTA DE AIRE
TECNOLOGÍA DE
ATOMIZACIÓN
LIVIANO/MEDIANO
15 - 20 segundos, Zahn 2
Barnices, lacas, lacas diluidas, materiales
para repintado automotriz
1466-10LV-A1S 1.0 mm X A1 REDONDEADA
1466-10LV-B1S 1.0 mm X B1 LVMP
1466-10HV-C1S 1.0 mm X C1 HVLP
MEDIANO
20 - 30 segundos, Zahn 2
Recubrimientos industriales de uso general,
esmaltes, epoxis, cerámica de granulación fina
1466-12LV-B1S 1.2 mm X B1 LVMP
1466-12HV-C1S 1.2 mm X C1 HVLP

ES
77-3043-R1.3 5 / 14
ART.
NO. NÚM.
DE PIEZA DESCRIPCIÓN
CANT.
1 54-6211
CONJUNTO DEL ANILLO DE RETENCIÓN
DE LA CUBIERTA DE AIRE
1
5
VER TABLAS A
CONTINUACIÓN
CUBIERTA DE AIRE
1
7
VER TABLAS A
CONTINUACIÓN
BOQUILLA DE FLUIDO
1
8 54-6215-K5
DEFLECTOR/SEPARADOR (KIT DE 5)
1
9 54-6216
CONJUNTO DE VÁLVULA DEL PUERTO
LATERAL
1
10 ------ +
∆
SUJETADOR DE RETENCIÓN
1
11 ------ +
MANGUITO DEL CUERPO
1
12 ------ +
∆
JUNTA TÓRICA
1
13 ------ +
VÁSTAGO DEL PUERTO LATERAL
1
14 ------ +
∆
CLAVIJA
1
15 54-6131-K ❏
KIT DE SERVICIO DE LA VÁLVULA DE AIRE
1
16 ------ •
SELLO DELANTERO – VÁLVULA DE AIRE
1
17 ------ •
SELLO DELANTERO DE LA VÁLVULA DE AIRE
1
18 54-6220 ❏
HUSILLO DE LA VÁLVULA DE AIRE
1
19 ------ •
MUELLE DE LA VÁLVULA DE AIRE
1
20 ------ •
SELLO TRASERO – VÁLVULA DE AIRE
1
21 SN-66
ALOJAMIENTO
22 47-6851
AGUJA – ACERO INOXIDABLE (ESTÁNDAR)
1
47-6852
AGUJA – PUNTA PLÁSTICA
1
ART.
NO. NÚM.
DE PIEZA DESCRIPCIÓN
CANT.
23 54-6223-K ❏
CONJUNTO DE MUELLE/ALMOHADILLA
1
24 54-6111
PERILLA – AJUSTE DE LA AGUJA
1
25 54-6130-K ❏
KIT DE LA EMPAQUETADURA DE LA AGUJA
1
26 ------ n
TUERCA – EMPAQUETADURA
1
27 ------ n
MUELLE PARA EMPAQUETADURA
1
28 ------ n
t
EMPAQUE DE LA AGUJA
1
29 54-6218
DISPARADOR
1
30 54-6228-K
KIT DE LA TUERCA DE ROSCA DEL DISPARADOR
1
31 ------ V
TORNILLO DEL DISPARADOR
1
32 ------ V
TUERCA DEL DISPARADOR
1
33 54-3513
HUSILLO DE LA CUBIERTA
1
34 JJ-42
CONJUNTO DE LA VÁLVULA DE AJUSTE DE AIRE
1
35 JJ-30
ACCESORIO – ORIFICIO DE ENTRADA DEL AIRE
1
36 ------
CUERPO DE LA PISTOLA
1
37 ------
HERRAMIENTA – INSERCIÓN DEL SELLO
1
38 ------
GUNNER’S MATE (TUBO DE 3 CC)
1
39 54-4458
CONJUNTO DE CUBETA ALIMENTADA
POR GRAVEDAD DE 4 OZ.
1
40 54-4459 k
CONJUNTO DE LA TAPA
1
41 ------
TAPA DE LA CUBETA
1
42 ------
TAPA DE LA CUBETA
1
TABLA 1: LISTA DE PIEZAS DE LA PISTOLA PULVERIZADORA PARA RETOQUES ALIMENTADA POR GRAVEDAD SERIE “TROPHY” DE BINKS
TABLA 4: PRESIONES Y FLUJOS DE AIRE LVMP
PRESIÓN DE ENTRADA EN LA PISTOLA
(PSI)
FLUJO DE AIRE DE LA
CUBIERTA DE AIRE (SCFM)
15 4.7
20 5.8
25 6.9
30 7.8
TABLA 3: PRESIONES Y FLUJOS DE AIRE HVLP
PRESIÓN DE ENTRADA
EN LA PISTOLA (PSI)
FLUJO DE AIRE DE LA
CUBIERTA DE AIRE
(SCFM)
PRESIÓN DE
ATOMIZACIÓN DE LA
CUBIERTA DE AIRE (PSI)
5 2.5 2
10 4.0 4
15 5.1 7
21 6.4 10
LA PRESIÓN DE ENTRADA EN LA PISTOLA SE MIDE EN EL ACCESORIO DE
ENTRADA DE LA PISTOLA CON LA PISTOLA ACTIVADA.
TABLA 2: OPCIONES DE CUBIERTA DE AIRE
DESIGNACIÓN TECNOLOGÍA DE
ATOMIZACIÓN NÚM. DE PIEZA
A1
Atomización redondeada
46-10020
B1 LVMP 46-10010
C1 HVLP 46-10000
KIT DE PRUEBA HVLP PARA CUBIERTA DE AIRE C1: 54-6226
+
LAS PIEZAS ESTÁN INCLUIDAS EN 54-6216
n
LAS PIEZAS ESTÁN INCLUIDAS EN 54-6130-K
•
LAS PIEZAS ESTÁN INCLUIDAS EN 54-6131-K
V
LAS PIEZAS ESTÁN INCLUIDAS EN 54-6228-K
∆
GTI-428-K5 KIT DE REPARACIÓN DEL
PUERTO LATERAL
t
TAMBIÉN DISPONIBLE EN KIT DE 3: SN-2-K3
k
DISPONIBLE EN EL KIT 54-4539 (JUEGO DE 3)
❏
LAS PIEZAS ESTÁN INCLUIDAS EN 54-6136
TABLA 5: OPCIONES DE BOQUILLAS DE FLUIDO
DE ACERO INOXIDABLE ENDURECIDO
MATERIAL NÚM. DE PIEZA / ORIFICIO
FLUJO MUY LIVIANO / REDUCIDO
45-12080
0.8mm (.030")
LIVIANO/MEDIANO
15 - 20 segundos, Zahn 2
Barnices, lacas, lacas diluidas,
materiales para repintado automotriz
45-12100
1.0mm (.040")
MEDIANO
20 - 30 segundos, Zahn 2
Recubrimientos industriales de uso general,
esmaltes, epoxis, cerámica de granulación fina
45-12120
1.2mm (.047")
ESPESO
Mayor que 30 segundos, Zahn 2
Recubrimientos con bajo nivel de emisiones
VOC, adhesivos, cerámica de granulación fina
45-12140
1.4mm (.055")

ES
77-3043-R1.36 / 14
INSTRUCCIONES DE INSTALACIÓN
Para lograr la máxima eficiencia de transferencia, no utilice
más presión que la necesaria para atomizar el material que
está siendo aplicado.
NOTA
Al usar HVLP no sobrepase las presiones de entrada indicadas en
la página 5.
1. Conecte la pistola a un suministro de aire limpio, libre de
humedad y aceite usando una manguera conductiva que
tenga por lo menos un D.I. de 5/16".
NOTA
Dependiendo de la longitud de la manguera, podría ser necesaria
una manguera con mayor D.I. Instale un calibrador neumático en el
mango de la pistola. Ver las presiones de operación en la página 5.
No utilice más presión que la necesaria para atomizar el material que
está siendo aplicado. El exceso de presión creará una
sobrepulverización adicional y reducirá la eficiencia de la
transferencia.
NOTA
Si se necesitan acopladores de conexión rápida, use sólo
acopladores de conexión rápida de flujo alto aprobados para uso
con modelos HVLP. Otros tipos no harán fluir suficiente aire para
la operación correcta de la pistola.
NOTA
Si se usa una válvula de ajuste de aire en la entrada de la pistola,
use la válvula de ajuste HAV-501.
OPERACIÓN
MODELOS A GRAVEDAD
1. Mezcle el material de recubrimiento según las
instrucciones del fabricante y filtre el material.
2. Llene la cubeta hasta no más de ¾ de pulgada desde la
parte superior de la cubeta. NO LLENE EN EXCESO.
3. Fíjela a la tapa de la cubeta.
4. Gire la perilla de ajuste de fluido (24) en sentido horario
para impedir el movimiento de la aguja de fluido.
5. Gire el control del puerto lateral (9) en sentido antihorario
hasta que esté totalmente abierto.
6. Ajuste la presión de aire de entrada si fuese necesario.
7. Haga girar la perilla de ajuste de fluido en sentido
antihorario hasta que se pueda ver la primera rosca.
8. Prueba de atomizado. Si el acabado está muy seco,
reduzca el flujo de aire reduciendo la presión de entrada
de aire.
9. Si el acabado es muy húmedo, reduzca el flujo de fluido
girando la perilla de ajuste de fluido (24) en sentido
horario. Si la atomización es muy gruesa, aumente la
presión de entrada. Si es muy fina, reduzca la presión de
entrada.
10. Se puede reducir el tamaño del patrón de atomizado
girando el control del puerto lateral (9) en sentido horario.
11. Sostenga la pistola perpendicularmente a la superficie que
está siendo atomizada. Arquear o inclinar la pistola puede
producir un recubrimiento disparejo.
12. La distancia de rociado recomendada es de 8 pulgadas.
13. Rocíe los bordes primero. Superponga cada recorrido de
atomizado al menos un 75%. Mueva la pistola a velocidad
constante.
14. Interrumpa siempre el suministro de aire y reduzca la
presión cuando la pistola no esté en uso.
MANTENIMIENTO PREVENTIVO
Y LIMPIEZA
Para limpiar la cubierta de aire y la boquilla de fluido, cepille
el exterior con un cepillo de cerdas duras. Si fuese necesario
limpie los orificios de la cubierta, use una paja de escoba o un
mondadientes si fuese posible. Si se usa alambre o un
instrumento duro, se debe tener mucho cuidado para evitar
rayar o formar rebabas en los bordes de los orificios lo que
distorsionaría los patrones de pulverización.
Para limpiar los conductos de fluido, elimine el material
excedente de la pistola y limpie con solución para lavar
pistolas. Limpie el exterior de la pistola con un paño
humedecido. Nunca sumerja completamente la pistola en
ningún solvente o solución limpiadora porque esto es
perjudicial para los lubricantes y la vida útil de la
pistola pulverizadora.
NOTA
Al reemplazar la boquilla de fluido (7) o la aguja de fluido (22),
reemplace ambas al mismo tiempo. El uso de partes gastadas
puede ocasionar la filtración de fluido. Vea la página 4. Además,
reemplace la empaquetadura de la aguja en este momento.
Aplique torsión de 170–180 pulg-lbs a la boquilla de fluido. No
los apriete demasiado.
!
PRECAUCIÓN
Para evitar dañar la boquilla de fluido (7) o la aguja de fluido (22),
asegúrese de 1) tirar del disparador y mantenerlo activado mien-
tras aprieta o afloja la boquilla de fluido, o 2) quitar la perilla de
ajuste de fluido (24) para reducir la presión del muelle contra el col-
lar de la aguja.
CUBETA DEL GRAVEDAD. Vacíe el material sobrante y
limpie la cubeta. Asegúrese de que el orificio de ventilación
en la tapa no esté bloqueado.
NOTA
Antes de usar la pistola pulverizadora, lávela con solvente para
asegurar que los conductos de fluido estén limpios.
Other manuals for TROPHY SERIES
3
Table of contents
Languages:
Other Binks Paint Sprayer manuals

Binks
Binks AA4400A User manual

Binks
Binks 2100 SERIES User manual

Binks
Binks MACH 1SL Installation guide

Binks
Binks 95SL User manual

Binks
Binks 80-295 User manual

Binks
Binks TROPHY SERIES User manual

Binks
Binks SV100 Installation guide

Binks
Binks HP 6/60 User manual

Binks
Binks TROPHY 2466 SERIES User manual

Binks
Binks Mach 1SLA User manual

Binks
Binks 102-2400 FRP User manual

Binks
Binks 21 User manual

Binks
Binks 2001 User manual

Binks
Binks EMG-100-343-K User manual

Binks
Binks 95G User manual

Binks
Binks 95AR User manual

Binks
Binks 44-6000 Troubleshooting guide

Binks
Binks HP 4/32 User manual

Binks
Binks M1-G HVLP Reference manual

Binks
Binks STEADI-GRIP SG-2 User manual