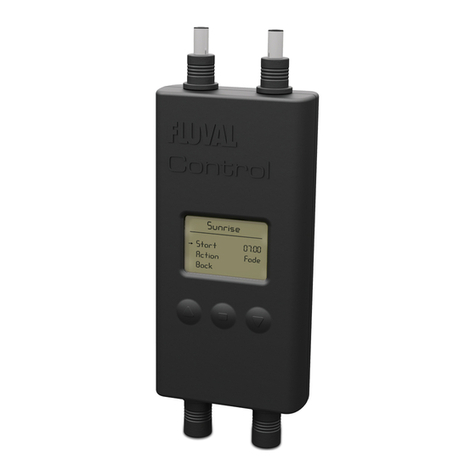
Biogents BG-CO2 Timer User manual

Status: December 2020

2
Table of contents
Introduction . . . . . . . . . . . . . . . . . . . . . . . . . . . . 3
Product components . . . . . . . . . . . . . . . . . . . 4
Battery . . . . . . . . . . . . . . . . . . . . . . . . . . . . . . . . 5
Functions . . . . . . . . . . . . . . . . . . . . . . . . . . . . . . 7
Attaching to CO2 tubes . . . . . . . . . . . . . . . . . 14
CE declaration of conformity. . . . . . . . . . . . 58
Contact . . . . . . . . . . . . . . . . . . . . . . . . . . . . . . . 60

3
Introduction
The daily activity patterns of a mosquito can dier depending on the spe-
cies. In order to save CO2, you can minimize the release of CO2to two tar-
geted release times using the BG-CO2timer. Observe your local mosquito
activity and then choose the appropriate start and stop times to correspond
to when they are active. CO2will only be released during these set times.
The BG-CO2timer is placed between the CO2tank and the mosquito trap(s)
with CO2tubing.

4
Product components
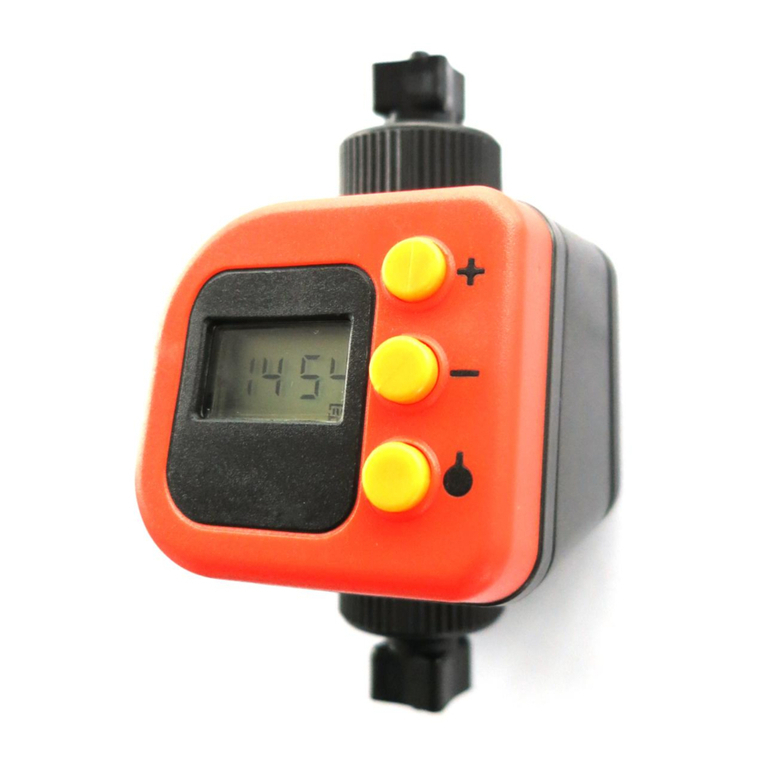
The BG-CO2timer consists of a body with a display, buttons to set up the
release times, and two connections to the CO2tubes.
Connection to CO2tube to CO2source
Connection to CO2tube to trap
Buttons to set up release times
Display

5
Battery
The 9 V battery to run the timer is not included in the contents. It has to be
inserted in the back of the body. To run the timer, remove the screws from
the back of the body. Insert a 9 V battery and connect the connection plate
to the battery. Pay attention to connect the battery always with the correct
polarity: hexagonal terminal to round terminal (even a short contact with
the wrong orientation might damage the device). The timer is now switched
on. Then retighten the back of the body with the screws. The charge status
of the battery is shown in the display. The battery should last at least six
months.

6
9 V battery
Connection plate
Opened back of the body
Battery status
9V

7
Button to switch on display/
Set-up of time frames of CO2release
Button to increase time /
switch on CO2permanently
Button to decrease time /
switch o CO2permanently
Functions
A3
1
2
5
4Down arrow indicates CO2emission
45
"A" indicates that the timer function is switched o

8
Switch on the display by pressing button 3.
To set the current time, press button 3 for two seconds.
To adjust the current time, use button 1 to increase and but-
ton 2 to decrease the time.
2 sec.
short
3
3
12
Switch on / Set current time

9
After setting up the current time, press button 3. "S1" (Start
time 1) appears in the display.
Set the rst start time with buttons 1 and 2 as described
previously.
Start time 1
Start set-up of
start time 1
3
1
2
Increase time
Decrease time
S1
3
12

10
After setting up the rst start time, press button 3. "E1" (End
time 1) appears in the display.
Set the end time with buttons 1 and 2 as described previ-
ously.
End time 1
Start set-up of
end time 1
3
1
2
Increase time
Decrease time
E1
3
12

11
Start and end time 2
E2
S2 R
To set up a second start and end time, press button 3 after setting up the
rst end time. "S2" (Start time 2) appears in the display. Set the time with
buttons 1 and 2 as described previously. To set the second end time, press
button 3. "E2" will appear in the display. Set time with buttons 1 and 2.
After the second end time is entered, press button 3. Now the timer is run-
ning, shown by an "R" in the display. NOTE: If a second start/end time cycle
is not required, set both the second start and end time to one minute after
the end of the rst cycle above.

12
To run the CO2continuously and not use the timer, change
the mode to "Always CO2". Press button 1 for two seconds.
With an audible click "A" will appear in the display along
with a down arrow showing that CO2is now emitted cont-
inuously.
To cancel the "Always CO2" mode, press button 1 again.
Option 1:
Permanent CO2
Switch on
CO2permanently
2 sec.
A
short
1
1
1

13
Option 2:
Switch o CO2
2 sec.
To switch o the CO2permanently, press button 2 for two
seconds. An "A" without a down arrow will appear in the dis-
play to show that the CO2 ow is switched o permanently.
To switch back to the timer mode, press button 2 again. short
Switch o CO2
permanently
2
2
2
A

14
Attaching to CO2tubes
Install the BG-CO2timer between the CO2source and the mosquito trap.
The tube coming from the CO2source should be attached to connection
Attach the tube to the trap to connection .
1
2
.

15
CO2source
Mosquito trap
Piece of tube (ca. 10 cm)
that can be cut o of the
existing black CO2tube
Black CO2tube

16
Inhaltsverzeichnis
Einführung . . . . . . . . . . . . . . . . . . . . . . . . . . . .17
Produktkomponenten . . . . . . . . . . . . . . . . . 18
Batterie . . . . . . . . . . . . . . . . . . . . . . . . . . . . . . 19
Funktionen . . . . . . . . . . . . . . . . . . . . . . . . . . . 21
Anschließen an CO2-Schläuche . . . . . . . . 28
EG Konformitätserklärung (Englisch) . . . 58
Kontakt . . . . . . . . . . . . . . . . . . . . . . . . . . . . . . .60

17
Einführung
Die Mückenaktivitäten sind zu verschiedenen Tageszeiten unterschiedlich
hoch. Um CO2zu sparen, können Sie die CO2-Abgabe mit Hilfe des BG-CO2-
Timers auf zwei verschiedene Zeitfenster pro Tag beschränken. Beobachten
Sie die Mückenaktivitäten und wählen Sie dann für die Hauptzeiten zwei
geeignete Zeitfenster aus. Der BG-CO2-Timer wird zwischen der CO2-Quelle
und der Mückenfalle mit CO2-Schläuchen angebracht.

18
Produktkomponenten
Anschluss an CO2-Schlauch zur CO2-Quelle
Anschluss an CO2-Schlauch zur Mückenfalle
Knöpfe zum Einstellen der Zeitfenster
Display
Der BG-CO2 -Timer besteht aus einem Korpus mit Display, Knöpfen zum Ein-
stellen der Zeitfenster und zwei Anschlüssen an CO2-Schläuche.

19
Batterie
Um den Timer zu betreiben, benötigen Sie eine 9-V-Blockbatterie, die im
Lieferumfang nicht enthalten ist. Um den Timer anzuschalten, entfernen
Sie die Rückseite des Timers, indem Sie die Schrauben lösen. Legen Sie eine
9-V-Blockbatterie ein und verbinden sie dann die Batterie mit der Batteriever-
bindungsplatte. Achten Sie darauf, die Batterie immer mit der richtigen Polarität
anzuschließen: sechseckiger Pol auf runden Pol (auch eine kurze Berührung der
falschen Pole könnte das Gerät beschädigen). Der Timer ist nun eingeschaltet.
Schrauben Sie die Rückseite des Korpus‘ wieder an. Der Batteriestatus wird im
Display angezeigt. Die Batterie sollte für mind. sechs Monate reichen.

20
9-V-Blockbatterie
Batterieverbindungsplatte
Geönete Rückseite des Timers
Batteriestatus
9V
Other manuals for BG-CO2 Timer
2
Table of contents
Languages:
Other Biogents Timer manuals

