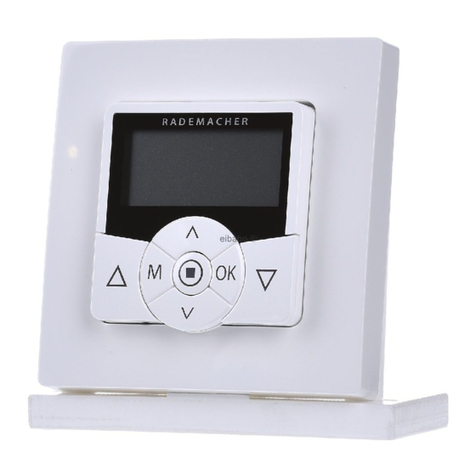
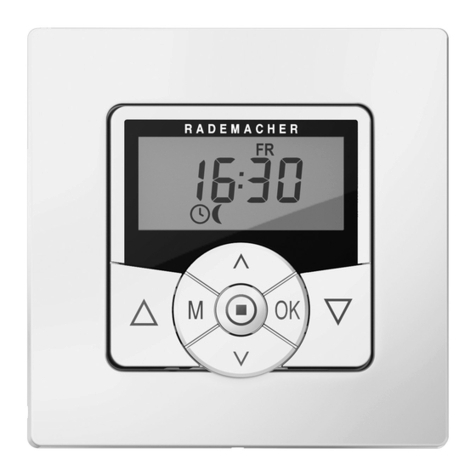
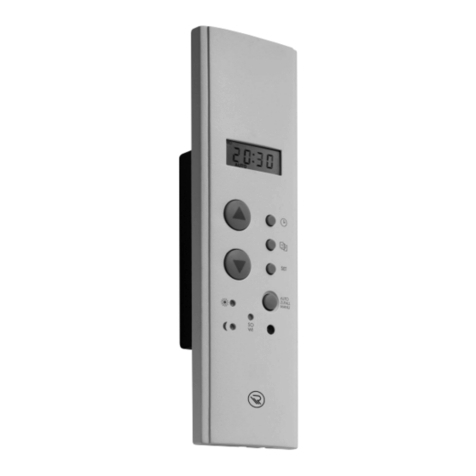
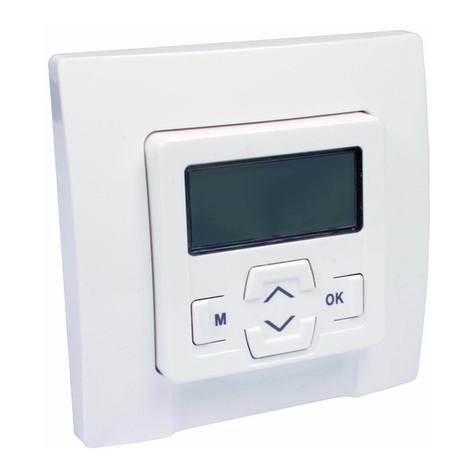
RADEMACHER Troll Basic DuoFern 5615 User manual

VBD 600-2 (01.21)
Troll Basic DuoFern 5615 / 5615-AL
Instruction manual for the electrical connection and for commissioning
Item No.:
3650 01 72 (ultra-white)
3650 01 82 (aluminium)
EN

2
iEN
Dear Customer,
These instructions...
...describe how to install, connect the electrical system and operate yourTroll Basic DuoFern.
Before you begin, please read these instructions through completely and
follow all the safety instructions.
This manual is a component of the product. Please store it in an easily ac-
cessible place.When passing the Troll Basic DuoFern on to a third party, this
manual must be passed on as well.
Damage resulting from non-compliance with these instructions and safety
instructions will void the guarantee. We assume no liability for any conse-
quential damage.
WithyourpurchaseofaTrollBasicDuoFern,youhavechosenaquality productmanufactured
by RADEMACHER.Thank you for the trust you have placed in us.
The Troll Basic DuoFern has been designed both in order to provide optimal convenience
and operability as well as to ensure solidity and durability. Having applied uncompromising
quality standards and thorough testing, we are proud to be able to present this innovative
product to you.
It’s brought to you by all the highly-qualified personnel here at
RADEMACHER.

3
iEN
Table of Contents
i Dear Customer, ....................................2
1. Included in delivery .............................4
2. General view - operating unit ...............5
2.1 Brief description of the keys ...............5
3. The function of the keys and LEDs .........6
4. Key to symbols ....................................7
5. Safety informations .............................8
5.1 Intended use ......................................8
5.2 Improper use......................................9
5.3 Required expert knowledge
of the installer....................................9
6. Brief description ................................10
6.1 Compatible switch ranges ................11
6.2 DuoFern network function table.......12
6.3 Troll Basic DuoFern function
overview...........................................14
7. Important information prior to
electrical installation and
mounting ........................................15
7.1 Safety instructions for
electrical connection ........................ 16
7.2 Connecting a tubular motor..............17
8. Assembly ........................................18
9. Important information prior to
initial commissioning.........................19
10. Manual operation ..............................19
10.1 Manual operation (jog mode) .......... 20
11. Logging DuoFern transmitters
on / off; brief description ....................21
11.1 Login for DuoFern transmitters......... 22
11.2 Logging off DuoFern transmitters..... 23
11.3 Clearing the DuoFern network..........24
12. Automatic mode; brief
description ........................................25
12.1 Switch all automatic functions
on / off simultaneously.....................25
13. Set the motor running time ................26
13.1 Setting the motor running time
with theTroll Basic DuoFern .............26
13.2 Time the running duration of
the motor and enter it into the
DuoFern controller............................27
14. Setting the sunshine position .............27
14.1 Switching the automated
solar function on/off.........................28
15. Switching the automatic
timer on/off.......................................29
16. Switching the automatic dusk
function on/off ..................................30
17. Switching the automatic dawn
function on/off...................................30
18. Automatic wind function;
brief description ................................31
19. Rain function; brief description...........32
20. Set the ventilation position ................33
21. Venetian blinds mode;
brief description ................................34
22. Switching reversal of rotation
direction on/off..................................35
23. End point adjustment.........................35
24. Function of external inputs
E1 and E2 ........................................37
25. Software reset ...................................37
26. Dismantling.......................................38
27. Simplified EU Declaration of
Conformity ........................................38
28. Technical Specifications......................39
29. Factory settings .................................39
30. Warranty conditions...........................40
5
iEN
2. General view - operating unit
Operating unit
Sun LED
Timer LED
Dawn LED
Dusk LED
Down key
Dusk key
i
2.1 Brief description of the keys
The operating keys [ up / down ]
◆Manual operation
[ up / down ].
SET/Stop key, [ ]
◆Manual stop or
simultaneously switch all
automatic functions on/off.
Timer key, [ ]
◆Switches the automatic timer
on/off
Sun key, [ ]
◆Switches the automated solar
function on/off.
Dawn key [ ]
◆Switches the automatic dawn
function on/off.
Dusk key [ ]
◆Switches the automatic dusk
function on/off.
NOTE:
◆Allofthe keysarealso usedinvariouscombinationsinordertoset the differentfunctions.
◆The Troll Basic DuoFern features automatic LED dimming. The LEDs dim as the roller
shutters are lowered.
Timer key
Up key
Sun key
Dawn key
SET/Stop key

6
iEN
3. The function of the keys and LEDs
Function Key Dura-
tion LED Action
up / stop / down / stop
Stop
Automatic timer on / off 1 s Lights red
Automated solar function on / off 1 s Lights red
Automatic dawn function on / off 1 s Lights red
Automatic dusk function on / off 1 s Lights red
Automatic system on / off 1 s
max. all LEDs
light up red or are
switched off
End point setting only for RADEMACHER
electronic tubular motors
/
Flashes red
+
Reversal of direction of rotation + 4 s Flashes red
Accept sunshine position + 1 s Flashes red
Accept ventilation position + 1 s Flashes red
Set the motor running time + 4 s Flashes red
Login for DuoFern transmitters + 4 s Flashes green
Logging off DuoFern transmitters + 4 s Flashes red
Clearing the DuoFern network
+
4 s Flashes red >
lights up green
+
Software reset
+
4 s All of the LEDs
flash red
+ +
+

7
iEN
Risk of fatal electric shock.
Thissignwarnsofdanger when workingon electricalconnections,components,etc.Itrequires
that safety precautions be taken to protect the life and health of the person concerned.
4. Key to symbols
NOTE
This is to draw your attention to information that is important for trouble-free operation.
Please read the operating instructions for external devices described at this point,
(e.g. a tubular motor).
This concerns
your safety.
Please pay particular attention and carefully follow all instructions marked with this symbol.

8
iEN
5. Safety informations
The use of defective equipment can lead to personal injury and damage to
property (electric shocks, short circuiting).
◆Neverusedefectiveor damaged equipment.Please contactourCustomerServicedepart-
ment in the event of faults, see page 40.
Incorrect use leads to an increased
risk of injury.
◆Train all personnel to use theTroll Basic DuoFern safely.
◆Thisdevicemaybeusedbychildrenfrom8yearsofageupwardsaswellasbypersonswith
reduced physical, sensory or mental capacities or with lack of experience and knowledge
if they are supervised or have been instructed on how to use the device safely and if they
understand what dangers may resulted from this.
◆Children must not play with the device.
◆Never remove the operating unit from the installation housing during operation.
5.1 Intended use
Only use the Troll Basic DuoFern for connecting and controlling a tubular motor for:
◆Roller shutters
◆Venetian blinds and slats
◆Awnings
Operating conditions:
◆The tubular motor must be fitted with a mechanical or electronic end position switch.
◆Only operate theTroll Basic DuoFern in dry rooms.
◆A 230V / 50 Hz power supply, together with a site-provided disconnecting device (fuse,
MCB), must be available at the installation location.
◆Theinstallationand operationoftheTrollBasic DuoFernis only permittedforthose systems
and devices where a malfunction in the transmitter or receiver would not cause a danger
to personnel or property or where this risk is already covered by other safety equipment.
i

9
iEN
5.2 Improper use
Using theTroll Basic DuoFern for purposes other than previously mentioned is impermissible
and is regarded as improper use.
Improper use can lead to serious injuries or property damage.
◆Donotuse theTrollBasicDuoFernforsafetydisconnectionof the connectedtubularmotor.
◆Never use the DuoFern radio system and its components (e.g. Troll Basic DuoFern) for
remote control of devices and systems with heightened safety-relevant requirements or
where there is a heightened risk of accidents.This shall require additional safety equip-
ment. Observe the respective statutory regulations for the installation of such systems.
There is a risk to life caused through short circuiting and electric shocks if the
Troll Basic DuoFern is used outside.
◆Never install or operate theTroll Basic DuoFern outside.
i
i
NOTE
Radio systems which transmit on the same frequency can cause interference.
5.1 Intended use
5.3 Required expert knowledge of the installer
Theelectrical connection,installationand commissioningoftheTrollBasicDuoFernmust only
be carried out by a qualified electrician in accordance with the instructions in this manual.

10
iEN
TheTroll Basic DuoFernservesasaDuoFernreceiverforcontrollingrollershutters,Venetian
blinds, slats or awnings by connecting a corresponding tubular motor.
The Troll Basic DuoFern can be controlled individually on site or it can be integrated into a
DuoFern network.
Central control of DuoFern devices with a HomePilot® or DuoFern manual central
operating unit.
A DuoFern network generally includes the HomePilot® or the DuoFern manual central
operating unit as central controllers.
The DuoFern receivers (actuators) and transmitters must be connected to the
DuoFern network.
NOTE
Youcan find adetaileddescription of thevariousfunctions,configurationoptionsand possible
combinations for the DuoFern system at:
http://www.rademacher.de/duofern
Roller shutter control
The system enables roller shutters to be automated.
Manual operation (normal mode)
Itispossible to manually control theconnectedtubularmotoratanytime by using thecontrols.
Manual operation (jog mode)
If Venetian blinds mode is activated for the DuoFern network from an overriding controller,
then manual operation can also be undertaken on site in jog mode.
External controller via the two inputs E1 and E2
The Troll Basic DuoFern features two configurable inputs E1 and E2 (230 V / 50 Hz) for
connecting an external switch (e.g. Venetian blinds switch, etc.), see page 17.
6. Brief description

11
iEN
Automatic functions
All automated functions of the Troll Basic DuoFern are controlled via the DuoFern network.
A complete overview of the functions can be found on page 12.
Assembly
TheTrollBasic DuoFerncanbeintegratedintomostcommerciallyavailableswitch rangeswith
the help of a corresponding intermediate frame 50 x 50 (DIN 49075). Suitable switch ranges
are detailed on the following page.
6. Brief description
6.1 Compatible switch ranges (www.rademacher.de)
Manufacturer switch range
BERKER Arsys / K1 / S1
BUSCH-JAEGER Busch-Duro 2000 Si / Reflex Si / alpha exclusive / alpha nea /
solo / impuls
GIRA Standard-System / S-Color-System / stainless steel range /
Standard 55
JUNG CD500 / ST550/ LS 990/CDplus asperCD but withcolouredrings
MERTEN M1 / Atelier / Artec /Trancent / Antik Neu
PEHA Standard / Dialog / Aura
LEGRAND Creo /Tenara
VEDDER Alessa (plus)
NOTE
◆It may be necessary to use an intermediate frame 50 x 50 * (DIN 49075), depending on
the respective switch range used.
* not included
i

12
iEN
DuoFern HomePilot®
DuoFern environmental sensor
DuoFern manual central operating unit
1WR ConfigTool with DuoFern manual central operating unit
RolloTron Comfort DuoFern
DuoFern manual transmitter standard
DuoFern wall controller
DuoFern radio transmitter, flush-mounted
DuoFern functions Value range Factory setting A BC D E F G H
1. Manual operation Up / Stop / Down - ● ● ● ● ● ●
2. Direct drive to a desired
%-position * 0 % - 100 % - ●
3. Manual mode on / off on / off Off ● ● ● ●
4. Automatic timer on / off on / off On ● ● ● ●
5. Random function - - ● ● ●
6. Automatic dawn function - - ● ● ● ●
7. Automatic dawn function on / off on / off Off ● ● ●
8. Automatic dusk function - - ● ● ● ●
9. Automatic dusk function on / off on / off Off ● ● ●
10. Sun function - - ● ●
11. Automated solar function on / off on / off Off ● ● ●
12. Sunshine position 0 % - 100 % 50 % ● ● ●
13. Wind function - - ●
14. Automatic wind function on / off * on / off Off ● ● ●
15. Travel direction wind * Up / Down Up ● ● ●
16. Rain function - - ●
17. Automatic rain function on / off * on / off Off ● ● ●
18. Travel direction rain * Up / Down Up ● ● ●
19. Running time 2 s - 150 s 150 s ● ● ●
20. Ventilation position on / off Off ● ● ●
21. Ventilation position 1 % - 99 % 80 % ● ● ●
22. Reversal of direction of rotation on / off Off ● ● ● ● ●
23. Connectivity test - - ● ●
24. Connect with radio code ** - - ● ● ●
25. Remote log on/off - - ● ● ●
6.2 DuoFern network function table

13
iEN
DuoFern functions Value range Factory setting A B C D E F G H
26. End point setting for RADEMACHER
tubular motors via radio ** - - ● ●
27. Reset via radio (3-stage) - - ● ●
28. Single-button operation - - ●
29. Jog mode - - ● ● ●
30. Blinds mode on / off Off ● ● ●
31. Standard slat position * /#0 % - 100 % 0 % ● ●
32. autoTilt after manual stop
direction "Down" * /#on / off On ● ●
33. autoTilt in sunshine position */ #on / off Off ● ●
34. autoTilt in sunshine position * /#on / off Off ● ●
35. autoTilt after moving to a
%-position * /#on / off On ● ●
36. Slat run time * /#100 ms - 5000 ms 1500 ms (1.5 s) ● ●
37. Motor dead time * 0 ms / 160 ms / 480 ms 0 ms (off) ● ●
6.2 DuoFern network function table
1The "WR ConfigTool" software can be downloaded from our website at www.rademacher.de
* Only available via radio
** Not supported byTroll Basic DuoFern.
#only withVenetian blinds mode activated

14
iEN
6.3 Troll Basic DuoFern function overview
◆Manual operation on site
◆Automatic timer on / off
◆Switch the automatic solar function on/off
◆Automatic dawn function on / off
◆Automatic dusk function on / off
◆End point setting (example circuit for RADEMACHER electronic tubular motors,
from 2000 onwards)
◆Switching reversal of rotation direction on/off
◆Logging on/off in DuoFern network
◆Clear
◆Deleting all settings (Reset)
◆External control via the two inputs E1 / E2
◆Set total running time
◆Set the sunshine position
◆Set ventilation position
Description and configuration of the individual functions.
A precise description of the individual functions and settings is included starting on page
21.

15
i
[ 3 ]
[ 4 ]
[ 5 ]
EN
7. Important information prior to electrical installation and mounting
Installation and electrical connection of the Troll Basic DuoFern may only be
undertaken with the supplied installation housing [ 3 ].
The connecting terminals [ 4 ] are located at the bottom of the installation housing [ 3 ].
NOTE
Installation housings for other variants of theTroll controller are not compatible.
Parallel connection of electronic tubular motors
A maximum of 3 tubular motors can be connected in parallel to theTroll Basic DuoFern (e.g.
RADEMACHER electronic tubular motors).
To do so, please refer to the operating manual for the corresponding tubular motor.
Parallel connection of mechanical tubular motors
A cut-off relay is required in order to connect mechanical tubular motors in parallel.

16
iEN
7.1 Safety instructions for electrical connection
Prior to connecting, check that the voltage / frequency on the type plate corresponds to the
local mains conditions.
There is a risk of fatal electric shock when touching
electrical components.
◆Carry out all installation and connection work only in an isolated, zero-volts state.
◆Disconnect all phases of the mains power supply cable and secure it to prevent any
reconnection.
◆Check the system for a zero-voltage status.
Incorrect wiring may lead to short-circuits and
destroy the device.
◆Follow the pin assignment detailed in the wiring diagram.
◆Follow all the electrical connection specifications in the operating instructions of your
tubular motor and that of the external controller (when using E1/E2).
Connection of a second phase to E1 or E2 will cause the
Troll Basic DuoFern to be damaged.
◆When inputs E1 / E2 are used, they must always be connected to the same phase.
◆If another phase is connected, the incorrect mains voltage (380 V / 50 Hz) will be
applied to the inputs and damage theTroll Basic DuoFern.

17
iEN
7.2 Connecting a tubular motor
Inputs E1 / E2 (230 V / 50 Hz) , only if required.
Connecting the white set cord (SET) from RADEMACHER tubular motors
* The white set cord (SET) from RADEMACHER tubular motors must be con-
nected to the neutral terminal [ N ] to ensure trouble-free operation of the
tubular motor.

18
iEN
8. Assembly
The Troll Basic DuoFern is designed for flush-mounted installation. For this, you require a
58mm flush-mounted box.We recommend using a deep box.
Installation procedure:
1. Switch off the mains.
2. Make the electrical connection according to the wiring diagram (see page 17).
3. Route the power cables to the flush-mounted box.
4. Slide the installation housing [ 3 ] into the flush-mounted box and clamp the claws [ 5 ] in
place with the screws provided.
5. Fit the frame [ 2 ].
6. Carefully insert the operating unit [ 1 ] into the installation housing [ 3 ].
7. Switch the mains power back on again.
[ 1 ]
[ 2 ]
[ 3 ]
[ 5 ]
Connecting terminals on bottom > [ 4 ]

19
iEN
9. Important information prior to initial commissioning
◆Prior to initial commissioning of theTroll Basic DuoFern, it must be ensured that the end
points are configured for the connected tubular motor.
◆Iftheendpointshavenotyetbeen configured, it isvitalthatbothendpointsareconfigured
for the tubular motor, as failure to do so can lead to malfunctions.
◆In order to do so, follow the information provided in the operating manual for the
respective tubular motor.
◆For electronic RADEMACHER tubular motors from year of manufacture 2000 onwards,
the end points can be configured with the help of theTroll Basic DuoFern, see page 35.
Example for manual control of a roller shutter
1. Open the roller shutters.
Brieflypressingthe button causestheroller shutters to move
to the upper end point.
2. / or causes the roller shutters to stop in the interim.
3. Close the roller shutters.
The roller shutters move to the configured ventilation
position or to the lower end point.
10. Manual operation
Manualoperationisalwayspossible and haspriorityovertheprogrammedautomaticfunctions.
Ventilation position, see page 33
If the ventilation position is configured, the roller shutters will first roll down to this position.
Pressing the [
Down
]key once more causes the roller shutters to continue downwards.

20
iEN
10.1 Manual operation (jog mode)
As soon as Venetian blinds mode is activated with the help of a DuoFern controller (e.g.
HomePilot®), it is possible to manually operate the Troll Basic DuoFern in jog mode.
Jog mode provides a convenient way to configure Venetian blinds. In doing so, the Venetian
blinds motor is powered only as long as the control key is actuated.
NOTE
Pressing the respective operating key [ Up / Down ] for an extended period causes the Troll
Basic DuoFern to automatically move theVenetian blinds to the corresponding end position.
Example for manual control of Venetian blinds in jog mode.
1.
Press briefly
The Venetian blinds move upwards briefly.
or
1.1. Press
The Venetian blinds open.
TheVenetian blinds move up to the upper end point.
2. / or Causes theVenetian blinds to stop in the interim.
3.
Press briefly
The Venetian blinds move downwards briefly.
or
3.1. Press
The Venetian blinds close.
The Venetian blinds move to the configured ventilation
position or to the lower end point.
Ventilation position, see page 33
If the ventilation position is configured, the roller shutters will first roll down to this position.
Pressing the [
Down
]key once more causes the roller shutters to continue downwards.
This manual suits for next models
3
Table of contents
Other RADEMACHER Timer manuals

RADEMACHER
RADEMACHER Troll Standard 5620 User manual

RADEMACHER
RADEMACHER Troll Comfort DuoFern User manual

RADEMACHER
RADEMACHER SpeedTimer 3650 05 12 Specification sheet

RADEMACHER
RADEMACHER Modi 2650 Quick guide

RADEMACHER
RADEMACHER 3650 05 12 User manual

RADEMACHER
RADEMACHER DuoFern HomeTimer 9498-UW User manual
Popular Timer manuals by other brands

Proficook
Proficook PC-KU 1041 instruction manual

Heatline
Heatline HLPC-TIMER-120P Installation and operating instructions

Skytech
Skytech E-Stop Series manual

Green Brook
Green Brook T40S Installation & operating instructions

Air King
Air King AKEDT2 operating manual

HANYOUNG NUX
HANYOUNG NUX LT4 Series instruction manual