birddog Studio NDI User manual
Quick-start guide
Version 2.0
Dec 2018
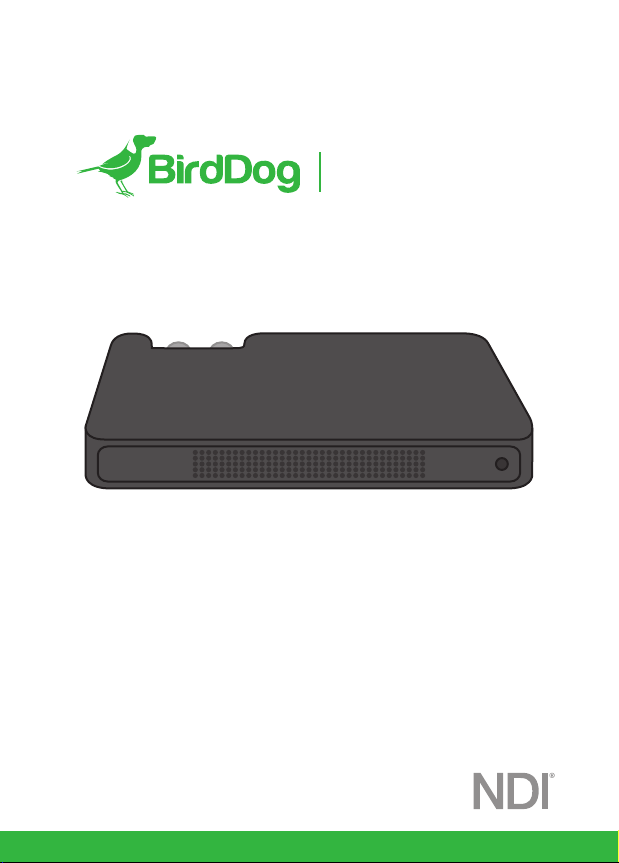
STUDIO NDI
Firmware Update
This product has regular firmware updates to enable additional
features and functions, please ensure you update to the lastest
firmware by following the instructions in this guide.
bird-dog.tv/firmware
Product Registration
To extend your product warranty from the standard 12 month
limited warranty to a full 36 month limited warranty please be sure
to register each individual product online at bird-dog.tv/register
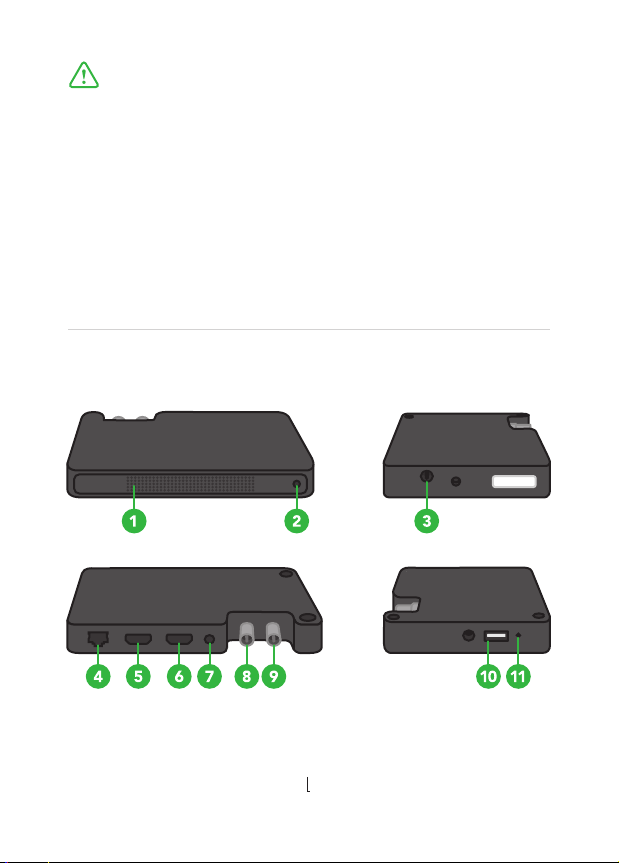
1. LED Display monitor
2. Audio Headset connector
3. DC Input (5-18v DC)
4. 1Gb Ethernet / Power over Ethernet
8. 3G-SDI Input
9. 3G-SDI Output
10. USB Accessory port
11. Factory reset
External connectors & features
5. HDMI Input
6. HDMI Output
7. External tally
--_connector (GPIO)
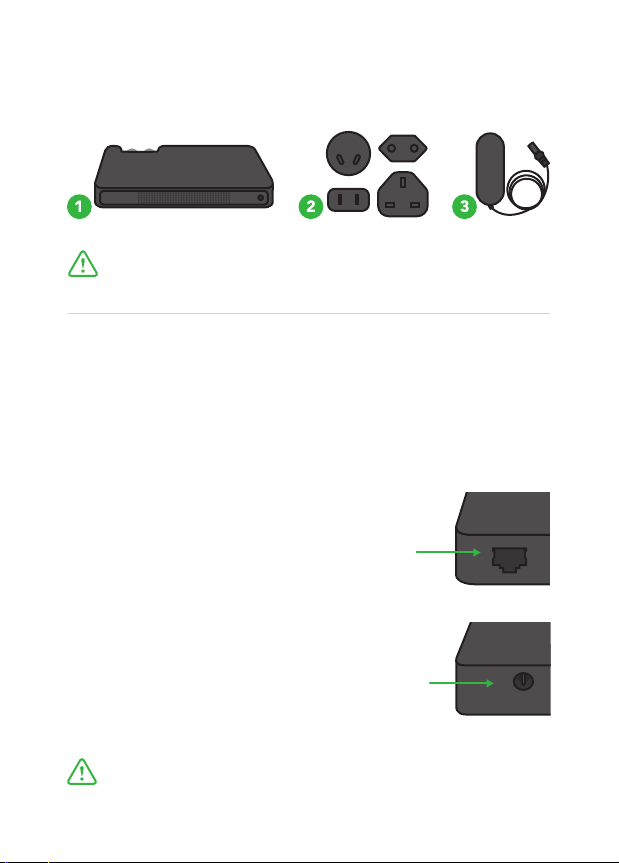
Powering Options
PoE Power over Ethernet (802.11af/at)
Studio NDI can receive power and data through a single Ethernet
cable. Always use a certified 802.11af/at switch with minimum 12w
port power capacity.
Always use geniune BirdDog power adapters.
3rd party products can cause permanent damage.
Dc Power (strictly 5-18v)
Once a DC cable is connected the unit
will automatically power on.
Once PoE Ethernet cable is inserted the unit
will automatically power on.
Please take time to ensure all items are incuded in your
BirdDog product package.
What’s in the box
1. Studio NDI Main Unit 2. International Adapters 3. AC/DC Power Adapter

Booting up your BirdDog Studio NDI
As Studio NDI progresses through its boot-up sequence it will
display “STARTUP”.1
Once the boot cycle is complete it will display “CAM1” by default.2
Please note. BirdDog Studio NDI should boot up and be ready for
operation in approximately 20 seconds. If it is taking longer than
this it bay be because it is unable to acquire a network “IP” address,
please ensure you have a valid network router on your network with
a functioning DHCP server.
After initial boot up is complete your Studio NDI unit will be visible
as a source on any NDI compatible devices on the SAME ethernet
subnet.
For further networking architecture instructions including routing
please consult either your system administrator or the support
page at bird-dog.tv
1
2
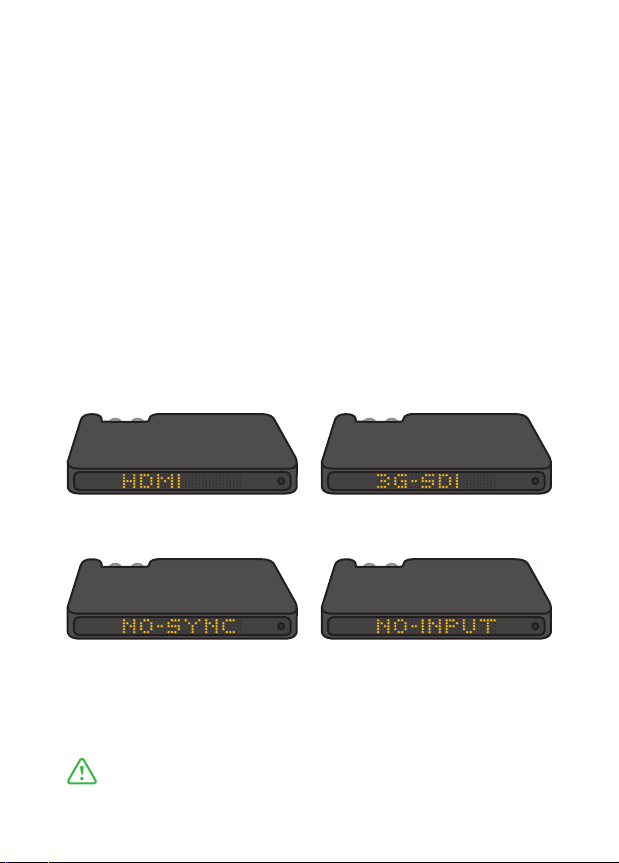
QUICK TIP. If both HDMI and 3G-SDI inputs are present
simultaneously, Studio NDI will default to 3G-SDI input.
Determining video input
Displaying current video input
Studio NDI will auto-detect the video input as soon as it becomes
active. Once video is synchronised a display will appear confirming
the video input is active and being encoded to NDI in realtime.1-2
If a video input is present but not compatible with Studio NDI a
message will appear “NO-SYNC”.3
If there are no valid inputs connected to Studio NDI a message will
appear “NO-INPUT”.4
1 1
3 4
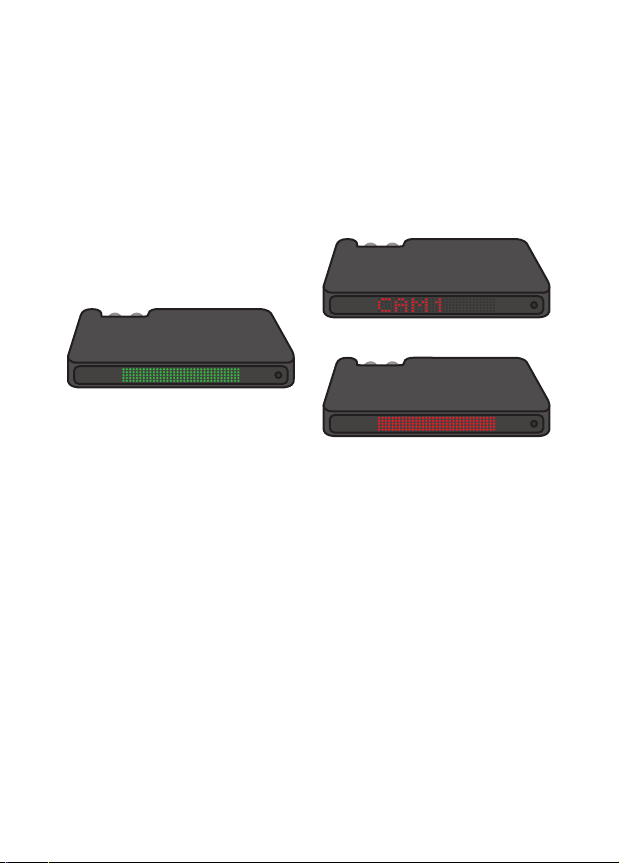
Tally light behaviour
Tally is used in productions for both talent and camera operators
to be aware which camera is being transmitted live to air (Program)
or being previewed with the intention of going live to air next
(Preview). BirdDog receives these signals from devices that
support Tally such as vision switchers and displays this information
on the internal screen.
If no destination device is receiving the NDI signal being genera-
ted by Studio NDI in either PROGRAM or PREVIEW mode, Studio
NDI will display the device name by default.1
If a destination device is receiving the NDI signal being generated
by Studio NDI on the PREVIEW bus, the display will illuminate
GREEN.2
If a destination device is receiving the NDI signal being generated
by Studio NDI on the PROGRAM bus, the display will illuminate
RED.3
External tally lights may also be connected via the External Tally
Connector (GPIO) port on the rear of the unit.
1
2
3

Connecting a video source
If the video input format changes while BirdDog Studio is active,
the unit will automatically reconfigure its settings to accommodate
the change when set to “AUTO” mode on the web configuration
interface. The process of reconfiguring the inputs takes approxima-
tely 3 seconds and is not recommended during a live production.
BirdDog Studio accepts either HDMI or 3G-SDI inputs, refer to the
latest release notes for confirmation of the current supported video
rates and resolutions.
Once your BirdDog Studio NDI has been set up to receive video
on a specific input, it will automatically detect the incoming format
and set everything up accordingly.
If you would like to manually configure your input, this can be done
via the web interface.
HDMI Input 3G-SDI Input
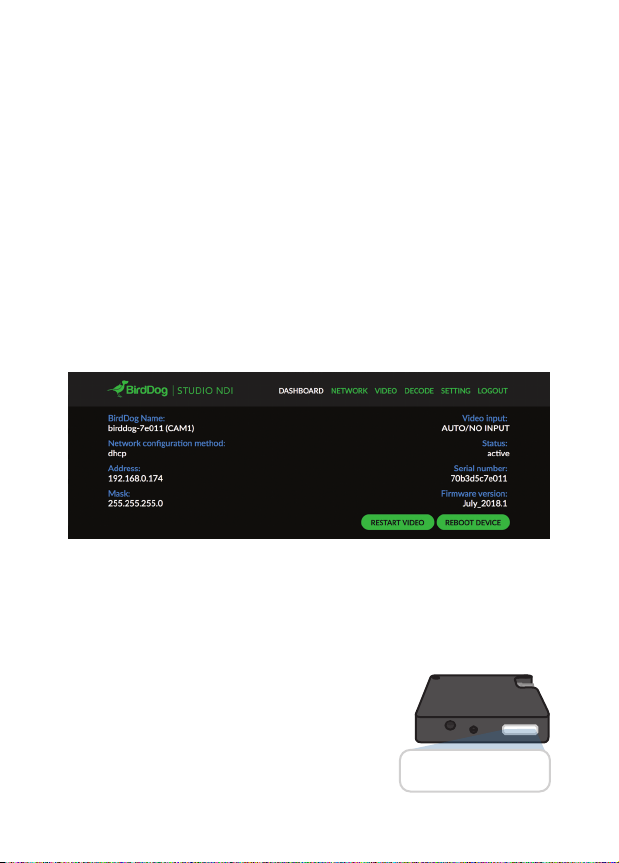
Accessing the web configuration console
After initial boot up is complete your BirdDog Studio NDI unit will
be visible as a source on any NDI compatible devices on the SAME
ethernet subnet.
For further networking architecture instructions including routing
please consult either your system administrator or the support
page at bird-dog.tv
As BirdDog progresses through its boot-up sequence it will display
“STARTUP”.
Once the boot cycle is complete it will display “CAM1”. At this
point the Web configuration console is available, please type the
following URL into your web browser: http://birddog-xxxxx.local
Where xxxxx is the last 5 digits of the serial
number on the sticker of your device
(case sensitive).
Default password: birddog
BirdDog Studio NDI - REV nº
SERIAL xx:xx:xx:xx:xx:xx

Your computer may require some prerequisite software installed to
enter the above URL successfully.
Please ensure Apple Bonjour is installed on your computer, the
installation package for this is available at:
bird-dog.tv/firmware
Alternative access to the Web configuration console
As an alternative to directly typing in the URL of your BirdDog unit,
BirdDog Finder is a beta (pre-release) application available for
download at:
bird-dog.tv/firmware
Once launched this application will list all NDI capable devices on
your network including BirdDog units and allow you to directly
open the configuration console.
Simply click 'Manage' on your BirdDog device listed in the
BirdDogFinder application, this will take you to your default web
browser and load the configuration console.
BirdDogFinder
Device Name
BIRDDOG-00122 (SDI) 192.168.0.195 Open in Web Browser
IP Address

Setting your video input
It is important to set the video input correctly within the web
configuration console, if the input is not set to the required settings
then either no video will be displayed or unexpected video results
can occur.
To access the video settings press the video menu option at the
top of the console.
Begin by selecting either AUTO or MANUAL as your primary
source setting. In most cases it is as simple as leaving the
Configuration set to Auto.
If you are not seeing the expected video results on your NDI
receiver with AUTO then manually configure the settings.
Other manuals for Studio NDI
2
Table of contents
Other birddog Media Converter manuals


