BLADDERSCAN BVI 6100 Manual
BLADDERSCAN
BVI6100
Operations & Maintenance Manual

0900‑4830‑00‑60

BLADDERSCAN
BVI6100
Operations & Maintenance Manual
Effective: July 31, 2017
Caution: Federal (United States) law restricts this
device to sale by or on the order of a physician.

CONTACT INFORMATION
To obtain additional information regarding your BladderScan system,
please contact Verathon®Customer Care or visit verathon.com/support.
Verathon Inc.
20001 North Creek Parkway
Bothell, WA 98011 U.S.A.
Tel: 800.331.2313 (US and Canada only)
Tel: 425.867.1348
Fax: 425.883.2896
verathon.com
Verathon Medical (Europe) B.V.
Willem Fenengastraat 13
1096 BL Amsterdam
The Netherlands
Tel: +31 (0) 20 210 30 91
Fax: +31 (0) 20 210 30 92
0123
Copyright 2017 Verathon Inc. All rights reserved. No part of this manual may be copied or transmitted by any method without the
express written consent of Verathon Inc.
Verathon, the Verathon torch symbol, BladderScan, the BladderScan symbol, ScanPoint, and Vmode are trademarks or registered
trademarks, and Total Reliability Plan is a service mark of Verathon Inc. All other brand and product names are trademarks or registered
trademarks of their respective owners.
Information in this manual may change at any time without notice. For the most up‑to‑date information, see the documentation
available at verathon.com/product‑documentation.

i
Operations & Maintenance Manual: Table of Contents
TABLE OF CONTENTS
IMPORTANT INFORMATION.................................................................................................................................1
Overview ............................................................................................................................................................1
Product Description .........................................................................................................................................1
Statement of Intended Use ..............................................................................................................................1
Essential Performance ......................................................................................................................................1
Notice to All Users ...........................................................................................................................................1
Safety Information ..............................................................................................................................................2
Ultrasound Energy Safety.................................................................................................................................2
Contraindications.............................................................................................................................................2
Cautions & Warnings .......................................................................................................................................2
INTRODUCTION ....................................................................................................................................................7
Product Description ............................................................................................................................................7
BladderScan BVI6100......................................................................................................................................7
ScanPoint Image Management Technology (Optional) .....................................................................................7
System Components & Accessories .....................................................................................................................8
Required System Components .........................................................................................................................8
Optional Components & Accessories................................................................................................................9
Buttons, Parts, & Icons ......................................................................................................................................10
Instrument Parts & Buttons ............................................................................................................................10
Screen Icons .................................................................................................................................................. 11
SETTING UP ......................................................................................................................................................... 13
Procedure 1. Perform Initial Inspection ..................................................................................................... 13
Procedure 2. Charge the Instrument......................................................................................................... 13
Procedure 3. Activate the BladderScan Instrument (Optional).................................................................... 14
Procedure 4. Install ScanPoint Software (Optional)................................................................................... 14

ii
MEASURING BLADDER VOLUME.......................................................................................................................15
Performing Scans.............................................................................................................................................. 15
Procedure 1. Prepare for the Exam ........................................................................................................... 16
Procedure 2. Measure Bladder Volume ..................................................................................................... 16
Scanning Tips.................................................................................................................................................... 19
CLEANING & DISINFECTING ...............................................................................................................................21
Procedure 1. Clean & Disinfect the Instrument..........................................................................................22
MAINTENANCE & TROUBLESHOOTING.............................................................................................................24
Regular Inspections ..........................................................................................................................................24
Calibrating the BladderScan Instrument.............................................................................................................24
Procedure 1. Calibrate the Instrument ......................................................................................................24
Warranty ..........................................................................................................................................................28
Instrument Repair or Replacement.....................................................................................................................29
Troubleshooting................................................................................................................................................30
Frequently Asked Questions...........................................................................................................................30
Help Resources ..............................................................................................................................................31
Device Disposal.................................................................................................................................................31
PRODUCT SPECIFICATIONS.................................................................................................................................32
Component Specifications ................................................................................................................................32
Instrument Specifications ...............................................................................................................................32
Charging Cradle Specifications.......................................................................................................................34
Electromagnetic Compatibility...........................................................................................................................35
Electromagnetic Emissions .............................................................................................................................35
Electromagnetic Immunity .............................................................................................................................35
Recommended Separation Distances..............................................................................................................38
Accessory Conformance to Standards.............................................................................................................38
GLOSSARY ...........................................................................................................................................................39

1
Operations & Maintenance Manual: Important Information
IMPORTANT INFORMATION
OVERVIEW
PRODUCT DESCRIPTION
The BladderScan®BVI6100 bladder volume instrument is a wireless, battery‑powered, ultrasound instrument
that provides a noninvasive measurement of urinary bladder volume.
During each scan, the instruments employs patented Vmode®technology to create a three‑dimensional
image of the bladder, which automatically calculates and displays measurements based upon this image.
Vmode measurements tend to be more accurate than those obtained from conventional two‑dimensional
ultrasound, as they are based on a more complete, multi‑faceted image of the bladder.
Optionally, exam results may be transmitted to a personal computer running ScanPoint®with QuickPrint
software via a USB communication cradle. ScanPoint with QuickPrint allows the user to archive data,
calibrate the instrument, update software, print, and transfer data through an application‑based interface.
STATEMENT OF INTENDED USE
The BladderScan BVI 6100 instrument is an ultrasound device intended to be used for measuring the urine
volume in the bladder noninvasively.
ESSENTIAL PERFORMANCE
Essential performance is the system performance necessary to achieve freedom from unacceptable risk.
The essential performance of the BladderScan BVI6100 system is to produce ultrasonic output energy and
display numerical values for bladder volume. The system has a passively temperature‑controlled transducer
assembly.
NOTICE TO ALL USERS
The BladderScan BVI6100 instrument should be used only by individuals who have been trained and
authorized by a physician or the institution providing patient care. All users must read this entire manual
prior to using the instrument. Do not attempt to operate the instrument until you thoroughly understand all
instructions and procedures in this manual. Failure to comply with these instructions may compromise the
performance of the instrument and the reliability of its measurements.

2
SAFETY INFORMATION
ULTRASOUND ENERGY SAFETY
To date, exposure to pulsed diagnostic ultrasound has not been shown to produce adverse effects. However,
ultrasound should be used prudently, and total patient exposure should be kept as low as reasonably achievable
(ALARA). Following the ALARA principle, ultrasound should only be used by medical professionals when
clinically indicated, using the lowest possible exposure times necessary to obtain clinically useful information.
For more information on ALARA, please refer to the American Institute of Ultrasound in Medicine publication,
Medical Ultrasound Safety.
The ultrasound output power of the BladderScan BVI6100 instrument is not user adjustable and is limited to
the minimum level necessary for effective performance. For more information about acoustic output levels,
see the Product Specifications chapter on page32.
CONTRAINDICATIONS
The BladderScan BVI 6100 is not intended for fetal use or for use on pregnant patients, patients with open
skin or wounds in the suprapubic region, or patients with ascites.
CAUTIONS & WARNINGS
Warnings indicate that injury, death, or other serious adverse reactions may result from use or misuse of
the device. Cautions indicate that use or misuse of the device may cause a problem, such as a malfunction,
failure, or damage to the product. Throughout the manual, pay attention to sections labeled Important, as
these contain reminders or summaries of the following cautions as they apply to a specific component or
usesituation. Please heed the following warnings and cautions.
PRECAUTIONS
When using the system with optional ScanPoint®software, your computer must be minimally
certified to EN/IEC/CSA/UL 60950‑1 or 60101‑1 standards. This configuration ensures that
compliance to the EN/IEC60601‑1 system standard is maintained. Anyone connecting additional
equipment to the signal input port or signal output port configures a medical system, and is
therefore responsible for ensuring that the system complies with EN/IEC60601‑1. If you need
assistance, contact your biomedical staff, local representative, or Verathon®Customer Care.
CAUTION
Use of the following cleaning methods or solutions may cause device damage not covered by
the BladderScan BVI 6100 warranty:
• Do not immerse the instrument in disinfectant solution.
• Do not use Cidex Plus®to disinfect the instrument. Cidex Plus will damage the plastic enclosure.
• Do not subject the instrument to any method of sterilization.
CAUTION

3
Operations & Maintenance Manual: Important Information
Statement of Prescription: Federal (United States) law restricts this device to sale by or on the
order of a physician.
CAUTION
To maintain electromagnetic interference (EMI) within certified limits, the system must be used
with the cords, components, and accessories specified or supplied by Verathon®. For additional
information, see the System Components & Accessories and Component Specifications sections.
The use of accessories or cords other than those specified or supplied may result in increased
emissions or decreased immunity of the system.
Medical electrical equipment requires special precautions regarding electromagnetic
compatibility (EMC) and must be installed and operated according to the instructions in this
manual. For more information, see the Electromagnetic Compatibility section on page35.
The system should not be used adjacent to or stacked with other equipment. If adjacent or
stacked use is necessary, the system should be observed to verify normal operation in the
configuration in which it will be used.
This device can radiate radio frequency energy and is very unlikely to cause harmful interference
with other devices in the vicinity. There is no guarantee that interference will not occur in a
particular installation. Evidence of interference may include degradation of performance in this
device or other devices when operated simultaneously. To correct interference, use the following
measures:
• Turn devices on and off in the vicinity to determine the source of interference
• Reorient or relocate this device or other devices
• Increase the separation between devices
• Connect the device to an outlet on a circuit different than the other device(s)
• Eliminate or reduce EMI with technical solutions (such as shielding)
• Purchase medical devices that comply with IEC60601‑1‑2 EMC Standards
Be aware that portable and mobile radio frequency communications equipment (cellular phones,
etc.) may affect medical electrical equipment; take appropriate precautions during operation.
CAUTION
4
WARNINGS
This product may only be cleaned and disinfected by using the approved processes provided in
this manual. Cleaning and disinfection methods listed are recommended by Verathon®based on
compatibility with component materials.
WARNING
Availability of cleaning, disinfection, and sterilization products varies by country, and Verathon is
unable to test products in every market. For more information, please contact Verathon Customer
Care or your local representative. For contact information, visit verathon.com/support.
WARNING
Cleaning is critical to ensuring the component is ready for disinfection. Failure to properly
clean the device could result in a contaminated instrument after completing the disinfection
procedure.
WARNING
Ensure that you follow the manufacturer’s instructions for handling and disposing of the
cleaning and disinfection solutions provided in this manual.
WARNING
When preparing and using one of the approved cleaning, disinfection, or sterilization solutions,
follow the instructions of the solution manufacturer. Pay close attention to the proper dilution
and immersion times.
WARNING
In order to maintain electrical safety, use only the provided, medical‑grade power adapter,
battery, and battery charger.
WARNING
To reduce the risk of electric shock, use only the accessories and peripherals recommended by
Verathon.
WARNING

5
Operations & Maintenance Manual: Important Information
The charging cradle, power adapter, and power cords are not intended for patient contact.
Ensure 2m (6ft) is maintained between the patient and these components.
WARNING
Ensure proper distance from patient. When transmitting data to or from your computer, make sure
the instrument, accessories, and computer are outside the patient vicinity (more than 2m (6ft)
from the patient).
WARNING
Do not use the system on:
• Fetal patients.
• Pregnant patients.
• Patients with open skin or wounds in the suprapubic region.
• Patients with ascites.
WARNING
To reduce the risk of electric shock or burns, do not use the system in conjunction with
high‑frequency surgical equipment.
WARNING
To reduce the risk of electrical shock, do not attempt to open the system components. This may
cause serious injury to the operator or damage to the instrument and will void the warranty.
Contact Verathon®Customer Care or your local representative for all servicing needs.
WARNING
To reduce the risk of explosion, do not use the system in the presence of flammable anesthetics.
WARNING
No modification of this equipment is allowed.
WARNING

6
Be aware of the following conditions that can affect ultrasound transmission:
• Catheterization—A catheter in the patient’s bladder may affect the accuracy of the bladder
volume measurement in two ways: 1) by introducing air into the bladder that may block the
ultrasound signal, and 2) by having the catheter‑retaining balloon interfere with the volume
measurement. However, the volume measurement may still be clinically useful if it is large
(detecting a blocked catheter, for example).
• Abdominal Surgery—Scar tissue, surgical incisions, sutures, and staples can affect ultrasound
transmission. Use care when scanning patients who have had abdominal surgery.
WARNING
Accuracy is compromised if you do not obtain an optimal, repeatable image.
WARNING
To date, exposure to pulsed diagnostic ultrasound has not been shown to produce adverse effects.
However, ultrasound should be used prudently, and total patient exposure should be kept as low
as reasonably achievable (ALARA). Following the ALARA principle, ultrasound should only be
used by medical professionals when clinically indicated, using the lowest possible exposure times
necessary to obtain clinically useful information. For more information on ALARA, please refer to
the American Institute of Ultrasound in Medicine publication, Medical Ultrasound Safety.
The ultrasound output power of the BladderScan BVI6100 instrument is not user adjustable and
is limited to the minimum level necessary for effective performance. For more information about
acoustic output levels, see the Product Specifications chapter on page32.
WARNING
To reduce the risk of leakage, explosion, fire, or serious injury, note the following when handling
the lithium‑ion battery included in the system:
• Do not store the battery in the console for an extended period of time.
• Never short‑circuit the battery by bringing the battery terminals into contact with any other
conductive object.
• Never expose the battery to abnormal shock, vibration, or pressure.
• Do not disassemble, heat above 60°C (140°F), or incinerate the battery.
• Keep battery out of reach of children and in original package until ready to use.
• Dispose of used batteries promptly according to local recycling or waste regulations.
• If the battery is leaking or its case is cracked, put on protective gloves to handle it, and
discard it immediately.
• Put insulating tape, such as cellophane tape, on the electrodes during transportation.
WARNING
7
Operations & Maintenance Manual: Introduction
INTRODUCTION
PRODUCT DESCRIPTION
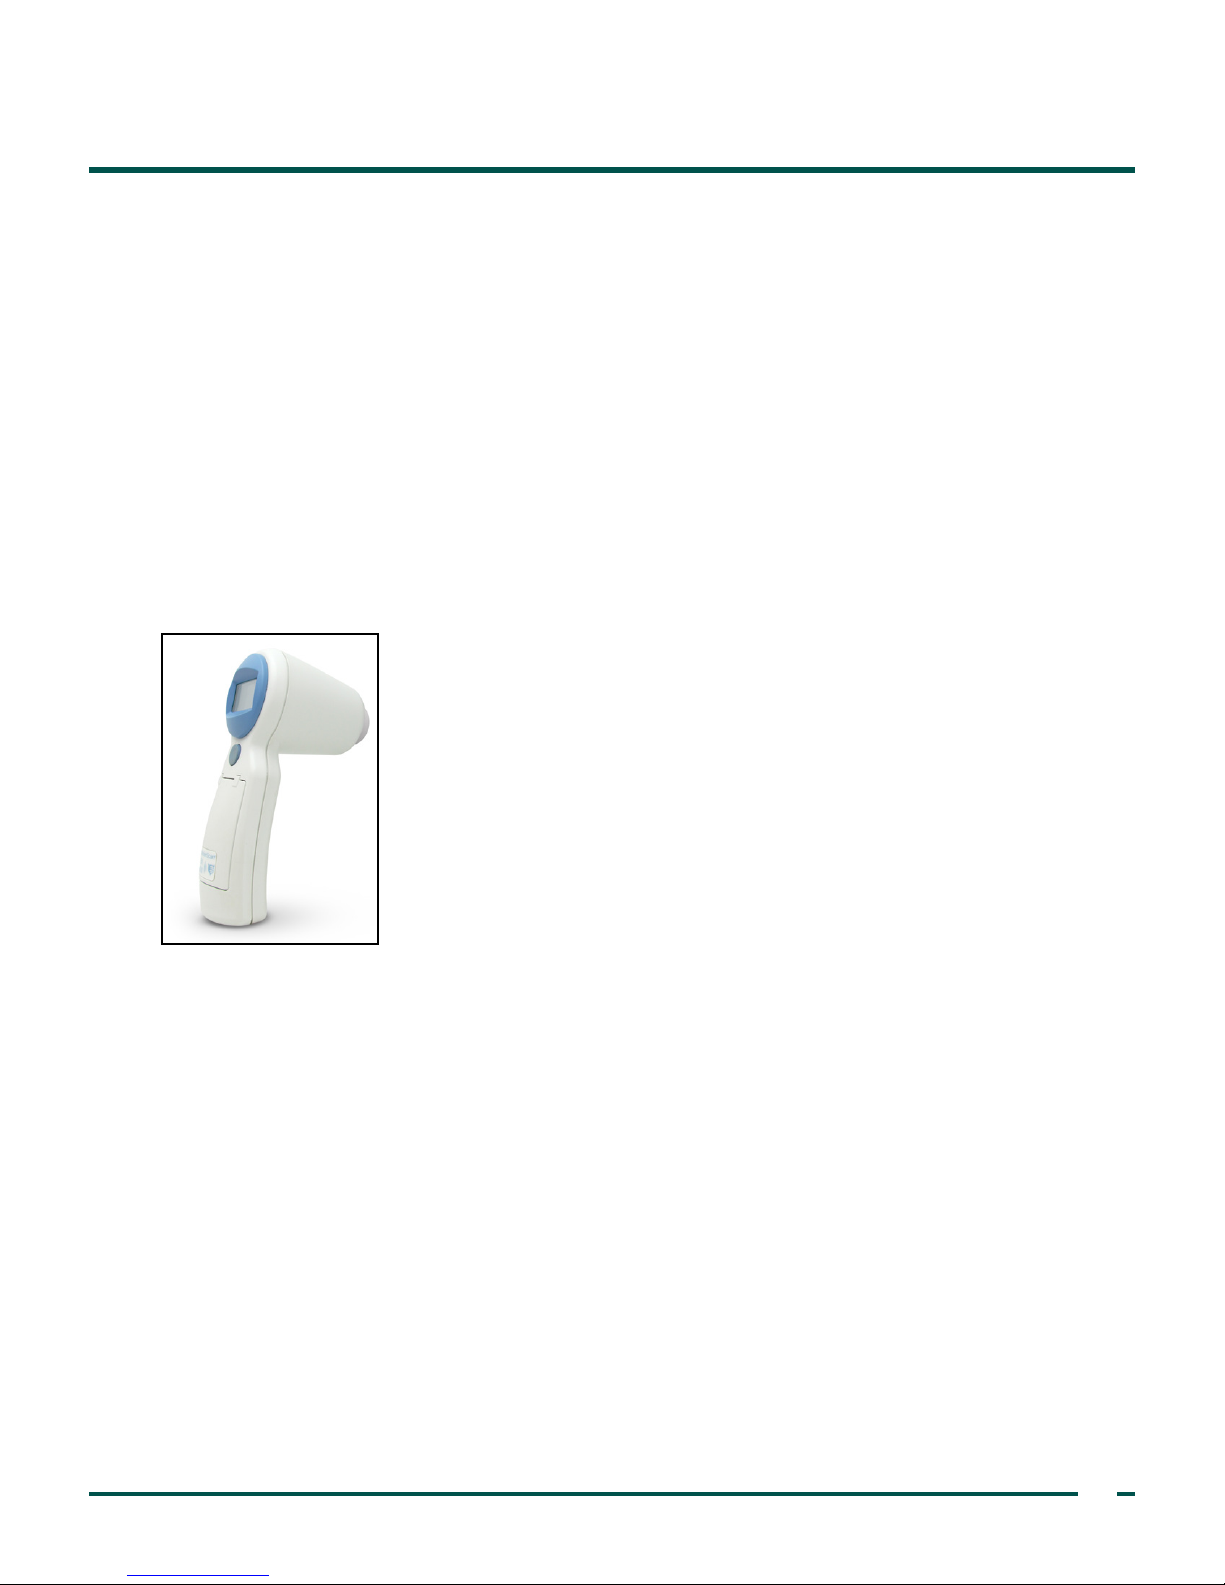
The BladderScan BVI6100 device is a portable ultrasound instrument. Using patented Vmode®technology, it
provides a noninvasive measurement of urinary bladder volume.
The instrument consists of an ergonomic, battery‑powered, hand‑held probe that scans the patient’s bladder.
The LCD screen provides aiming assistance and displays an array of bladder measurement information.
BladderScan instruments are quick and easy to use. A sonographer is not required. The instrument measures
ultrasonic reflections on multiple planes inside the body, producing a three‑dimensional image. Based on this
image, the instrument calculates and displays the bladder volume.
Volume measurements made with Vmode ultrasound are more accurate than those from conventional
ultrasound, as they are based on a more complex, three‑dimensional image of the bladder.
BLADDERSCAN BVI6100
The hand‑held, portable BladderScan BVI6100:
• Measures bladder volume noninvasively.
• Takes scans quickly, providing test results in a matter of seconds.
• Is easy to operate: staff members can easily learn to scan patients quickly
and accurately.
• Allows for exam results and images to be downloaded, viewed and
printed using the optional ScanPoint®Image Management Technology.
• Is battery‑operated, lightweight, and portable.
SCANPOINT IMAGE MANAGEMENT TECHNOLOGY (OPTIONAL)
You may transmit bladder volume measurements and ultrasound images from your BladderScan instrument
to ScanPoint image management software. ScanPoint installs on a Windows®‑based computer and allows
viewing, printing, and archiving of patient exam results, including ultrasound images for patient records and
reimbursement (when applicable). Exam data and ultrasound images may be printed in a variety of report
formats from adhesive labels that may be affixed to patient charts, to full, letter‑size formats.
ScanPoint can also be used to calibrate your instrument. The ScanPoint image management technology
(ScanPoint software, license, and accessories) is available with the purchase of many BladderScan
instruments. Comprehensive service and warranty are provided under the ScanPoint Total ReliabilitySM Plan.
Note: Plan availability and conditions may differ depending on your location. For more information about
terms and availability, contact Verathon®Customer Care or your local representative.
ScanPoint Local Client (LC) is a stand‑alone, non‑networked version of the software. It is available for use
with the BladderScan BVI6100 instrument.

8
ScanPoint with QuickPrint is a network‑based version of the application. Archived patient data is
stored securely on HIPAA‑compliant, Verathon®‑maintained servers. Users can access records from any
Internet‑enabled, Windows‑based PC. ScanPoint with QuickPrint allows users to maintain the most recent
software for their instruments, to calibrate their instruments themselves without having to send them in for
service, and also enables remote diagnostics and troubleshooting by Verathon service technicians.
SYSTEM COMPONENTS & ACCESSORIES
REQUIRED SYSTEM COMPONENTS
Table 1. Required System Components and Accessories
PART DESCRIPTION
BladderScan BVI6100
Hand‑held, wireless, battery‑operated, ultrasound bladder volume
instrument.
Charging cradle
Use the charging cradle to charge the BladderScan instrument’s
internal battery. The charging cradle plugs directly into an electrical
wall outlet. Before using your BladderScan instrument, you must
charge it for a minimum of 6hours.
BladderScan BVI6000 series in‑service CD
Includes the electronic version of this operations and maintenance
manual.
Activation tool
If needed, use this tool in order to press the Activation button on
the instrument.

9
Operations & Maintenance Manual: Introduction
OPTIONAL COMPONENTS & ACCESSORIES
The following optional items are available to enhance the capabilities of your BladderScan instrument. Please
contact Verathon®Customer Care or your local representative for more information on any of the following
Verathon products.
Table 2. Optional Components and Accessories
PART DESCRIPTION
Local Client
Local Client
Scan Point, Verat hon and the Verathon Torch are
trademar ks of Verathon Inc. ©2017 Verathon Inc.
Verathon Inc.
20001 North Creek Parkway
Bothell, WA 98011, USA
Tel: 800 331 2313 (USA & Canada only)
Tel: 425 867 1348 Fax: 425 883 2896
Verathon Medical (Europe) B.V.
Willem Fenengastraat 13
1096 BL Amsterdam, The Netherlands
Tel: +31 (0) 20 210 30 91
Fax: +31 (0) 20 210 30 92
verathon.com
0900-1009
0900-1025-04-40
ScanPoint®LC Software install CD
Installs ScanPoint Image Management System on a stand‑alone
(non‑networked) Windows®PC. For more information, see ScanPoint
Image Management Technology (Optional).
ScanPoint with QuickPrint Install CD
Installs ScanPoint with QuickPrint software on a network‑enabled
Windows PC. For more information, see ScanPoint Image
Management Technology (Optional).
ScanPoint docking station
Used with ScanPoint image management technology. Transmits data
from the BladderScan instrument to the ScanPoint host computer and
simultaneously recharges the instrument battery.
Calibration kit (requires ScanPoint with QuickPrint software)
The calibration tank base holds a spiral‑shaped calibration target
and 4.2liters of water. The indentation in the tank lid places the
instrument in a known and repeatable location with respect to the
spiral target. Self‑calibration takes about 15 minutes.
ScanPoint label writer
Prints exam results on adhesive label media. Requires installation
of ScanPoint software on a Windows®PC. The following items are
related to the ScanPoint label writer:
• USB Cable—Connects the ScanPoint label writer to the ScanPoint
host computer.
• Power Cord—Connects the ScanPoint label writer power adapter
to a wall outlet.
• Power Adapter—Connects the power cord to the label writer.
• Roll of Labels—Labels in roll format properly sized for the
ScanPoint label writer.
Battery replacement kit
Contains a replacement lithium‑ion battery and instructions for
installing it.

10
BUTTONS, PARTS, & ICONS
INSTRUMENT PARTS & BUTTONS
Figure 1. BVI6100 Parts
LCD screen
Scanhead
Activation
button
Infrared window
Top button
Scan button
Table 3. BVI6100 Parts and Buttons
PART PURPOSE
Scan button Press to take a scan.
Scanhead
The scanhead transmits and receives ultrasound waves, automatically moving its
internal transducer 360º in order to scan twelve different planes, producing a
three‑dimensional image of the bladder.
Top button Press to select gender.
Activation button Press to reactivate the BladderScan instrument if the battery becomes completely
discharged.
LCD screen Displays bladder volume measurements and other scan, patient, and instrument
data.
Infrared (IR) window Enables the BladderScan instrument to communicate with a
ScanPoint®‑equipped PC via the ScanPoint docking station.

11
Operations & Maintenance Manual: Introduction
SCREEN ICONS
The following icons may appear on the instrument LCD screen.
Table 4. Probe screen icons
ICON MEANING
Battery power level.
Female gender option is selected. Select this option only for women who have not
had a hysterectomy. Deselect for all others, male or female.
Bladder imaging in progress. Hold instrument steady.
Solid: Indicates that the bladder was not centered within the ultrasound field of view.
However, the bladder volume measurement is still accurate. Re‑aiming is optional.
Flashing: Indicates that the aim was “off target.” In order to get an accurate bladder
volume measurement, you must re‑aim the probe in the direction of the arrow.
The patient’s actual bladder size is larger than the ultrasound field of view.
Indicates the number of days remaining until the next required calibration.

12
BATTERY ICON
The battery icon is located in the lower‑right corner of the instrument’s LCD screen and indicates the power
level of the battery. The instrument can be charged at any time, but must be recharged when the battery is
completely discharged.
Table 5. Battery status icons
BATTERY ICON DESCRIPTION
Battery is fully charged and ready for use.
Battery is 50–75% charged.
Battery is 25–50% charged.
Battery is nearly discharged and may only have enough power for few scans.
Recharge the battery as soon as possible.
The battery is completely discharged. The bladder volume instrument will not work
until it is recharged.
Scrolling segments indicate that the battery is charging.
13
Operations & Maintenance Manual: Setting up
SETTING UP
To help you get up and running as quickly as possible, the next few pages explain how to:
1. Perform Initial Inspection
2. Charge the Instrument
3. Activate the BladderScan Instrument (Optional)
4. Install ScanPoint Software (Optional)
PROCEdURE 1. PERFORM INITIAL INSPECTION
When you receive the instrument, Verathon®recommends that an operator familiar with the instrument
perform a full visual inspection of the system for any obvious physical damage that may have occurred during
shipment.
1. Verify that you have received the appropriate components for your system by referring to System
Components & Accessories.
2. Inspect the components for damage.
3. If any of the components are missing or damaged, notify the carrier and Verathon Customer Care or your
local representative.
PROCEdURE 2. CHARGE THE INSTRUMENT
In order to maintain electrical safety, use only the provided, medical‑grade power adapter,
battery, and battery charger.
WARNING
The charging cradle, power adapter, and power cords are not intended for patient contact.
Ensure 2m (6ft) is maintained between the patient and these components.
WARNING
Before using your BladderScan instrument for the first time, or when the battery becomes completely
discharged, you must charge your instrument battery for approximately 6 hours or until it is fully charged. In
this procedure, you set up the charging cradle and use it to charge thebattery.
Note: If you have already installed ScanPoint®on your computer and installed the docking station, then you
can use the docking station to charge the instrument.
When you are not using your instrument, Verathon recommends that you store it in the charging cradle in
order to ensure that the instrument is always sufficiently charged. The charging cradle cannot overcharge the
battery.

14
1. Plug the charging cradle into an electrical wall outlet.
2. Place the BladderScan instrument in the charging cradle. The scrolling‑segments battery icon displays,
indicating that the instrument is charging.
If the battery icon does not appear, then the instrument was completely discharged. Allow the battery to
charge for 2hours. If the scrolling‑segments battery icon does not appear after 2hours, reactivate the
instrument according to the following procedure.
PROCEdURE 3. ACTIVATE THE BLAddERSCAN INSTRUMENT (OPTIONAL)
Complete this procedure if the battery is completely discharged, or if after 2hours in the charging cradle the
instrument does not show the scrolling‑segments battery icon.
1. Using the tip of the activation tool, press the Activation button located just above the Scan button.
2. Place the BladderScan instrument in the charging cradle or docking station until the “full battery” icon is
displayed.
Note: When you are not using your instrument, Verathon®recommends that you store it in the charging
cradle in order to ensure that your instrument is always sufficiently charged. The charging cradle cannot
overcharge the battery.
PROCEdURE 4. INSTALL SCANPOINT SOFTWARE (OPTIONAL)
If you are using ScanPoint®Image Management Technology, install it according to the instructions in the
ScanPoint user’s manual. Refer to the manual for further instructions on how to use ScanPoint or how
to set up and install the ScanPoint label writer. For more information, see the section ScanPoint Image
Management Technology (Optional).
Other manuals for BVI 6100
1
Table of contents
Other BLADDERSCAN Medical Equipment manuals


Popular Medical Equipment manuals by other brands


Getinge
Getinge Arjohuntleigh Nimbus 3 Professional Instructions for use

Mettler Electronics
Mettler Electronics Sonicator 730 Maintenance manual

Pressalit Care
Pressalit Care R1100 Mounting instruction

Denas MS
Denas MS DENAS-T operating manual

bort medical
bort medical ActiveColor quick guide

AccuVein
AccuVein AV400 user manual


