Blatchford Elite2 User manual

2
EN
Contents
Contents.................................................................................................................................................................2
1 Description and Intended Purpose ....................................................................................................................3
2 Safety Information....................................................................................................................................................4
3 Construction ...............................................................................................................................................................5
4 Function........................................................................................................................................................................6
5 Maintenance...............................................................................................................................................................6
6 Limitations on Use....................................................................................................................................................6
7 Bench Alignment.......................................................................................................................................................7
8 Fitting Advice..............................................................................................................................................................8
9 Dis-assembly Instructions......................................................................................................................................9
10 Assembly Instructions .......................................................................................................................................... 10
11 Technical Data ......................................................................................................................................................... 12
12 Ordering Information ........................................................................................................................................... 13
938223SPK2/1-0121

3
These instructions for use are for the practitioner.
The term device is used throughout these instructions for use to refer to Elite2.
Application
This device is to be used exclusively as part of a lower limb prosthesis.
Intended for a single user.
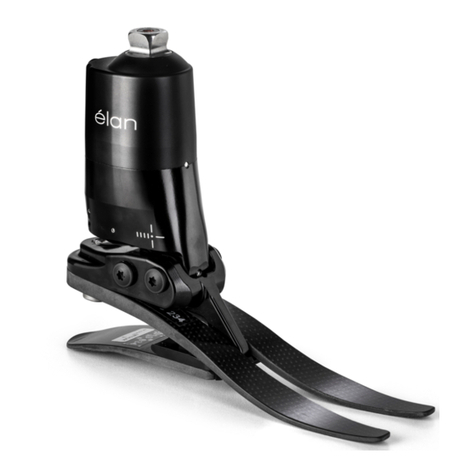
A high-energy-return foot. The independent heel and toe springs provide axial deection. The
split toe provides good ground compliance.
Activity Level
This device is recommended for users that have the potential to achieve Activity Level 3 or 4. Of
course there are exceptions and in our recommendation we want to allow for unique, individual
circumstances and any such decision should be made with sound and thorough justication.
1 Description and Intended Purpose
Contraindications
This device might not be suitable for Activity Level 1 individuals or for competitive sports events,
as these types of users will be better served by a specially designed prosthesis optimized for their
needs.
Ensure that the user has understood all instructions for use, drawing particular attention to the
section regarding maintenance.
Has the ability or potential for ambulation with variable cadence.
Typical of the community ambulator who has the ability to traverse most environmental
barriers and may have vocational, therapeutic, or exercise activity that demands prosthetic
utilization beyond simple locomotion.
Activity Level 3
Clinical Benets
• Vertical compliance for shock-absorption
• High levels of mobility for active users
• Improved prosthetic side push-o
• Increased walking speed
938223SPK2/1-0121

4938223SPK2/1-0121
Note… If in doubt choosing between two categories, choose the higher rate spring set.
Foot Spring set recommendations shown are for transtibial users.
For transfemoral users we suggest selecting a spring set one category lower, refer to
tting advice Section 7 to ensure satisfactory function and range of movement
Low Daily walking and occasional sports such as golf and hiking
Moderate Aggressive walking, frequent or daily sports such as jogging
High Daily activities such as distance running, climbing, lifting and carrying heavy objects for
vocational purposes
User Weight
Foot spring
set
Impact
Activity
44–52
(100-115)
53–59
(116-130)
60–68
(131-150)
69–77
(151-170)
78–88
(171-195)
89–100
(196-220)
101-116
(221-255)
117-130
(256-285)
131-147
(286-325)
148-166
(326-365)
kg
(lb)
Low 31123456789
Mod4123456789
High 4 2 3 4 5 6 7 8 9
Spring Set Selection
2 Safety Information
Any changes in the performance or
function of the limb e.g. restricted
movement, non-smooth motion or
unusual noises should be immediately
reported to your service provider.
Always use a hand rail when descending
stairs and at any other time if available.
The device is not suitable for extreme
sports, running or cycle racing, ice and
snow sports, extreme slopes and steps.
Any such activities undertaken are done
so completely at the users’ own risk.
Recreational cycling is acceptable.
Assembly, maintenance and repair of
the device must only be carried out by
a suitably qualied clinician.
The user should contact their clinician if
their condition changes.
Ensure only suitably retrotted vehicles
are used when driving. All persons are
required to observe their respective
driving laws when operating motor
vehicles.
To minimise the risk of slipping and
tripping, appropriate footwear that
ts securely onto the footshell must be
used at all times.
This warning symbol highlights important safety information which must be
followed carefully.
Important:
For higher impact users, do not exceed the weight limit for individual springs.

5938223SPK2/1-0121
Glide
Sock
Foot
Shell
Principal Parts:
• Carrier Assembly (aluminum/stainless steel/
titanium)
• Heel & Toe Springs (e-Carbon)
• Spring Attachment Screws (titanium)
• Glide Sock (UHM PE)
• Foot Shell (PU)
3 Construction
Toe Spring
Carrier
Heel
Spring
Toe Spring
Screw
Heel Spring
Screws
4
15Nm
13A/F
25Nm
(cat 8&9)
4
15Nm
(cat 1–7)
Heel Wedge

6938223SPK2/1-0121
4 Function
This device comprises an e-carbon toe and independent heel spring.
Heel and toe springs are attached to the carrier using titanium screws. The foot is wrapped in a
UHM PE sock which is in turn surrounded by a PU foot shell.
5 Maintenance
6 Limitations on Use
Maintenance must be carried out by competent personnel.
We recommend the following annual maintenance:
• Remove the foot shell and glide sock, check for damage or wear and replace if necessary.
• Check all screws for tightness, clean and reassemble as necessary.
• Check heel and toe springs for signs of delamination or wear and replace if necessary. Some
minor surface damage may occur after a period of use, this does not aect the function or
strength of the foot.
The user should be advised:
• Any changes in performance of this device must be reported to the practitioner
e.g. reduced energy return or unusual noises.
• The practitioner must also be informed of any changes in body weight and/or activity level.
If this device is used for extreme activity, the maintenance level and interval should be reviewed
and if required advice and technical support sought to plan a new maintenance schedule
dependent upon the frequency and nature of the activity. This should be determined by a local
risk assessment carried out by a suitably qualied individual.
The user should be advised that a regular visual check of the foot is recommended, signs of wear
that may aect function should be reported to their service provider (e.g. signicant wear or
excessive discoloration from long term exposure to UV).
Cleaning
Use a damp cloth and mild soap to clean outside surfaces, do not use aggressive cleansers.
Intended Life
A local risk assessment should be carried out based upon activity and usage.
Lifting Loads
User weight and activity is governed by the stated limits.
Load carrying by the user should be based on a local risk assessment.
Environment
This device is waterproof to a maximum depth of 1
meter.
Thoroughly rinse this device with fresh water after
use in abrasive environments such as those that may
contain sand or grit, for example, to prevent wear or
damage to moving parts.
Thoroughly rinse with fresh water after use in salt or chlorinated water.
Foot units must be adequately nished to prevent water ingress into the foot shell where
possible. If water enters the foot shell, it should be inverted and dried before further use.
Exclusively for use between -15˚C and 50 ˚C.

7938223SPK2/1-0121
0-10mm
½½
7 Bench Alignment
Static Alignment
Setup length
With exion, adduction and abduction
properly accommodated, set the limb length
5mm longer than the sound side to allow for
compression and deection of the foot springs
during gait. This should be re-assessed once
the dynamic trial commences and the length
adjusted accordingly.
Build Line
This should fall 10mm anterior to the centre
of the pyramid (with heel height properly
accommodated). The socket should be
positioned accordingly.
Dynamic Alignment
Coronal Plane
Ensure that M-L thrust is minimal by adjusting
relative positions of socket and foot.
Sagittal Plane
Check for smooth transition from heel strike
to toe-o. Ensure also that when standing the
heel and toe are evenly loaded and that both
are touching the oor.
Transfemoral Alignment
Align trans-femoral components according
to tting instructions supplied with the knee,
keeping the build line relative to the foot as
shown.
Build
Line
*
Approx. 1/3 2/3
Allow for users
own footwear
*
Transfemoral
Transtibial

8938223SPK2/1-0121
8 Fitting Advice
Spring sets are supplied as matched pairs i.e. the heel and toe spring are designed to work
together to give smooth progression for most users.
Heel Wedge
A heel wedge is supplied with the foot. Fitting the wedge will have the eect of stiening the
heel spring. These can be taped in place for trial. For permanent tting, wedges should be
adhered in place by application of Loctite 424 (926104) between the lower contacting surface of
the heel and the wedge.
Heel Stiness
Progression throughout the stance phase should be smooth; heel function is key to this process:
• Too soft a heel or load line excessively posterior will result in sinking at heel strike and
diculty in getting over the toe.
• Too hard a heel or load line excessively anterior will result in a rapid progression through
mid-stance or jarring at heel strike.
Symptoms Remedy
Heel too soft
• Sinking at heel strike
• Diculty climbing over the
toe (toe feels too hard)
1. Add heel wedge
2. Move socket anteriorly in relation
to the foot
(excess movement may result in
drop o)
3. If 1 and 2 fail, t a stier spring set
Heel too hard
• Rapid transition from heel
strike through stance phase
• Diculty in controlling heel
action, foot jars into mid-
stance
• Foot feels too rigid
1. Remove heel wedge (if tted)
2. Move socket posteriorly in relation
to foot
3. If 1 and 2 fail, t softer spring set
Toe/ Blade too soft
• Rapid progression through
mid-stance.
• ‘Drop o’ at higher Activity
Levels
1. Move socket posteriorly in
relation to foot
2. Plantarex foot slightly - note:
some
re-alignment may be required
Please contact your supplier if it is not possible to achieve a smooth gait after following the
advice above.

9
2
43
1.
938223SPK2/1-0121
Carefully remove, with a knife, any foam cosmesis
that may be adhered to the foot shell.
Remove securing screws from the carrier and
pull the toe spring towards the rear of the foot.
Remove the toe spring to leave the carrier/heel
spring assembly alone inside the foot shell.
Rotate the carrier/heel spring assembly toward
the rear of the foot to dis-engage the spring from
it’s location in the shell.
9 Dis-assembly Instructions
Use appropriate health and safety equipment at all times including
extraction facilities.
Be aware of nger trap hazard at all times.
1

10 938223SPK2/1-0121
10 Assembly Instructions
Assemble heel spring onto carrier as shown.
Use special Allen wrench 940080, Torque spanner
adaptor 940081 or 13A/F spanner 940273. Use
Loctite 243 (926012) and torque to 15Nm.
Fit glide sock onto the toe spring, heel spring
and carrier assembly as shown.
If a foam cosmesis is to be tted, roughen top
surface of foot shell to provide ideal bonding
surface.
Attach the toe spring
to the carrier using
Loctite 243 (926012)
on the bolts.
1. For spring rates 1
to 7 use 4 A/F Allen
wrench and torque
to 15Nm. Do not use
external hex, this is
reserved for loosening
the bolt, if required.
2. For spring rates
8 and 9 use 13 A/F
spanner and torque to
25Nm. Ensure correct spring set number is marked on
left side of carrier. Use black marker to cover
unwanted segments.
4
15Nm
or
13A/F
Heel
spring
Carrier
Glide
Sock
1.2.
3.4.
5.6.

11 938223SPK2/1-0121
10 Assembly Instructions (continued)
Slide a metal shoe horn between heel spring and
back of foot shell opening and lever the spring
down into the foot shell.
Press heel spring into location in shell as shown.
The shoe horn should be located approx. 30 mm
below top surface of foot shell
Bond foam cosmesis to top surface of the foot
shell as shown using Thixox adhesive (926204)
or equivalent and shape to suit.
Slide whole assembly into foot shell. Ensure
correct t into toe spring slot.
Ensure heel spring’s correct t into location slot
in foot shell.
30mm
below heel
Toe spring location
in foot shell
heel spring
location slot
7.8.
9.10.
11.

12 938223SPK2/1-0121
Fitting Length
11 Technical Data
Operating and
Storage Temperature Range:
-15˚C to 50 ˚C
(5˚F to 122 ˚F)
Component Weight (size 26): 680 g (1lb 7oz)
Activity Level: 3–4
Maximum User Weight: 166kg (365 lb)
Proximal Alignment Attachment: Male Pyramid (Blatchford)
Range of Adjustment: ±7° Angular
Build Height:
(See diagram below)
130mm
Heel Height: 10mm
130mm
10mm
*
* Sizes
22-26 = 65mm
27-28 = 70mm
29-30 = 75mm

13 938223SPK2/1-0121
12 Ordering Information
Spring Kit
Glide Sock
Order Example Available from size 22 to size 30:
EL22L1S to EL30R9S
EL22L1SD to EL30R9SD
(add‘D’ for a dark tone foot shell)
Spring Kit Foot Size
22-24 25–26 27–28 29–30
Set 1 539701S 539710S 539719S Special order
Set 2 539702S 539711S 539720S Special order
Set 3 539703S 539712S 539721S 539730S
Set 4 539704S 539713S 539722S 539731S
Set 5 539705S 539714S 539723S 539732S
Set 6 539706S 539715S 539724S 539733S
Set 7 539707S 539716S 539725S 539734S
Set 8 539708S 539717S 539726S 539735S
Set 9 539718S 539727S 539736S
Foot Shell (For dark add ‘D’)
EL 25 L N 3 S
Size Side
(L/R)
Width*
(N/W)
Spring Set
Category
Sandal
Toe
e.g. EL25LN3S
Size/Side Narrow Wide
22L 539038S -
22R 539039S -
23L 539040S -
23R 539041S -
24L 539042S -
24R 539043S -
25L 539044SN 539044SW
25R 539045SN 539045SW
26L 539046SN 539046SW
26R 539047SN 539047SW
27L 539048SN 539048SW
27R 539049SN 539049SW
28L - 539050S
28R - 539051S
29L - 539052S
29R - 539053S
30L - 539054S
30R - 539055S
Sizes 22-24 531011
Sizes 25-30 532811
*Sizes 25-27 only. For all other sizes, omit the Width eld.

14 938223SPK2/1-0121
Liability
The manufacturer recommends using the device only under the specied conditions and for
the intended purposes. The device must be maintained according to the instructions for use
supplied with the device. The manufacturer is not liable for any adverse outcome caused by any
component combinations that were not authorized by them.
CE Conformity
This product meets the requirements of the European Regulation EU 2017/745 for medical
devices. This product has been classied as a class I device according to the classication rules
outlined in Annex VIII of the regulation. The EU declaration of conformity certicate is available at
the following internet address: www.blatchford.co.uk
Compatibility
Combination with Blatchford branded products is approved based on testing in accordance
with relevant standards and the MDR including structural test, dimensional compatibility and
monitored eld performance.
Combination with alternative CE marked products must be carried out in view of a documented
local risk assessment carried out by a Practitioner.
Warranty
This device is warranted for 36 months - foot shell 12 months - glide sock 3 months.
The user should be aware that changes or modications not expressly approved could void the
warranty, operating licences and exemptions.
See Blatchford website for the current full warranty statement.
Reporting of Serious Incidents
In the unlikely event of a serious incident occurring in relation to this device it should be
reported to the manufacturer and your national competent authority.
Environmental Aspects
Where possible the components should be recycled in accordance with local waste handling
regulations.
Retaining the Packaging Label
You are advised to keep the packaging label as a record of the device supplied.
Medical Device Single Patient – multiple use
Manufacturer’s Registered Address
Blatchford Products Limited, Lister Road, Basingstoke RG22 4AH.
Trademark Acknowledgements
Elite Foot and Blatchford are registered trademarks of Blatchford Products Limited.

15 938223SPK2/1-0121
Vsebina................................................................................................................................................................. 15
1 Opis in namen uporabe....................................................................................................................................... 16
2 Varnostne informacije .......................................................................................................................................... 17
3 Konstrukcija.............................................................................................................................................................. 18
4 Delovanje.................................................................................................................................................................. 19
5 Vzdrževanje.............................................................................................................................................................. 19
6 Omejitve uporabe.................................................................................................................................................. 19
7 Poravnanost sestava.............................................................................................................................................. 20
8 Nasvet za namestitev............................................................................................................................................ 21
9 Navodila za razstavljanje ..................................................................................................................................... 22
10 Navodila za sestavljanje....................................................................................................................................... 23
11 Tehnični podatki..................................................................................................................................................... 25
12 Podatki za naročanje............................................................................................................................................. 26
SL
Vsebina

16 938223SPK2/1-0121
Ta navodila za uporabo so predvidena za zdravnika.
Izraz pripomoček se v teh navodilih za uporabo uporablja za Elite2.
Uporaba
Pripomoček je predviden izključno kot del proteze za spodnje okončine.
Predviden je za enega uporabnika.
Stopalo z visokim povratkom energije. Neodvisni vzmeti na peti in sprednjem delu stopala
omogočata aksialni pregib. Deljeni veliki prst zagotavlja dobro prileganje tlom.
Stopnja aktivnosti
Pripomoček je priporočen za uporabnike, ki imajo potencial doseči stopnjo aktivnosti3 ali4.
Seveda pa obstajajo izjeme, zato pri našem priporočilu dopuščamo možnost edinstvenih,
posameznih okoliščin, odločitev o tem pa je treba sprejeti na osnovi temeljite presoje.
1 Opis in namen uporabe
Kontraindikacije
Ta pripomoček ni primeren za uporabnike s stopnjo aktivnosti1 ali za vrhunske športne
prireditve, saj morajo ti uporabniki uporabljati proteze, razvite posebej za njihove potrebe.
Poskrbite, da uporabnik razume vsa navodila za uporabo in ga še posebej opozorite na poglavje
o vzdrževanju.
Ima sposobnost ali potencial za premikanje s spremenljivim korakom.
Običajno pokretna oseba, ki lahko premaga večino okoljskih ovir in morda opravlja poklicno,
terapevtsko ali zično aktivnost, ki zahteva uporabo proteze, ki presega zgolj preprosto
gibanje.
Stopnja aktivnosti 3
Klinične prednosti
• Navpično blaženje sunkov
• Visoke stopnje mobilnosti za aktivne uporabnike
• Izboljšan odriv na strani proteze
• Hitrejša hoja

17 938223SPK2/1-0121
Opomba… Če ste v dvomih in ne veste, katero kategorijo izbrati, izberite sklop vzmeti z višjo stopnjo.
Priporočila za sklope stopalnih vzmeti so prikazana za transtibialne uporabnike.
Pri transfemoralnih uporabnikih priporočamo, da izberete sklop vzmeti eno
kategorijo nižje; glejte napotke za namestitev v poglavju7, da zagotovite ustrezno
delovanje in razpon gibanja.
Nizka Dnevna hoja in občasne športne aktivnosti, kot sta golf in pohodništvo.
Zmerna Agresivna hoja, pogosta ali dnevna športna aktivnost, kot je tek.
Visoka Dnevne aktivnosti, kot so tek na dolge razdalje, plezanje, dviganje in nošenje težkih
predmetov pri izvajanju poklica.
Sklop stopalnih
vzmeti
Teža uporabnika
Sunkovita
obremenitev
Aktivnost
44–52
53–59
60–68
69–77
78–88
89–100
101–116
117–130
131–147
148–166
kg
nizka 3 1 1 2 3 4 5 6 7 8 9
zmerna 4 1 2 3 4 5 6 7 8 9
visoka 4 2 3 4 5 6 7 8 9
Izbor sklopa vzmeti
2 Varnostne informacije
Morebitne spremembe v delovanju
okončine, kot so npr. omejeno gibanje,
zatikajoče gibanje ali neobičajni zvoki,
je treba nemudoma javiti ponudniku
storitve.
Pri hoji po stopnicah navzdol in vedno,
ko je sicer mogoče, je treba uporabljati
držala.
Pripomoček ni primeren za ekstremne
športe, tekaške ali kolesarske dirke,
športe na ledu in snegu ter za hojo po
strminah in strmih stopnicah. Tovrstne
aktivnosti uporabnik izvaja na lastno
odgovornost. Rekreativno kolesarjenje
je sprejemljivo.
Pripomoček lahko sestavi, vzdržuje in
popravlja samo ustrezno usposobljen
zdravnik.
Uporabniku naj se obrne na svojega
zdravnika, če se njegovo stanje
spremeni.
Poskrbeti je treba, da se za vožnjo
uporabljajo samo ustrezno predelana
vozila. Vse osebe morajo pri upravljanju
motornih vozil upoštevati veljavne
cestno-prometne predpise v svoji
državi.
Za zmanjšanje nevarnosti zdrsa in
spotika je treba vedno uporabljati
ustrezno obutev, ki se dobro prilega na
ogrodje stopala.
Ta opozorilni simbol poudarja pomembne varnostne informacije, ki jih je
treba natančno upoštevati.
Pomembno:
pri uporabnikih, izpostavljenih visokim sunkovitim obremenitvam, ne prekoračite
omejitve teže za posamezne vzmeti.

18 938223SPK2/1-0121
Drsna
nogavica
Ogrodje
stopala
Glavni deli:
• Nosilni sestav (aluminij/nerjaveče jeklo/titan)
• Petna vzmet in vzmet sprednjega dela stopala (e-karbon)
• Vijaki za pritrditev vzmeti (titan)
• Drsna nogavica (UHM PE)
• Ogrodje stopala (PU)
3 Konstrukcija
Vzmet za prst
Nosilec
Petna
vzmet
Vijak vzmeti za prst
Vijak petne
vzmeti
4
15Nm
13A/F
25Nm
(kat.8 in9)
4
15Nm
(kat. 1–7)
Petna zagozda

19 938223SPK2/1-0121
4 Delovanje
Ta pripomoček je sestavljen iz e-karbonskega sprednjega dela stopala in samostojne petne
vzmeti.
Petna vzmet in vzmet za prste sta pritrjeni na nosilni sestav z vijaki iz titana. Stopalo je ovito v
nogavico iz UHM PE, ki je obdana z ogrodjem stopala iz poliuretana.
5 Vzdrževanje
6 Omejitve uporabe
Vzdrževanje lahko izvaja samo usposobljeno osebje.
Priporočamo naslednje letno vzdrževanje:
• Snemite ogrodje stopala in drsno nogavico ter ju preglejte, če sta kje poškodovana ali
obrabljena in ju po potrebi zamenjajte.
• Preverite, ali so vsi vijaki čvrsto pritrjeni in jih očistite ter po potrebi znova vstavite.
• Preglejte petno vzmet in vzmet za prst, če laminirani sloji kje odstopajo ali so obrabljeni in
jih po potrebi zamenjajte. Po določenem času uporabe se lahko pojavijo manjše površinske
poškodbe, ki pa ne vplivajo na delovanje ali stabilnost stopala.
Uporabniku je treba svetovati naslednje:
• Morebitne spremembe v delovanju tega pripomočka, kot so npr. zmanjšani povratek energije
ali neobičajni zvoki, je treba sporočiti zdravniku.
• Zdravnika je prav tako treba obvestiti o morebitnih spremembah v telesni teži in/ali stopnji
aktivnosti.
Če se pripomoček uporablja za ekstremne aktivnosti, je treba preveriti raven in interval
vzdrževanja ter se po potrebi posvetovati s tehnično podporo glede novega vzdrževalnega
načrta na osnovi pogostosti in narave aktivnosti. To je treba določiti na osnovi lokalne ocene
tveganja, ki jo mora opraviti ustrezno usposobljen posameznik.
Uporabniku je treba svetovati, da je stopalo priporočeno redno vizualno pregledovati in da je
treba znake obrabe, ki lahko vplivajo na delovanje pripomočka, prijaviti ponudniku storitve
(npr. večja obraba ali prekomerno razbarvanje zaradi dolgotrajne izpostavljenosti UV-žarkom).
Čiščenje
Z vlažno krpo in blagim milom očistite zunanje površine. Ne uporabljajte agresivnih čistil.
Predvidena uporabna doba
Na osnovi aktivnosti in uporabe je treba opraviti lokalno oceno tveganja.
Dviganje bremen
Glede na težo in aktivnost uporabnika veljajo navedene omejitve.
Pri prenašanju bremena mora uporabnik upoštevati lokalno oceno tveganja.
Okolje
Pripomoček je vodotesen do globine največ 1m.
Po uporabi v abrazivnih okoljih, kot so tista,
ki vsebujejo pesek ali prod, je treba pripomoček
temeljito sprati v sladki vodi, da preprečite obrabo ali
poškodbo premikajočih se delov.
Pripomoček je prav tako treba temeljito sprati po uporabi v slani ali klorirani vodi.
Stopalne enote morajo biti ustrezno zaščitene, da se prepreči vdor vode v ogrodje stopala, kadar
je to mogoče. Če voda prodre v ogrodje stopala, je treba stopalo pred ponovno uporabo obrniti
navzven in posušiti.
Samo za uporabo med –15in 50˚C.
Primerno za potopitev v tekočine

20 938223SPK2/1-0121
0-10mm
½½
7 Poravnanost sestava
Statična prilagoditev
Nastavitev dolžine
Ko ste eksijo, krčenje in iztegovanje
ustrezno prilagodili, lahko dolžino okončine
nastavite 5mm daljšo od zdrave okončine,
da upoštevate kompresijo in deeksijo
proteznega stopala ter aksialnih blažilnih
vzmeti. Pred izvedbo dinamičnega pomerjanja
je treba to znova preveriti in ustrezno
prilagoditi dolžino.
Linija obremenitve
Ta mora potekati 10mm anteriorno do sredine
piramidnega adapterja (s pravilno nastavljeno
višino pete). Ležišče mora biti ustrezno
prilagojeno.
Dinamična prilagoditev
Čelna ravnina
S prilagoditvijo položajev ležišča in stopala
poskrbite, da bo premik M-L minimalen.
Sagitalna ravnina
Preverite, ali je prehod s pete na prste
enakomeren. Prav tako preverite, ali sta peta in
prst med stanjem enakomerno obremenjena
in se oba dotikata tal.
Transfemoralna prilagoditev
Poravnajte transfemoralne dele skladno z
navodili za nameščanje, priloženimi kolenu,
pri čemer naj bo linija obremenitve poravnana
s stopalom, kot je prikazano.
Linija
obremenitve
*
Pribl. 1/3 2/3
Upoštevajte višino pete
uporabnikove obutve.
*
Transfemoralno
Transtibialno
This manual suits for next models
4
Table of contents
Languages:
Other Blatchford Personal Care Product manuals

