manuals.online logo
Brands
  1. Home
  2. •
  3. Brands
  4. •
  5. Blaupunkt
  6. •
  7. Car Video System
  8. •
  9. Blaupunkt 640 SERIES User manual

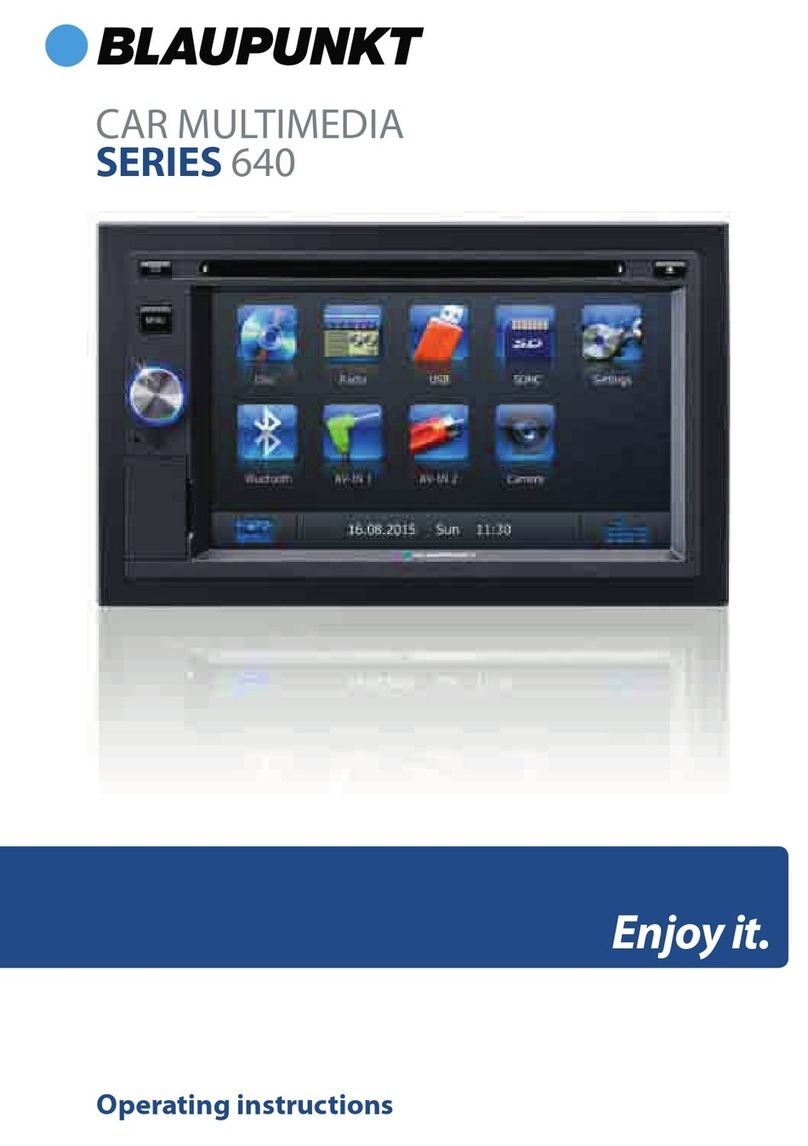
Blaupunkt 640 SERIES User manual

BLAUPUNKT
CAR
MULTIMEDIA
SERIES
640
Bedienungsanleitung
Operating
instructions
Notice
d'utilisation
lstruzioni
d'uso
Bedieningshandleiding
Bruksanvisning
Manual
de
instrucciones
lnstru~oes
de
servi~o
Betjeningsvejledning
Kayttoohjeet
061"1yi£c;
XEIPIOIJOU
lnstrukcjaobstugi
Hasznalati
utmutato
lf1HCTPYK4MR
no
3KCnnyaTa4MM
lnstrucliuni
de
utilizare
P'bKOBOACTBO
3a
pa6oTa
CD
DIS
button
Short press: Adjust
the
display brightness
Long press: Switch
off
the
display
With inserted microSD card
with
navigation data:
Short press: Start
the
navigation
In navigation mode:Call
up
menu
of
active source
Long press: Switch
off
the
display
@
MENU
button
Short press: Call
up
main menu
In
the
main menu: Call
up
menu
of
active source
Long press: Call
up
Bluetooth
111
function
directly
®
Rotary/pushbutton
Short press: Switch on device
In operation:
Mute
audio source
Long press: Switch
off
device
Turn: Adjust volume
0
Infrared receiver
for
remote control
0
Microphone
®Cover
Controls
-
Device
0
Reset
button
Access
only
with
open cover
Restoring
the
original factory settings
of
the
device.
Caution! All personal settings will be lost!
® microSD card reader
Access
only
with
open cover
The card reader supports microSD cards on which
either audio/video files
or
navigation data can be
stored. ·
®
Front
AV-IN
socket (source
AV-IN
1)
Access
only
with
open cover
@
USB
socket
Access
only
with
open cover
@ Touchscreen user interface
@
~
button
(Eject)
Eject a DVD/CD
@ DVD/CD drive
23
Controls-
Remote control
@
HOME
button
Call
up
main menu
In
the
main menu:Call
up
menu
of
active source
@
~I
EJECT
button
Eject a DVD/CD
@
RADIO
button
Start radio mode
@)
DISC
button
Starting DVD/CD
mode
@
DISbutton
Short press: Adjust
the
display brightness
Long press: Switch
off
the
display
@
f.ll
ZOOM
button
Call
up
overview
of
audio files
Zoom in on imagearea
@
@I
BAND
button
Call
up
folder overview
Select waveband/memory bank
24
I
@
AUDIO
button
Select playback language (ifavailable on
DVD)
@
EQbutton
Call
up
equaliser menu
@
..,..1..,.1
.6.1
T
button
Navigate in menus/lists
Tuning
into
stations manually
(.6.1
T)
Calling stored stations
(.,..I..,.)
@
OKbutton
Confirm selection
@
MENU
button
Call
up
DVD
menu
Displaythe folder/file list
@
Numberbuttons
0-9
@
*I
RPT
button
Repeatfunction
@-button
Delete last character
of
an
entry
@
#I
MIX
button
Random track play
@
~button
Ending/rejecting a phone call
@
r'button
Answer acall
@
GOTO
button
Directlyselect title, chapter, movie
or
playtime
@
•¢button
Mute
audio source
@
SETUP
button
Call
up
settings menu
@
VOL
+
1-
button
Adjusting
the
volume
@
fS
I
ANGLE
button
Call
up
overview
of
movies
Selectcamera viewing angle (ifavailable on
DVD)
@
~I
SUBTITLE
button
Call
up
overview
of
images
Select subtitle language
(if
available
on
DVD)
@)
..,./llbutton
Start and interrupt playback
@
1+111111+1
button
Selecttitle, chapter, movie
Fast
searching
@
MAPbutton
Starting
the
navigation
@
BTbutton
Starting Bluetooth mode
@
<!>I
POWER
button
Switching device
on/off
@
SRC
button
Select source
Contents
Safety notes ..............................................................
26
DVD/CD/USB/microSDHC/iPod media playback..•. 33
Symbols used
...................
...............
......................................
26
Basic
information
....................
...............
..............................
33
Road
safety
.............................................................................
26 DVD/CD
mode
......................
......
.......................................
...
33
General safety notes
......
..
............
................
.......................
26
USB
data carrier
....................................................................
34
Declaration
of
conformity
.................................................
26 microSDHC cards
.......................................
......
....................
34
Cleaning notes..........................................................
26
Disposal notes...........................................................
26
iPod/iPhone via
USB
...........................................................
34
DVD movie playback
............
........
......................................
34
Audio playbackfrom DVD/CD,
USB,
microSDHC
Scope
of
delivery
......................................................
27
or
iPod/iPhone
..............
........
................................................
35
Placing
the
device in operation...............................
27
Video playbackfrom DVD/CD,
USB
or
microSDHC
...
36
Switching
on/off
...................................................................
27
Image playbackfrom DVD/CD,
USB
oraudioSDHC.. 37
Volume
.....................................................................................
27
Bluetooth
mode
........................................................
37
Main menu
.............................................................................
27 Starting Bluetooth
mode
..................................................
37
Setting
the
reception area
................................................
27 Registering Bluetooth devices
........................................
37
Radio
mode
...............................................................
28
Telephone
mode
..................................................................
38
Start radio
mode
..................................................................
28 Audio playback via Bluetooth streaming
....................
38
Select
memory
bank
...........................................................
28
Tuning
into
a station
...........................................................
28
Storing stations manually
.................................................
28
Audio playbackvia
app
control
(Android cell phone)
........
........
...........................................
38
Bluetooth settings
..........................................................
..
...
39
Storing stations automatically (Travelstore)
..............
28
Pandora®
mode
(available only
in
the
US,
Scanning stations
................
.................................
................
28
Australia
and
New
Zealand)........................•............
39
Switching
RDS
on/off
.........................................................
28 Requirements
........
..........
.....................................................
39
Switching
the
REG
function (regional Connecting
the
iPod/iPhone device
............................
39
programmes)
on/off
...........................................................
29 Connecting
the
Android device
....................................
40
Switching
the
AF
(alternative frequencies) Starting
the
Pandora®
mode
............................................
40
function
on/off
......................................................................
29 Station list menu
..................................................................
40
Adjusting
the
seek
tuning
sensitivity
......................
.....
29 Pandora®
Error Messages
..................................................
40
Selecting
the
programme
type
and starting
seek
tuning
.............................................................................
29
Switching
priority
for
trafficannouncements
on/off
...............
...............
..........................................................
29
External audio/video sources..................................41
AV
inputs
.................................................................................
41
Video
input
................................................
..
............
..
..........
...
41
Navigation (only
for
devices
with
navigation).......
29
External
monitor.......................................................
41
Loading navigation data
........
................
...........................
29
Sound settings..........................................................
41
Download
of
map
data
......................................................
29 Volume distribution (fader/balance)
............................
41
Starting
the
navigation
......................................................
30 Equalizer
..................................................................................
41
Initial startup
..............................................
...........................
30
Basic settings ............................................................
42
Entering a destination
..............................
..........................
30 General
....................................
.
...............................................
42
Address
...........................................
...
........
.
...........................
.30 Video
.........................................................................................
42
Points
of
Interest
..................................................
...............
31
Sound
.......................................................................................
42
Setting route
options
.........................................................
32
Time
............................................
....
..........................
.
...............
42
Map Settings
..........................................................................
32
Language
................................................................................
42
Bluetooth
................................................................................
43
Volume
.....................................................................................
43
Useful information ...................................................
43
Warranty
..............
......
..
..
.
....
.....................................................
43
Service
......................................................................................
43
Connection diagram ..............................................
322
Appendix.................................................................
323
25
Safety
notes
I
Cleaning
notes
I
Disposal
notes
Safety
notes
The car sound system was manufactured according
to
the
state
of
the
art
and established safety guidelines.
Even
so,
dangers may occur
if
you
do
not
observe
the
safety notes in these instructions.
These instructions
are
intended
to
familiarise you
with
the most
important
functions. Detailed information
can
befound on the Internet underwww.blaupunkt.com.
Read
these instructions carefully and completely
before using
the
car sound system.
Keep the instructions at a location
so
that
they
are always accessible
to
all
users.
Always
pass
on thecar sound system
to
third parties
together
with
these instructions.
In addition, observe the instructions
of
the devices used
in conjunction
with
this car sound system.
Symbols
used
These instructionsemploythe following symbols:
At
DANGER!
Warns about injuries
CAUTION!
Warns aboutdamages
to
the
DVD/CD drive
A
DANGER!
A~
)
Warns about high volume
CE:
The
CE
mark confirms the compliance
with
EU
directives.
..-
Identifiesasequencing step
Identifiesa listing
Road
safety
Observe thefollowing notes aboutroad safety:
Use
your
device
in
such
away that
you
can
always
safely control your vehicle.
In
case
of
doubt, stop
at a suitable location and operate your device while
thevehicle
is
standing.
As
the
driver,you may
not
use
the applications
that
will distractyou fromtraffic(de-
pending on the scope
of
functions
of
thedevice,
e.g.
viewingvideos, entering a destination).
Follow the driving recommendations during the
route guidance only if
you
are not violating any
traffic regulations!
Traffic signs and traffic regula-
tions have always priorityoverdriving recommenda-
tions.
26 1
Always
listen at a moderate volume
to
protect
your
hearing and
to
be able
to
hear acoustic warn-
ing signals
(e.g.
police sirens). During mute phases
(e.g.
when changing
the
audio source), changing the
volume
is
not
audible. Do
not
increase the volume
during this mute phase.
General safety
notes
Observe the following note
to
protect yourself against
injuries:
Do
not modifyor
open
the
device.
The device contains
a
Class
1laser
that
can cause injuries
to
your
eyes.
Use
as
directed
This car sound system
is
intended for installation and
operation in a vehicle
with
12
V vehicle system voltage
and must be installed in a
DIN
slot. Observe
the
output
limits
of
thedevice. Repairs and installation,
if
necessary,
should be performed bya specialist.
Installation instructions
You
may
only
install the car sound system yourself
if
you
are experienced in installing car sound systems and
are
very familiar
with
the electrical system
of
thevehicle.
For
this purpose, observe
the
connection diagram
at
the
end
of
these instructions.
Declaration ofconformity
The Blaupunkt Technology GmbH declares
that
the
de-
vice complies
with
the basic requirements and
the
other
relevant regulations
of
the
directive 1999/5/EC.
The declaration
of
conformitycan be found on the Inter-
net underwww.blaupunkt.com.
Cleaning
notes
Solvents, cleaning and scouring agents
as
well
as
dash-
board spray and plastics care product may contain in-
gredients
that
will damage the surface
of
the car sound
system.
Use
onlya
dry
orslightlymoistenedcloth
for
cleaning the
car sound system.
Disposal
notes
):(
Do
not
dispose
of
your old
unit
in
the
household
_ trash!
Use
the return and collection systems available
to
dispose
of
the
old device,
the
remote control and
exhausted batteries.
Scope
of
delivery
The
scope
of
delivery includes:
Car
sound system
Remote control (incl. battery)
TMC
tuner (onlyfor devices with Europe navigation)
microSD card
with
navigation data in the microSD
card slot (only
for
devices
with
navigation)
GPS
antenna
External Bluetooth microphone
Getting started
Supportframe
Small parts set
Installation material
Connecting cable
Placing
the
device in operation
Caution!
Transport securing screws
Ensure
that
the transport securing screws
at
the
top
side
of
the device are removed before the startup
of
the de-
vice.
Switching on/off
Switching on/offwith
the
rotary/pushbutton
..-
For
switch-on,
press
the rotary/pushbutton G).
..-
For
switch-off, hold the rotary/pushbutton ®
pressed for more than 2seconds.
Switching
on/off
via vehicle ignition
If
the car sound system
is
connected
with
the vehicle
ignitionand
it
was switched
off
with
the rotary/pushbut-
tonG),
it
is
switched on
or
off
with
the ignition.
Volume
Adjusting
the
volume
You
can
adjust the volume in steps from 0 (off)
to
50
(maximum).
..-
Turn the rotary/pushbutton ®
to
change the vol-
ume.
Muting
the
car sound system {Mute)
..-
Briefly
press
the rotary/pushbutton ®
to
mute
the
device
or
to
reactivate theprevious volume.
Scope
of
delivery
1
Startup
Main menu
In
the main menu, you
press
the buttons on the touch-
screen
to
call
up
the different sources and operating
modes.
..-
Press
the
MENU
button
®.
-Or-
..-
In the current source,
press
the [
1\-]
button.
As
long
as
you
do
not
select anewaudio source, the
last active audio source
is
played back.
Note:
The figures used in these instructions are intended
to
facilitate the explanations and details may deviate
from yourdevice.
Setting the reception area
This car sound system
is
designed for operation in differ-
ent
regions
with
different frequency ranges and station
technologies.
The
factory default
of
the reception
area
is
"Europe (FM/AM)".
You
can set adifferent reception
area.
..-
In the main menu,
press
the
[Settings]
button.
The Settings menu
is
displayed.
..-
In
the
bottom
area
of
the Settings menu,
press
the
[General]
button.
The currentsetting
is
displayed behind "Radio region".
..-
Tap
twice (double-click) on the [
Radio
region]
but-
ton
to
displaythe list
of
available reception
areas.
..-
Select the desired reception
area
bydouble-clicking.
The list
is
hidden,the selected reception
area
is
set.
..-
Press
the [
1\-
]
button
.
The main menu
is
displayed again.
27
Radio mode
Radio mode
Start radio mode
..-
In
the
main menu, press
the
[
Radio]
button.
Theradio playback menu
is
displayed.
h Radio
11
:
30
FM1
P3
REG
TA
AF
OX
89.00
90
90
P3
105
80
96
20
97
40
87
50
~
~~
•
.......
=~::
.-"
,-··~
~,,
Select
memory bank
Different
memory
banks and wavebands are available.
Up
to
6 stations can be stored in each memorybank.
..-
Press
the
[
~]
button
repeatedly until
the
desired
memory
bank
is
displayed.
FMl
~
FM2
~
FM3
~
AM1
~
AM2
~
FM1
Tuning
into a station
Tuning into stations manually
..-
Brieflypress
the
[I~]
or
[
..
I]
button
once
or
sev-
eral times
to
change
the
frequency in increments.
Enter broadcastfrequency directly
If
the
frequency
of
the
desired stations
is
known,
it
can
be entered directlyvia
the
touchscreen.
..-
Press
the
[
••••]
button
to
displayadditional operat-
ing
options.
..-
Press
the
[
555]
button.
A numeric keypad
is
displayed for
the
frequency
input.
..-
Enter
the
frequency
of
the
desired station
with
the
numerickeypad.
..-
Press
the
[OK]
button.
The radio playback menu
is
displayed,
the
station
of
the
frequency entered
is
played back.
Starting station seektuning
..-
Press
the
[I~]
or
[
..
I]
button
for approx. 2 sec-
onds
to
start station
seek
tuning.
28
The radio tunes
into
the next receivable station.
Note:
For
the
reception
area
Europe: In
the
FM
waveband,
only traffic information stations are tuned
into
if
the
priority
for
traffic information
is
switched on.
Storing stations manually
_.
Select
the
desired
memory
bank
with
the
[
~]
but-
ton
.
..-
Set
the
desired station.
..-
Press
one
of
the
memory
buttons [
Pl
] - [ P6 1
for
approx. 2 seconds
to
store
the
current station
at
the
button.
The station
is
stored.
Storing stations automatically
(Travel
store)
With Travelstore, you can automatically
sG?arch
for
and
store
the
6
FM
stations offering
the
strongest reception
in
the
region in
the
current memorybank. Any previously
stored stations in this
memory
bank are deleted in the
process.
..-
Select a
memory
bank.
..-
Press
the
[
••••]
button
to
displayadditional operat-
ing options.
..-
Press
the
[
TS]
button
.
The
tuner
starts
the
automatic station seek tuning.
After
the
storing
is
completed,
the
radio plays the
station
at
memory
location 1
of
the
previously
se-
lected
memory
bank.
Note:
For
the
reception area Europe:With switched-on pri-
ority
for
traffic information,
only
traffic information
stations are stored.
Scanning
stations
You
can
use
the
scan
function
to
play all
the
receivable
stations
of
the
current waveband
for
a
few
seconds.
..-
Press
the
[
_,.]
button.
The seek
tuning
searches for stations in
the
current
waveband.
Each
receivable station
is
played
for
afew
seconds in
the
process.
..-
Pressing
the
[
_,.]
button
again selects
the
currently
scanned station and plays
it
back.
Switching
RDS
on/off
Many
FM
stations broadcast an
RDS
(Radio Data System)
signal in addition
to
their
programme in
the
reception
area Europe
that
allows additional functions, such
as
the
display
of
the
station name.
..-
Press
the
[
••••]
button
to
displayadditional operat-
ing options.
..-
Press
the
[ RDS]
button
to
switch
the
RDS
function
on
or
off.
If
the
RDS
function
is
switched on,
RDS
is
displayed
in white.
..-
Press
the
[
V]
buttorr
to
hide
the
additional oper-
ating options,
or
wait
until
they
are automatically
hidden.
Switching
the
REG
function (regional
programmes) on/off
Some
RDS
stations dividetheir programmes into region-
al
programmes
with
different contents at certain times.
If
the
REG
function
is
activated,
the
car sound system
changes
only
to
those alternate frequencies
of
the set
station
on
which
the
same
regional
programme
is
being
broadcast.
..-
Press
the
[REG]
button
to
switch
the
REG
function
on
or
off.
The
REG
button
is
illuminated
if
the
REG
function
is
switched on.
Switching
the
AF
(alternative frequencies)
function
on/off
If
the
AF
function
is
activated,thecar sound system auto-
maticallytunes into
the
bestreceivable frequencyfor
the
station
that
is
currentlyset.
..-
Press
the
[
AF]
button
to
switch the
AF
function on
or
off.
The
AF
button
is
illuminated
if
the
AF
function
is
switched on.
Adjusting
the
seektuning sensitivity
The
seek
tuning sensitivity decides whether the auto-
matic station seek tuning finds only strong stations
or
also weaker stations
that
may be noisy.
..-
Press
the
[
LO
1
or [
OX]
button
to
adjustthe sensitiv-
ity
of
station seek tuning.
If
LO
is
displayed, only stations with a strong signal
are
found during seek tuning.
If
OX
is
displayed, stations with a strong and weak
signal are found during seektuning.
Selecting
the
programmetype and
5tarting seektuning
fou
can
select a programme type
with
the
PTY
function
:o
purposefully search
for
stations, for example,
that
Jroadcast rock music
or
sportevents.
,...
Press
the
[
••••]
button
to
display additional operat-
ing options.
.-
Press
the
[
PTY]
button
to
display
the
programme
types.
.-
Scroll through
the
list with [
T]
I
[.A]
and
tap
on
the
desired programmetype
to
select it.
.-
Press
the
[
PTV]
button
to
start
PTY
seek tuning.
If
a station broadcasts a programme
with
the select-
ed programmetype, this station
is
played back.
Radio
mode
1
Navigation
Switching priorityfor traffic
announcements
on/off
In
the reception region Europe,
an
FM
station can iden-
tifytraffic announcementsvia
an
RDS
signal.
If
priorityfor
traffic reports
is
switched on, atraffic report
is
automati-
cally switched through, even
if
the
car sound system
is
currently not
in
radio
mode.
..-
Press
the [
TA
]
button
to
switch thepriorityfortraffic
announcements on
or
off.
TheTA
button
is
illuminated
if
the
priority for traffic
announcements
is
switched on.
Navigation
{only for devices with navigation)
Loading navigation data
The navigation software and map data are located on a
microSD card. For devices
with
navigation,
the
device
is
delivered
with
the
microSD card in
the
microSDcard slot.
To
be able
to
use
the
navigation, the microSD card must
be inserted in the card slot.
Important note:
The card reader supports microSD cards on which
either audio/video files
or
navigation data can be
stored. The microSD card
for
the navigation may
not
contain any otherfiles besides the navigation data.
..-
Open
the
cover ® underneath the rotary/pushbut-
ton.
..-
Insert the microSD card with its labelled side
to
the
left(flattened corner
to
the
top) and its contacts first
into
the
card slot ® until
it
clicks into place.
Download
of
map
data
To
ensure
that
you havethelatestversion
of
themapdata
when you purchase the device, you have 30 days from
the first
GPS
positioning
to
download
the
latest version
of
the
map data once and free
of
charge
to
the
standard
microSD card from
the
Internetatwww.naviextras.com.
You
can
always purchase map material from this site at
alatertime.
Important note:
If
the
microSD card
is
lost
or
damaged, the naviga-
tion map licenseassociated
with
the
card will be lost.
Inthis
case,
the
licensemustbe purchased anewwith
a new microSD card.
29
Navigation
Starting
the
navigation
..-
In
the
main menu, press [Navigation 1
to
start
the
navigation mode.
The navigation menu
is
displayed.
If
you start
the
navigation for
the
first time,
the
setup wizard
is
dis-
played.
Initial startup
If
you start
the
navigation
for
the
firsttime,asetupwizard
appearswhich performs
the
basic settings
for
the
naviga-
tion.
..-
Adjust the language
for
the
navigation. This can be
a different language from
the
other
functions
of
the
device .
..-
Confirm the selection
with
[
v
].
The end-userlicense agreement
is
displayed.
..-
Read
the
end-user license agreement.
If
you agree
with
the
terms and conditions, press [
v].
The configuration wizard starts.
..-
Press
[
v
1
to
continue.
..-
Select avoice
for
the
voice
output
of
the
navigation.
Various voices are available
forthe
languages.
..-
Confirm
the
selection
with
[
v ]
.
..-
Specify
the
time
format and
the
units
forthe
naviga-
tion. Next, press [
v
].
On
the
next screen, you can perform your preferred
route settings.
..-
If
necessary, change
the
entries
by
pressing
the
dis-
played menu entries.
..-
Press
[
v
],
afteryou adjusted
the
settings.
..-
Touch [
v
],
to
finish
the
configuration.
The navigation menu
is
displayed.
Entering a destination
Destinations can beentered in differentways:
Via
the
ad-
dress
or
as
point
of
interest from
the
database
of
points
of
interest.Points
of
interestcan besights, museums, sta-
diums, petrol stations.
30
Address
..-
Open
the
navigation menu.
..-
Press
on [
Find
].
The menu
for
the
destination entry
is
displayed.
..-
Press
[
Find
Address
].
The menu
for
the
address entry
is
displayed.
..-
Enter
the
country, city and street in succession
as
well
as
the
intersection
or
house number.
To
do
so,
press
the
corresponding entry in
the
address
entry
menu.
A menu for
text
entry
is
displayed.
..-
Enter
the
desired destination via
the
keyboard.
With every character entered,
the
entry in
the
input
line
is
automaticallycompleted.
..-
If
the
name
of
the
desired destination
is
displayed in
the
address line, press
the
[
v]
button.
The selected destination
is
displayed on
the
map.
.-
Press
[
Next
1
to
start
the
route guidance.
Thecalculation
of
the route starts. Depending onthe
distance between start and destination,
the
route
calculation maytake some time.
After the route calculation
is
complete,
the
param-
eters
of
the
route, such
as
distance and time, are
displayed.
In
addition,
the
entire route
is
displayed
on the map.
.-
Press
[Go!
1
to
start the route guidance.
,ointsof Interest
.-
Open the navigation menu.
.-
Press
on [ Find
1.
The menu for
the
destination entry
is
displayed.
r
Press
[ Find Places
1.
Navigation
The
point
of
interest menu
is
displayed
.
18:40
Find
Places
f($
®Petrol
Station
.,
Along Route
Quick
Search
cv
Parking
Along Route At My Destination
~"
®
Restaurant
Jl
Along Route
0
Accommodation
Custom
Search
At My Destination
Back
..-
You
can
select a
point
of
interest from one
of
the
four predefined categories Petrol Station, Parking,
Restaurantand
Accommodation
or
start aseparate
search.
..-
For
example, press on
[Petrol
Station
1
to
quickly
find a petrol stations.
A list
of
petrol stations in
the
vicinity
of
the
vehicle
is
displayed.The petrol stations are sorted by distance
to
vehicle
.
18:40
Places Found
tr.\
Aral Char1ottenburg BismarckstraBe
'VI
BismarckstraBe
2, 10625
Charlottenburg
tr.\
Aral
Charlottenburg
Kaiser-Friedrich-StraBe
'VI
Kaiser
-
Fnednch-StraBe
45B,
10627
Charlottenburg
tr.\
Avia
Bothfeld
lm
Heidkampe
"Vrm
Heidkampe
76, 30659
Bothfeld
~I
lllllf
...,
7.3
km
G
9km
~
-
281
km
tr.\
Aral Vahrenheide VahrenwalderStraBe
~
'VI
Vahrenwalder Strafle
325, 30851
Vahrenheide
286
km
Back
More
Filter
..-
Selectapetrol stationfrom
the
listbypressing on
the
listentry.
The petrol stations
is
displayed on
the
map.
..-
Press
[
Next
1.
The route course and
the
route data are displayed.
..-
Press
[Go!
1
to
start
the
route guidance.
31
:I:
VI
...J
"
z
w
Navigation
Setting route options
In
the
route
options,
the
vehicle
type,
type
of
route
(quick, short, dynamic) and additional parameters are
defined which are required by
the
device
to
calculate
the
route according
to
your requirements.
You
define
the
route options during
the
initial configura-
tion
of
the
navigation,
but
you can change
them
for
any
route guidance.
Adjusting route options before
the
route guidance
..-
Call
up
the
navigation menu.
..-
Press
[
More
...
].
0 18:42
More...
"
,'A,/
((,.,
'"',,
,,
~·
•
:t·~:
! FuelUpdates and calculator Consumption
Settings Extras
'
'i
••••
'"
" 1
:
...
o
;
~
··-
Country Help
Sunrise & Trip Monitor Information
Sunset
Back
..-
Press
[ Settings ].
The settings menu
for
the navigation
is
displayed.
..-
Press
on
the
[ + ]
button
to
display
the
second page.
..-
Press
[ Route Settings ].
The route settings are displayed.
..-
Change
the
settings,
if
necessary.
..-
Press
[ Back] repeatedly
until
the
navigation menu
is
displayed again.
32
Changing route options during route guidance
..-
During a route guidance, press
the
[More]
button.
..-
Press
[ Route Settings].
The route settings are displayed
.
..-
Change
the
settings,
if
necessary.
..-
Press
[ Back ].
The route guidance
is
displayed again.
Map
Settings
With
the
map
settings, you can adjust the view mode
(2D
or
3D),
the
viewingangle
of
the map,
the
colours and
the
display
of
buildings and points
of
orientation
on
the
map. In addition,you can specify
for
categories
of
points
of
interestwhethertheyshould be displayed on
the
map,
e.g.
car dealerships, cafes, restaurants.
..-
Call
up
the
navigation menu.
..-
Press
[
More
...
].
..-
Press
[ Settings ].
The settings menu
forthe
navigation
is
displayed
.
..-
Press
on
the
[+]button
to
display
the
second page.
..-
Press
[
Map
Settings ].
Navigation IDVD/CD/USB/microSDHC/iPod media playback
The mapsettings are displayed.
..-
Change
the
settings,
if
necessary.
..-
Press
[Back
1
repeatedly until
the
navigation menu
is
displayed again.
Note:
You
can also change
the
map settings during the
route guidance:
..-
During a route guidance, press the
[More]
button.
..-
Press
[Map
Settings].
The map settings are displayed.
..-
Change the settings,
if
necessary.
..-
Press
[ Back].
The route guidance
is
displayed again.
DVD/CD/USB/microSDHC/iPod
media playback
Basic
information
The car sound system can be used
to
play audio DVDs/
CDs
(CDDA)
and DVD/CD-R/RWs
with
audio or
MP3
files
as
well
as
MP3
or
WMA files
on
USB
data carriers and
microSDHC cards.
Inaddition,you can viewmovies and imagesfrom DVDs/
VCDs/CDs,
USB
data carriers and microSDHC cards on
the
display
or
a connected monitor.
Forsafety reasons,
the
playback
of
moviesand imageson
the
integrated
monitor
is
allowed
only
while the vehicle
is
standing and
the
hand brake
is
applied. The
"BRAKE"
cable must be connected
with
the hand brake connec-
tion
of
the vehicle
(see
Connection diagram
at
the
end
of
these instructions).The movieplayback
on
an
external
monitor
is also possible while driving.
Notes:
•
To
ensure proper functioning, use
only
CDs
with
the
Compact-Disc logo and
DVDs
with
the
DVD
logo.
• Blaupunkt cannot guarantee
the
flawless func-
tion
of
copy-protected DVDs/CDs and all DVD/CD
blanks,
USB
data carriers and microSD cards avail-
able
on
the
market.
Note thefollowing information when preparing an MP3/
WMA data carrier:
Naming
of
tracks and directories: Max.
32
characters
without
the
file extension ".mp3"
or
".wma" (the use
of
morecharacters reduces
the
number
of
tracks and
folders
that
the car sound system can recognise)
DVD/CD formats: DVD/CD-R/RW, 0:
12
em
DVD/CD data formats:
ISO
9669 Level 1and
2,
Joliet
CD
burn speed: Max. 16x(recommended)
USB
format/file system:
mass
storage device
I
FAT/
FAT16/FAT32
microSD card file system:
FAT
/FAT16/FAT32
File extension
of
audiofiles:
-
.MP3
for MP3 files
-.WMA
for
WMAfiles
WMA files only
without
Digital Rights Management
(DRM)
and created
with
Windows Media• Player ver-
sion 8 or later
MP31D3 tags:Version 1and 2
Bit rate for creating audiofiles:
-MP3:
32
to
320 kbps
-WMA: 32
to
192 kbps
Maximum
number
of
files and directories:
-
USB
medium: Up
to
10,000 entries
-microSD cards: Up
to
10,000files.
DVD/CDmode
Inserting a DVD/CD
A Risk
of
severe damage
to
the
DVD/CD drive!
f5!A
Noncircular contoured DVDs/CDs and DVDs/
CDs
with
a diameter
of
8
em
(mini DVDs/CDs)
must
not
be used.
We
accept
no
responsibility for any damage
to
the
drive
that
may occur
as
a result
of
the
use
of
unsuitable
DVDs/CDs.
..-
Insert the DVD/CD
with
its printed side
up
into
the
DVD/CD tray@ until you feel a slight resistance.
The drive automatically draws in
the
DVD/CD and
checks its data. Afterwards,
the
playback starts in
DVD/CD
or
MP3
mode.
Note:
You
must
not
hinder
or
assist
the
drive
as
it
automati-
cally draws in
the
DVD/CD.
Ejecting a DVD/CD
..-
Press
the~
button
@
to
eject an inserted DVD/CD.
Note:
You
must
not
hinder
or
assist thedrive
as
it
ejects
the
DVD/CD.
33
DVD/CD/USB/microSDHC/iPod media playback
USB
data carrier
This device features a
USB
port
under
the
cover at
the
front
of
the
device.
Connecting a
USB
data
carrier
..-
Open
the
cover®
underneath
the
rotary/pushbut-
ton.
..-
Insert
the
USB
data carrier in
the
USB
socket@).
The device automaticallyswitches
to
USB
mode.The
dataare read,
the
playbackstarts
with
the first media
file recognized by
the
device.
Removing
the
USB
data
carrier
..-
Turn
off
the
car sound system.
..-
Disconnect
the
USB
data carrier.
microSDHC
cards
This device features an microSDHC card slot under
the
cover at
the
front
of
the
device.
Inserting
the
microSDHC card
..-
Open
the
cover®
underneath
the
rotary/pushbut-
ton.
..-
Insert the microSDHC card
with
its labelled side
to
the left (flattened corner
to
the
top) and its contacts
first
into
the
card
slot®
until
it
clicks intoplace.
The device automatically switches
to
microSDHC
mode.The data are read, the playbackstarts
with
the
first media file recognized
by
the
device.
Removing
the
microSDHCcard
..-
If
necessary, open
the
cover@.
..-
Push
on
the microSDHC card until
it
disengages.
..-
Pull the microSDHC card
out
of
thecard
slot®.
iPod/iPhone
via
USB
You
can connectnumerous
iPod®
and
iPhone®
models
to
the
car sound system via
the
USB
port
and control
the
audio playbackfrom
the
car sound system.
Note:
A list
of
compatible
iPod®
and
iPhone®
models
is
lo-
cated at
the
end oftheseinstructions.Blaupunktcan-
not
guarantee the flawless function
of
other
iPod®
and
iPhone®
models.
Use
a suitable adapter cable
to
connect your
iPod®
or
iPhone®
with
the
USB
port
of
the
car sound system.
..-
Open
the
cover ® underneath the rotary/pushbut-
ton.
..-
Insert
the
USB
plug
of
theadapter cable into
the
USB
socket
of
the
device.
The deviceautomatically switches
to
USB
mode.The
data are read,
the
playbackstarts
with
thefirst media
file on
the
iPod®/iPhone® recognized bythe device.
34 1
DVD
movie playback
The car sound system can play video
DVDs
and
VCDs.
Af-
ter
inserting
the
DVD,
the
playback starts automatically.
The
DVD
menu
is
displayed.
You
can navigatein
the
DVD
menu
by
touching
the
corre-
sponding buttonsin the
DVD
menu
on
the touchscreen.
After starting the movie via the menu
of
the
DVD,
the
movie
is
displayed.The playbackmenu for
DVDs
is
hidden.
..-
Briefly touch the touchscreen once
to
display the
playback menu again.
The playback menu
is
shown.
[
II
]
Pause
playback, call up DVD menu.
[
I~
]
Select previous chapter.
[II/
....
] Interruptplaybackand continue playback.
[
._.,
] Select nextchapter.
[
555
1
Call
up
keypad for direct selection
of
titles,
chapters
or
playing time.
[
••••
] Show additional operating options.
..-
Tap
on [
••••]
to
display additional operating
op-
tions
of
the
playback menu.
[ V ]
Hide additional operating options.
[
ii:i
]
Display equalizer.
[ A-B ]
Define range for repeat function.
[
....
] Selectplaybacklanguage (only
if
supported
bythe
DVD)
.
[
C,
]
Show subtitles (only
if
supported bythe
DVD).
[
~
] Switch repeat function for title, chapter or
area
A-Bon/off.
[
IDI
] Adjust image.
Audio playbackfrom DVD/CD,
USB,
microSDHC
or iPod/iPhone
The principles
of
the
audio playback (MP3/WMA) from
datacarriers
or
iPod
8
/iPhone• areidentical
for
all sources.
..-
Select
the
desired source via
the
main menu.
The device changes
to
the
desired source and
the
playback starts.
If
the
playback does
not
start
with
the
audio playback,
..-
press
the
[
~]
button
to
change
to
the
folder/file list.
..-
Press
the
[ ]
button
to
displayall
the
folders and
files
of
the
data carrier
(not
in iPod
8
/iPhone• mode).
-Or
-
..-
Press
the
[
f.l
1
button
to
displayall
the
audio
files
of
the
data carrier.
h
l_tSQ
1'220
~
11
:30
....
J.J
Music Track 1
..!..
J:J
J.J
Mus1c
Tmck
2
-
J.J
Mus1c
Track
3
J.J
1Vlus1c
Track
4
-
J.J
Mus1c
Tmck
5
"!'
[ A. ]
Scroll
through
the
list page
by
page.
[ T ]
Scroll
through
the
list page
by
page.
[
t.
] Change
to
next higherfolder level.
[
.....
] Open selected folder
or
start titles.
-Or-
...,
....
.....
,../
Brieflytap twice (double-dick)
on
the
name
of
the
folder/track.The folder
is
opened/the
track.
is
started.
[ X ]
Exit
the
folder/file list.
Afterstarting atitle,
the
playback menu
is
displayed.
h
USb
Ftle
Name
2/16
t
11
:3
0
•
Ar~1~t
N~~me
T1tle N
...
tme
.
r::l
f"'
Alourn
f\J
...
1me
;),_,
44
"~
4~
~
,
......
II
....
,
.....
[ ~
] Display
the
folder/file list.
[
1.-
] Short press: Title selection.
Long press:
Fast
searching.
[
11/
.....
]
Interruptplayback and continue playback.
DVD/CD/USB/mlcroSDHC/iPod
media
playback
[
.-.1
] Short press: Title selection.
Long press:
Fast
searching.
[
••••
] Show additional operating options.
..-
Tap
on
[
••••
]
to
display additional operating
op-
tions
of
the
playbackmenu.
h
USB
F11e
Name
~!16
+:
11
:30
•
Arttst
Name-
T1tle
Name
r:1
,...
Aloum
Name
~
.......
II
.....
....,
....
..
!!!
~
--
--
-
--..::
[ V ]
Hideadditional operating options.
[
555
] Display keypad
to
directly
enter
the
number
of
the
desired
title
.
Audioplayback
from
DVD/CD,
USB
or
microSDHC:
[
~
] Start and end
REPEAT
function.
The
REPEAT
mode
changes each
time
the
[
~
1
button
is
pressed.
Display
REPEAT
mode
.•
.•o
Repeat currenttrack
,.
•'•
Repeat current folder
,.
•'
0
Repeat all tracks
of
data carrier
,•
•'
Repeat
title
off
[X ]
Start MIX random track play and end
it
again.
If
the
MIX
function
is switched on,
the
X
symbol
is
displayed in white.
The MIX
mode
depends
on
the
selected
REPEAT
function.
REPEAT
MIX
mode
mode
display
,•
.•o
No
random track play
,.
•'•
Mixing tracks
of
the
current
folder
=·
Mixing tracks
of
the
data
carrier
1
3s
:I:
VI
:::i
\!'
z
w
DVD/CD/USB/microSDHC/iPod media playback
Audio playback
from
iPod®/iPhone®:
[ t::; 1
Start
and
end
REPEAT
function
.
The
REPEAT
mode
changes each
time
the
[
~
]
button
is
pressed.
Display
REPEAT
mode
.•
•'O
Repeat currenttrack
=·
Repeat current selection
..
~
Repeat
title
off
[X ] Start MIX random track play and end
it
again.
The MIX
mode
changes each
time
the
[X
]
button
is
pressed.
Display MIX
mode
:x:o Mixing tracks
of
the
current
selection
:x:e Mixing tracks
of
the
current
album
:X: Random track playback
off
Note:
The random trackplay
of
tracks dependson
the
iPod®/iPhone®
model used.
[ 55:5 1
Display equalizer.
Video playbackfrom
DVD/CD,
USB
or
microSDHC
..-
Select
the
desired source via
the
main menu.
The device changes
to
the
desired source and
the
playback starts.
If
the
playbackdoes
not
start
with
the
video playback,
..-
press the [
i]
button
to
change
to
the
folder/file list.
..-
Press
the
[ 1
button
to
displayall
the
foldersand
files
of
the
data carrier.
-Or -
..-
Press
the
[Iii
1
button
to
display all
the
video files
of
the
data carrier.
h
USB
1/
20
t
1
1
:30
·
-----
-",··~"·
--
:
-
•.>;:
~.
,
[]
Movie
1
...
.....
.
~
'll"l'
..
:
[]
Movie 2 v
......
·
-
--~
---
[]
Movie
3
)''''
•••
6
[]
Movie
4
.._....
....
[]
Movie
5
"!"
,
36
Note:
Folders and videos are selected
and
started
as
de
-
scribed
under
audio
playback.
If
you selected a movie,
the
playback
is
started. During
the
movie playback,
the
playback menu
is
hidden.
..-
Briefly touch
the
touchscreen once
to
display
the
playback menu again.
The playback menu
is
shown.
[ i 1
Display
the
folder/file list.
[
I~
] Select previous movie.
[II
I
....
1
Interrupt
playback and continue playback.
[ .-.1 1
Select next movie.
[
55!
1
Call
up
keypad
for
direct selection
of
movie
or
playing time.
[ •••• 1
Showadditional operating options.
..-
Tap on [
••••
1
to
display additional operating
op
-
tions
of
the
playback
menu
.
[ V 1
Hide additional operating options.
[
5!!:!!
1 Displayequalizer.
[
~
1
Switch repeat
function
for movie
or
folder
on/off
.
[
IDI
1 Adjust image.
[ ..... 1 Select playbacklanguage(only
if
supported
by
the
movie).
[
~
1
Show subtitles (only
if
supported
by
the
movie).
DVD/CD/USB/microSDHC/iPod media playback
I
Bluetooth
mode
Note:
You
can play back video files stored on
an
iPod•J
iPhone•
with
this device. For this purpose, the iPod•J
iPhone• must be connected
with
the
device using a
special cable
(USB
-
AV)
that
is
commercially avail-
able.
Image playbackfrom DVD/CD,
USB
or
audioSDHC
...- Select
the
desired source via the main menu.
The device changes
to
the
desired source and the
playback starts.
If
the
playbackdoes
not
start
with
the image playback,
...- press the [
i!1
button
to
change
to
thefolder/file list.
...-
Press
the [ 1
button
to
displayall
the
folders and
files
of
the data carrier.
-Or-
..-
Press
the [ } 1
button
to
display all the images
of
the
data carrier.
USB
4/144
t
11
:3
0
P1cture 1 P1cture 2
B
P1cture 4
a
P1cture 6
BB
P1cture 9 P1cture
10
P1cture 11 P1cture
12
Note:
Folders and images are selected and started
as
de-
scribed underaudio playback.
Bluetooth mode
The Bluetooth• function allows registering cell phones
and media playbackdevices
with
the
car sound system.
When you register a cell phone
with
the car sound
sys
-
tem, you can make phone calls
with
the
built
-in hands-
free function.
You
can
access
the
lists
of
dialled numbers
and the phone book
of
the registered cell phone.
If
the
connected Bluetooth• device supports the func-
tions
A2DP
and
AVRCP,
you can play
the
music via the
car sound system and control
the
playback.During acall,
the
music playback
is
interrupted and continued again
afterthe call.
If
acell phone
is
registered via Bluetooth" and acall
is
re
-
ceived during
the
playback
of
anothersource, the source
playback
is
interrupted and the call menu
is
displayed.
Starting Bluetooth
mode
...- In
the
main menu, press on [ Bluetooth
1.
-Or-
...-
Press
the
MENU
button
®
for
approx. 2 seconds.
The Bluetooth• menu
is
displayed.
It
contains
the
list
of
known Bluetooth• devices. Other audio sources
are switched
off.
[
~
1 Add
new
Bluetooth• device.
[G
1 Display options menu.
...-
Press
the
[Connect
1
button
of
the
Bluetooth• de-
vice
with
which you
want
to
establish aconnection.
When the device
is
in range,
the
connection
is
estab-
lished and the menu for
the
device
is
displayed.
...-
Press
the
[ Delete
1
button
if
you want
to
delete
the
Bluetooth• device from the list.
Registering Bluetooth devices
If
you
want
to
registeradevice
with
the
car sound system
for
the first time, proceed
as
follows:
...- Ensure
that
Bluetooth•
is
activated at the car sound
system and atyour Bluetooth• device.
...- In
the
options menu
of
the Bluetooth• mode, entera
pairing code
(see
Bluetooth• settings).
...- Search
for
new devices/connections on your Blue-
tooth
®device.
...- The car sound system appears
as
"BP
640" in
the
list
of
Bluetooth• devices.
...- Establish
the
connection; you may have
to
enter
the
pairing code
that
was
previously entered on
the
car
sound system.
The connection
is
being established and the menu
for
the
registered device
is
displayed.
Note:
If
a telephone
is
connected
with
the
car sound
sys-
tem,
the
Bluetooth• icon
*
is
displayed at
the
top
right
edge
of
the
display in all audio/video sources.
37
Bluetooth mode
Telephone mode
If
you connected a phone
with
the
car sound system
via
Bluetooth®, the following menu appears.
ft
Bluetootl1
;.
"""
11
:30
.......
...--
My
Pllone
..
..,
?
{-
v
A
t:
c
-7
"7
0
n
....
...
n
4 -
"'
-
...
n
tot:~
~
.....
oC:I
.......
Displaythe phone menu.
Display
the
playback menu for Bluetooth®
streaming.
...
•••
Display
the
playback menu forapp control.
[
....
1
Disconnectconnection
with
currentdevice.
[ (J
1
Call
up
the phone book.
[ 1g
1
Call
up
caller lists.
[
Go
1
Displayoptions menu.
..-
Enteraphone number
with
thekeypad and
press
the
[
~1
button.
-Or-
..-
Select a contact/number via the caller lists
or
phone
book and press
the
[Dial 1
button
in
the
pop-up
window.
The connection
is
being established.
If
acall
is
coming in, the call menu
is
displayed.
[
~
1
Reject acall.
[
~
1
Answera call.
38
1
Audio
playback
via
Bluetooth streaming
If
an
audio streaming device
is
connected
with
the
car
sound system via Bluetooth®, you can play back the mu-
sic via the car sound system and control the playback
.
..-
Press
the
[
f.J
1
button
to
change
to
the
audio play-
back.
...
•••
[
....
1
[ 1
..
1
Display
the
phone menu.
Display the playback menu for Bluetooth®
streaming.
Display the playback menu for app control.
Disconnectconnection
with
currentdevice.
Short press:Title selection.
Long press:
Fast
searching.
Interruptplayback and continue playback.
[
.-.1
1
Short press: Title selection.
Long press:
Fast
searching.
[
ii:i
1
Displayequalizer.
Audio playback
via
app control
(Android
cell
phone)
With the "Biaupunkt Android Player Multimedia Series"
app, music files stored on an Android cell phone can
be
divided
into
certain categories
with
the help
of
ID3
tag
information.This allows you
to
quickly and conveniently
selectand play back music tracks across differentcatego-
ries. For this purpose, the app must be installed on the
Android cell phone. The "Biaupunkt Android Player Mul-
timedia Series" app can be downloaded on the Internet
from www.blaupunkt.com.
Note:
The audio playback via "Biaupunkt Android Player
Multimedia Series" app
is
available only for Android
cell phones
with
operating system Android
2.3
and
higher. In addition,
the
cell phone must support the
Bluetooth®profiles
SPP
(Serial Port Profile) and
A2DP
(Advanced Audio Distribution Profile).
..-
Press
the
[
•l•l
button
to
change
to
the audio play-
back.
ft
f-.lurt~
-n,
,...,
It
11
:
30
.A.r~
s~
~Llrne
T1tt:-
~~.Jrne
r-.:J
l..lt)~Wl
~J;)')it
.w
r·:·
-11
~
.........
II
......
.......
--
-
f'.
~'
Display
the
phone menu.
f.l
Display
the
playback menu
for
Bluetooth•
streaming.
[ t• )Display
the
playback menu forapp control.
[ i ) Display category lists.
[
1.-
l
Short
press:
Title selection.
Long
press:
Fast
searching.
[
11/
....
) Interruptplaybackand continue playback.
[
-.1
)
Short press:Title selection.
Long press:
Fast
searching.
[
~
] Switch repeatfunction on/off.
[X ]
Switch random playback on/off.
Bluetooth settings
In
the options menu for Bluetooth•, you can make
the
basic settings
for
the Bluetooth• mode.
..-
Press
the
[
G]
button.
The options menu
is
displayed.
Bluetooth-
Bluetooth• can be switched on
or
off
.
Auto
connect-
If
"Auto Connect"
is
activated, the
device automatically connects with known Blue-
tooth•
devices
as
soon
as
theyare in range.
Auto
answer-
If
"Auto Answer"
is
activated, incom-
ing phone calls
are
automatically answered.
Bluetooth mode 1
Pandora• mode
Microphone-
Select
the
microphone
to
be used
for
the hands-free system via Bluetooth
01
•
Pairing
code-
ManyBluetooth• devices request
the
pairingcode beforeestablishing
the
connection.
You
can
define
it
here.
Phone book
sync
-To
be able
to
access
the
phone
book
of
a connected telephone, you must first syn-
chronise
it
via this menu entry.
..-
Press
[!:)
1
to
exit
the
options menu.
Pandora®
mode
(available onlyin
the
US, Australia
and
New
Zealand)
Requirements
Control for Pandora• requires:
An
iPhonedevice
or
an
Androiddevice
with
areliable
data connection,
or
an
iPod touch
that
is
connected
to
wireless internet.
The Pandora• app installed on
the
iPhone/iPod de-
vice
or
on
the
Android device.
An
active account
with
Pandora•. Sign
up
at
www.pandora.com.
The
USB
sync cable
that
came
with
youriPhone/iPod
device.
Using
an
Android device
it
is
necessary
to
establish a
connection
to
the
car sound system via Bluetooth•.
Notes:
• Pandora•
is
available onlyin
the
US,
Australia and
NewZealand.
• Refer
to
www.pandora.com/everywhere/mobile
for devices compatible
with
the
Pandora• mobile
application.
• Pandora•
is
an
internet service, carrier and data
charges may apply.
• Some Pandora• functionality cannot be operated
from this car sound system.
•
For
issues
using
the
Pandora• application, please
contact
Pandora
at [email protected]
• Stations must be created in your account prior
to
connectingyouriPhone/iPod
or
Androiddevice
to
the
car sound system.
Connecting
the
iPod/iPhonedevice
..-
Open
the
cover ® underneath
the
rotary/pushbut-
ton.
..-
Connect
the
iPhone/iPod device
with
the
USB
port
@
of
the
car sound system, using
the
USB
sync cable
included with youriPhone/iPod device.
39
Pandora® mode
Connecting
the
Android device
..-
Connect
the
Android device
to
the
car sound system
via Bluetooth®.
Starting
the
Pandora®
mode
Note:
To
use
the
Pandora®
mode, first set "Pandora" in the
general settings
to
"On". Then
the
Pandora source
can
be selected in
the
main menu.
..-
Launch the
Pandora®
application on
your
iPhone/
iPod
or
Android device.
..-
In
the main menu, press
the
[Pandora]
button
to
switch
to
the
Pandora®
mode.
40
Note:
If
both
an iPhone/iPod device and
an
Android device
are connected
to
the
car sound system, a selection
screen appears
to
select one
of
the
devices.
The playback menu
is
displayed.
h
Pandora
11:30
Stat1on
Name
:X:
• Artist
Name
,...
Album
Name
,
;:J
T1t1e
Name
5 47
12.08
~
II
........
I_
•
:~
~fJ
iii;ii
..
~
...
I
..
(
[
iJ
1 Displaystation list.
[II/
...
] Interruptplaybackand continue playback.
[
~I
]
Skip
to
the
next
track, subject
to
the skip
limit.
[
4.
]
Tell
Pandora®
you like the track currently
playing, and
Pandora®
will play more tracks
like it.
[
.,
]
Tell
Pandora®
not
to
playthistrack.
Pandora®
will skip
to
the
next
track.
If
the
skip
limit
has
been reached, Pandora will continue
to
play
but
yourfeedback will be recorded.
[
IW
1
Bookmark
an
artist.
[
IW
1 Bookmark a track.
[X ]
Shuffle songs
from
all
of
your
stations.
Station list menu
The
station list menu allows you
to
search for music
by
stations you created.
..-
In
the
playback menu, press
the
[
iJ]
button.
The station list menu
is
displayed.
+ Scroll
through
the list page by page.
+ Scroll
through
the
list page
by
page.
[ X ]
Exit
the
station list menu.
[ 0 ] List the stations by date.
Tap
on
the
name
of
the
station
to
choose
that
sta-
tion.
Pandora® Error Messages
Message Cause Corrective Action
Displayed
BookMark Software Error The trackcould
not
Track Error be bookmarked,
please
try
again in a
moment.
BookMark Software Error The song could
not
Artist Error
be
bookmarked,
please
try
again in a
moment.
Thumbs Up Software Error Song feedback
I Down Error could
not
be sent,
"ErrorTrack please
try
again in a
Rating" moment.
No Active Software Error This account
has
no
Station Error stations in it.
Please
visit Pandora.com
and login
to
your
account and add
stations.
Skip Limit Software Error
Please
note
that
Reached Pandora®
limits
skips
to
a maximum
of
six skips per hour
Externalaudio/video sources
1
External monitor
I
Sound settings
External audio/videosources
AVinputs
This devicefeatures
two
external
AV
inputsforaudio and
video playback:
AV-IN
1
is
located under
the
cover at
the
front
of
the
device.
AV-IN
2
is
implemented
as
a cinch socket on a cable
at
the
rear
of
the device.
You
can specify the instal-
lation location
of
the
port
during
the
installation
of
the
device.
A Danger!
cLa Increased risk
of
injuryfrom connector.
In
case
of
an accident,
the
protruding connec-
tor
in the
front
AV-IN
socket may cause injuries. The
use
of
straight plugs
or
adapters leads
to
an increased risk
of
injury.
..-
Start
the
AV-IN
mode
with
the
button [
AV-IN
1 ]
or
[
AV-IN
2 ].
The displayshows the audio
or
video playback
of
the
selected
AV
source.
Video input
This devicefeaturesavideo
input
at
the
rear
of
the
device
for
connecting acamera
that
is
available
as
an
option.lf
a
camera
is
connected, you can display
the
camera image.
..-
In the main menu, press
the
[Camera
]
button.
External monitor
This devicefeatures an
output
forconnecting an external
monitor
for
the
rear area
of
the
vehicle
(see
Connection
diagram
at
the
end
of
these instructions).
..-
Select the desired source via
the
main menu and
start
the
film playback, e.g.
from
a
DVD
.
The film
is
displayed on the
monitor
of
the device.
..-
Call
up
the
main menu.
..-
Press
the
[!!I
1
button.
The film
is
also displayed on
the
external monitor.
Sound settings
Volume distribution (fader/balance)
You
can adjust
the
volume distribution in the vehicle
for all sources.
..-
In the main menu
or
on
the
control bar
of
the
current
audio source,
press
the [
:5::]
button.
The equalizer menu
is
displayed.
..-
Press
the
[ ffi]
button.
The menu
for
fader and balance
is
displayed.
..-
Adjust fader and balance
with
[ T
1
I [.A.]
or
[
....
]/[
....
].
..-
Next, press
[!:)
].
The setting
is
stored, the current source
is
displayed
again.
Equalizer
You
can adjust
the
equalizerforall sources.
..-
In
the
main menu
or
on
the
control bar
of
the
current
audio source, press
the
[
:5::]
button.
The equalizer menu
is
displayed.
..-
Select a preset equalizervia
the
buttons.
-Or
-
..-
Press
the
[
User ]
button
to
adjust the level
of
the
available frequency bands according
to
your prefer-
ences.
I
41

Other manuals for 640 SERIES

1

Other Blaupunkt Car Video System manuals

Blaupunkt Osaka 760 User manual

Blaupunkt

Blaupunkt Osaka 760 User manual

Blaupunkt MMP440 User manual

Blaupunkt

Blaupunkt MMP440 User manual

Blaupunkt MICHIGAN CITY 800 W User manual

Blaupunkt

Blaupunkt MICHIGAN CITY 800 W User manual

Blaupunkt Los Angeles 500 User manual

Blaupunkt

Blaupunkt Los Angeles 500 User manual

Blaupunkt BP RSE AD 10.6 User manual

Blaupunkt

Blaupunkt BP RSE AD 10.6 User manual

Blaupunkt COSTA MESA 900 User manual

Blaupunkt

Blaupunkt COSTA MESA 900 User manual

Blaupunkt ASPEN IVDM-7003 User manual

Blaupunkt

Blaupunkt ASPEN IVDM-7003 User manual

Blaupunkt 600 Series User manual

Blaupunkt

Blaupunkt 600 Series User manual

Blaupunkt IVMR 7001 User manual

Blaupunkt

Blaupunkt IVMR 7001 User manual

Blaupunkt OSAKA 960 User manual

Blaupunkt

Blaupunkt OSAKA 960 User manual

Blaupunkt CHICAGO IVDM-7002 Product guide

Blaupunkt

Blaupunkt CHICAGO IVDM-7002 Product guide

Blaupunkt Los Angeles 510 User manual

Blaupunkt

Blaupunkt Los Angeles 510 User manual

Blaupunkt IVMR 1042P User manual

Blaupunkt

Blaupunkt IVMR 1042P User manual

Blaupunkt SAN MARINO 350 User manual

Blaupunkt

Blaupunkt SAN MARINO 350 User manual

Blaupunkt Adayo HM4Z05A User manual

Blaupunkt

Blaupunkt Adayo HM4Z05A User manual

Blaupunkt San Pedro 950 User manual

Blaupunkt

Blaupunkt San Pedro 950 User manual

Blaupunkt San Pedro 950 User manual

Blaupunkt

Blaupunkt San Pedro 950 User manual

Blaupunkt SAN MARCOS 370 User manual

Blaupunkt

Blaupunkt SAN MARCOS 370 User manual

Blaupunkt Ft.Lauderdale 900 User manual

Blaupunkt

Blaupunkt Ft.Lauderdale 900 User manual

Blaupunkt TEXAS 600 Assembly instructions

Blaupunkt

Blaupunkt TEXAS 600 Assembly instructions

Blaupunkt SAN FRANCISCO 540 User manual

Blaupunkt

Blaupunkt SAN FRANCISCO 540 User manual

Blaupunkt San Andres 970 User manual

Blaupunkt

Blaupunkt San Andres 970 User manual

Blaupunkt La Paz 880 User manual

Blaupunkt

Blaupunkt La Paz 880 User manual

Blaupunkt HANNOVER 570 DAB User manual

Blaupunkt

Blaupunkt HANNOVER 570 DAB User manual

Popular Car Video System manuals by other brands

Kia Sportage Features & functions guide

Kia

Kia Sportage Features & functions guide

Kia ADBC0H8EE user manual

Kia

Kia ADBC0H8EE user manual

Directus Intraphex UCI-11C manual

Directus

Directus Intraphex UCI-11C manual

Movies 2 go AMVXMTG10/VXMTG10 owner's manual

Movies 2 go

Movies 2 go AMVXMTG10/VXMTG10 owner's manual

Eonon DB Series instruction manual

Eonon

Eonon DB Series instruction manual

Audiovox VOH681 Operation manual

Audiovox

Audiovox VOH681 Operation manual

INDIWORK A-LINK For V-sensus instruction manual

INDIWORK

INDIWORK A-LINK For V-sensus instruction manual

Xtrons HD1003HD user manual

Xtrons

Xtrons HD1003HD user manual

Philips CED1700 Specifications

Philips

Philips CED1700 Specifications

Pioneer AVH-P6800DVD - DVD Changer With LCD Monitor installation manual

Pioneer

Pioneer AVH-P6800DVD - DVD Changer With LCD Monitor installation manual

Boyo VTC433R instruction manual

Boyo

Boyo VTC433R instruction manual

Tview T712HR-IR owner's manual

Tview

Tview T712HR-IR owner's manual

Audiovox Mobile Video 128-8565A Operation manual

Audiovox

Audiovox Mobile Video 128-8565A Operation manual

Exonic EXONIC EXD 6805 Specifications

Exonic

Exonic EXONIC EXD 6805 Specifications

Kenwood DDX630WBT instruction manual

Kenwood

Kenwood DDX630WBT instruction manual

NavInc NP6-PO-CDR31 manual

NavInc

NavInc NP6-PO-CDR31 manual

BMW Advanced Car Eye 3.0 Pro Instructions for use

BMW

BMW Advanced Car Eye 3.0 Pro Instructions for use

Hyundai IONIQ Plug-in Hybrid Getting started guide

Hyundai

Hyundai IONIQ Plug-in Hybrid Getting started guide

manuals.online logo
manuals.online logoBrands
  • About & Mission
  • Contact us
  • Privacy Policy
  • Terms and Conditions

Copyright 2025 Manuals.Online. All Rights Reserved.