Blumfeldt 10030927 User manual

Postbutler
Paketpostkasten
Parcel Post Box
Buzón para paquetería
Boîte postale de paquets
Pacchetti postali
10030927 10030928

2
DE
Sehr geehrter Kunde,
wir gratulieren Ihnen zum Erwerb Ihres Gerätes.
Lesen Sie die folgenden Hinweise sorgfältig durch und
befolgen Sie diese, um möglichen Schäden vorzubeugen.
Für Schäden, die durch Missachtung der Hinweise und
unsachgemäßen Gebrauch entstehen, übernehmen wir
keine Haftung. Scannen Sie den folgenden QR-Code,
um Zugriff auf die aktuellste Bedienungsanleitung und
weitere Informationen rund um das Produkt zu erhalten:
HERSTELLER
Chal-Tec GmbH, Wallstraße 16, 10179 Berlin, Deutschland.
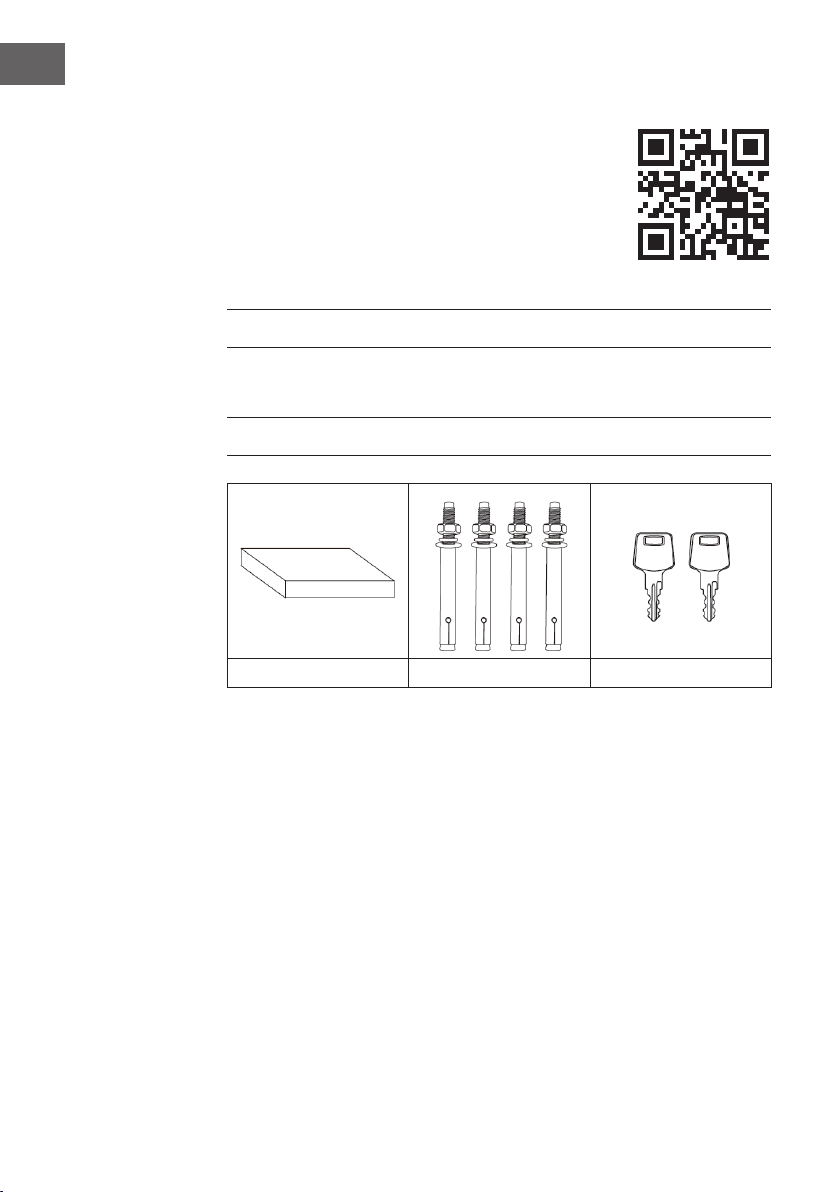
ZUBEHÖR
Abdeckung Anker (4x) Schlüssel (2x)
3
DE
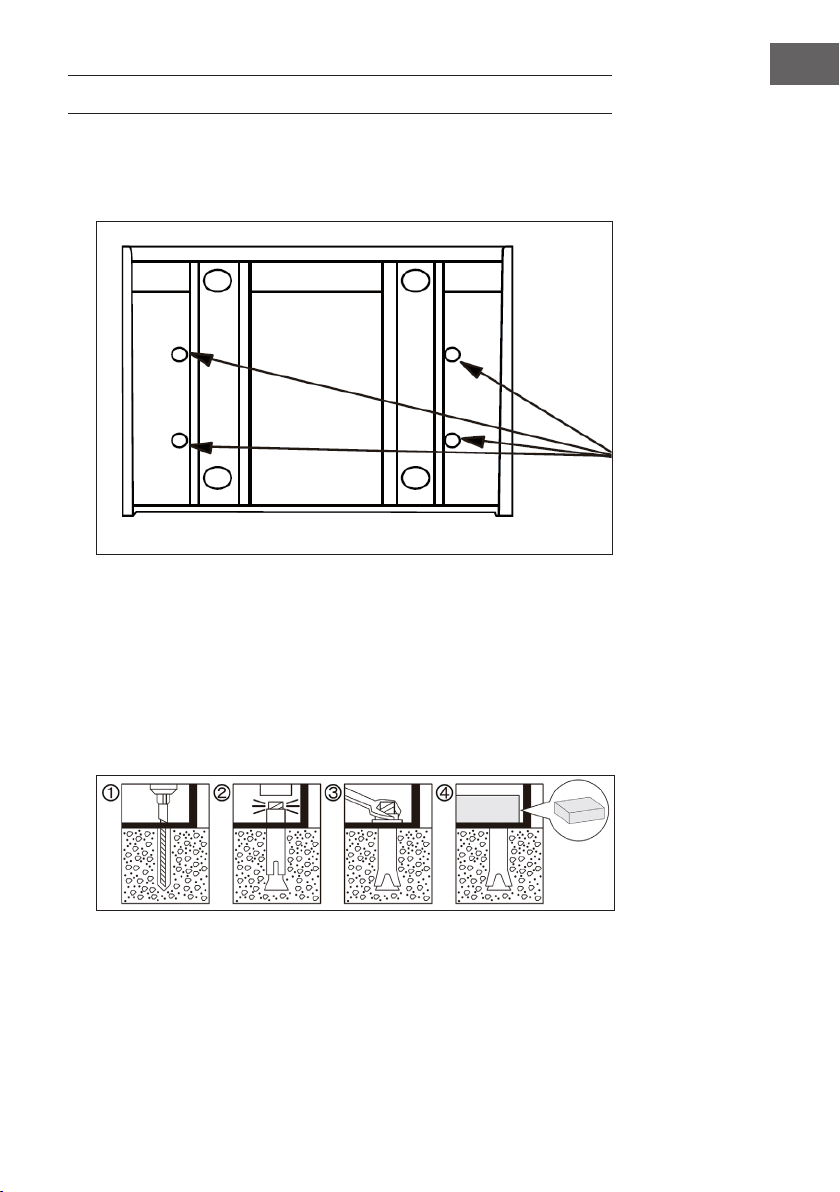
INSTALLATION
1 Esbendensich4LöcheranderUnterseitederPaketbox.BevorSiemit
der Installation beginnen, messen sich den Abstand zwischen den Löchern
ab mit einem Maßband ab.
2 Verwenden Sie die abgemessenen Abstände, wenn Sie die Löcher
(Tiefe:85mm,Durchmesser:12mm)indenUntergrundbohren.
3 Richten Sie die Löcher am Boden der Paketbox an den gebohrten Löchern
ausundxierenSiediePaketboxmitdenAnkernimUntergrund.
4 Benutzen Sie zum Festziehen der Anker einen Schraubschlüssel.
5 Setzen Sie zum Schluss die Abdeckung auf die Anker.

4
EN
Dear Customer,
Congratulations on purchasing this device. Please read
the following instructions carefully and follow them to
prevent possible damages. We assume no liability for
damage caused by disregard of the instructions and
improper use. Scan the QR code to get access to the
latest user manual and more product information.
PRODUCER
Chal-Tec GmbH, Wallstraße 16, 10179 Berlin, Germany.
ACCESSORY
Cover Anchor (4x) Keys (2x)

5
EN
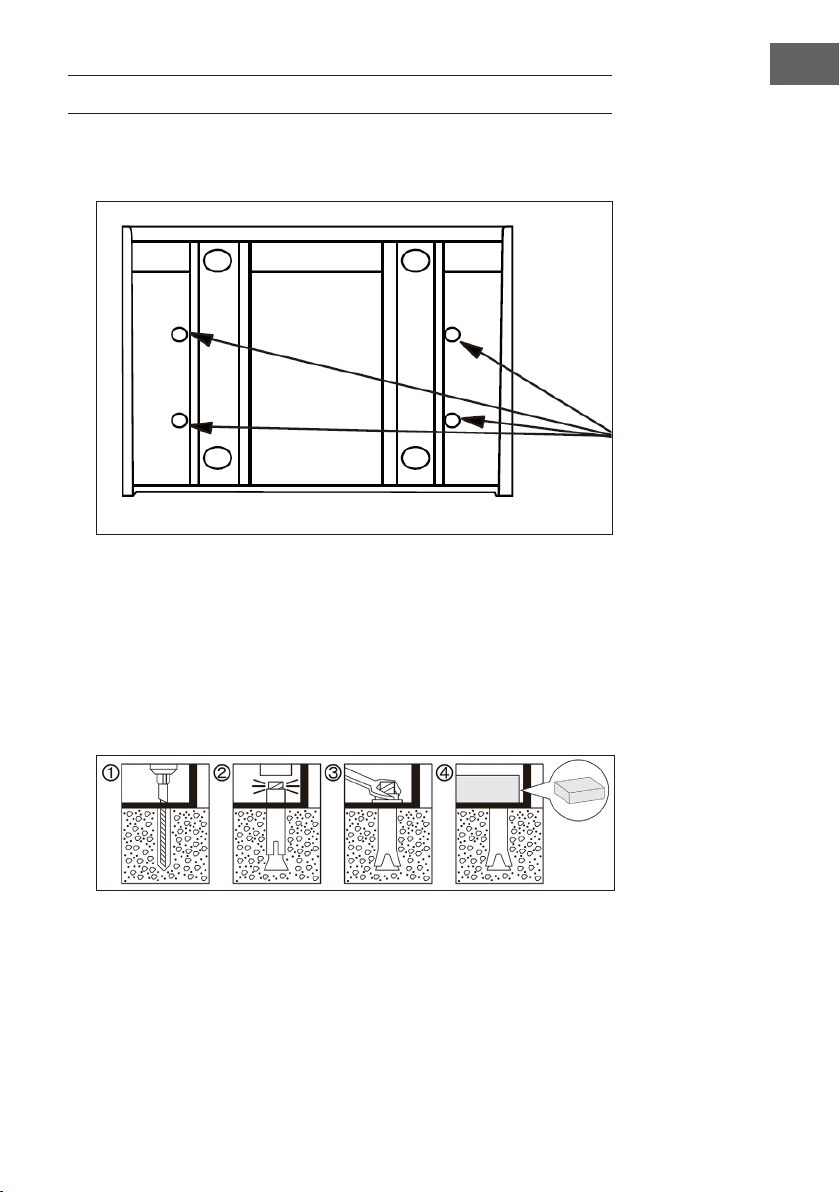
INSTALLATION
1 Thereare4xedholesonthebottomofparclbox.Beforeyoustart
to install, please measure the actual holes distance on the box with
measuring tool.
2 Usethemeasureddistanceswhendrillingtheholes(depth:85mm,
diameter: 12 mm) in the substrate.
3 Align the holes at the bottom of the parcel box with the drilled holes and
xtheparcelboxtothesubstratewiththeanchors.
4 Useaspannertotightentheanchors.
5 Finally, place the cover on the anchors.

6
ES
Estimado cliente,
Le felicitamos por la adquisición de este producto.
Lea atentamente las siguientes instrucciones y sígalas
para evitar posibles daños. No asumimos ninguna
responsabilidad por los daños causados por el
incumplimiento de las instrucciones y el uso inadecuado.
Escanee el siguiente código QR para obtener acceso
a la última guía del usuario y más información sobre el
producto.
FABRICANTE
Chal-Tec GmbH, Wallstraße 16, 10179 Berlín, Alemania.
ACCESORIOS
Cubierta Anclaje (4x) Llaves (2x)

7
ES
INSTALACIÓN
1 Hay4oriciosenlaparteinferiordelbuzón.Antesdecomenzarconla
instalación,midaladistanciaentrelosoriciosconunacintamétrica.
2 Utilicelasdistanciasmedidasparaperforaroriciosenlasuperciede
apoyo (profundidad: 85 mm, diámetro: 12 mm).
3 Alineelosoriciosdelfondodelbuzónconlosperforadosenlasupercie
deapoyoyjeelbuzónalsueloconlosanclajes.
4 Utiliceunallaveparaapretarlosanclajes.
5 Por último, coloque la cubierta sobre los anclajes.
8
FR
SChère cliente, cher client,
Toutes nos félicitations pour l’acquisition de ce nouvel
appareil. Veuillez lire attentivement et respecter les
instructionsdecemoded’emploiand’éviterd’éventuels
dommages.Nousnesaurionsêtretenuspourresponsables
des dommages dus au non-respect des consignes et à la
mauvaise utilisation de l’appareil. Scannez le QR-Code
pour obtenir la dernière version du mode d‘emploi et des
informationssupplémentairesconcernantleproduit.
FABRICANT
Chal-Tec GmbH, Wallstraße 16, 10179 Berlin, Allemagne.
ACCESSOIRES
Couvercle Ancre (4x) Clé(2x)

9
FR
INSTALLATION
1 Le dessous de la boîte à paquets comprend 4 trous. Avant de commencer
l’installation,mesurerladistanceentrelestrousàl’aided’unmètreà
ruban.
2 Utiliserlesdistancesmesuréespourpercerlestrousdanslesupport
(profondeur : 85 mm, diamètre : 12 mm).
3 Alignerlestrousdufonddelaboîteàpaquetsaveclestrouspercésetxer
laboîteàpaquetsausupportàl’aidedesancres.
4 Utiliserunecléanglaisepourserrerlesancres.
5 Pournir,placerlecouverclesurlesancres.

10
IT
Gentile cliente,
La ringraziamo per aver acquistato il dispositivo. La
preghiamo di leggere attentamente le seguenti istruzioni
perl’usoediseguirleperevitarepossibilidanni.Nonci
assumiamo alcuna responsabilità per danni scaturiti da
una mancata osservazione delle avvertenze di sicurezza
e da un uso improprio del dispositivo. Scansionare il
codiceQRseguente,peraccederealmanualed’usopiù
attuale e per ricevere informazioni sul prodotto.
PRODUTTORE
Chal-Tec GmbH, Wallstraße 16, 10179 Berlino, Germania.
ACCESSORI
Coperchio Elemento di
ssaggio(4x)
Chiave (2x)
11
IT
INSTALLAZIONE
1 Nella parte inferiore della cassetta pacchi ci sono 4 fori. Prima di installare
la cassetta, misurare la distanza tra i fori servendosi di un metro.
2 Fare riferimento alle distanze misurate per eseguire i fori nel pavimento
(profondità: 85 mm, diametro: 12 mm).
3 Allineareiforisullaparteinferioredellacassettaaiforieseguitiessarela
cassettaalpavimentoutilizzandoglielementidissaggio.
4 Utilizzareuncacciaviteperserrareglielementidissaggio.
5 Innemettereilcoperchiopercoprireglielementidissaggio.

This manual suits for next models
1
Table of contents
Languages:


