BonsenKitchen VS3906 User manual

1-888-965-8032
1
Vacuum Sealer
Model:VS3906
Operation Instructions

Introduction
Congratulations on the purchase of this modern and high-qualityproduct. This instruction
manual contains important information on safety, usage and disposal. Before using the
product, familiarize yourself with all handling and safety guidelines. This devicee may only
be used as described and for the purposes indicated. Please also pass these operating
instructions on to any future owner(s).
Safety Instructions
Always abide by the following safety rules and instructions when using electrical
appliances and read these instructions carefully before using the vacuum sealer.
Read all instructions.
Do not touch hot surfaces. Use handles or knobs.
To protect againstelectric shock do not immerse the cord or main unit in water or
other liquid.
Close supervision is necessary when any appliance is used by or near children.
Unplug from outlet when not in use and before cleaning.
Do not operate the device with a damaged cable or plug or after a malfunction of the
device or after damage. Contact customer service for inspection, repair or adjustment.
Do not use outdoors.
Do not let the cable hang over the edge of the table or counter and do not touch hot
surfaces.
Do not place on or neara hot gas or electric burner, or in a heated oven.
Do not open the appliance cover during operations.
Always ensure the upper/bottom cover in correct location during operations.
This product is onlyauthorized for domestic use and not for commercial or industrial
purposes. It is only intended for applications described in these instructions.
This vacuum sealer may be used by children aged8 years old and over if they are
supervised by an adult and have been told how to usethe appliance safely and are
aware of potential risks.
Cleaning and maintenance may not be carried out by children unlessthey are 8 years
old or older and are supervised.
Children must not play with the vacuum sealer.
WARNING: Do not immerse the vacuum sealer in water or other liquids when cleaning it. If
2
the supplied power cord is damaged, it should be replaced by a qualified technician in order
to avoid a hazard.

SAVE THESE INSTRUCTONS
easeofdisposal,andarethereforerecyclable.
3
OPERATING INSTRUCTIONS
If the SUPPLY CORD is damaged, it must be replaced by the manufacturer, its service
agent or similarly qualified person in order to avoid a hazard.
A short power-supply cord is to be provided to reduce the risk resulting from becoming
entangled in or tripping over a longer cord.
If an extension cord is used,
1) The marked electrical rating of the extension cord should be at least as great as the
electrical rating of the appliance;
2) If the appliance is of the grounded type, the extension cord should be a
grounding-type 2-wire cord;
3 ) The longer cable should be arranged so that it does not hang over the counter top
or table top where it can be pulled by children or where it can be accidentally tripped
over.
Longer extension cords are available and may be used if care is exercised in their use.

Returning the packaging to the materials cycle conserves raw materials and reduces
the amount of waste that is generated. Dispose of packaging materials that are no
longer needed in accordance with applicable local regulations.
NOTE:
If possible, keep the original packaging during the warranty period so that the device
can be properly packed for returning in the event of a warranty claim.
Scope of Delivery
The appliance is supplied withthe following components as standard:
1 x Vacuum Sealer
5 x Vacuum Bags (20x30cm)
5 x Vacuum Bags (25x28cm)
1
2
x Vacuum Hose
x EVA Seal Ring
Check the package for completeness and for signs of visible damage.
If the consignment is incomplete or damaged due to defective packaging or carriage,
please contact us.
Installation Requirements
For safe and trouble-free operation of the device, the set-up location must fulfill the
following requirements:
When setting it up, place the appliance on a firm, flat and horizontal surface.
Do not place the device in a hot, wet or extremely damp environment or in the vicinity
of flammable materials.
The mains power socket must be easily accessible, so that the power cable can be
easily disconnected in the event of an emergency.
Electrical Connection
Before connecting the device, compare the connection data (voltage and frequency) on
the type plate with those of your power supply. This data must match to prevent
damage to the device.
Make sure that the power cord is undamaged and does not run over hot surfaces
and/or sharp edges.
Make sure that the power cord is not taut or bent.
Do not let the power cable hang over edges (trip wire effect).
Insert the plug into the mains power socket.
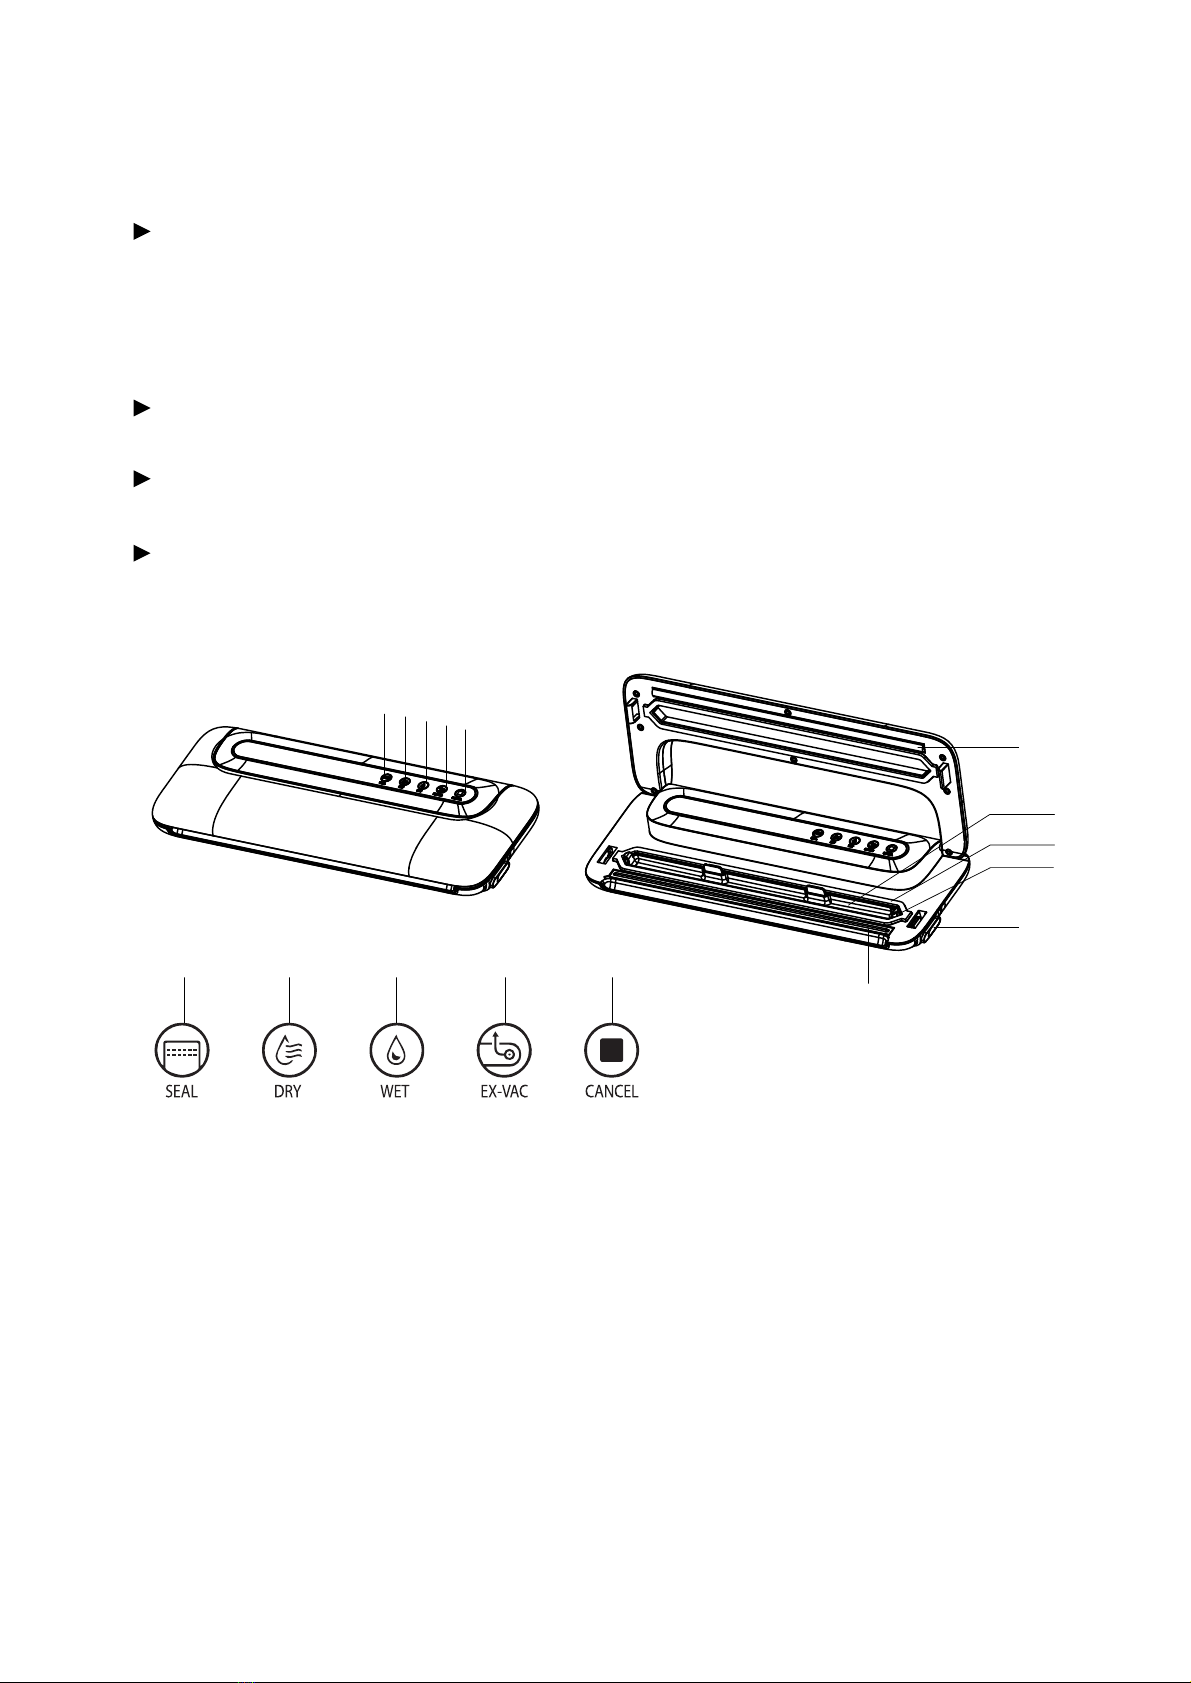
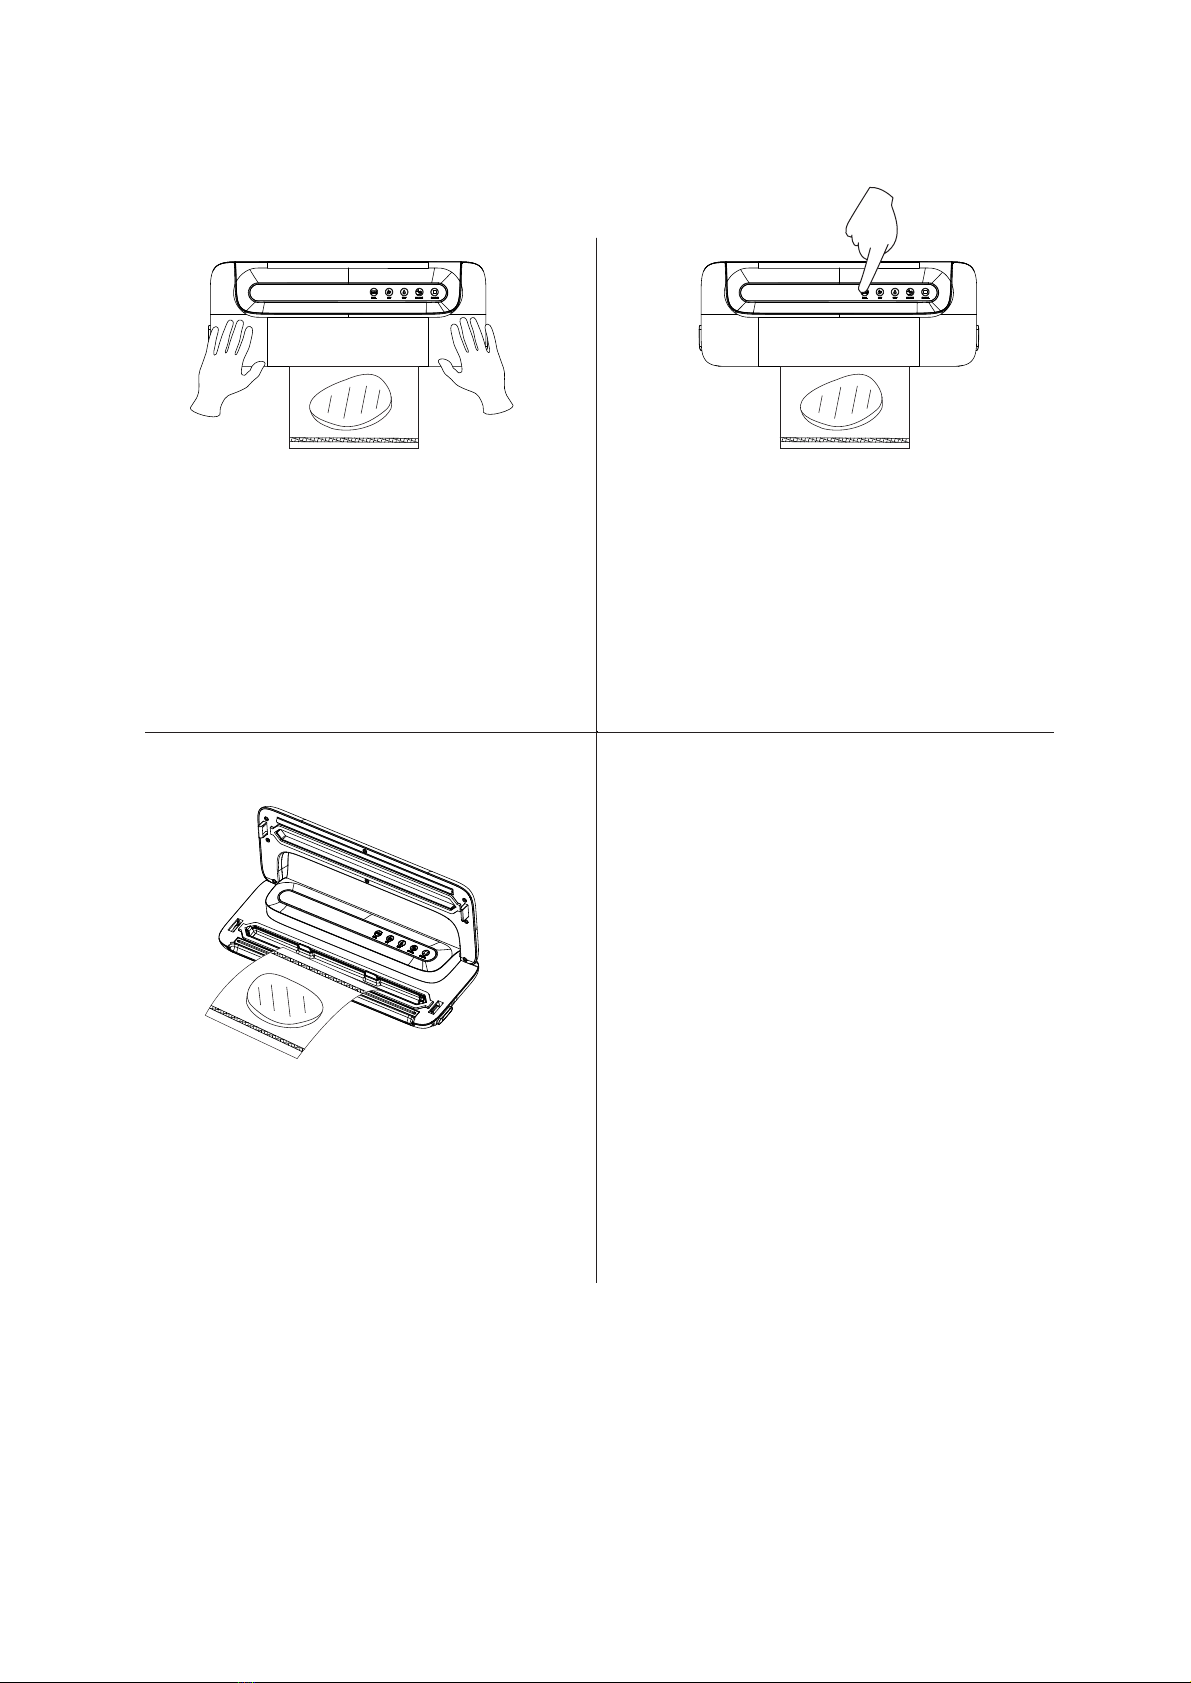
Sealing Vacuum Bags
The bag widthmay not exceed 30cm.Otherwise it cannot be welded correctly.
Use only nylon-PE films with a structure (points or grooves) on oneside and athickness
of approximately 0.15 - 0.30 mm. Otherwise the weld seam will not be tight and the
appliance may be damaged. You can recognize bags of this type from the information
on the package. The quality of the weld seam will vary depending on the type and
thickness of the bag.
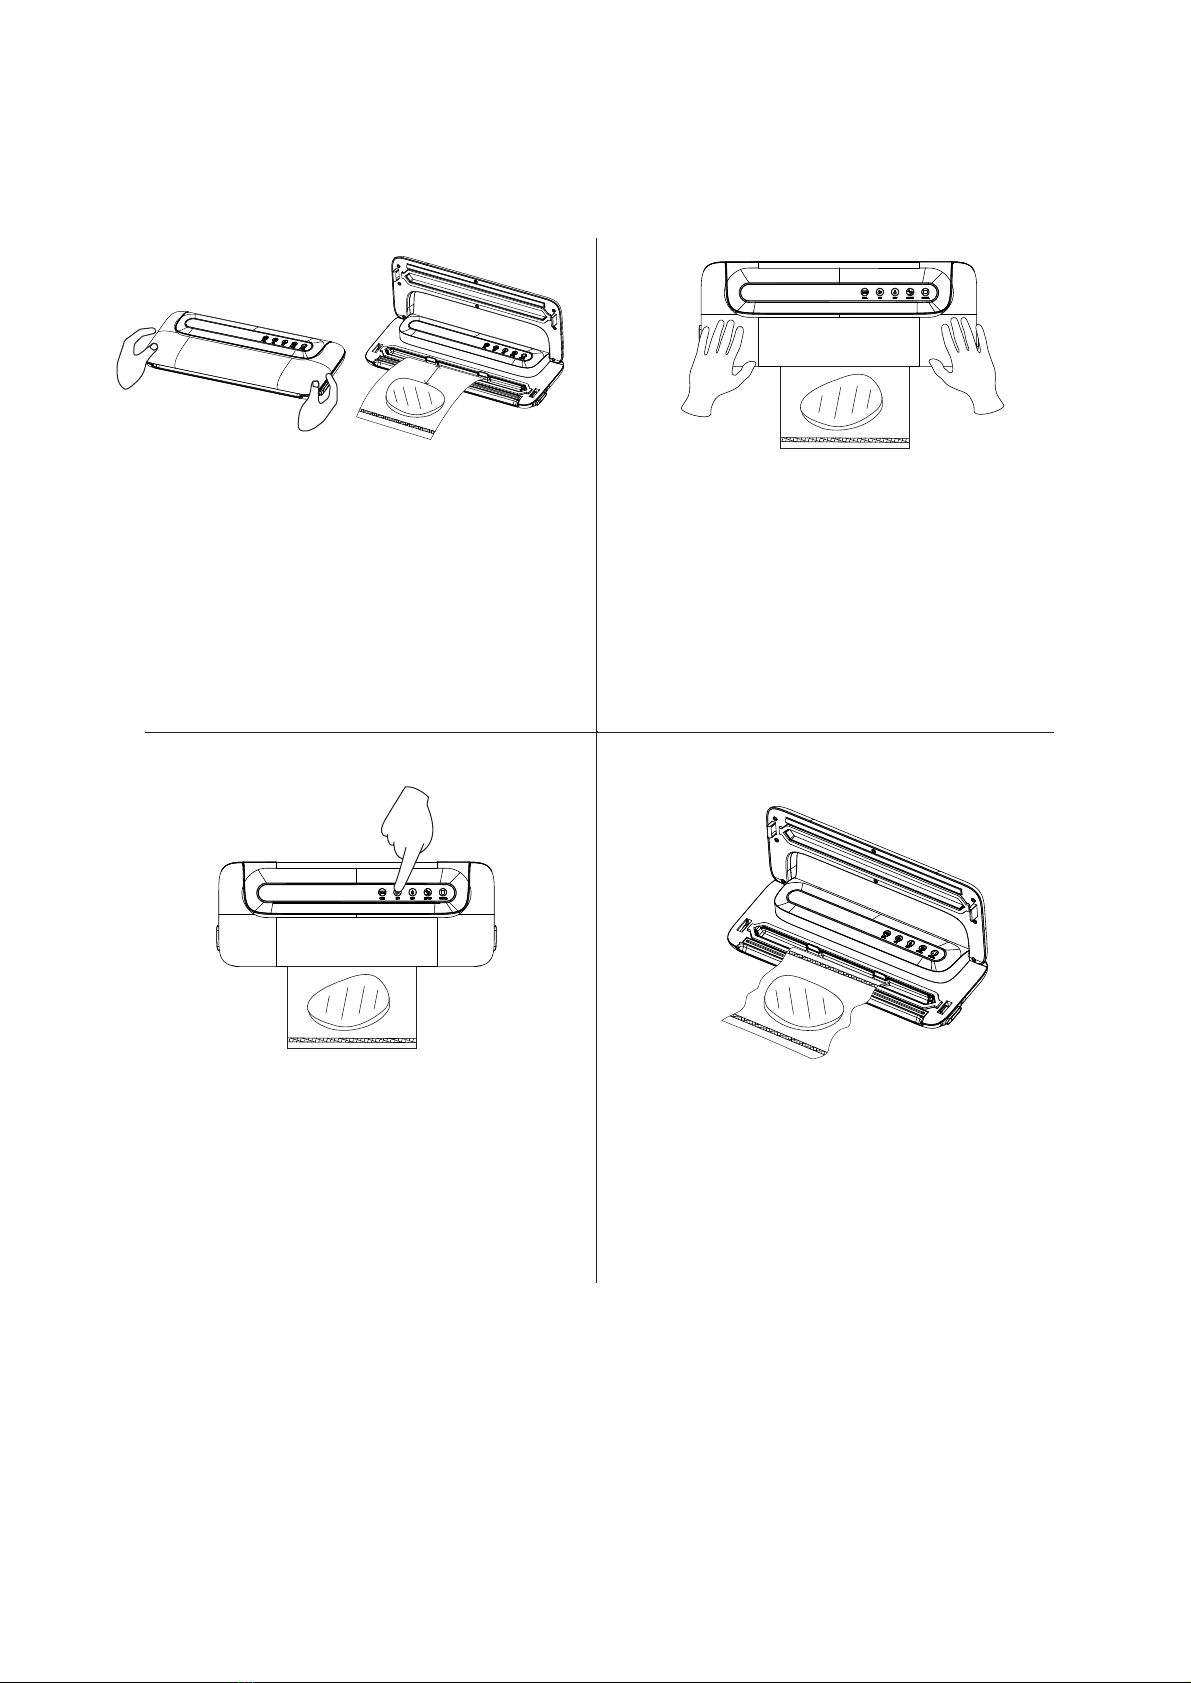
Cut the desired length for your bag from theroll. Open the device cover bypressing the
cover release and fold the cover upwards. Place the open end of the bag in the machine
so that the opening of the bag lies centrally under the lower sealing ring. The bag should
4

not be inserted further than the rear sealing ring and must lie between the front and
rear sealing ring. If the bag lies over one or both of the sealing rings, the bag cannot be
properly sealed.
5
The bag opening must lie flat on the welding wire. Otherwise, welding will not work
properly. Close the cover of the device. The seal presses the bag onto the sealing wire to
create a smooth seam. Make sure that both corners of the lid are closed. If necessary,
press the top cover again so that the lid clicks in audibly and firmly. Select the mode
(dry or wet). When the selection is , the indicator lights up. When is selected, Dry Dry Wet
the indicator will light up.Wet
1.Buttons:
1) SEAL 2) DRY 3) WET 4) EX-VAC 5) CANCEL
2.Indicate Light:
6)SEAL Indicator 7) DRY Indicator 8) WET Indicator
9) EX-VAC Indicator 10)CANCEL Indicator
3.Other Parts:
11)Open Button 12) Vac Cotton 13) Vac Chamber
14)Heating Seal 15) Sealing Rubber Strip
16) External Interface / Suction Interface
Make sure that the weld is properly closed. A correct weld should be a smooth, straight
strip without wrinkles.
Wait 15 seconds before sealing the next bag to allow the appliance to cool down.
Fill the bag in such a way that no food residues or liquids can escape and enter the
machine during sealing.
Parts
1
6 7 8 9 10
2345
11
14
15
16
12
13

6
1.How to use “DRY”vacuum mode :
Plug in the vacuum sealer. Open the lid
by pressing buttons on both sides. Place
item(s) in bag, allowing at least 5cm
(2 inches) of space between bag contents
and the open end of bag. More space is
required for larger item(s).
Press “DRY” button, it will automatically
vacuum the seal.
Push down both sides of the lid until
hear a big lock-up sound. (Pic.2)
Open the lids by pressing the buttons
on both sides after “DRY” and “SEAL”
indicator lights turn off. Take out the
bag.
(Pic.1)
(Pic.3)
(Pic.2)
(Pic.4)
① ②
③ ④
Operating the equipment
5CM
(2 Inches)

7
2.How to use “WET” vacuum mode:
Push down both sides of the lid until
hear a big lock-up sound.(Pic.1)
Open the lids by pressing the buttons
on both sides after “WET” and “SEAL”
indicator lights turn off.
Press “WET” button, indicator light turns
on. (Pic.2)
It will automatically vacuum the seal.
Take out the bag. (Pic.4)
(Pic.1)
(Pic.3)
(Pic.2)
(Pic.4)
① ②
③ ④

8
3.How to seal only:
Push down both sides of the lid until
hear a big lock-up sound.
Open the lids by pressing the buttons
on both sides after indicator light turns
off, then take out the bag.
If you want to seal a bag without vacuuming,
press “SEAL”button, indicator light turns on.
(Pic.2)
(Pic.1)
(Pic.3)
(Pic.2)
① ②
③

9
4.How to vacuum packaging jar:
Insert one end of Accessory Hose into
Accessory Port on appliance. Insert the
other end into port on the jar. (Pic.1
universal interface)
Press “EX-VAC” button on the appliance,
it starts to vacuum. When it has no sound,
it means job has been finished. You also
can stop it whenever you want, just press
“CANCEL” button. (Pic.2)
(Pic.1) (Pic.2)
① ②

i
r
V
a
A
l
v
e
e
v
l
a
A
V
r
i
10
5.How to vacuum zipper bags:
Insert one end of Accessory Hose into
Accessory Port on appliance. Insert the
other end into port on the zipper bag.
(Pic.1 universal interface)
Press “EX-VAC” button on the appliance,
it starts to vacuum. When it has no sound,
it means job has been finished. You also
can stop it whenever you want, just press
“CANCEL” button. (Pic.2)
(Pic.1) (Pic.2)
① ②

Customer Service: [email protected]
1-888-965-8032
Warranty claim procedure
Warranty
Cleaning
Storage
NOTE: Once you have sealed 11 bags continuously, allow the appliance to cool down for
about 15 minute. During this cool-down phase, you cannot start the appliance. After the
cool-down phase, you can use the appliance as normal.
In order to ensure a quick processing of your case, please observe the following notes:
The article number can be found as a sticker on the back or underside of the device.
If functional or other defects occur, please contact the specified service center by e-mail.
The warranty for this device is 12 months from the date of purchase. The warranty only
covers material and manufacturing defects, but not transport damage, wear parts or
damage to fragile components such as buttons or sealing rings.
The guarantee expires in case of improper handling, use of force and internal
manipulations which are not carried out by our authorized service center. Your statutory
rights are in no way limited by this warranty. The warranty period is not extended by
repairs under the warranty. This also applies to replaced and repaired parts. The device
has been manufactured with care and carefully checked before delivery.
Please keep your receipt as proof of purchase.
In case of warranty please contact our customer service.
Unplug the unit before cleaning it.
The unit has a built-in cable holder on the bottom of the case, on which you can wind
the power cord when not in use. This will prevent the power cord from getting caught,
getting dirty or becoming a source of danger by hanging loosely.
Do not use aggressive or abrasive cleaning agents, as these can damage the surface of the
housing.
Clean the surface of the device with a slightly moistened cloth and a mild detergent.
Make sure that no moisture can penetrate into the device.
Store the appliance in a clean, dry place protected from direct sunlight.
Do not use hard or sharp objects to remove adhesive from the welding wire. Otherwise the
welding wire or the insulation could be damaged.
Wipe off the upper and lower sealing rings as well as the press seal with a damp cloth.
Make sure the device is dry before using it again.
11

WARNING!DO NOT CHANGE THE PLUG!
To reduce the risk of electric shock, this product has a polarized plug (one blade is
wider than the other). This plug is intended to fit in a polarized outlet only one way.
When the plug does not fit fully in the outlet, reverse the plug. When it still does not
fit, contact a qualified electrician to install the proper outlet. Do not change the plug
in any way.
Technical Data
Model No.: VS3906
Operating Voltage: 120VAC 60Hz
Power Consumption: 130W
Max. Width for Shrink-wrapping: 300mm (11.81 Inch)
Vacuum Value: <-50Kpa
Noise Level: about 77 dB
Product Dimension: 376x141x49 mm (14.8x5.55x1.93 Inch)
12
Table of contents
Other BonsenKitchen Food Saver manuals