Bootstrap Farmer 14 Hoop House Quick start guide

14’ & 20’ Hoop House
INSTRUCTION & OWNERS MANUAL
Rev. Date 2023-1-02
Thank you for choosing Bootstrap Farmer for your farm’s equipment needs. Our
All-Metal Greenhouse Kit is manufactured with 100% American made steel and
aluminum for maximum strength and durability.
Our team strives to provide quality products that are built to last. From all of us at
Bootstrap Farmer, we thank you for putting your trust in us.
If you have any questions, please reach out. We are available 7 days a week by
phone, email and chat.
1(888)-406-1982 contact@bootstrapfarmer.com www.bootstrapfarmer.com

Table of Contents
Getting Started 4
CAD DRAWINGS 4
Recommended Tool List 5
Greenhouse Placement 6
Parts List 6
Ground Posts 11
Squaring Your Structure 12
Installing the Ground Posts 13
Hoops 14
Connect and Install Hoops 15
Installing Hoops to Ground Posts 16
Ridge Poles 17
End Wall Cross Connector 17
Cross Connectors and Ridge Poles 19
Install Ridge Pole and Connectors 19
Hip & Base Braces 20
Installing the Hip and Base Brace 21
End Walls 23
Installation of Endwall 23
Endwall Lock Channel 25
Doors 26
Door Frame Installation 26
Door Hanging and Latch Installation 28
Door Lock Channel 32
Optional Upgrades 33
Purlin Kit (Optional) 33
Need Help? contact@bootstrapfarmer.com Page 2 www.bootstrapfarmer.com

Corner Brace Kit (Optional) 34
Truss Kit (Optional) 35
Insect Netting (Optional) 39
Greenhouse Plastic 40
Installation 41
Roll Up Sides (Optional) 43
Trellis Bar Kit (Optional) 45
Double Layer Inflation Kit (Optional) 50
Shade Cloth (Optional) 53
Maintenance 54
Repairing Holes 55
Seasonal Considerations 55
Special Weather Conditions 55
Need Help? contact@bootstrapfarmer.com Page 3 www.bootstrapfarmer.com

Getting Started
BEFORE BEGINNING INSTALLATION, PLEASE CAREFULLY READ THROUGH
ALL INSTRUCTIONS. CONTACT OUR TECH TEAM WITH ANY QUESTIONS YOU
HAVE BEFORE BEGINNING YOUR BUILD. WE ARE AVAILABLE VIA EMAIL, CHAT
OR PHONE 7 DAYS A WEEK 888-406-1982 EXT. 1
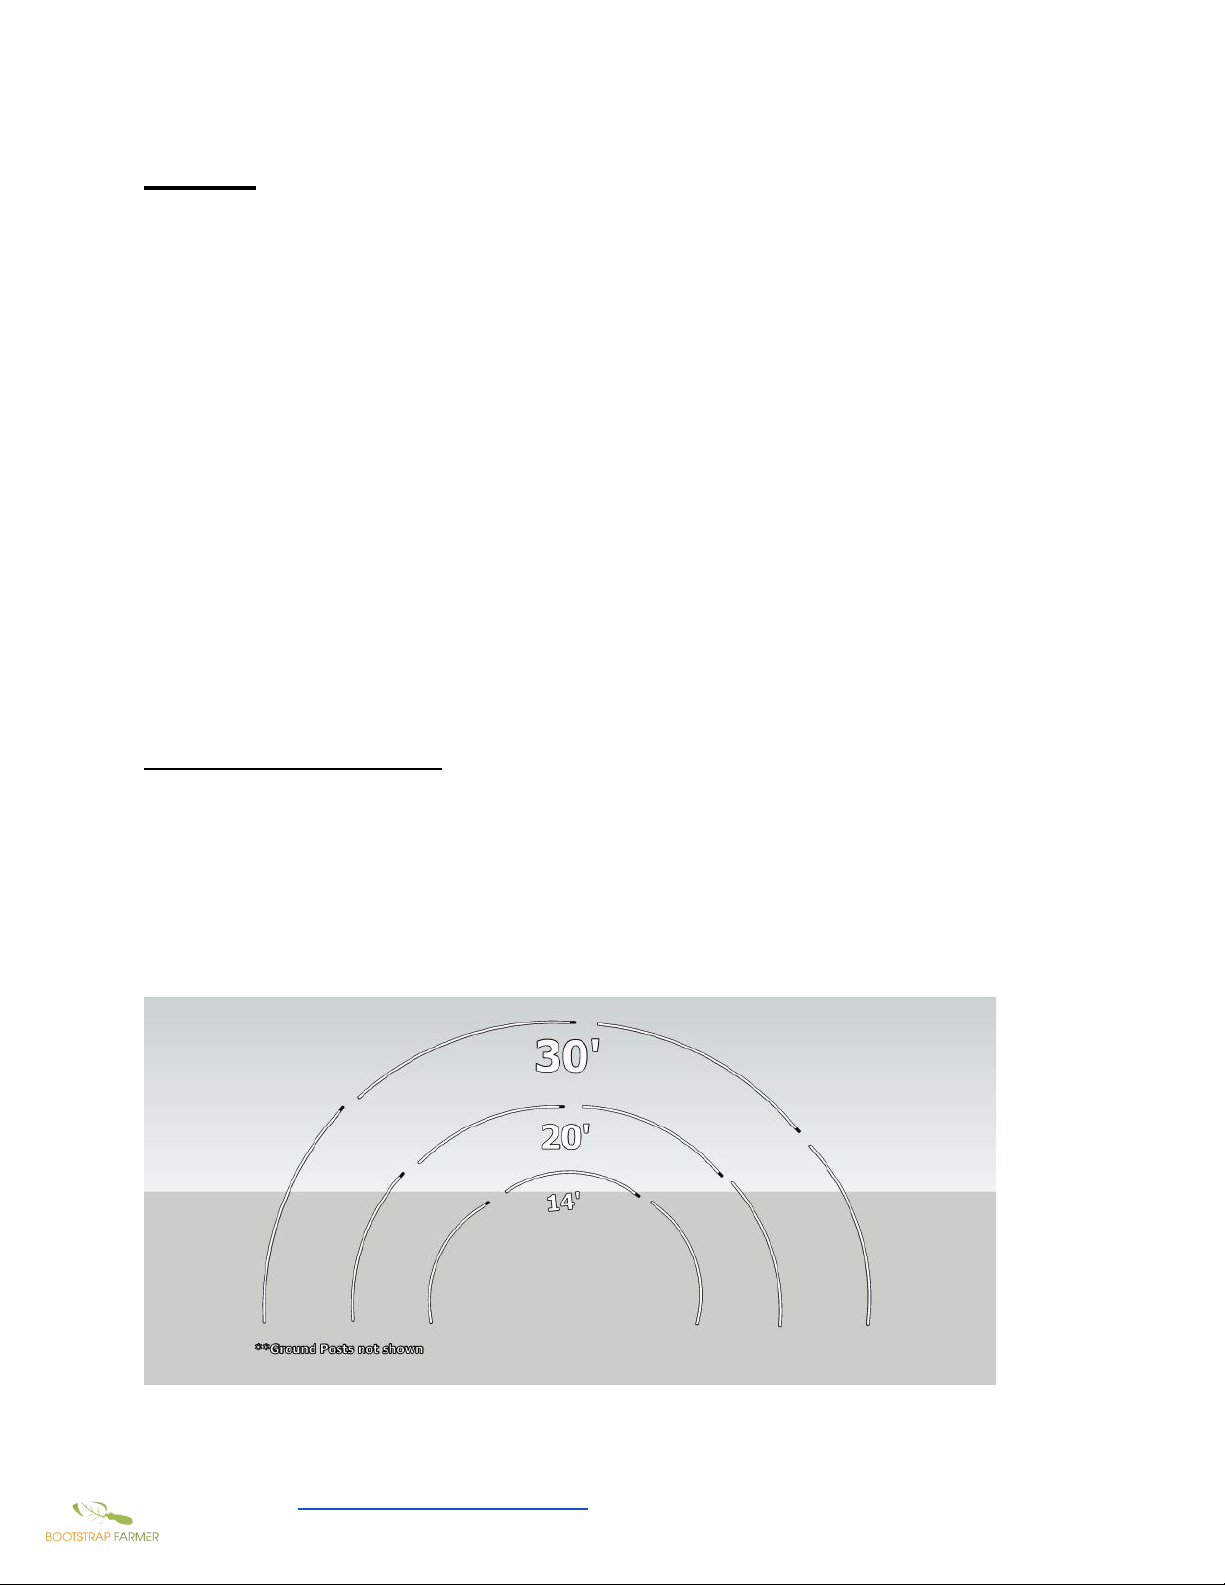
CAD DRAWINGS
Need Help? contact@bootstrapfarmer.com Page 4 www.bootstrapfarmer.com

Recommended Tool List
For Your Safety: Take all necessary safety precautions with power tools and building
equipment. Personal protective gear such as: gloves, eye protection, ear plugs, and
closed toe shoes are recommended.
● Clamps
● Drill & Drill Bits (1/4" bit included)
** Impact driver not recommended for
driving self tap screws.
● Extension Cord
● Ground Post Driver (included)
● Levels (long, magnetic & string
line)
● Roll of mason line
● Metal File
● Metal Saw (reciprocating, chop or
hack saw)
● Grinder
● Slip joint pliers
●Scissors / blade
●Sledge hammer (double jack)
●Single jack (3 pound hammer)
●Center hole punch
●Socket set & Adjustable Wrench -
(1/2" ratchet or nut driver)
● Spare Rope & tennis balls
● Stakes / Markers
● Step Ladders (at least one tall
enough to reach the peak of your
roof line, see height warning.)
● Tape measure
● Extendable painter’s pole
HEIGHT WARNING: The 20' kit has a center height of 11'4" which means you will have
to work 12-14' from the ground. The 14' kit has a center height of 9'4". BOOTSTRAP
FARMER cannot be held liable for unsafe work practices. Installers and Farm Owners
are encouraged to rent a lift from your local equipment rental company. Refer to their safety equipment
recommendations and best practices for the unit you rent during use, loading, unloading, and transport.
On the build site keep the lift level and on packed solid ground. Do not operate in inclement weather.
Need Help? contact@bootstrapfarmer.com Page 5 www.bootstrapfarmer.com

Greenhouse Placement
We recommend finding a flat area of land, clear of any trees, and far enough away from
existing structures to avoid runoff and snow drifts. Pay attention to the drainage in the
area. Extra ground work may be required to divert water runoff caused by regular
greenhouse waterings. Make sure that you are able to access the area with water.
**Always call 811 before you dig or install ground posts to have gas and utility lines marked or
check your site map.
Scan QR for info on Greenhouse Orientation and Site Prep before you build or visit
https://www.bootstrapfarmer.com/blogs/building-a-greenhouse/ideal-location-for-a-greenhouse
Parts List
Uncrate shipment and check against packing list to ensure that all materials have been
included. If any discrepancies are noted, please notify us immediately at (888) 406-1982
so we can get parts to you as soon as possible.
Door Hardware
**Upgraded double door will include additional hardware
Door Latch Kit
1. Handle (1 per frame) *latch plate/ 2 attachment
plates
2. Strike plate w/ 2 screws
3. ¼ nut galv. (8)
4. ¼ x 3" bolt galv. (8)
5. ¼ split lock washer gal. (8)
6. ¼ flat washer galvanized (16)
Need Help? contact@bootstrapfarmer.com Page 6 www.bootstrapfarmer.com

Door Frame Hardware
7. Cane Bolt (1 per door)
8. Spring (1 per door)
9. Door Mounting Kit
10.Hinges (4 per door)
Single Door/ Door Frame
*Double door upgrade available
1. Single GH Door
2. Single Frame
Endwalls
Endwall Hardware
1. Kit with Tools (in zipper bag)- 2¼" jobber length drill bit (1), 1" Hole Saw, Nut
drivers for #8 & #10 self tap
2. #8 x ¾ zinc self tap (200)
3. #10 x ¾ zinc self tap (50)
4. ¼ x 2" bolt galvanized (10)
5. ¼ nut galvanized (10)
6. ¼ split lock washer galv. (10)
7. ¼ flat washer (20)
Endwall Frame Hardware
1. Tension Band Clamp 1.35 (8)
2. Endwall Cross Connector 1.375 (2)
Need Help? contact@bootstrapfarmer.com Page 7 www.bootstrapfarmer.com

Frame Hardware Kit
** Check "Pick-list" as hardware/part quantities are
dependent on kit size.
1. ¼ x 2" bolt galv.
2. ¼ nut galv.
3. ¼ split lock washer galv.
4. ¼ flat washer galv.
5. #8 x ¾ zinc self tap
6. #10 x ¾ zinc self tap
7. Sidewall hardware kit
Hoop House Frame Parts
1. 10in splice channel
2. Cross connector 1.375
3. 75in swaged ridge pole
4. 36in extension ridge pole
5. 48in 1.66 drilled ground post*
6. 78in hat channel
7. Lock channel & spring wire
8. Wire Hoop Pack**
*Ground Post Pack Options
14/20- (18) 14/40- (28) 14/60- (38) 14/80- (48)
14/100- (58)
20/20- (20) 20/40- (30) 20/60- (40) 20/80- (50)
20/100- (60)
**Hoop Pack Options
● 14' Hoop Pack (2) 96" Swaged & (1) 102.75" Pole
● 20' Hoop Pack (3) 96" Swaged & (1) 117" Pole
Need Help? contact@bootstrapfarmer.com Page 8 www.bootstrapfarmer.com

Optional Upgrades
Roll-up Sidewalls
1. Sidewall Hand Crank (2)
2. Snap Clamps
3. Strapping
4. Eye Bolt
5. EMT 0.5in 2ft
6. 78in 0.922 EMT Pole with swaged End
Corner Brace Kit
1. Flat open 75in brace 1.315 (4)
2. Flat swage 36in brace 1.315 (4)
3. #8 Hex self-tap screws 1in (11)
4. 1 ⅜ tension band for hoops (4)
5. 1 ⅝ tension band for ground posts (4)
Purlin Kit
● Cross connector 1.375 (2 per hoop)
● 75in swaged ridge pole (# dependent on length of kit)
● 36in extension ridge pole (2)
Need Help? contact@bootstrapfarmer.com Page 9 www.bootstrapfarmer.com

Labeled CAD Drawings
1. 48” 1.66 drilled ground post
2. Base brace (hat channel)
3. Hip brace (hat channel)
4. Single door / door frame
5. Optional corner brace
6. Optional purlins
7. Endwall hoop
8. Ridge pole
9. Optional truss kit 36” flat flat bar with tension bands (2)
10.Vertical uprights (36” extension & 78” Ridgepole)
11. 10” Splice channel
Need Help? contact@bootstrapfarmer.com Page 10 www.bootstrapfarmer.com

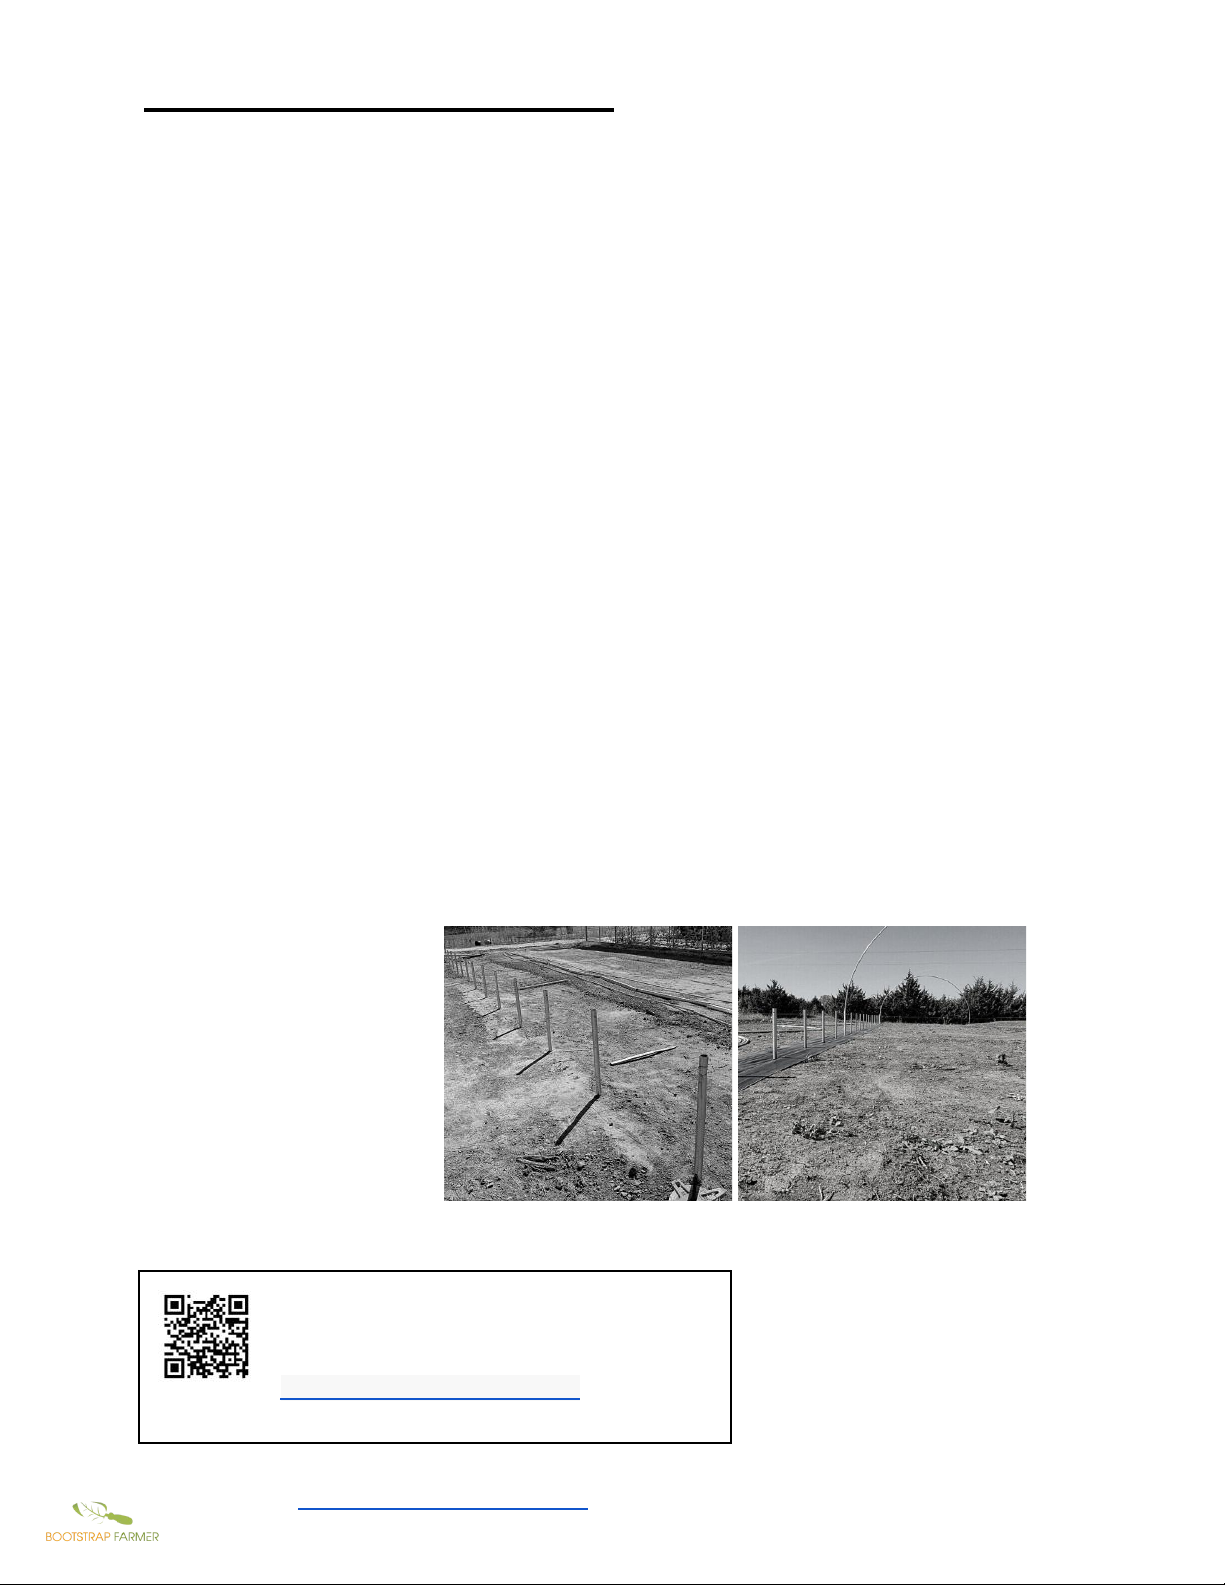
Ground Posts
Optional: Install landscape fabric prior to installing ground posts. It is
recommended that you line the perimeter of the greenhouse 1’ inside and 3’ along
the outside with landscape fabric, so you will prevent erosion from the water the
greenhouse sheds and so you don’t have to mow or weedeat next to your
greenhouse! Accidentally throwing debris through your greenhouse plastic!
Scan QR Code for information on
Landscape Fabric or visit
https://youtu.be/spzkFIPTOWE
Tools
Every kit we sell comes with a specialized tool called a
ground post driver. It is placed on the top of the post to
keep it from mushrooming when you hit it with a sledge
hammer.
You will also need:
● Sledge hammer/double jack
● Single jack (a smaller sledge hammer with a handle under 2’ in length)
● Tape measures; ideally at least one that will measure the entire length of the
diagonal between corner posts.
● Levels; a line & magnetic level.
● Mason line
● Stakes
● Pencil, paper, and a calculator
Parts
● 48in 1.66 Drilled Ground Posts
* Quantity of posts dependent on kit size.
Need Help? contact@bootstrapfarmer.com Page 11 www.bootstrapfarmer.com

Squaring Your Structure
Making sure that your first four corner posts are squared will provide you with a base to
work from to ensure the rest of the posts are easy to install plumb and level.
Using one of the following methods, set your corners.
Measure Method - First measure length to length. Then mark width, it should be 14’ or
20’ depending on your kit. Then measure diagonally, making sure the diagonal
measurements are equal to each other. Double check that all length, width and diagonal
measurements are equal and install stakes. This ensures your greenhouse will be
square.
Pythagorean Theorem method - Starting at your first desired post location, sink a
marking stake. Use your tape measure to measure and mark a line at 3 feet and a
second line at 4 feet perpendicular to the first. Then place a line directly across both
marks. The third line should equal 5 feet and give you a square corner.
From this triangle you can extrapolate out to the desired length and width to sink your
second and third stakes for the corners. Use a plumb line from the second and third
stakes to intersect at a right angle for the location for the final corner post. Check all
measurements.
Need Help? contact@bootstrapfarmer.com Page 12 www.bootstrapfarmer.com
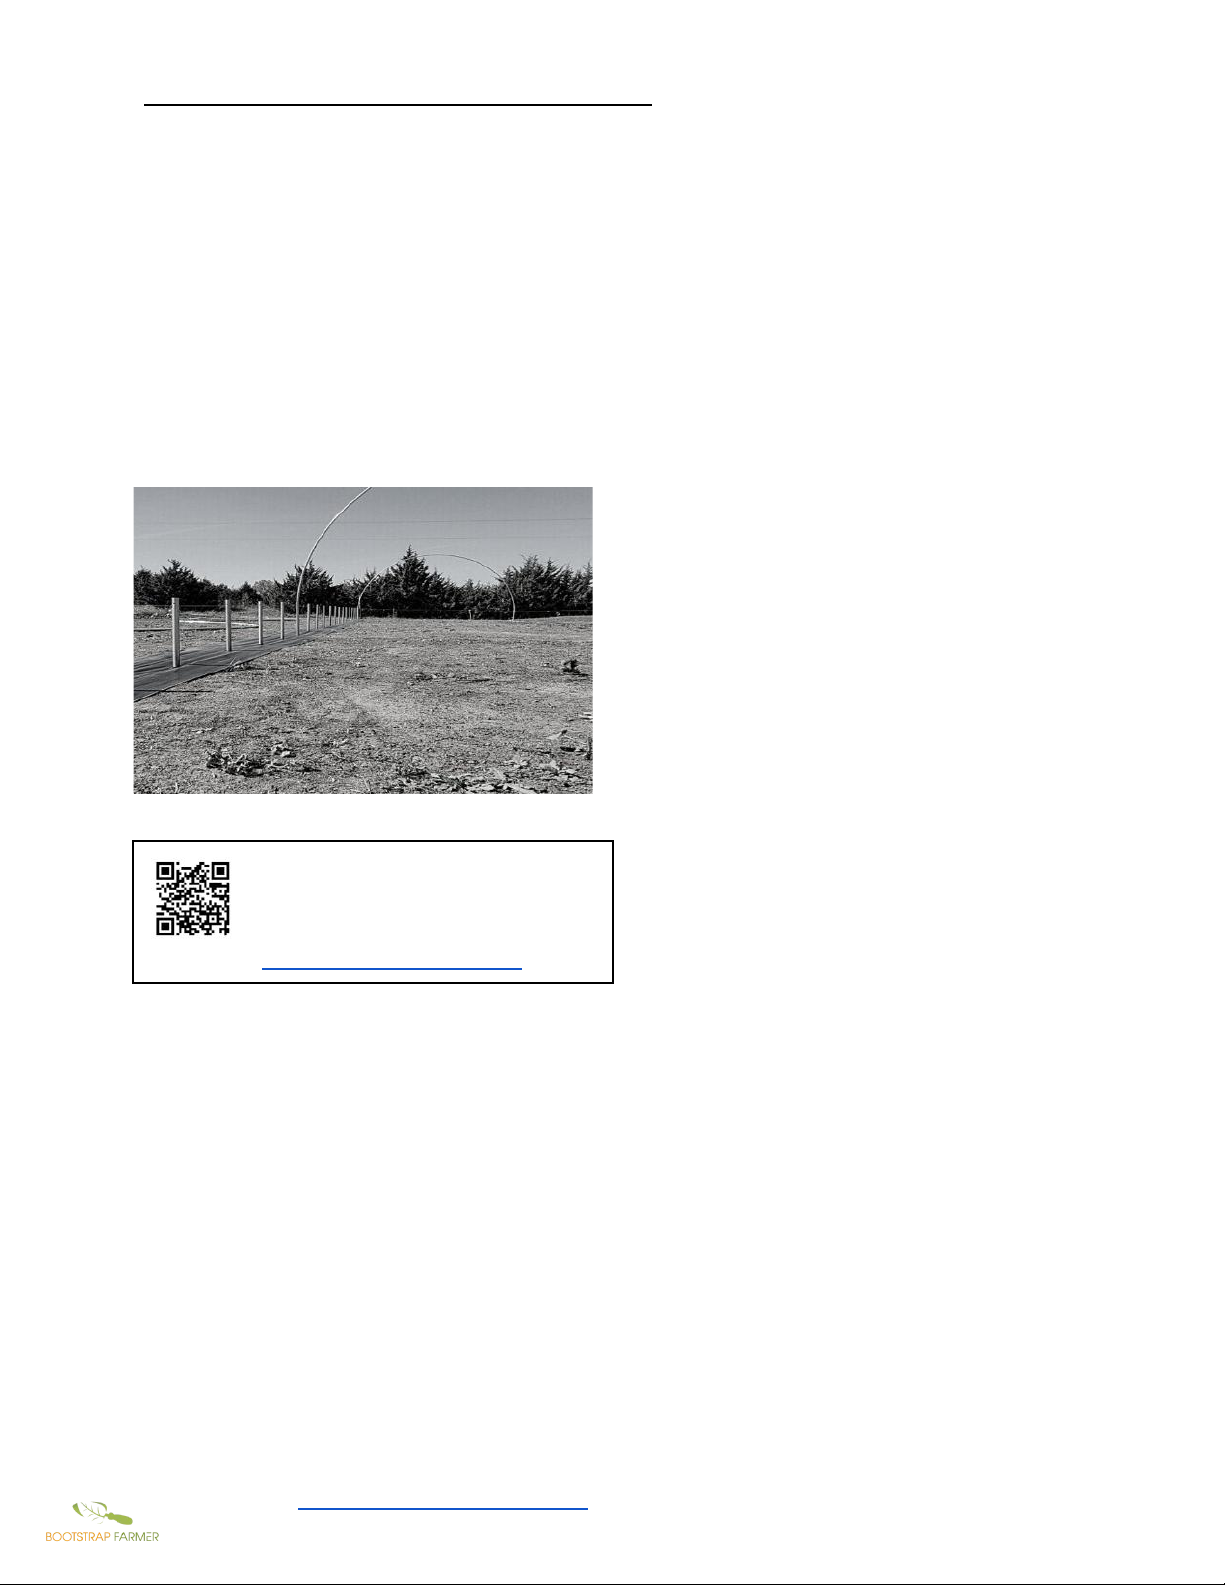
Installing the Ground Posts
Once your area is measured out with temporary stakes in place. Install each corner
ground post from the previous step. Place your posts where you had previously marked
the corners and begin driving those into the ground.
While driving the posts into the ground you want to make sure the poles are plumb in all
directions.
As you are driving the pole into the ground check for levelness on the front and sides
and adjust as needed. The hole should be facing parallel to the length of the hoop
house.
After the corner ground posts are installed, re-measure length, width and diagonals one
last time. If you made a mistake it’s not too late to fix it without too much work. Once you
are satisfied, tie a string line around the outside of the corner posts.
This will help to keep all your ground posts in alignment so you don't get wavy hoops
later on. Install ground posts every 4' on center following your line keeping
approximately 2' into and 2' above ground.
Scan QR for info on
Installing Ground Posts or visit
https://youtu.be/S0iSPnsYVi0
Need Help? contact@bootstrapfarmer.com Page 13 www.bootstrapfarmer.com
Hoops
The hoops will come bundled together and you will need to construct them.
Tools
● Drill
● #8 Self Tap Screw
Parts
14' WIDE HOOP set contains:
● (2) 96in Swaged pole (bent)
● (1)102.75’ Pole (bent)
20' WIDE HOOP set contains:
● (3) 96in Swaged pole (bent)
● (1)117' Pole (bent)
Pole Layout for Hoops
Our pre-bent poles come with (1) swaged end to decrease the diameter, similar to a
pipe nipple. This enables you to connect poles without the use of fittings.
**Always drill on the side of the hoop so that the screw will end up parallel to the ground
when the hoop is placed upright to protect the plastic from damage.**
Need Help? contact@bootstrapfarmer.com Page 14 www.bootstrapfarmer.com

Connect and Install Hoops
● Piece your hoop set together on a flat surface. For consistency, assemble all your
hoops in the same spot, so they match.
● Using a #8 self tap screw, connect the hoop together to prevent twisting and
separation. Screwing straight down while the hoop is lying flat will ensure the
screw is parallel to the ground once you raise the hoop.
● When all of the hoops are connected, place them near the ground posts.
● With a partner, stand the hoops up and place one side into a ground post and
then the other. For consistency, have the same person go first. At this point do
not force the hoops down into the ground posts all the way. Adjustments will
come on the next couple of steps.
Scan QR for info on Setting Hoops or
visit
https://youtu.be/eXq7C5LAeVQ
Need Help? contact@bootstrapfarmer.com Page 15 www.bootstrapfarmer.com
Installing Hoops to Ground Posts
1. While on a ladder, one person eyeballs the top of hoops as a partner adjusts the
height of the hoops at ground posts. (20’ has a center height of 11’-4’’. The 14’
has a center height of 9’-4’’)
2. Adjust height and sides until they all line up and are level all the way along the
structure.
3. When you are satisfied with the hoops being aligned, drill a 1/4" hole through the
hoop at the hole in the ground post. Secure with 1/4"x2" bolt, flat washers, lock
washer, and 1/4" nut.
NOTE: If you purchased optional bracing,
installing on the ground posts now will be
much easier. SKIP TO PAGE 34 for install
instructions.
Do not stress out about the hoops looking
uneven when in the ground posts at this
point. Adjustments will come later.
Scan QR for info on Installing Hoops
to Ground Posts or visit
https://youtu.be/S0iSPnsYVi0
Need Help? contact@bootstrapfarmer.com Page 16 www.bootstrapfarmer.com

Ridge Poles
End Wall Cross Connector
The end wall connector is manufactured in the OPEN position for an easier installation
over the hoops. End wall cross connectors help to keep the ridgepole from extending
past the end hoops and poking the plastic end walls. We recommend adding a #8 self
tap screw to all tension bands and end wall cross connectors - but not the saddle type
cross connectors.
Note: Since each hoop will be connected to the first end wall it should be carefully
made plumb and held that way as you make the connections. You can do this easily
using stakes and rope. Wrap a rope up and around the hoop. Using a magnetic level,
stake the rope securely on either side of the hoop with the hoop directly perpendicular
to the ground. If you need to, move the stakes slightly left or right in order to secure the
hoop in the proper position.
Tools / Parts
● Ladder
● Clamps
● Drill with 3/16” drill bit
● Hammer (16 oz)
● Slip joint pliers for installation.
● End Wall Cross Connectors with hardware
Need Help? contact@bootstrapfarmer.com Page 17 www.bootstrapfarmer.com
Installing End Wall Cross Connectors
1. Place Ridge Pole past the lower loop but not further than 1/2 way past the hoop,
tighten the gold nut and bolt supplied with the end wall cross connector.
2. Pre drill at “Point A” with a 3/16” drill bit. These connectors are thicker metal so
be prepared to use extra force.
3. Use a clamp to press the ear that faces the inside of the hoop house with the
pre-drilled holes against the hoop. Secure with #8 self-tap screws.
4. Use slip joint pliers and a 16 oz. hammer to curl the outside ears further around
the end wall hoop. It is not necessary to make the end wall cross connector snug
around the hoop.
5. Finally, drill through the end wall cross connector and ridge pole. Insert a 2" bolt
with a lock washer and nut (same as ground post nut/bolt) at point C.
6. When you install the lock channel over the ears you can install self-tap screws
close to, but not through, the ears of the end wall cross connector to add
tension.
Scan QR for info on Stabilizing
Your End Wall or visit
https://youtu.be/eXq7C5LAeVQ?t=300
Need Help? contact@bootstrapfarmer.com Page 18 www.bootstrapfarmer.com

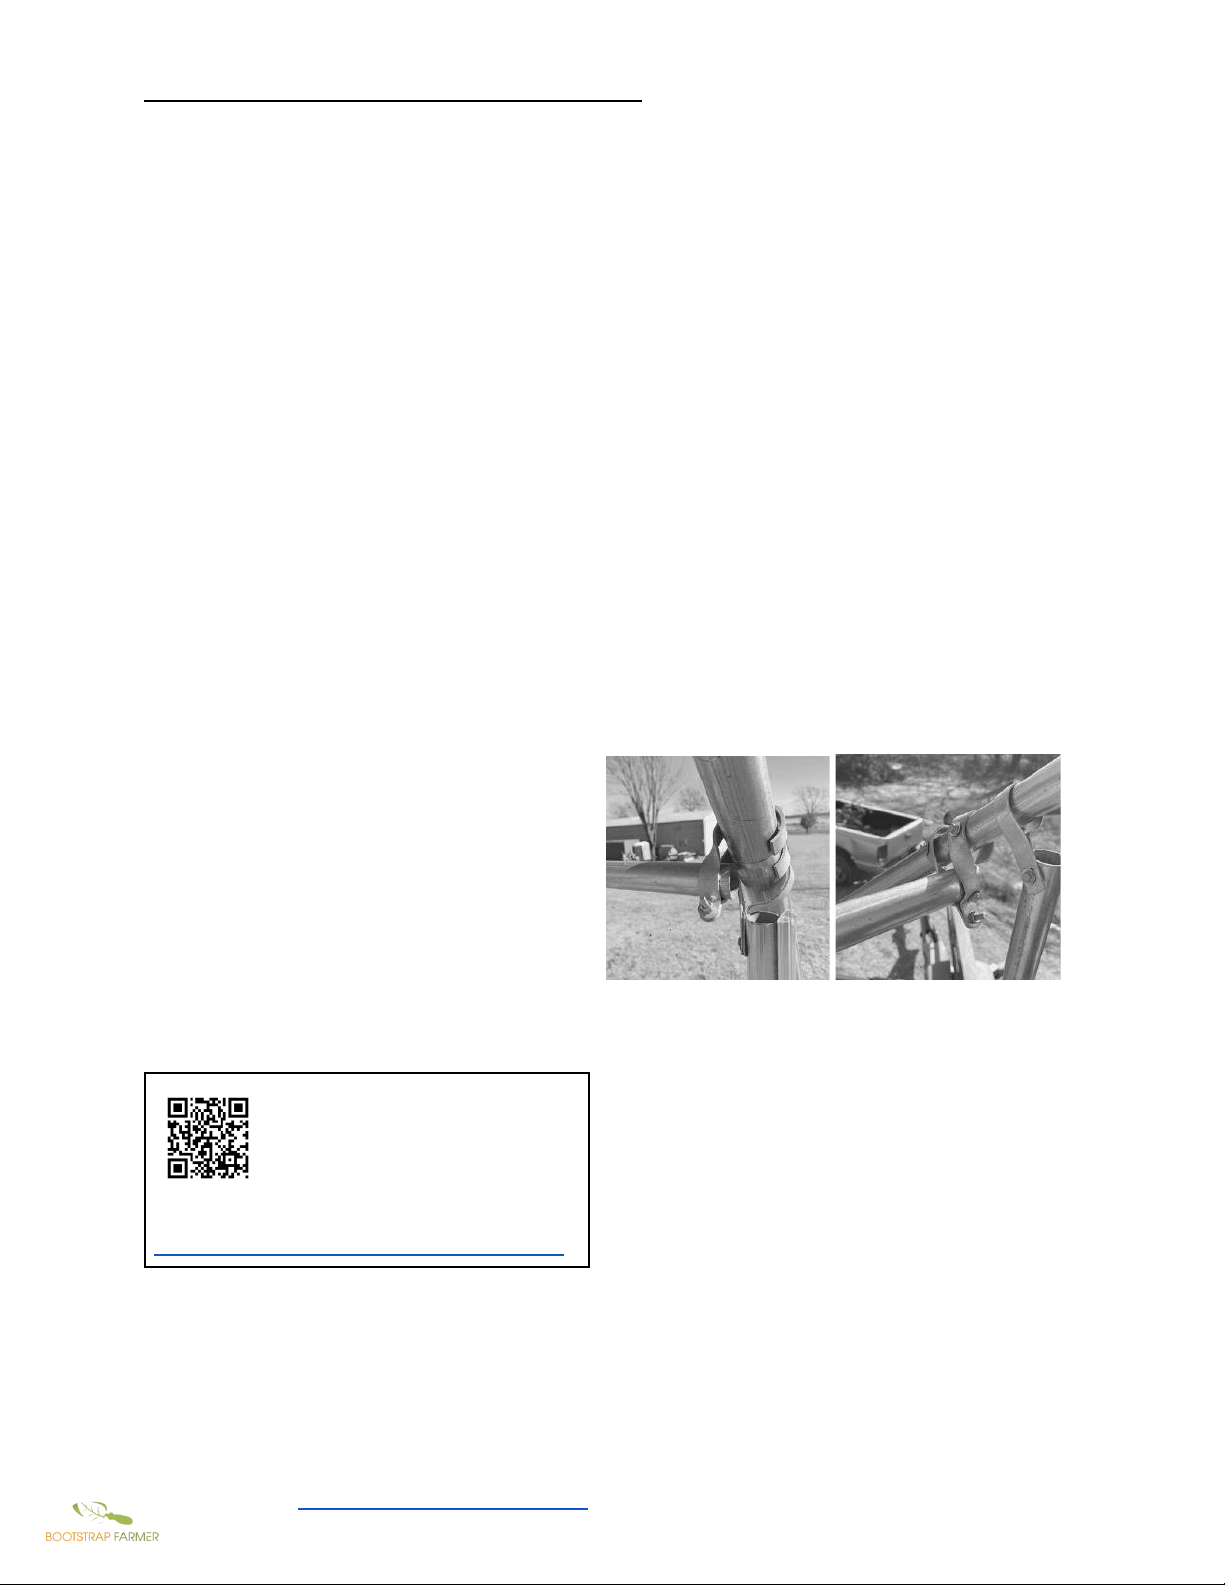
Cross Connectors and Ridge Poles
Pictures on the following page.
Ridge poles and cross connectors work together to connect and stabilize the hoops.
Optional purlins and additional cross connectors further stabilize and are installed the
same way. (See page 33)
Tools
● Rope/ Stakes
● Drill w/ ¼” bit
● Step ladder
● Saw
● Ratchet & Sockets
● Tape measure
● wrench
Parts (PER 20FT)
● ¼ x 2" bolt galv. (15)
● ¼ nut galv. (15)
● ¼ split lock washer galv. (15)
● ¼ flat washer galv.(30)
● Cross Connector 1.375
● 75in Swage Ridge Pole
● 36in Extension Ridge Pole
● End Wall Band Clamp 1.375”
● #10 self tap screw
Install Ridge Pole and Connectors
1. Loosely place cross connector on the top of the rest of the hoops.
2. Starting at one end wall carefully ensure that the end wall is still plumb.
3. Connect the ridge poles together with #8 self tap through from the bottom or on
the side at the swaged connection.. Insert the pole into the end wall cross
connector and the next hoop cross connector. Continue adding ridge poles until
the other endwall is reached.
4. Center the loose assembly on the very top and center of the hoop, double check
the plumb of the end wall and tighten the bolt on the connector using a ratchet.
5. Measure 4' on center from 1st tightened connector to the next connector and
secure at that point.
6. Repeat this process for each hoop as you make final plumb adjustments while
keeping cross connectors 4' apart. Depending on the length of your greenhouse,
you will use a 36’’ extension on the end of the ridge pole, or a full 75’’ ridge pole
and cut off the excess.
Need Help? contact@bootstrapfarmer.com Page 19 www.bootstrapfarmer.com

Scan QR for info on RidgePoles or
visit
https://youtu.be/AfTKTvcqw20
Hip & Base Braces
All Metal Kits use 16 gauge hat channel. Hat channel is the same material for both the
hip board and baseboards where lumber would typically be used.
The hip and base braces are made exactly the same way and is a layering process
between hat channel, hat splice, and lock channel.
These steps are not complicated but do require your understanding of the process
before you start. Please read all steps in this section, view pictures, and consult our
video on the build process. Hat splice seams will get close but not fall directly on hoops.
When you are assembling, understand that you slide the next hat channel inside of a
space between the hat splice and lock channel as you butt up to the previously installed
hat channel. Begin with the base and then the hip brace. Keep the base brace as close
to the ground and level as possible.
Tools
● Drill & Drill Bits
● Clamps
● Metal Saw
● Bubble Level
Need Help? contact@bootstrapfarmer.com Page 20 www.bootstrapfarmer.com
This manual suits for next models
1
Table of contents
Other Bootstrap Farmer Greenhouse Kit manuals


