manuals.online logo
Brands
  1. Home
  2. •
  3. Brands
  4. •
  5. Borglocks
  6. •
  7. Lock
  8. •
  9. Borglocks BL 2605 MG Pro Configuration guide

Borglocks BL 2605 MG Pro Configuration guide

Š
ˆ
FACTORY
PRE-SET CODE
11
‰
Parts List,
Installation
and
General
Information
„
†
 ‚
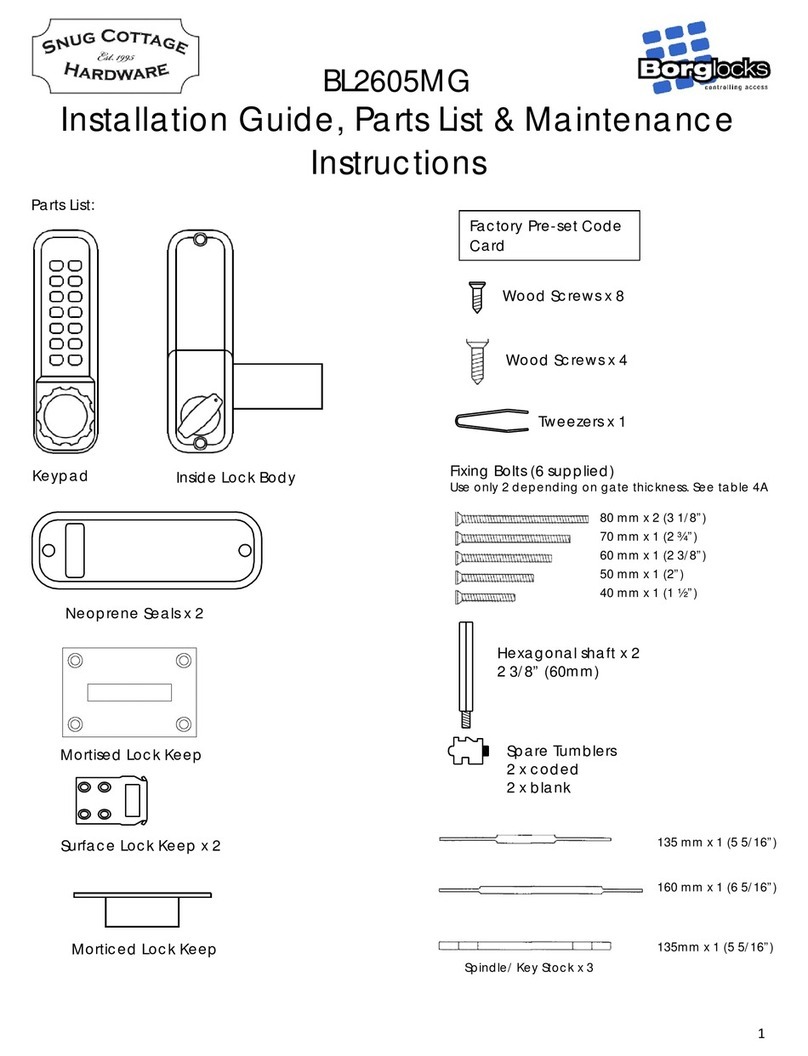
Please make sure you have received all the
following parts:
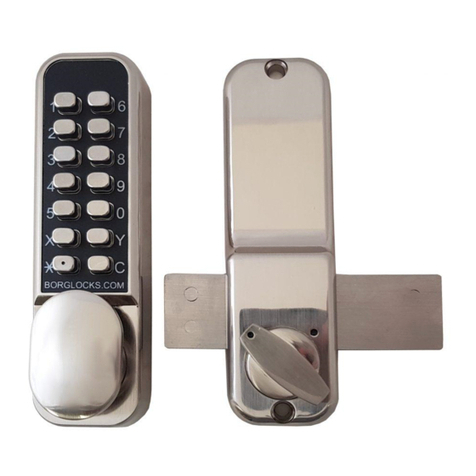
(1) Keypad
(2) Inside lock body
(3) Neoprene seals x 2
(4) Spindles
(5) Surface lock keep
(6) Morticed lock keep
(7)Wood screws x 8
(8) Tweezers (For changing the code)
(9) Fixing bolts. 6 supplied
(10) Spare tumblers. 2 x Coded
2 x Uncoded
(11) Code card
…
‡
ƒPARTS LIST
.1.
BL2605MG
Fixing Bolts. 2 supplied
(4) Spindle
V2
BL 2605 MG Pro
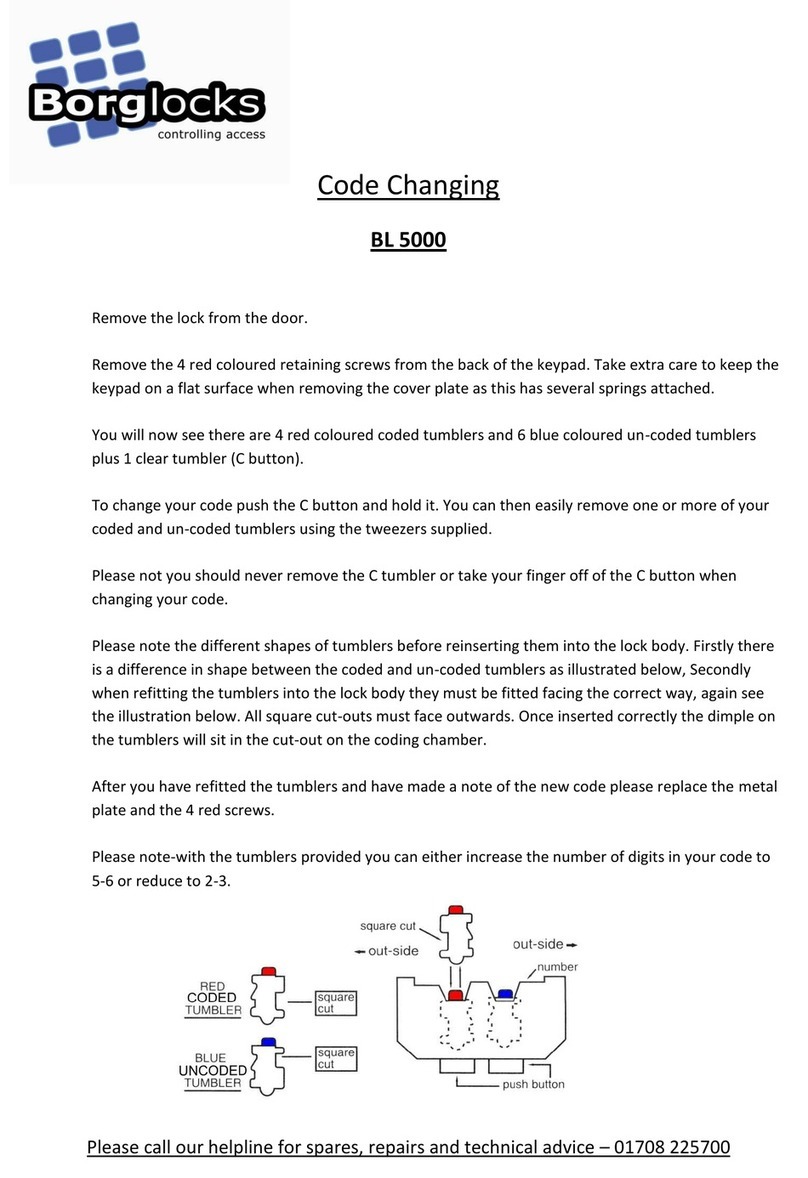
1) Remove the lock from the door .
2) Remove the 2 retaining screws from the back
of the keypad. Take EXTRA care to keep the
keypad on a flat surface, when you are
removing the covering plate, because there are
a lot of small components inside.
3) You will now see that there are 5 red coloured
coded tumblers & 8 blue coloured uncoded
tumblers plus 1 clear tumbler ('C' button).
4) To change your code, push the 'C' button down
and hold it. You can then easily remove one or
more of your coded & uncoded tumblers, using
the tweezers supplied.
Remember, the red tumblers represent
coded digits and the blue tumblers
represent non-coded digits
5) Please note you should NEVER remove the 'C'
tumbler.
6) Please note the different shapes of tumblers,
before reinserting them into the lock body.
Firstly there is a difference in shape between
the coded & uncoded tumblers, illustrated
below. And secondly when refitting the
tumblers into the lock body, they must be fitted
facing the right way, again see the illustration
Below. (All square cutouts must face outwards)
7) After you have refitted the tumblers and made
a note of the new code, please replace the
metal plate with the 2 screws
8) PLEASE NOTE.With the spare tumblers
provided, you can either increase the number
of digits in your code to 6 - 7 or reduce to 3 - 4.
HOW TO CHANGE YOUR CODE NUMBER
Blue Non-Coded
Tumbler
Red Coded
Tumbler
Dismantling the lock will invalidate your warranty
If you expericnce any problems when fitting
this lock or changing the code please
contact the:
BORG HELPLINE
00800 44 88 377
SPECLAL NOTES
FOR RIGHT HAND
DOOR
PIN
X
YC
Z
1
2
3
4
50
9
8
7
6
FOR LEFT HAND
DOOR Square
cut-out
Square
cut-out
PIN
Z
C Y
X
BLUE
COLOUR
SCREW
6
7
8
9
0 5
4
3
2
1
CHANGING THE HANDING OF THE UNIT
CHECK THE HAND OF YOUR DOOR
Before commencing installation check that all
parts are working correctly: Press the code
according to the code card and then the knob
should turn and return easily under spring pressure.
lf you intend to change the code, you should do it
before installing the lock, See the code change
instructions.
OUTSIDE
INSIDE
RIGHT AHND
Your door is right-
handed, if viewed,
form the outside the
hinges are on the
right.
LEFT HAND
Outwards
Square
cut-out
Outwards
Buttons
Square
cut-out
.2.
Borg Locks Helpline
+44 (0) 1708 225700
V2
Plate to be removed
Unscrew the four
screws and remove
the plate
Dead bolt
Right
Dead bolt
Left
Assembling and Fitting
Morticed lock keep
·
·
Surface lock
keep
·
Surface lock keep
Keypad ·
Inside lock
body
·
.3.
V2
BORG LOCKS UK LTD
9 Upminster Trading Park, Warley Street, Upminster, Essex RM14 3PJ
Tel. +44 (0) 1708 225700 Fax. +44 (0) 1708 226338
sales@borglocks.com www.borglocks.com
Maintenance Instrucons – Applicable for all models
Monthly
Clean the surface of the keypad and all of the exposed elements of the latch assembly with a
light spray applicaon of a silicon based lubricant such as GT85 or other. Remove any excess
with so cloth.
Do not use oil based lubricants such as WD40. Oil based products will aract dirt. A Silicon
based lubricant will also help to displace water away from the internal mechanisms.
Annually
1. Remove the lock from the door/locking assembly.
2. Spray the inside of the lock with GT85 or other silicon based lubricant through the tumbler
holes on the reverse of the keypad. Remove any excess with so cloth.
3. Spray all of the xings, accessories and latch with GT85 or other silicon based lubricant.
4. Push each of the buons and rotate the knob/lever several mes to ensure that the lock is
working smoothly and that all buons return to their outward posion.
Remarks
The above maintenance procedures can be carried out whenever the operaon of the lock
is scky or the code is intermiently accepted. If for whatever reason the above instrucons
do not solve the problem, please call our help line on +44 (0) 1708 225700.

Other Borglocks Lock manuals

Borglocks BL2005ECP Series User manual

Borglocks

Borglocks BL2005ECP Series User manual

Borglocks BL2005 Configuration guide

Borglocks

Borglocks BL2005 Configuration guide

Borglocks BL4409 User manual

Borglocks

Borglocks BL4409 User manual

Borglocks BL2615MG Configuration guide

Borglocks

Borglocks BL2615MG Configuration guide

Borglocks BL3030ECP User manual

Borglocks

Borglocks BL3030ECP User manual

Borglocks BL2605MG Configuration guide

Borglocks

Borglocks BL2605MG Configuration guide

Borglocks BL2605MG User manual

Borglocks

Borglocks BL2605MG User manual

Borglocks BL2400 Series User manual

Borglocks

Borglocks BL2400 Series User manual

Borglocks BL 5000 User manual

Borglocks

Borglocks BL 5000 User manual

Borglocks BL2615MG Configuration guide

Borglocks

Borglocks BL2615MG Configuration guide

Borglocks BL7000 Easicode User manual

Borglocks

Borglocks BL7000 Easicode User manual

Borglocks BL2701 Quick guide

Borglocks

Borglocks BL2701 Quick guide

Popular Lock manuals by other brands

COMPX CB098-198 instruction sheet

COMPX

COMPX CB098-198 instruction sheet

National Cabinet Lock C8178 Dimensional drawing

National Cabinet Lock

National Cabinet Lock C8178 Dimensional drawing

FUHR Multisafe 855 installation instructions

FUHR

FUHR Multisafe 855 installation instructions

Assa Abloy Effeff 519 Installation and fitting instructions

Assa Abloy

Assa Abloy Effeff 519 Installation and fitting instructions

OEZ S-P50U06 Instructions for use

OEZ

OEZ S-P50U06 Instructions for use

JNF IN.08.MFU.16 quick start guide

JNF

JNF IN.08.MFU.16 quick start guide

L&F Euro-Locks 2800 User instructions

L&F

L&F Euro-Locks 2800 User instructions

CDVI V5NU instructions

CDVI

CDVI V5NU instructions

Falcon W-Series with Knobs installation instructions

Falcon

Falcon W-Series with Knobs installation instructions

Safety 1st OutSmart HS270 user guide

Safety 1st

Safety 1st OutSmart HS270 user guide

BASI HS 1400 installation instructions

BASI

BASI HS 1400 installation instructions

iLoq D10S Series installation instructions

iLoq

iLoq D10S Series installation instructions

Kaba Mas AUDITCON 2 Series installation guide

Kaba Mas

Kaba Mas AUDITCON 2 Series installation guide

CISA E-volution E6515 Series user guide

CISA

CISA E-volution E6515 Series user guide

Orno OR-ZS-827 manual

Orno

Orno OR-ZS-827 manual

Creone KeEYBOX KEYRACK KEYWIN5 installation guide

Creone

Creone KeEYBOX KEYRACK KEYWIN5 installation guide

Pado FDS-10 user manual

Pado

Pado FDS-10 user manual

COMPX 1T-058 Information

COMPX

COMPX 1T-058 Information

manuals.online logo
manuals.online logoBrands
  • About & Mission
  • Contact us
  • Privacy Policy
  • Terms and Conditions

Copyright 2025 Manuals.Online. All Rights Reserved.