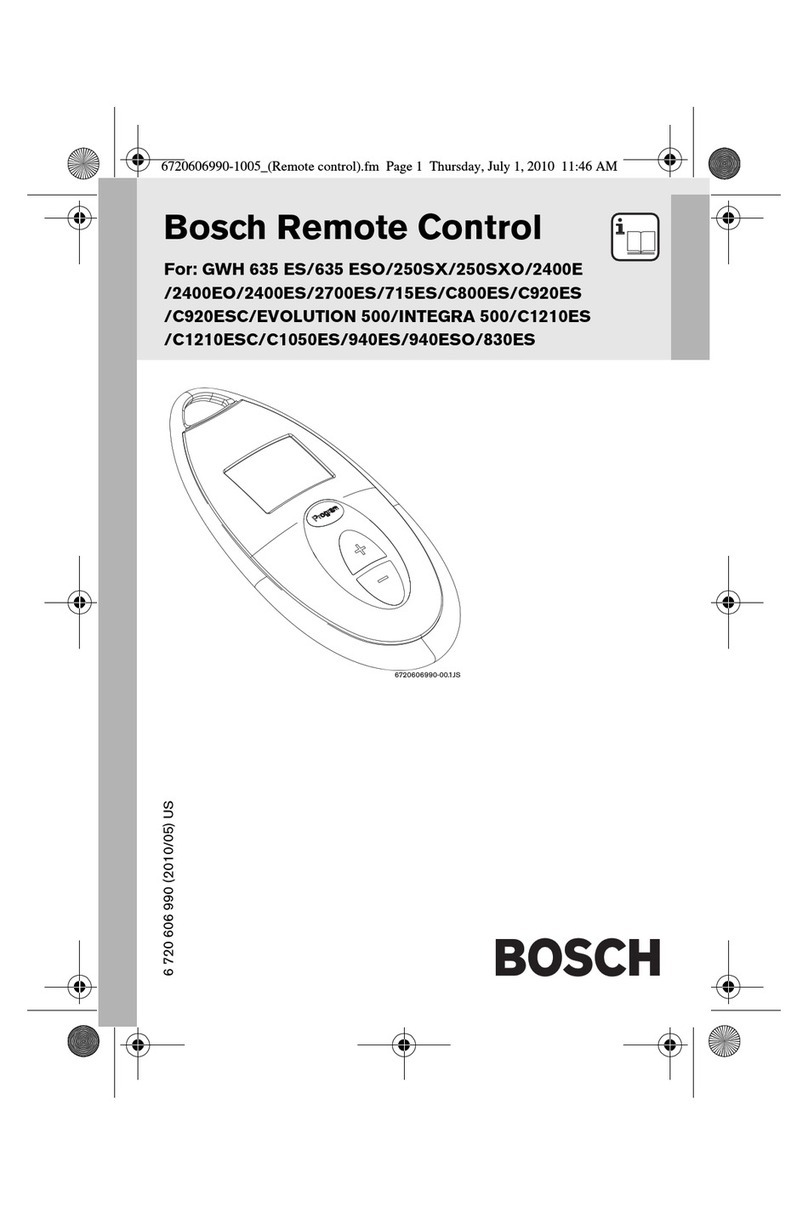
Bosch Junkers 1119 User manual

Nr. 1119
7 709 003 550
English 2
Italiano 11
Français 21
Deutsch 32
6 720 607 740 (05.11) SM
6720607740-0511(telecomando)_all.fm Page 1 Friday, November 25, 2005 5:44 PM

2
Contents
6 720 607 740
Contents
1 Declaration of Conformity with
CE marking 2
2 Remote Control Data 3
3 Parts supplied 3
4 Using the Remote Control 3
5 Maintenance 9
Safety Instructions
BRead the following instructions very
carefully to ensure perfect
operation.
BFollow safety instructions.
1 Declaration of
Conformity with CE
marking
This device meets the requirements of
European Directives 1999/ 5/CEE
(R&TTE) and is compliant with the
type-tested sample in the relative CE
test certificate.
Caution: the re-
mote control is wa-
terproof and can
also be used in the
shower . Nev-
ertheless, you
should ensure it is
not immersed in wa-
ter, for instance in
the bathtub .
Caution: The remo-
te control can be
used only in the
following countries:
Italy, France, Ger-
many, Belgium,
Holland, Spain and
Portugal.
6720607740-0511(telecomando)_all.fm Page 2 Friday, November 25, 2005 5:44 PM

3
Remote Control Data
6 720 607 740
2 Remote Control Data
Remote control for temperature control
and adjustment at a distance of the
Celsius Plus WTD..AME....
Technical Data:
Further Indications:
3 Parts supplied
Fig. 1 Parts
1Remote control
2Remote control transceiver PCB
3PCB’s connection cable
4UsingtheRemote
Control
4.1 Description of the LCD
Fig. 2 Multifunctional LCD
1Displays temperature, error codes
and functions
2"Remote control in operation"
indication (signal arriving from
remote control)
3Device in operation (with burner
on)
4Degrees centigrade symbol
indication
5Remote control battery level
indication (weak signal coming
from the remote control)
6Priority function (temperature
cannot be modified when water is
running)
7"Security lock" symbol
Battery power
supply Alkaline LR 6
2 x 1,5V
Frequency 868 MHz
Type of
protection
IP X6
Remote
control
Further remote controls
can be ordered (up to six).
6720607740-0511(telecomando)_all.fm Page 3 Friday, November 25, 2005 5:44 PM

4
Using the Remote Control
6 720 607 740
4.2 Remote control trans-
ceiver PCB installation
Pre-installation preparation
BDisconnect power supply to heater.
BRemove the mirror from the appli-
ance by pushing it lightly towards.
BLoosen the two screws.
Fig. 3 Remove front cover
BOpen control box cover.
BConnect PCB’s connection cable
as in Fig. 4.
Fig. 4 PCB connection cable
Caution: For safety
reasons, disconnect
the power supply to
the water heater
before performing
installation.
6720607740-0511(telecomando)_all.fm Page 4 Friday, November 25, 2005 5:44 PM

5
Using the Remote Control
6 720 607 740
BFix the transceiver PCB as show in
Fig. 5.
Fig. 5 Transceiver PCB
BConnect the other side of PCB con-
nection cable as in Fig. 6.
Fig. 6 PCB connection cable
BClose control box cover.
BRe-assemble front cover.
6720607740-0511(telecomando)_all.fm Page 5 Friday, November 25, 2005 5:44 PM

6
Using the Remote Control
6 720 607 740
4.3 Remote Control Activa-
tion
BMove the main switch on the
equipment to the 0 position.
BKeep the "Program" button on the
device pressed and turn the main
switch to position I.
The code "P1" will appear on the
control panel display.
BRelease the "Program" button and
press the on the control panel
until the code "P3" appears.
The device is now in the "remote
control activation position" with the
code "P3" displayed.
BKeep the "Program" button pressed
for several seconds until the code
"99" appears on the display.
BPoint the remote control at the
equipment and simultaneously press
the buttons and on the
remote control (Fig. 7).
Fig. 7 Remote control activation
BKeep the buttons and
pressed until the control panel
display stops flashing and the code
"00" appears.
BMove the main switch to the 0
position.
The remote control is now active.
4.4 Hot Water Temperature
Adjustment by Remote
Control
BPress the buttons or on
the remote control (Fig. 8, pos. 2)
until the required temperature (in
degrees centigrade) appears on the
remote control display (Fig. 8, pos.
1).
BWhen the required temperature is
defined, turn on the hot water tap.
iBefore the remote
control will work it will
have to be activated,
using the procedure
described below, and
standing in front of the
equipment.
6720607740-0511(telecomando)_all.fm Page 6 Friday, November 25, 2005 5:44 PM

7
Using the Remote Control
6 720 607 740
BThe required temperature will flash
on the remote control display.
BThe flashing will stop when the
required temperature is reached
(tolerance ± 3 °C).
Fig. 8 Temperature adjustment
4.5 "Program" Button on the
Remote Control
Memorizing the water
temperature with the remote
control "Program" button
BPress the buttons or on
the remote control (Fig. 9, pos. 2),
until the required temperature (in
degrees centigrade) appears on the
remote control display (Fig. 9, pos.
1).
BYou will now be able to memorize
this temperature by keeping the
"Program" button on the remote
control (Fig. 9, pos. 3) pressed for 3
seconds.
Fig. 9 Memorising water
temperature
BOnly one temperature can be
memorized using the "Program"
button on the remote control.
BAt this point the remote control will
display the memorized temperature .
When the hot water tap is turned on,
the boiler will supply hot water for
washing at the temperature
memorized on the remote control.
6720607740-0511(telecomando)_all.fm Page 7 Friday, November 25, 2005 5:44 PM

8
Using the Remote Control
6 720 607 740
If the temperature was memorized
using remote control buttons (it is
possible to combine up to six remote
controls), it can only be modified whilst
hot water is flowing if the same remote
control is used again (see chapter 4.6
"Priority Function").
Using the "Program" button
(operation with memorized
temperature)
To operate the equipment with a
previously memorized temperature:
BPress the "Program" button on the
remote control.
The remote control display or control
panel will now show the previously
memorized temperature. When the hot
water tap is turned on, the boiler will
supply hot water after a few seconds,
at the memorized temperature.
4.6 "Priority" function
The equipment does not have a default
temperature setting and therefore has
no default "Priority" function.The
"priority" will be attributed
automatically by the first user who
selects or memorises (on the remote
control or on the control panel) a
temperature for subsequent use (e.g. a
shower).
Then, when the hot water is used (e.g.
for a shower), the control panel display
and remote control/s display will show
the symbol " ".
The temperature may only be modified
iApart from the
temperature that can be
memorized using the
"Program" button on the
control panel, a second
temperature can be
memorized on each
remote control using the
"Program" button, to
meet the needs of each
user.
iTemperature cannot be
memorized or selected
using the control panel
buttons or even a
second remote control
when hot water is in use
(e.g. during a shower)
since the "Priority"
function will
automatically start up to
stop another user
modifying the
temperature when hot
water is in use.
6720607740-0511(telecomando)_all.fm Page 8 Friday, November 25, 2005 5:44 PM

9
Maintenance
6 720 607 740
using the same buttons that
memorized it (depending on whether
the control panel or the remote control
was used).
The "Priority" function ends:
• 5 minutes after the last use of the
hot water (return to basic set up).
• 2 minutes after selecting/
memorizing the temperature if no hot
water is used immediately
afterwards.
Acquiring "priority”
Any user can acquire "priority" for
subsequent use of hot water, as
follows:
BMove main switch to position I.
BKeep button or button
pressed.
BSelect the required temperature.
BPress the "Program" button for 3
seconds to memorize the
temperature, if required.
BUse the hot water within two
minutes of acquiring "priority.
4.7 Error Messages
This device has an error message
system. Any anomalies will be
indicated by an error code that will
appear on the display (Fig. 2, pos. 1)
and by a symbol indicating a "safety
block" (Fig. 2, pos. 7). The device will
be operative once again following the
elimination of the fault and after
pressing the reset button.
To identify the type of anomaly, consult
chapter 8 of the installation manual.
5 Maintenance
5.1 Replacing batteries
Batteries are not mounted in the
remote control. When batteries are flat,
the symbol (Fig. 2, pos. 5) will appear
on the display.
BRemove the two screws on the back
of the remote control.
BOpen the battery housing and
insert/ remove the flat batteries, then
replace with new batteries, ensuring
they are inserted correctly.
BClose the battery housing using the
two screws.
i"Priority" cannot be
acquired whilst the hot
water tap is being used.
6720607740-0511(telecomando)_all.fm Page 9 Friday, November 25, 2005 5:44 PM
10
Maintenance
6 720 607 740
5.2 Cleaning
Use a damp cloth to clean parts of the
remote control. No abrasive or solvent-
based detergents are needed.
Warning: flat bat-
teries must be re-
placed. Conse-
quently, the
manufacturer is not
liable for any faults
or damage caused
by flat batteries.
Do not create litter
with flat batteries:
ensure they are dis-
posed of in the spe-
cific refuse con-
tainers.
6720607740-0511(telecomando)_all.fm Page 10 Friday, November 25, 2005 5:44 PM

11
Indice
6 720 607 740
Indice
1 Dichiarazione di conformità con
marcatura CE 11
2 Dati relativi al telecomando 12
3 Componenti 12
4 Uso del telecomando 12
5 Manutenzione 20
Istruzioni di sicurezza
BLeggere molto attentamente le
seguenti istruzioni per assicurare un
funzionamento ineccepibile.
BAttenersi alle istruzioni di sicurezza.
1 Dichiarazione di con-
formità con marcatura
CE
Questo apparecchio soddisfa i
requisiti delle direttive europee 1999/
5/CEE (R&TTE) e corrisponde al
campione omologato nel relativo
certificato di prova CE.
Prudenza: il teleco-
mando, è impermeabi-
le, e può utilizzarsi
anche sotto doccia
. Fare comun-
que attenzio-ne a non
immergerlo nelle va-
sche da bagno.
Prudenza: Il tele-
comando è utilizza-
bile esclusivamente
nei seguenti paesi:
Italia, Francia, Ger-
mania, Belgio, Olan-
da, Spagna e
Portogallo.
6720607740-0511(telecomando)_all.fm Page 11 Friday, November 25, 2005 5:44 PM

12
Dati relativi al telecomando
6 720 607 740
2 Dati relativi al teleco-
mando
Telecomando per il controllo e
regolazione a distanza della
temperatura, per scaldabagni Celsius
Plus WTD..AME..
Dati tecnici:
Ulteriori indicazioni:
3 Componenti
Fig. 1 Componenti
1Comando a distanza
2Trasmettitore comando a distanza
PCB
3Cavo di collegamento PCB
4 Uso del telecomando
4.1 Descrizione del display
multifunzioni a cristalli
liquidi
Fig. 2 Display multifunzioni a cri-
stalli liquidi
1Visualizzazione temperatura,codici
d'errore e funzioni
2Segnalatore di "telecomando in
funzione" (segnale in arrivo dal
telecomando)
3Apparecchio in funzione (con
bruciatore acceso)
4Simbolo d'unità dei gradi
centigradi
5Livello di carica delle batterie del
telecomando (segnale debole in
arrivo dal telecomando)
6Funzione di priorità (temperatura
bloccata durante il prelievo)
7Simbolo di "blocco di sicurezza"
Alimentazione a
batteria Alcaline LR 6
2 x 1,5V
Frequenza 868 MHz
Tipo di
protezione
IP X6
Telecomando Con fornitura opzionale, è
possibile abbinare
all'apparecchio ulteriori
telecomandi (fino a un
massimo di 6).
6720607740-0511(telecomando)_all.fm Page 12 Friday, November 25, 2005 5:44 PM

13
Uso del telecomando
6 720 607 740
4.2 Installazione trametti-
tore a distanza
Preparazione alla pre installa-
zione
BRimuovere il tappo dall’attacco per
gas e acqua.
BEstrarre in avanti la copertura fron-
tale.
BAllentare le viti di fissaggio.
BTirare verso avanti la parte inferiore
del mantello e sollevarlo legger-
mente verso l’alto.
Fig. 3 Smontaggio mantellatura
BAprire il coperchio del vano di con-
trollo.
Prudenza: Per
ragioni di sicurezza
scollegare
l'alimentazione del
riscaldatore di
acqua prima di
iniziare
l'installazione.
6720607740-0511(telecomando)_all.fm Page 13 Friday, November 25, 2005 5:44 PM

14
Uso del telecomando
6 720 607 740
BCollegare il cablaggio PCB come
nella Fig. 4.
Fig. 4 Cablaggio PCB
6720607740-0511(telecomando)_all.fm Page 14 Friday, November 25, 2005 5:44 PM

15
Uso del telecomando
6 720 607 740
BFissare il trasmettitore PCB come
illustrato in Fig. 5.
Fig. 5 Trasmettitore PCB
BCollegare l'altra estremità del
cablaggio PCB come nella Fig. 6.
Fig. 6 Chiudere il coperchio del
vano di controllo
BRimontare il coperchio anteriore.
BRimontare mantello.
6720607740-0511(telecomando)_all.fm Page 15 Friday, November 25, 2005 5:44 PM

16
Uso del telecomando
6 720 607 740
4.3 Attivazione del teleco-
mando
BRuotare l'interruttore principale
dell’apparecchio nella posizione 0
BMantenere premuto il tasto
"Program" dell’apparecchio, e
ruotare l'interruttore principale in
posizione I.
Il display del quadro comandi
dell’apparecchio visualizza il codice
"P1".
Il display del quadro comandi
dell’apparecchio visualizza il codice
"P3".
BRilasciare il tasto “Program” e
premere il tasto sul quadro
comandi, fino a far visualizzare sul
display il codice "P3".
L'apparecchio si trova ora in
"posizione di attivazione telecomando"
con il display che visualizza il codice
"P3".
BPremere per alcuni secondi il tasto
"Program" sul quadro comandi
dell’apparecchio, fino a che il display
visualizza il codice "99" ad
intermittenza.
BPosizionare il telecomando di fronte
al quadro comandi dell'apparecchio
e premere contemporaneamente i
tasti e del telecomando
(Fig. 7).
Fig. 7 Attivazione del teleco-
mando
BMantenere premuti i tasti e
fino a che l'intermittenza sul
display del quadro comandi smette
e si visualizza il codice “00”.
BRuotare l'interruttore principale nella
posizione 0.
Il telecomando è stato attivato.
iPer poter far funzionare il
telecomando è necessa-
rio procedere alla sua
attivazione seguendo la
procedura sottostante e
stando di fronte all’appa-
recchio.
6720607740-0511(telecomando)_all.fm Page 16 Friday, November 25, 2005 5:44 PM

17
Uso del telecomando
6 720 607 740
4.4 Regolare tramite il tele-
comando, la temperatura
di erogazione dell'acqua
calda
BPremere i tasti oppure sul
telecomando (Fig. 8, pos. 2) fino a
visualizzare sul display del
telecomando (Fig. 8, pos. 1) il valore
desiderato (temperatura in gradi
centigradi).
BUna volta definito il valore
desiderato, aprire il rubinetto
dell'acqua calda.
BOra, il valore di temperatura
desiderato, viene visualizzato sul
display del telecomando, ad
intermittenza.
BIl valore di temperatura desiderato,
arresta l'intermittenza quando la
temperatura è stata raggiunta (con
una tolleranza di ± 3 °C).
Fig. 8 Regolazione temperatura
4.5 Tasto "Program" sul tele-
comando
Memorizzare tramite il tasto
"Program" sul telecomando, la
temperatura di erogazione
dell'acqua calda
BPremere i tasti oppure sul
telecomando (Fig. 9, pos. 2), fino a
visualizzare sul display del
telecomando (Fig. 9, pos. 1) il valore
desiderato (temperatura in gradi
centigradi).
BOra è possibile memorizzare tale
temperatura, premendo per 3 sec. il
tasto "Program" sul telecomando
(Fig. 9, pos. 3).
Fig. 9 memorizzazione
temperatura
BPuò essere memorizzata una sola
temperatura tramite il tasto
"Program" del telecomando.
BA questo punto il display del
telecomando visualizza il valore di
6720607740-0511(telecomando)_all.fm Page 17 Friday, November 25, 2005 5:44 PM

18
Uso del telecomando
6 720 607 740
temperatura memorizzata.
All'apertura di un rubinetto d'acqua
calda, l'apparecchio erogherà acqua
calda sanitaria, alla temperatura
memorizzata sul telecomando.
Se la temperatura è stata memorizzata
tramite i tasti di un telecomando
(possibilità di abbinare max. 6
telecomandi), la temperatura potrà
essere modificata durante l'erogazione
d'acqua calda, esclusivamente con i
tasti del medesimo telecomando (vedi
capítulo 4.6 "Funzione di priorità").
Uso del tasto "Program"
(funzionamento con temperatura
memorizzata)
Per ottenere il funzionamento
dell'apparecchio con la temperatura
memorizzata precedentemente:
Bpremere il tasto "Program" sul
telecomando.
Ora il display del telecomando o del
quadro comandi, visualizza il valore di
temperatura memorizzata. Aprendo un
rubinetto d'acqua calda, dopo alcuni
istanti l'apparecchio erogherà acqua
calda, alla temperatura memorizzata.
4.6 Funzione di priorità
Come impostazione di base,
l'apparecchio non ha una temperatura
memorizzata e quindi nessuna
"funzione di priorità".
iOltre alla temperatura
memorizzabile sul tasto
"Program" del quadro
comandi, in ogni
telecomando può
essere memorizzata una
temperatura differente,
tramite il tasto
"Program", a seconda
delle esigenze di ogni
utente.
iMemorizzando o selezio-
nando una temperatura
tramite telecomando,
durante il prelievo
d'acqua calda (p.es. una
doccia) non sarà
possibile modificare la
temperatura con i tasti
del quadro comandi o
usando un eventuale 2°
telecomando poiché la
"funzione di priorità",
subentrata automatica-
mente, impedisce che
un altro utente possa
modificare la tempera-
tura durante l'erogazione
d'acqua calda.
6720607740-0511(telecomando)_all.fm Page 18 Friday, November 25, 2005 5:44 PM

19
Uso del telecomando
6 720 607 740
La "priorità" viene attribuita
automaticamente al primo utente che
seleziona o memorizza (sul
telecomando o sul quadro comandi) la
temperatura per il suo successivo
utilizzo (p. es. una doccia).
Ora, durante l'erogazione d'acqua
calda (p. es. una doccia), il display del
quadro comandi e del/i telecomando/i,
visualizzano il simbolo " “.
La temperatura può essere modificata
esclusivamente usando i medesimi
tasti con cui era stata memorizzata (a
seconda se con il quadro comandi o
mediante telecomando).
La funzione di "Priorità" termina:
• 5 minuti dopo l'ultimo utilizzo
dell'acqua calda (ritorno
all'impostazione base).
• 2 minuti dopo aver selezionato/
memorizzato la temperatura senza
che poi nessun prelievo successivo
sia stato effettuato.
Acquisire la priorità
Qualunque utente può acquisire la
"priorità" per il suo successivo prelievo
d'acqua calda, operando nel seguente
modo:
Binterruttore principale in posizione I.
Btenere premuto per 5 secondi il
tasto oppure il tasto .
Bselezionare la temperatura
desiderata.
Bnel caso, premere per 3 sec. il tasto
"Program" se si vuol memorizzare la
temperatura.
Bprocedere al prelievo entro un
tempo max. di 2 minuti.
4.7 Segnalazioni di
anomalia
Questo apparecchio dispone di un
sistema di segnalazione delle
anomalie. L'avviso di eventuali
anomalie avviene per mezzo di segnali,
mediante un codice di errore
visualizzato nel display (Fig. 2, pos. 1)
e da un simbolo di "blocco di
sicurezza" (Fig. 2, pos. 7).
L'apparecchio torna a funzionare una
volta rimossa la causa del guasto e
dopo aver premuto il tasto di riarmo
dell’apparecchio.
Per identificare il tipo di anomalia,
consultare il capitolo 8 del manuale
installazione.
iLa "priorità" non può
essere acquisita mentre
l'apparecchio sta ero-
gando acqua calda.
6720607740-0511(telecomando)_all.fm Page 19 Friday, November 25, 2005 5:44 PM
20
Manutenzione
6 720 607 740
5 Manutenzione
5.1 Inserzione/sostituzione
delle batterie
Il telecomando non include le pile.
Quando le batterie sono scariche, il
simbolo (Fig. 2, pos. 5) è visualizzato
nel display.
BSvitare le 2 viti poste sulla parte
posteriore del telecomando.
BAprire il vano, togliere le batterie
esaurite ed inserire le nuove, posi-
zionandole correttamente.
BRichiudere il vano "portabatterie"
del telecomando e riavvitare le due
viti.
5.2 Pulizia
Per pilire tutte le parti del telecomando,
è sufficiente un panno inumidito. Non
utilizzare prodotti abrasivi o detergenti
a base di solventi.
Avvertenza: Le
batterie scariche de-
vono essere assolu-
tamen-te sostituite.
A tal riguardo, si de-
clina ogni responsa-
bilità per guasti o
danneggiamenti
causati da batterie
scariche.
Non disperdere nell'
ambiente le batterie
scariche ma deposi-
tarle negli appositi
contenitori di raccol-
ta.
6720607740-0511(telecomando)_all.fm Page 20 Friday, November 25, 2005 5:44 PM
Table of contents
Languages:
Other Bosch Remote Control manuals

Bosch
Bosch Remote Control User manual

Bosch
Bosch ARC R-1 IR User manual

Bosch
Bosch Remote Control User manual

Bosch
Bosch ASI09DW40 User manual

Bosch
Bosch CLIMATE 5000 VRF RDCI Series Instruction Manual

Bosch
Bosch GWH-635-ES User manual

Bosch
Bosch Climate 5000 Series User manual

Bosch
Bosch 7736504945 User manual

Bosch
Bosch WRC-HR User manual

Bosch
Bosch 7736504945 User manual

Bosch
Bosch RG57A6 User manual

Bosch
Bosch BRC3600 User manual

Bosch
Bosch RC 1 Professional User manual

Bosch
Bosch RF3332 User manual

Bosch
Bosch BRC3600 User manual

Bosch
Bosch CR 10H User manual

Bosch
Bosch WRC-HP User manual

Bosch
Bosch Twist User manual

Bosch
Bosch RC 1 Professional User manual

Bosch
Bosch FB 100 User manual