Bose FRAMES TEMPO User manual

FRAMES TEMPO

13
|
ENG
WHAT’S IN THE CARTON
CONTENTS
Confirm that the following parts are included:
Bose Frames Tempo Carry case
3L
3R
1L
1R
Charging cable Nose pads (sizes 1 and 3)
NOTE: Size 2 nose pads are attached to the frames.
For help identifying the nose pad sizes, see
page 17.
Cleaning cloth
NOTE: If any part of the product is damaged, don’t use it. Contact your authorized
Bose dealer or Bose customer service.
Visit: worldwide.Bose.com/Support/Tempoworldwide.Bose.com/Support/Tempo

14
|
ENG
BOSE MUSIC APP SETUP
The Bose Music app lets you set up and control the frames from any mobile device,
such as a smartphone or tablet.
Using the app, you can customize power settings, choose your voice prompt
language, and get new features.
NOTE: If you have already created a Bose account in the app for another Bose
product, see “Add the frames to an existing account.”
DOWNLOAD THE BOSE MUSIC APP
1. On your mobile device, download the Bose Music app.
NOTE: If you’re located in mainland China, download the Bose8app.
BOSE MUSIC
2. Follow the app instructions.
ADD THE FRAMES TO AN EXISTING ACCOUNT
1. Press and hold the button on the right temple until you hear “Ready to connect”
or see the status light blink blue.
2. In the Bose Music app, go to the My Products screen and add your frames.
NOTE: If the app can’t find the frames, see “Bose Music app can’t find frames” on
page 33.

15
|
ENG
SWEAT AND WEATHER RESISTANCE
The frames are rated IPX4 water resistant. They are designed to be sweat and weather
resistant against drops of water but aren’t meant to be submerged under water.
CAUTIONS:
• Do NOT swim or shower with the frames.
• Do NOT submerge the frames.
NOTE: IPX4 is not a permanent condition, and resistance might decrease as a result
of normal wear.

16
|
ENG
HOW TO WEAR
CHECK YOUR FIT
Move your head up and down to check that you’re using the best nose pad size.
NOTES:
• If the frames don’t feel comfortable and secure, see “Try another nose pad size” on
page 17.
• When riding a bike, wear the frames over your helmet strap.
PROPER FIT
When the frames fit:
• The nose pads comfortably
rest on the sides of your nose.
• The lenses comfortably rest
over your eyes and don’t
move when you smile.
IMPROPER FIT
When the frames don’t fit:
• The lenses might sit too low
or too high on your face.
• The lenses might sit too close
or too far from your face.
17
|
ENG
HOW TO WEAR
TRY ANOTHER NOSE PAD SIZE
Size 2 nose pads come attached and additional sizes are in the box.
The size is marked on the inside of each nose pad with a 1, 2, or 3. Each nose pad is
also marked with an L(left) and an R(right).
3L
3R
2L
2R
1L
1R
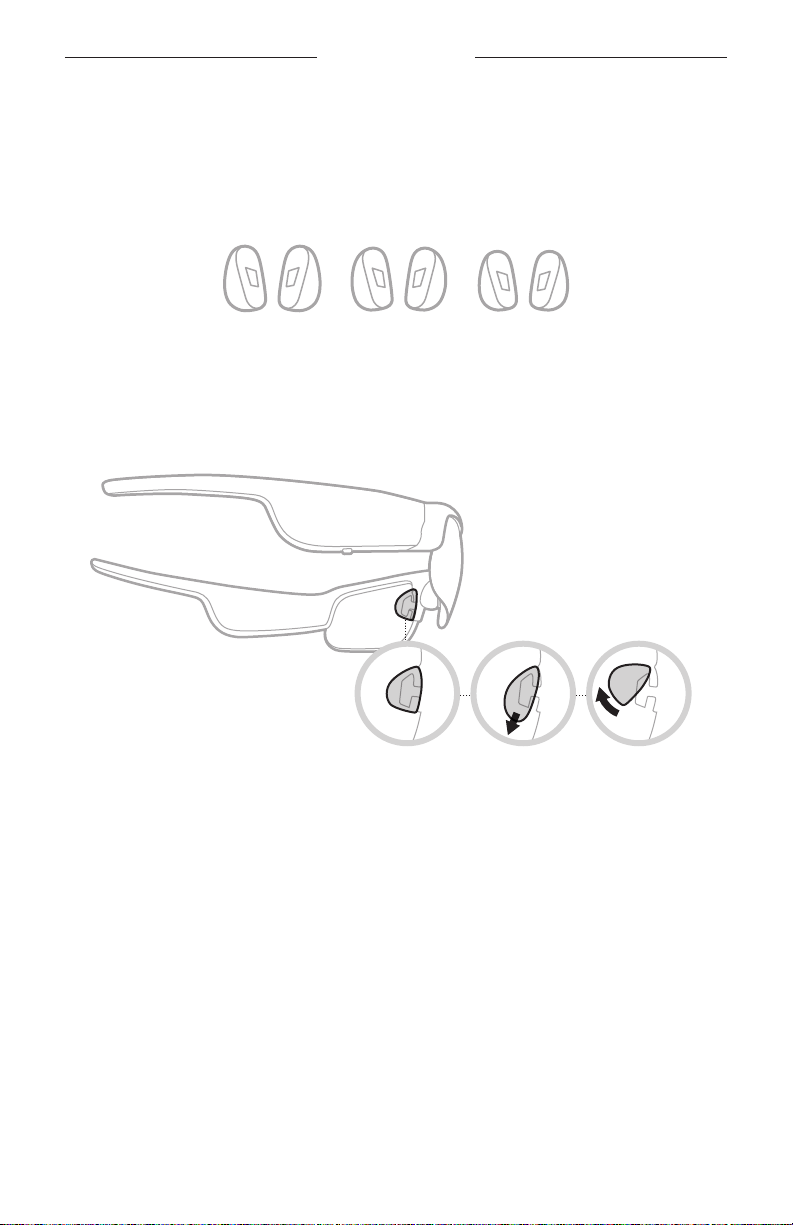
CHANGE THE NOSE PADS
1. Using the provided cleaning cloth, firmly pull the bottom of the nose pad down
and away from the frames.
2. Choose a new nose pad size.

HOW TO WEAR
18
|
ENG
3. Align the bottom of the nose pad hole with the bottom of the nose pad arm.
4. Push the nose pad up then in towards the frames until you feel it click into place.
NOTE: Make sure you’re attaching the Rand Lnose pad to the correct side of
the frames.
Nose pad arm
5. Check your fit (see page 16).
19
|
ENG
POWER
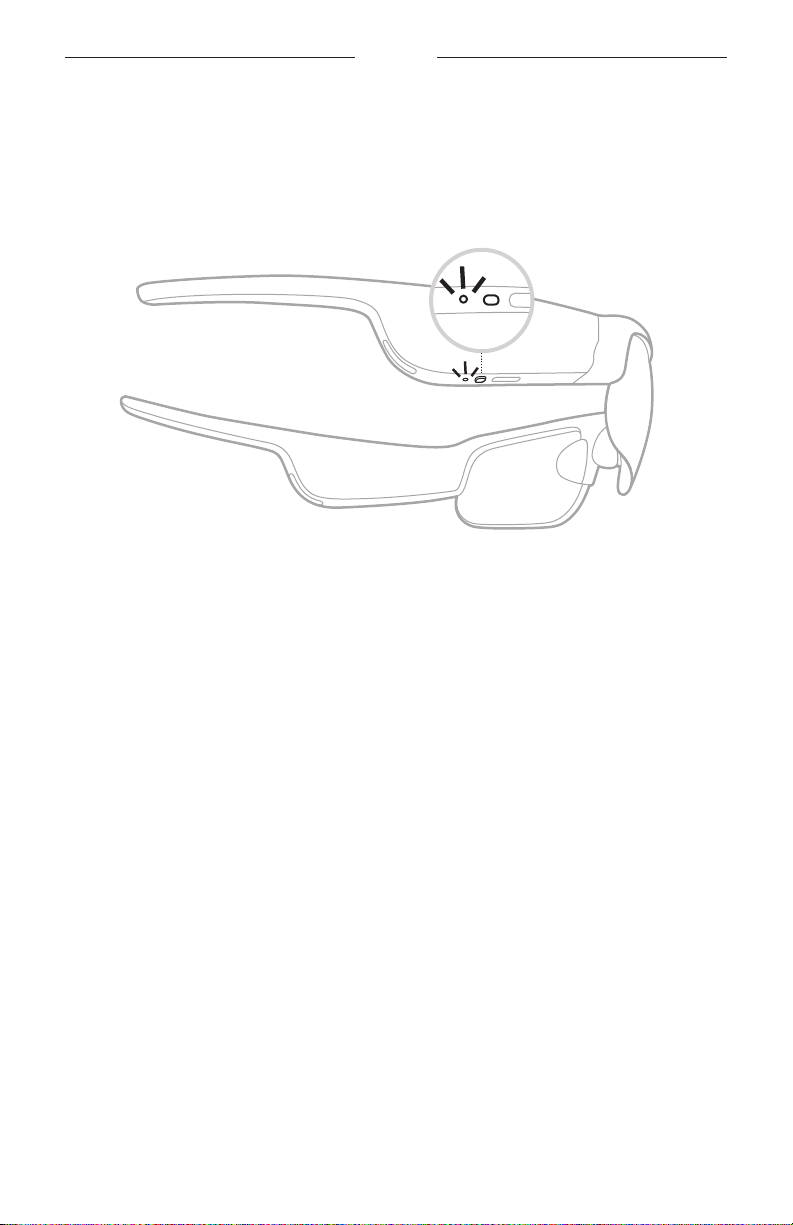
POWER ON
Press the button on the right temple.
The status light blinks white twice then glows according to Bluetooth connection
status (see page 25). A voice prompt announces the battery level and Bluetooth
connection status.
NOTE: The frames ship with a partial charge and may need to wake up before first
time use. To wake up the frames, connect the frames to power for 2 seconds
and then disconnect (see page 24). After, try powering on again.
20
|
ENG
POWER
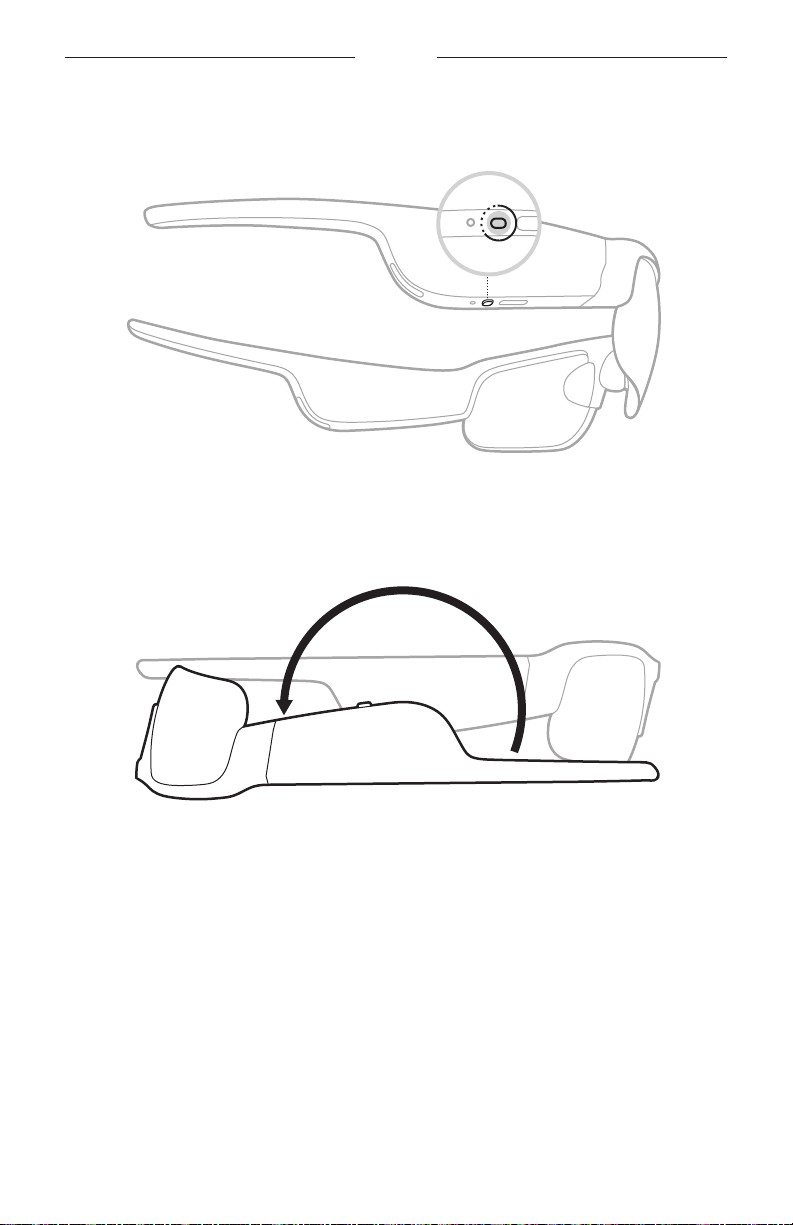
POWER OFF
Press and hold the button until you hear a tone.
The status light blinks white twice then fades to black.
Flip-to-O
Flip the frames upside down for 2 seconds.
The status light blinks white twice then fades to black.
NOTE:
• After the frames power o, you can move them in any orientation.
• You can disable Flip-to-O in the Bose Music app. You can access this option from
the Settings menu.
Auto-o using motion detection
The frames use motion detection to identify when they aren’t being used. When the
frames haven’t moved for 10 minutes, they automatically power o.
NOTE: You can disable motion detection in the Bose Music app. You can access this
option from the Settings menu.
21
|
ENG
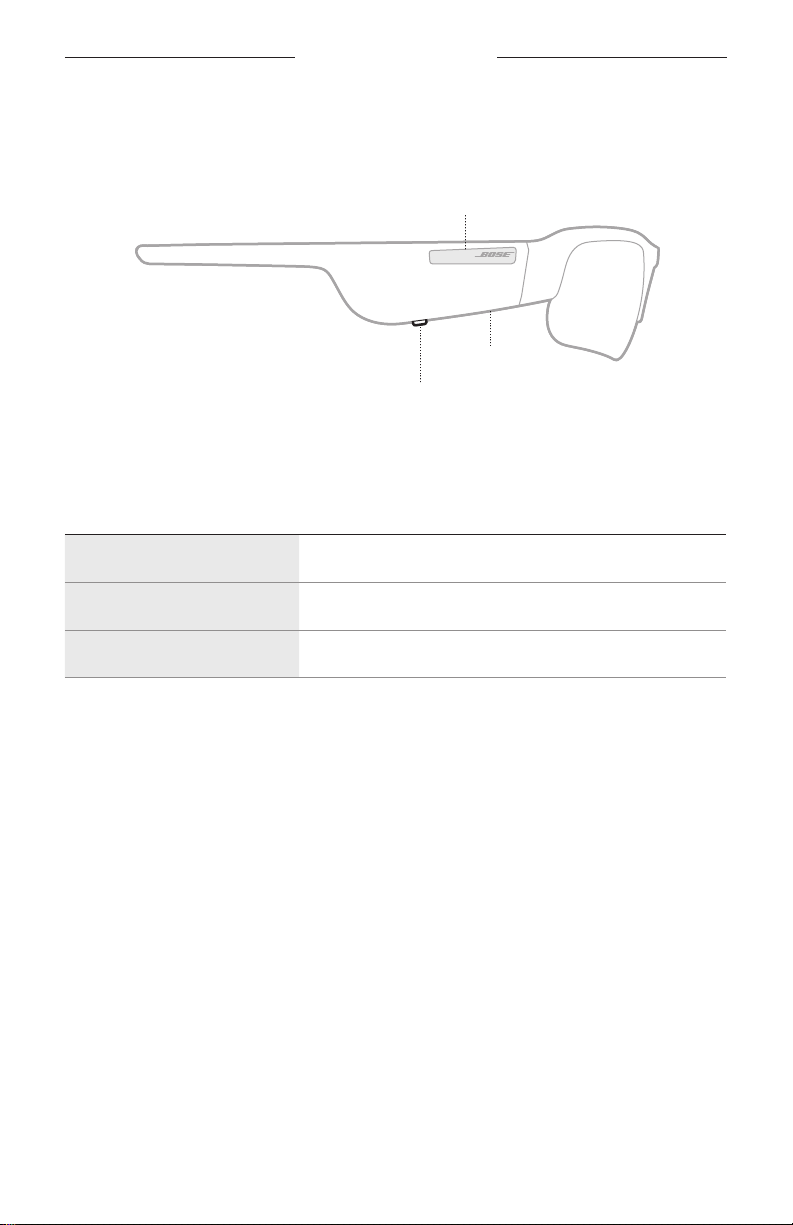
FRAMES CONTROLS
Use the button and touch surface on the right temple to control media playback,
volume, phone calls, and voice control.
Button
Control media playback
Control phone calls
Microphone
Touch surface
Adjust volume
Access voice control
MEDIA PLAYBACK
CONTROL WHAT TO DO
Play/Pause Press the button.
Skip forward Double-press the button.
Skip backward Triple-press the button.
Other manuals for FRAMES TEMPO
1
Table of contents
Other Bose Smart Glasses manuals


