VerciseTM DBS Charging Handbook
VerciseTM DBS Charging Handbook
92357527-02 Page 2 of 101
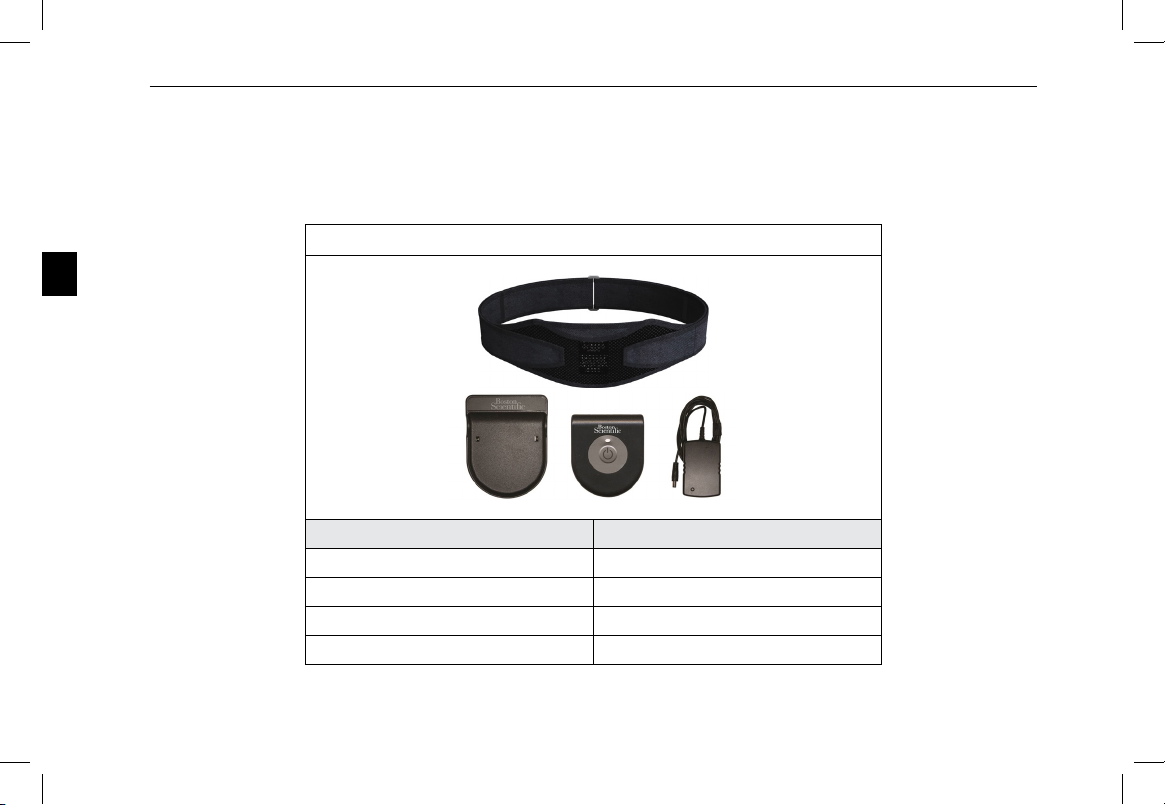
Using the Charging System
You should expect a daily recharging time of 5 to 30 minutes per day or a periodic recharging time of
30 minutes to 4 hours every 1 to 2 weeks. Your recharge routine may vary depending on your stimulation settings. Some
stimulation settings will require more frequent charging. Boston Scientic recommends any recharge routine that ts your
schedule and lifestyle while maintaining sufcient charge to maintain stimulation.
Developing a recharge routine involves nding the right balance between four factors:
●How much power is required to experience effective therapy
●How often you want to recharge
●How long you want to recharge
●How you would like to manage your personal schedule
The Boston Scientic DBS System’s programming software gives your healthcare provider a conservative
recommendation for how often to charge. This estimate assumes stimulation is on 24 hours per day, 7 days per week at
the programmed energy output level. While you may want to follow these recommendations, you and your physician can
also develop an appropriate charge routine that best ts your schedule.
The Remote Control provides an easy‑to‑view Stimulator battery meter on the Home screen and messages to inform
you of the battery’s condition. When the Remote Control indicates a low battery, the Stimulator should be recharged as
soon as possible. Failure to recharge may result in loss of stimulation. After stimulation stops, communication with the
Stimulator will also stop until the Stimulator is sufciently charged. Refer to your Remote Control Handbook for more
information.