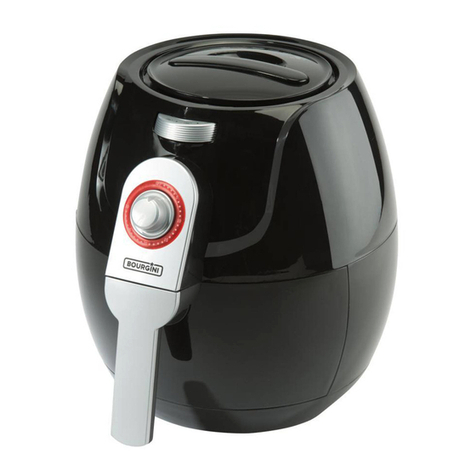
Bourgini 18.2143.00.00 User manual

Gebruiksaanwijzing NL
Instructions EN
Mode d’emploi FR
Gebrauchsanleitung DE
Instrucciones de uso ES
18.2143.00.00 Health Fryer Pro 4.0L/1.0KG

© THE BOURGINI COMPANY B.V. WWW.BOURGINI.COM
Fig. 1
Fig. 2

Gebruiksaanwijzing NL 4
Bourgini service en garantie NL 9
Instructions EN 10
Bourgini service and warranty EN 15
Mode d’emploi FR 16
Service après-vente et garantie Bourgini FR 21
Gebrauchsanleitung DE 22
Bourgini Kundenservice und Garantie DE 27
Instrucciones de uso ES 28
Servicio postventa y garantía de Bourgini ES 33

4
VEILIGHEIDSAANWIJZINGEN
Lees voor gebruik de
gebruiksaanwijzing
aandachtig door. Bewaar de
gebruiksaanwijzing.
Het apparaat kan worden
gebruikt, gereinigd en
onderhouden door kinderen
vanaf 8 jaar indien ze onder
toezicht staan van een
persoon die verantwoordelijk
is voor hun veiligheid.
Houd het apparaat en het
netsnoer buiten het bereik
van kinderen onder de 8 jaar.
Kinderen mogen niet met het
apparaat spelen. Houd altijd
toezicht op kinderen om te
voorkomen dat ze met het
apparaat spelen.
Het apparaat kan worden
gebruikt door personen
met een fysieke, zintuiglijke,
mentale of motorische
handicap en door personen
zonder de benodigde
ervaring en kennis indien ze
onder toezicht staan van een
persoon die verantwoordelijk
is voor hun veiligheid of
instructies krijgen over
hoe het apparaat op een
veilige manier te gebruiken
is en indien ze de gevaren
begrijpen die met het
gebruik samenhangen.
• Dit apparaat is uitsluitend bedoeld voor
huishoudelijk gebruik.
• Laat het apparaat niet onbeheerd achter tijdens
gebruik.
• Gebruik het apparaat en de toebehoren
uitsluitend voor de beoogde doeleinden.
Gebruik het apparaat en de toebehoren niet
voor andere doeleinden dan beschreven in de
handleiding.
• Gebruik het apparaat niet als een onderdeel,
toebehoren, netsnoer of stekker beschadigd
of defect is. Laat een beschadigd of
defect onderdeel, toebehoren, netsnoer of
stekker door de leverancier of een erkend
servicecentrum vervangen.
• Gebruik het apparaat niet in de buurt van
voorzieningen die water bevatten zoals
badkuipen, douches en wastafels.
• Dompel het apparaat niet onder in water of
andere vloeistoffen. Als dit toch gebeurt,
haal dan zo snel mogelijk de stekker uit het
stopcontact. Verwijder het apparaat nooit
uit water of andere vloeistoffen, voordat de
stekker uit het stopcontact gehaald is. Een
apparaat dat in water of andere vloeistoffen
terecht is gekomen kunt u niet meer gebruiken.
• Zorg dat er geen water in de aansluitpunten
van het netsnoer en het verlengsnoer kan
komen.
• Houd het netsnoer uit de buurt van
warmtebronnen, olie en scherpe randen.
• Controleer voor gebruik altijd of de
netspanning overeenkomt met de spanning op
het typeplaatje van het apparaat.
• Sluit voor extra bescherming het apparaat
aan op een groep die beveiligd is door
een aardlekschakelaar met een nominale
aanspreekstroom van maximaal 30 mA.
• Bedien het apparaat niet door middel van
een externe tijdschakelaar of een apart
afstandsbedìeningssysteem.
• Wikkel het netsnoer en een eventueel
verlengsnoer altijd volledig af. Zorg dat het
netsnoer en een eventueel verlengsnoer niet
over de rand van een werkblad hangen, dat
deze niet per ongeluk verstrengeld kunnen
raken en dat niemand er over kan struikelen.
• Trek niet aan netsnoer om de stekker uit het
stopcontact te halen.
• Haal de stekker uit het stopcontact als het
apparaat niet in gebruik is.
• Gebruik het apparaat niet buitenshuis. Plaats
het apparaat op een stabiel en vlak oppervlak.
• Houd het apparaat Uit de buurt van
warmtebronnen. Plaats het apparaat niet op
hete oppervlakken of in de buurt van open
vlammen.
NL

5
• Zorg dat uw handen droog zijn voordat u het
apparaat aanraakt.
• Haal de stekker uit het stopcontact
voordat u het apparaat gaat monteren of
demonteren en voordat u reinigings- en
onderhoudswerkzaamheden aan het apparaat
gaat uitvoeren.
• Motor apparaten: pas op voor scherpe en/
of bewegende delen. Houd uw handen tijdens
gebruik, reiniging en onderhoud uit de buurt van
de bewegende delen.
• Verwarmingsapparaten: wacht totdat het
apparaat is afgekoeld voordat u de behuizing en
de onderdelen van het apparaat aanraakt.
Wees extra voorzichtig tijdens reiniging en onderhoud.
DE VERSCHILLENDE
BEDIENINGSELEMENTEN EN ONDERDELEN
(Zie Fig. 1)
1. Touchscreen met display
2. Draaiknop & startknop
3. Ontspanknop van de mand (onder het
afdekkapje)
4. Handvat mand
5. Frituurmand (in de lade)
6. Lade
DISPLAY ICONEN
(Zie Fig. 2)
7. Timer instellen
8. Programma vis
9. Programma bakken
10. Display minutenweergave
11. MIN-minuten
12. Display temperatuurweergave
13. °C (graden Celsius)
14. Programma vlees
15. Programma schaaldieren
16. Temperatuur instellen
17. Programma pizza
18. Programma worst
19. Indicatielampjes
20. Programma frites
21. Programma kip
GEBRUIK
Beoogd gebruik:
• Het apparaat is bedoeld voor grillen, bakken,
ontdooien en opwarmen van voedsel.
• Het apparaat is niet geschikt voor de bereiding
van vloeibare gerechten zoals soepen, sauzen
of ragouts.
Algemene aanwijzingen:
• Verwijder voor het eerste gebruik alle
verpakkingsmaterialen. Verwijder nooit het
typeplaatje en eventuele waarschuwingen.
• Reinig de lade-pan en het mandje eerst in een
sopje, spoel na met schoon water en droog deze
delen goed af.
• Rondom het apparaat moet voldoende ruimte
zijn om warmte te laten ontsnappen.
• Zorg voor voldoende ventilatie.
• Plaats het apparaat op een stabiel en vlak
oppervlak.
• Bedek de luchtinlaat – en uitlaatopeningen niet
tijdens het gebruik; zorg dat er geen gordijn
tegen het apparaat hangt en leg er geen
handdoek, vaatdoek e.d. op.
• Doe NOOIT olie, vet of andere vloeistoffen in de
pan want dit kan brandgevaar geven!
• Steek niet uw hand in de geopende Health
Fryer als deze in werking is vanwege de hete
krachtige luchtstroom.
• Raak de lade-pan en het mandje tijdens en
kort na gebruik niet zonder ovenwanten aan
want deze delen worden zeer heet. Schakel na
gebruik het apparaat uit, verwijder de stekker
uit het stopcontact en wacht totdat het apparaat
is afgekoeld.
• Berg het apparaat op een droge plaats op
wanneer het niet in gebruik is.
• Zorg ervoor dat kinderen geen toegang hebben
tot opgeborgen apparaten.
Veiligheidsvoorzieningen:
• Het apparaat is met een interne timer
(schakelklok) uitgerust. Wanneer de ingestelde
timertijd is verstreken, wordt het verhitten
automatisch gestopt. Om het apparaat opnieuw
in te schakelen, drukt u op de -knop(2).
• Het apparaat schakelt automatisch uit wanneer
de lade (6) met de frituurmand (5) uit het
apparaat wordt genomen. Alle elementen op het
touchscreen (1) gaan uit.
• Als de lade weer in het apparaat wordt geplaatst,
klinkt er een signaal en lichten alle elementen op.
Het eerder ingestelde programma of de eerder
ingestelde timertijd loopt nog steeds.
Basishandelingen:
Dit apparaat werkt met hete lucht. Het is geen
traditionele friteuse waar het voedsel met veel
olie gefrituurd wordt. In het algemeen kan al het
voedsel worden bereid, dat ook in een standaard
heteluchtoven kan worden bereid.
• Steek de stekker in een geaard stopcontact.
NL

6
BEREIDEN VAN VOEDSEL
1. Plaats de frituurmand (5) in de lade (6). Het
mandje moet hoorbaar op zijn plaats klikken.
2. Plaats het te bereiden voedsel in de mand.
3. Plaats de lade met de mand in het apparaat.
Er moet een signaal klinken en alle elementen
moeten eenmaal op het touchscreen (1)
oplichten en weer uitgaan. Nu zit de lade correct
in het apparaat.
4. Druk op de - knop (2) om het apparaat in te
schakelen. De basisinstellingen voor de timertijd
in minuten (10) en temperatuur in °C (12)
worden weergegeven (15 min., 180 °C).
5. Selecteer het gewenste programma of stel
afzonderlijk de gewenste temperatuur en
timertijd in met behulp van de draaiknop (2).
Opmerking: De temperatuur en timertijd kunnen
ook tijdens het bakproces worden aangepast.
6. Druk op de - knop om het bakproces te
starten. De indicatielampjes (19) lichten na
elkaar op om aan te geven dat de ventilator
in het apparaat werkt. Als een programma
geselecteerd is, knippert het bijbehorende
symbool tijdens het bakproces. Opmerking:
door tijdens het bakproces op de - knop
te drukken, kan dit op elk moment handmatig
worden gestopt.
7. Na het verstrijken van de ingestelde timertijd of
de handmatige uitschakeling van het apparaat
blijft de ventilator even actief. Het display toont
OFF (uit). Alle elementen op de indicatielampjes
gaan uit. Na ongeveer 20 seconden zullen 5
pieptonen klinken en zullen de indicatielampjes
permanent opnieuw gaan branden. De ventilator
en het apparaat zijn uitgeschakeld.
8. Trek de lade met de frituurmand voorzichtig aan
het handvat uit het apparaat (4) en plaats ze op
een hittebestendig, antislip oppervlak.
9. Verwijder de mand uit de lade door de cover
naar voren te schuiven en de daaronder
liggende ontgrendelingsknop (3) in te drukken.
Trek de mand naar boven uit de lade.
10. Haal het voedsel voorzichtig uit de mand.
11. Koppel het netsnoer los en laat het apparaat
volledig afkoelen.
12. Maak het apparaat na elk gebruik schoon om
de vorming van bacteriën te voorkomen. Laat
resten niet opdrogen.
Bereiding:
• De Health Fryer is geschikt voor alle voedsel
dat normaal in een hete lucht oven bereid word;
het gaat vaak wel veel sneller vanwege de zeer
geconcentreerde luchtstroom en de compacte
ruimte waarin het voedsel gaar gemaakt wordt.
• Voor de bereiding van voorverpakt voedsel,
zoals bijvoorbeeld bevroren frites en snacks,
raden wij aan om de oven-variant te nemen,
indien beschikbaar.
• Ook treft u in de supermarkt frites en snacks
van diverse merken die speciaal voorbereid is
voor gebruik in een hete lucht friteuse (vaak
airfryer genoemd); volg bij deze bereiding de
aanwijzingen op de verpakking van het voedsel.
• In de onderstaande tabel treft u een indicatie
van voedsel dat geschikt is om in de Health
Fryer te bereiden. De aangegeven tijd en
temperatuur is bij benadering aangezien
hoeveelheid en de exacte samenstelling van het
voedsel nog invloed hebben. Soms is het nodig
om wat te experimenteren met de instellingen.
• In het algemeen is voor een grotere hoeveelheid
voedsel ook een wat langere bereidingstijd nodig.
• Het mandje is luchtdoorlatend omdat dit
belangrijk is voor een goede werking van de
Health Fryer. Blokkeer de luchtstroom dus niet
door bijvoorbeeld aluminium folie in het mandje
te leggen.
• Bereid geen zeer vet voedsel en of voedsel dat
zeer sterk spat in de Health Fryer. Het vet zou
tegen de hete verwarming kunnen spatten en
gaan schroeien of zelfs branden.
Programma’s:
Het apparaat heeft 8 programma’s en één
basisinstelling:
Programma Temp Min Geschikt voor bijv.
Basisinstelling 180 15 Groentesticks,
Mozarellasticks,
Appelflappen
Vis 160 20 Gebakken vis,
vissticks
Bakken 160 30 Taart,
brood, pizza,
gehaktballetjes
Vlees 180 20 Schnitzels,
gehaktballetjes
Schaaldieren 160 20 Garnalen,
scampi’s
Pizza 170 20 Pizza
Worst 200 10 Worst
Frites 200 15 Frites van
(zoete)
aardappelen
NL

7
Kip 200 20 Kippenvleugels,
kippenbillen en
kipnuggets
* Alleen in combinatie met de optioneel
verkrijgbare broodbakmand te gebruiken.
• In elk programma kunnen de temperatuur en de
duur individueel aangepast worden (zie volgend
hoofdstuk ‘Bedieningselementen en functies’).
• Afhankelijk van de keuze van het programma,
knippert het overeenkomstige symbool op het
touchscreen (1). Als er geen programmasymbool
op het display wordt weergegeven, wordt
de basisinstelling of een zelf ingestelde
temperatuur en timertijd ingesteld.
Bedieningselementen en functies:
Het apparaat heeft de volgende
bedieningselementen of functies:
Bedieningselementen Functies
Timer Verwarmingstijd (1 - 30
minuten in stappen van
1 minuut)
Temperatuur Temperatuur (80 - 200 °C
in stappen van 5 graden)
Draaiknop Stel minuten en
temperatuur in door te
draaien -knop
- knop Schakel het apparaat in
en uit
Start het
verwarmingsproces
• De gewenste duur en temperatuur kunnen
worden ingesteld door aan de knop (2) te draaien.
• Als u op de - knop (2) drukt, wordt het
apparaat in- of uitgeschakeld. Druk opnieuw om
de basisinstelling, het geselecteerde programma
of de individueel ingestelde verwarmingstijd te
starten.
De beste methode om verse aardappel gerechten te
bereiden is als volgt:
Aardappel wordt alleen frites wanneer deze al een
keer in de olie gebakken is zoals bij voorgebakken
frites. Men kan verse aardappelen in allerlei
vormen snijden, dus ook in de vorm van frites.
Het eindresultaat zal echter meer naar gebakken
aardappelen smaken dan naar frites.
• Laat de gesneden aardappelstukjes 20 a 30
minuten weken in koud water; laten uitlekken en
nadrogen met een keukendoek of keukenpapier.
• Doe een eetlepel olie (zonnebloemolie of olijfolie)
in een schaal en strooi er wat peper en zout bij.
• Doe de aardappelstukjes ook in de schaal
en haal deze door de olie totdat de
aardappelstukjes bedekt zijn met een laagje olie.
• Haal de aardappelstukjes uit de schaal met een
schep oid en doe ze in het mandje van de Health
Fryer. Giet de schaal niet leeg in de mand anders
zou er teveel olie meekomen.
Olie:
• De Health Fryer werkt zonder dat men olie moet
en mag toevoegen; gerechten zijn dus veel
minder vet en bevatten 65% minder olie dan bij
traditionele bereidingswijzen (gemeten t.o.v. een
Bourgini friteuse met frituurolie).
• De enige toepassing waarbij men een geringe
hoeveelheid (één eetlepel = 15 ml) olie kan
gebruiken is de bereiding van verse aardappel.
TIPS
• Dit apparaat werkt met hete lucht. In het
algemeen kan al het voedsel worden bereid,
dat ook in een standaard heteluchtoven kan
worden bereid. Het apparaat is geschikt
voor o.a. het hete lucht grillen van frieten
en aardappelpartjes van verse aardappelen,
voor de bereiding van diepgevroren frieten en
andere diepgevroren afgewerkte producten en
de bereiding van alle soorten klein gesneden
voedingsmiddelen (zowel verse groenten als
vers vlees en verse vis).
• In het algemeen is het niet noodzakelijk om
het apparaat voor te verwarmen. Om de
bereidingstijd beter te kunnen meten of om
voedsel te bereiden dat tot in de perfectie moet
worden bereid, wordt het voorverwarmen tot
de gewenste temperatuur toch aanbevolen.
Voor de bereiding van voedsel in het apparaat
is in principe geen olie nodig. Olie kan
als smaakdrager aan het voedsel worden
toegevoegd door het voedsel met een beetje olie
uit de olieverstuiver te besprenkelen. Bovendien
kan gemarineerd of gepaneerd voedsel ook in
het apparaat worden bereid.
NL

8
• De baktijden zijn afhankelijk van de grootte
en de hoeveelheid van het voedsel alsook van
de baktemperatuur. In het algemeen zijn de
baktijden echter korter dan in een standaard
oven. We raden aan te beginnen met een kortere
baktijd en de baktijd later aan uw persoonlijke
smaak aan te passen.
• Voor de bereiding van diepgevroren producten
volgt u de tijd- en temperatuurspecificaties
van de fabrikant. Om een knapperig resultaat
te krijgen, mag u nooit vet toevoegen aan
de bereiding van industrieel geproduceerde
diepvriesproducten, omdat ze meestal
voorgebakken zijn. De voorbereidingstijd kan
een beetje worden ingekort. Controleer daarom
vóór het einde van de aangegeven baktijd of het
voedsel goed gaar is.
• Voor sommige levensmiddelen (bijv. frieten of
dergelijke), wordt aanbevolen om ze van tijd tot
tijd te mengen om een uniform gaar resultaat
te verkrijgen. Neem hiervoor de lade (4) uit
het apparaat en schud de inhoud voorzichtig
om de levensmiddelen te mengen. Plaats
vervolgens de lade opnieuw en ga verder met
het bakproces.
REINIGING EN ONDERHOUD
Maak het apparaat na elk gebruik schoon.
Gebruik geen metalen keukengerei of schurende
schoonmaakmiddelen om de bakplaat te reinigen,
omdat dit de antiaanbaklaag kan beschadigen.
Haal de stekker uit het stopcontact en laat het
apparaat afkoelen.
Opmerking: Open de klep en laat daardoor de
Health Fryer sneller afkoelen.
Buitenkant van de Health Fryer schoonmaken:
De buitenkant van de Health Fryer kan het beste
worden schoongemaakt met een vochtige doek.
Het mandje van de Health Fryer schoonmaken:
Het mandje van de Health Fryer kan in de
vaatwasser geplaatst worden. Daarnaast kan
het mandje ook gemakkelijk met de hand worden
schoongemaakt: Laat het mandje van de Health
Fryer 8 min in warm water met afwasmiddel weken,
hierna kunnen de etensresten met de zachte kant
van een sponsje worden weggehaald. Keer het
mandje om en maak de onderkant schoon met
de harde kant van het sponsje. Pas wel op dat je
de anti-aanbaklaag niet wordt beschadigd. Om
nare geurtjes te neutraliseren kan het mandje
ingesmeerd worden met citroensap, laat dit 35 min
intrekken en spoel het mandje goed af.
De pan (opvang bak) van de Health Fryer
schoonmaken:
De pan van de Health Fryer kan in de vaatwasser
geplaatst worden. Daarnaast kan de pan ook
gemakkelijk met de hand worden schoon gemaakt:
Laat de pan van de Health Fryer 8 min in warm
water met afwasmiddel weken, hierna kunnen
de aangekoekte etensresten met de zachte kant
van een sponsje worden weggehaald. Gebruik
GEEN harde borstels, schuursponsjes of andere
gereedschappen, anders wordt de antiaanbaklaag
beschadigd. Om nare geurtjes te neutraliseren kan
het mandje ingesmeerd worden met citroensap, laat
dit 35 min intrekken en spoel het mandje goed af.
Het verwarmingselement schoonmaken met
citroensap:
Het verwarmingselement van de Health Fryer mag
nooit van zijn plaats gehaald worden.
HAAL DE STEKKER UIT HET STOPCONTACT.
Plaats de Health Fryer zodat het
verwarmingselement met een zacht sponsje
en een mild schoonmaakmiddel kan worden
schoongemaakt. Gebruik GEEN harde borstels,
schuursponsjes of andere gereedschappen, anders
wordt het verwarmingselement beschadigd. Om
bij lastige hoekjes te kunnen, kan een stokje met
een doekje eromheen gebruikt worden. Na het
schoonmaken moet het afgedroogd worden met
een zachte droogdoek. Voor het verwijderen van
moeilijk toegankelijk vetresten: Zet een schoteltje
in de Health Fryer met een heel dun laagje water (1
tot 3 millimeter). Snij een citroen in stukken en leg
deze op het schoteltje. Zet de Health Fryer 10 tot 12
minuten aan op 170 graden. Verwijder het schoteltje
en poest alles na met een vochtige doek en maak
het hierna droog.
Het verwarmingselement schoonmaken met
bakpapier:
Het verwarmingselement van de Health Fryer mag
nooit van zijn plaats gehaald worden. HAAL DE
STEKKER UIT HET STOPCONTACT. Plaats de Health
Fryer zodat het verwarmingselement met een zacht
sponsje en een mild schoonmaakmiddel kan worden
NL

9
schoongemaakt. Gebruik GEEN harde borstels,
schuursponsjes of andere gereedschappen, anders
wordt het verwarmingselement beschadigd. Om
bij lastige hoekjes te kunnen, kan een stokje met
een doekje eromheen gebruikt worden. Na het
schoonmaken moet het afgedroogd worden met
een zachte droogdoek. Voor het verwijderen van
moeilijk toegankelijke vetresten: Laat de Health
Fryer onderste boven staan. En vul een spuitflesje
met 3 gram bakpoeder en 0,1 liter water en schudt
het goed zodat het goed gemengd is. Spuit de
bakpoederoplossing op het verwarmingselement en
wacht 30 minuten. Zet de Health Fryer weer rechtop
en vul de pan met een laagje water en zet deze
terug in de Health Fryer zet deze 25 minuten aan op
180 graden.
AFVALVERWIJDERING
Elektrische apparaten, accessoires en hun
verpakkingen moeten op een voor het milieu
verantwoorde wijze zoveel mogelijk worden
hergebruikt. Gooi deze materialen dus niet bij het
huisvuil. Alleen voor landen van de EU:
Volgens de Europese WEEE richtlijn
2002/96/EG voor afdanken van elektrische en
electronische oude apparaten moeten niet meer
bruikbare apparaten apart worden ingezameld
en op een milieu verantwoorde wijze worden
gerecycled.
BOURGINI SERVICE EN GARANTIE
Garantie wordt verleend gedurende 2 jaar vanaf
de aankoop datum volgens de kassabon, welke
tevens het garantiebewijs is. Voor garantie
wendt u zich tot de winkelier. Geen garantie voor
defecten welke het gevolg zijn van verkeerd
gebruik, ondeskundige demontage, schade
door vallen, stoten e.d. en schade door niet
tijdig ontkalken van apparaten welke met water
worden gebruikt. Indien bij een bepaald product
specifieke garantievoorwaarden worden vermeld,
hebben deze prioriteit boven de algemene
voorwaarden. De garantie is niet van toepassing op
gevolgschade. Voor vragen over het gebruik van
het product kunt u onze website raadplegen
www.bourgini.com.
DISCLAIMER
Wijzigingen voorbehouden; specificaties kunnen
zonder opgave van redenen worden gewijzigd.
NL

10
SAFETY INSTRUCTIONS
Read these instructions
carefully before use and
keep them in a safe place.
This appliance may be
used, cleaned and serviced
by children older than 8
years of age provided they
are supervised by a person
responsible for their safety.
Keep the appliance and
the power cord away from
children younger than 8.
Children are not allowed
to play with the appliance.
Children should always
be monitored to prevent
them from playing with the
appliance.
The appliance may be
used by persons with a
physical, sensory, mental
or motor disability and
by persons without the
necessary experience and
knowledge, provided they
are supervised by a person
responsible for their safety,
or when they are given
instructions on how to
safely use the appliance
and if understand the
dangers that come with the
use of the appliance.
• This appliance is only intended for normal
household use.
• Never leave the appliance unattended when in use.
• Only use the appliance and accessories for their
intended purposes. Do not use the appliance and
accessories for any other purposes than those
described in the instructions.
• Do not use the appliance when a part, accessory,
the power cord or plug is damaged or defective.
Only let the supplier or an acknowledged service
centre replace a damaged or defective part,
accessory, power cord or plug.
• Do not use the appliance near facilities containing
water, such as bath tubs, showers and wash
basins.
• Do not immerse the appliance in water or any
other liquid. If this nevertheless happens, unplug
the appliance from the wall socket as soon as
possible. Never remove the appliance from water
or other liquids before unplugging it from the wall
socket. You can no longer use an appliance that
has been immersed in water or other liquids.
• Make sure that water cannot get into the
connection points of the power cord nor the
extension cord.
• Always keep the power cord away from heat
sources, oil and sharp edges.
• Always check, before use, that the mains voltage
corresponds to the voltage on the rating plate of
the appliance.
• For extra safety, connect the appliance to
a group protected by a residential current
operated circuit breaker with a nominal
operating current of max. 30 mA.
• Never operate the appliance by means of an
external time switch or a separate remote
control system.
• Always unroll the power cord and extension cord
(when applicable) fully. Make sure that the power
cord and extension cord (when applicable) do not
dangle over the edge of the worktop to prevent
them from becoming entangled or somebody
accidentally tripping over them.
• Do not unplug the appliance by pulling the
power cord.
• Always unplug the appliance when not in use.
• Do not use the appliance outdoors. Place the
appliance on a stable and level surface.
• Keep the appliance away from heat sources. Do
not place the appliance on hot surfaces or near
open flames.
• Make sure your hands are dry before you touch
the appliance.
• Unplug the appliance before assembling or
disassembling it and before cleaning or servicing
the unit.
ENEN

11
• Engine driven appliances: beware of sharp and/or
moving parts. Always keep your hands away from
the moving parts when using, cleaning or servicing
the appliance.
• Heating devices: wait until the appliance has cooled
down before you touch the housing and parts of
the unit.
Be extra careful during cleaning and servicing.
THE DIFFERENT OPERATING CONTROLS
AND PARTS
(see Fig. 1)
1. Touchscreen with display
2. Rotary knob and starter button
3. The basket’s release button (under the cover cap)
4. Handgrip for the basket
5. Frying basket (in the tray)
6. Tray
THE DISPLAY ICONS
(see Fig. 2)
7. Set the timer
8. Programme for fish
9. Programme for baking/cooking
10. Display: minutes reading
11. MIN (minutes)
12. Display: temperature reading
13. In °C (degrees Celsius)
14. Programme for meat
15. Programme for crustaceans (shellfish etc.)
16. Set the temperature
17. Programme for pizza
18. Programme for sausage
19. Indicator lights
20. Programme for french fries
21. Programme for chicken
USAGE
Intended usage:
• The appliance is intended to be used for the
grilling, baking, cooking, defrosting and heating
up of food.
• The appliance is not intended to be used for
preparing liquid dishes such as soups, sauces,
ragouts or stews.
General instructions:
• Remove all packaging materials before using the
product for the first time.
• First clean the tray and the basket with soapy
water, then rinse with clean water and dry these
parts thoroughly.
• There must be enough space around the
appliance to let heat escape.
• Make sure there is sufficient ventilation.
• Place the appliance on a stable, flat surface.
• Do not obstruct the air intake and/or air exhaust
openings during use; ensure that no curtains
hang against the appliance and do not cover the
appliance with a towel or dishcloth etc.
• NEVER put oil, fat or other liquids/fluids in the
tray, as this is a fire hazard!
• Do not place your hand in the opened Health
Fryer while it is in operation, on account of the
hot and powerful airflow.
• Do not touch the tray or the basket without oven
gloves while the appliance is in use or shortly
thereafter, as these parts become extremely hot.
After use, switch off the appliance, unplug it and
wait for it to cool down completely.
• When the appliance is not being used, store it in
a dry place.
• Always keep stored appliances out of the reach
of children.
Safety features:
• The appliance is equipped with an internal
timer (a time switch). When the set timer time
has elapsed, the heating process is stopped
automatically. To switch the appliance on again,
press the - button (2).
• The appliance switches off automatically when
the tray (6) with the frying basket (5) is removed
from the appliance. All the display items on the
touchscreen (1) go blank. If the tray is placed in
the appliance again then a signal sounds and all
the display items light up again. Any programme
and/or timer already set is/are still running.
Basic operation:
This appliance works using hot air. It is not a
traditional fryer where the food is fried using a
lot of oil. In general, the appliance can be used
to prepare all the food that can be prepared in a
standard hot-air (convection) oven.
• Insert the plug into an earthed power outlet/
socket.
PREPARING FOOD
1. Place the frying basket (5) in the tray (6). You
have to hear the basket click into its proper place.
2. Place the food to be cooked into the basket.
3. Place the tray containing the basket in the
appliance. A signal must sound, with all the
display items lighting up a single time on the
touchscreen (1) and then going out again. The
tray is now correctly placed in the appliance.
4. Press the - button (2) to switch the appliance
on. The standard settings are displayed for the
timer in minutes (10) and for the temperature in
°C (12) (15 min., 180 °C).
EN EN

12
5. Select the programme you want or else use the
rotary knob (2) to select the desired temperature
and time separately. Note: The temperature
and the timer can also be adjusted during the
cooking process itself.
6. Press the - button to start the cooking
process. The indicator lights (19) light up one
after the other to show that the ventilator in the
appliance is working. Once a programme has
been selected, the accompanying symbol will
flash during the cooking process. Note: You can
stop a cooking process manually at any time
while it is underway by pressing the - button.
7. The ventilator continues to operate briefly when
the timer that has been set, elapses or when
the appliance has been switched off manually.
The display now shows the word OFF. All
the indicator lights switch off. After about 20
seconds, you will hear 5 beeps, following which
the indicator lights light up again and stay lit
up. The ventilator and appliance have now been
switched off.
8. Carefully use the handgrip to pull the tray with
the frying basket out of the appliance (4) and
place it on a heat-resistant, non-slip surface.
9. Remove the basket from the tray by pushing
the cover forward and by pressing the release
button (3) located beneath it. Pull the basket
upwards from the tray.
10. Carefully remove the food from the basket.
11. Detach the power cord and allow the appliance
to cool down completely.
12. Clean the appliance after each use in order to
prevent the formation of bacteria. Do not let
residues dry up.
Preparation:
• The Health Fryer is suitable for all foods that
may normally be cooked in a hot-air (convection)
oven. Food will often be ready much more
quickly in the Health Fryer due to the highly
concentrated airflow and the compact area in
which the food is cooked.
• If available, we recommend using the oven
version for preparing pre-packaged foods such
as frozen french fries or snacks.
• In supermarkets, you may also find various
brands of french fries and snacks that are
specially intended for cooking in a hot-air fryer
(often called an ‘airfryer’). When preparing these
foods, please follow the instructions on the
foods’ packaging.
• The following table gives examples of foods
that are suitable for preparation in the Health
Fryer. The indicated times and temperatures
are estimates and will vary, depending on the
amount of food placed in the appliance, as well
as on the food’s precise composition. You will
sometimes need to experiment a little with the
settings.
• In general, larger amounts of food will need a
slightly longer preparation time (i.e. cooking
time).
• The basket is permeable to air because this is
essential for the Health Fryer to work properly.
As a result, you should make sure that you do
not block the airflow by, for instance, placing
aluminium foil in the basket.
• Do not use the Health Fryer to prepare very
fatty foods and/or foods that spatter a lot. This
is because the fat could come into contact with
the hot heating element and thus could begin to
scorch or even burn.
Programs:
The appliance offers 8 programmes plus a standard
setting:
Programme Temp
°C Min Suitable for:
Standard
setting 180 15 Vegetable sticks,
mozzarella
sticks, apple
turnovers
Fish 160 20 Pre-cooked fish,
fish fingers
Baking/
Cooking 160 30 Pies, bread,
pizza, casseroles
Meat 180 20 Schnitzels,
meatballs
Shellfish 160 20 Shrimp, scampi
Pizza 170 20 Pizza
Sausage 200 10 Sausage
French fries 200 15 French fries
made from
potatoes or sweet
potatoes
Chicken 200 20 Chicken wings,
chicken thighs,
chicken nuggets
* Only in combination with the bread baking basket
that is available separately.
EN

13
• In each programme, the temperature and
cooking/heating time can be adjusted
individually (see the next section ‘The operating
controls and their functions’).
• Depending on the programme chosen, the
corresponding symbol on the touchscreen (1)
will flash. If no programme symbol is shown on
the display, the standard setting or the manually
set temperature and timer are set.
The operating controls and functions:
The appliance has the following operating controls
and functions:
The operating controls Functions
Timer Cooking time (1-30
minutes in 1-minute
increments)
Temperature Temperature (80 - 200 °C
in increments of
5 degrees Celsius)
Rotary knob Turn it in order to set the
duration (in minutes) and
temperature
- button Switches the appliance
on and off.
Starts the heating/
cooking process.
• The desired heating/cooking time and
temperature can be set by turning the knob (2).
• Press the - button (2) to switch the appliance
on or off. Press it again to start cooking using
the standard setting, the selected programme or
the manually set cooking time.
The best method to prepare fresh potato dishes is
as follows:
Potatoes only become french fries when they have
been pre-fried in oil, as is the case with pre-fried
french fries. Fresh (i.e. raw) potatoes can be cut into
all types of shapes, including the shape of french
fries. However, the final result will taste more like
fried potatoes than fries.
• Soak the cut potato pieces for 20-30 minutes in
cold water; leave to drain and then dry with a
kitchen cloth or paper towel.
• Put a tablespoon of sunflower oil or olive oil in a
bowl and sprinkle with some salt and pepper.
• Add the potato pieces to the bowl and use a
spoon to turn them until they are covered in a
thin layer of oil.
• Remove the potato pieces from the bowl with a
spoon or similar and place them in the basket
of the Health Fryer. Do not pour the oil from the
bowl into the basket, as this will overload the
appliance with oil.
Oil:
• The Health Fryer cooks food without the addition
of oil. Oil must not be added. As a result, dishes
are much less fatty and contain on average
65% less oil than food cooked using traditional
methods (such as a Bourgini fryer that uses
frying oil).
• The only time where you should use a small
amount of oil (i.e. a single tablespoon = 15 ml) is
when preparing fresh potatoes.
TIPS
• This appliance works using hot air. In general,
the appliance can be used to prepare all the
food that can be prepared in a standard hot-air
(convection) oven. The appliance can be used
for instance for the hot-air grilling of fries and
potato pieces made from fresh potatoes, for
the preparation of frozen french fries and other
frozen finished products and to prepare all
kinds of all types of cut foods (including fresh
vegetables, fresh meat and fresh fish).
• In general, you do not need to heat up the
appliance beforehand. However, we do
recommend pre-heating up to the desired
temperature if you want to measure the actual
cooking time more accurately or if you have
food that needs to be prepared to a state of
perfection. In principle, no oil is needed to
prepare food in the appliance. However, a little
oil can be added to the food as a flavour carrier,
by using a dispenser to sprinkle the food with a
small quantity of oil. In addition, marinated or
breaded food can be prepared in the appliance.
• The cooking times depend on the amount and
quantity of the food, as well as on the cooking
temperature. In general however, cooking times are
shorter than in a standard oven. We recommend
starting with a shorter cooking time that you can
later adapt to your own personal taste.
• When it comes to preparing frozen products,
follow the manufacturer’s instructions regarding
times and temperatures. If you want the end
result to be crunchy/crispy food, never add fat
or oil to the preparation of industrially produced
frozen foods, because they are usually pre-
cooked. The cooking time can be shortened a
little. This is why you should check - before the
end of the specified cooking time - whether the
food is ‘done’ (i.e. properly cooked).
EN

14
• For some foods (such as french fries and similar
products), it is recommended that you mix
them from time to time, in order to achieve a
uniformly cooked result. To do this, take the tray
(4) out of the appliance and carefully shake the
tray’s contents in order to mix the food items.
Then put the tray back in and continue with the
cooking process.
CLEANING AND MAINTENANCE
Clean the appliance after each usage.
Do not use metal kitchen utensils or abrasive
cleaning products to clean the griddle because they
may damage the non-stick layer.
Before you start cleaning, remove the plug from the
socket and let the appliance cool down completely.
Note: Opening the cover allows the Health Fryer to
cool down more quickly.
Cleaning the outside of the Bourgini Health Fryer:
It’s best to clean the outside of the Bourgini Health
Fryer with a damp cloth.
Cleaning the basket of the Bourgini Health Fryer:
You can put the basket of the Bourgini Health Fryer in
the dishwasher. You can also easily clean the basket
by hand. Leave the basket of the Bourgini Health
Fryer to soak in warm water with a detergent for 8
minutes. After that, you can remove any food residue
with the soft side of a sponge. Turn over the basket
and clean the underside with the hard side of the
sponge. Be careful that you do not damage the non-
stick coating. You can rub lemon juice on the basket
to neutralise unpleasant smells. Leave it to rest for
35 minutes and then rinse the basket thoroughly.
Cleaning the pan (collection tray) of the Bourgini
Health Fryer:
You can put the pan of the Bourgini Health Fryer in
the dishwasher. You can also easily clean the pan by
hand. Leave the pan of the Bourgini Health Fryer to
soak in warm water with a detergent for 8 minutes.
After that, you can remove any food residue with
the soft side of a sponge. Do NOT use stiff brushes,
abrasive sponges or other tools, as these will
damage the non-stick coating. You can rub lemon
juice on the pan to neutralise unpleasant smells.
Leave it to rest for 35 minutes and then rinse the pan
thoroughly.
Cleaning the heating element with lemon juice:
The heating element of the Bourgini Health Fryer
may never be removed. UNPLUG THE APPLIANCE.
Position the Bourgini Health Fryer in such a way
that the heating element can be cleaned with a
soft sponge and a mild detergent. Do NOT use stiff
brushes, abrasive sponges or other tools, as these
will damage the heating element. You can use a small
stick with a cloth wrapped around it to clean areas
that are hard to get to. After cleaning, the heating
element must be wiped dry with a soft tea towel. In
order to remove inaccessible fatty deposits, place a
saucer in the Bourgini Health Fryer with a little bit
of water (1 to 3 millimetres). Cut a lemon into pieces
and put them on the saucer. Switch on the Health
Fryer for 10 to 12 minutes at 170 degrees Celsius.
Remove the saucer, clean everything with a damp
cloth and wipe dry afterwards.
Cleaning the heating element with baking powder:
The heating element of the Bourgini Health Fryer
may never be removed. UNPLUG THE APPLIANCE.
Position the Bourgini Health Fryer in such a way
that the heating element can be cleaned with a
soft sponge and a mild detergent. Do NOT use stiff
brushes, abrasive sponges or other tools, as these
will damage the heating element. You can use a small
stick with a cloth wrapped around it to clean areas
that are hard to get to. After cleaning, the heating
element must be wiped dry with a soft tea towel. In
order to remove inaccessible fatty deposits, place
the Bourgini Health Fryer upside down. Fill a spray
bottle with 3 grams of baking powder and 0.1 litre of
water and shake it thoroughly to mix the ingredients
properly. Spray the baking powder solution onto the
heating element and wait for 30 minutes. Place the
Health Fryer upright again, fill the pan with a little
water, put it back in the Bourgini Health Fryer and
switch the Health Fryer on for 25 minutes at 180
degrees Celsius.
WASTE DISPOSAL
Electrical appliances, accessories and their
packaging must be reused as much as possible in
an environmentally sound manner. Do not dispose of
these items together with your normal rubbish. Only
for EU countries:
According to the European 2002/96/EG WEEE
Guideline on the disposal of old electric and
electronic appliances, the appliances that are no
longer used must be collected and recycled in an
environmentally sound manner.
ENEN

15
BOURGINI SERVICE AND WARRANTY
The warranty is valid for a period of 2 years from
the date of purchase as stated on your purchase
receipt, which also your proof of warranty. Please
turn to your retailer to claim your warranty. The
warranty shall not apply if the product is subjected
to incorrect use,, improperly disassembled,
damaged by falls, impacts or similar, or if damage
is caused due to failure to descale in good time
products that are manufactured for use with water.
Should a certain product be provided with specific
warranty terms and conditions, these shall receive
priority over general terms and conditions. The
warranty shall not apply to indirect damages.
Should you have any questions regarding the use of
the product, please consult our website at
www.bourgini.com
DISCLAIMER
Changes reserved; specifications are subject to
change without stating grounds for doing so.
EN

16
CONSIGNES DE SÉCURITÉ
Lisez attentivement le
mode d’emploi avant toute
utilisation. Conservez le
mode d’emploi.
Cet appareil peut êtreutilisé,
nettoyé et entretenu par des
enfants à partir de 8 ans
sous la supervision d’un
adulte responsable de leur
sécurité. Tenez l’appareil
et le cordon électrique hors
de portée des enfants de
moins de 8 ans. Les enfants
ne doivent pas jouer avec
l’appareil. Surveillez
toujours les enfants pour
éviter qu’ils ne jouent avec
l’appareil.
L’appareil peut être utilisé
par des personnes ayant un
handicap physique, sensoriel,
mental ou moteur et par
des personnes ne disposant
pas de l’expérience et des
connaissances nécessaires
à condition qu’elles soient
supervisées par une personne
responsable de leur sécurité
ou qu’elles reçoivent des
instructions sur la façon
d’utiliser cet appareil en toute
sécurité et qu’elles comprennent
les dangers qui vont de pair
avec son utilisation.
•Cet appareil est uniquement conçu pour un usage
ménager.
• Ne laissez pas l’appareil sans surveillance
pendant son utilisation.
• Utilisez l’appareil et ses accessoires uniquement
pour l’usage pour lequel il est conçu. N’utilisez pas
l’appareil et les accessoires pour un usage autre
que ceux décrits dans le mode d’emploi.
• N’utilisez pas l’appareil lorsqu’un de ses
composants, un accessoire, le cordon ou la
fiche sont endommagés ou défectueux. Faites
remplacer un composant, accessoire, cordon
ou fiche endommagés ou défectueux par le
fournisseur ou un réparateur agréé.
• N’utilisez pas l’appareil à proximité d’éléments
contenant de l’eau tels que baignoires, douches et
lavabos.
• Ne plongez pas l’appareil dans l’eau ou tout
autre liquide. Si cela se produit, débranchez
immédiatement l’appareil de la prise de courant.
Ne sortez jamais l’appareil hors de l’eau ou
autre liquide avant d’avoir débranché la fiche de
la prise de courant. Vous ne pouvez plus utiliser
un appareil qui est tombé dans l’eau ou un autre
liquide.
• Évitez que l’eau ne puisse pénétrer dans les points
de connexion du cordon et de la rallonge.
• Tenez le cordon à l’écart de sources de chaleur, de
produits huileux et de rebords coupants.
• Avant emploi, vérifiez toujours que le voltage de
votre domicile correspond a voltage indiqué sur
la plaque d’identification de l’appareil.
• Pour une meilleure protection, branchez l’appareil
sur un groupe protégé par un disjoncteur avec une
tension nominale de 30 mA maximum.
• N’alimentez pas l’appareil au moyen d’une
minuterie externe ou d’un système séparé de
commande à distance.
• Déroulez toujours entièrement le cordon et
éventuellement la rallonge. Veillez à ce que le
cordon et éventuellement la rallonge ne pendent
pas sur le rebord d’un plan de travail, qu’ils ne
risquent pas de s’emmêler et que personne ne
risque de se prendre les pieds dedans.
• Ne tirez pas sur le cordon pour débrancher la fiche
de la prise de courant.
• Débranchez la fiche de la prise de courant lorsque
l’appareil n’est pas utilisé.
• N’utilisez pas l’appareil à l’extérieur. Placez
l’appareil sur une surface stable et plane.
• Ne placez pas l’appareil à proximité de sources de
chaleur. Ne placez pas l’appareil sur des surfaces
chaudes ou à proximité d’un feu ou de flammes.
• Veillez à avoir les mains bien sèches lorsque vous
touchez l’appareil.
• Débranchez la fiche de la prise de courant avant
de monter ou de démonter l’appareil et avant
FR

17
d’effectuer des opérations de nettoyage ou
d’entretien.
• Appareils motorisés: faites attention aux parties
acérées et/ou mobiles. Pendant l’emploi, le
nettoyage et l’entretien, ne touchez pas les
parties mobiles.
• Appareils de chauffage: attendez que l’appareil
ait refroidi avant de toucher le coffrage et les
pièces.Soyez particulièrement vigilant lors du
nettoyage et de l’entretien.
DESCRIPTION DES DIFFÉRENTES
COMMANDES ET PIÈCES
(fig. 1)
1. Écran tactile avec affichage
2. Bouton rotatif - Marche / Arrêt
3. Bouton de déblocage du panier (sous le
couvercle)
4. Poignée du panier
5. Panier à friture (dans le bac-tiroir)
6. Bac-tiroir
ICÔNES DE L’ÉCRAN D’AFFICHAGE
(fig. 2)
7. Minuterie
8. Programme poisson
9. Programme cuisson
10. Écran d’affichage des minutes
11. MIN (minutes)
12. Écran d’affichage de la température
13. °C (degrés Celsius)
14. Programme viande
15. Programme crustacés
16. Thermostat réglable
17. Programme pizza
18. Programme saucisse
19. Témoins lumineux
20. Programme frites
21. Programme poulet
UTILISATION
Utilisation prévue:
• Cet appareil est conçu pour la grillade, la
cuisson, la décongélation et le réchauffage des
aliments.
• Il n’est pas adapté pour la cuisson de plats
liquides comme des soupes, des sauces ou des
ragoûts.
Généralités:
• Avant la première utilisation, retirez tous les
matériaux d’emballage. Ne retirez jamais
la plaque signalétique ni les éventuels
avertissements.
• Nettoyez d’abord le bac-tiroir et le panier dans
du liquide vaisselle, rincez-les bien à l’eau claire
et séchez-les.
• Il est nécessaire de laisser de l’espace autour
de l’appareil afin de permettre à la chaleur de
s’évacuer.
• Assurez-vous que la pièce dans laquelle
l’appareil est branché est suffisamment ventilée.
• Posez l’appareil sur une surface plane et stable.
• Ne recouvrez pas l’entrée et la sortie d’air
pendant l’utilisation : veillez à ce qu’aucun
rideau ne pende contre l’appareil et ne posez
pas de serviette, de chiffon ou tout autre
élément similaire dessus.
• Pour éviter tout risque d’incendie, ne remplissez
jamais le bac-tiroir d’huile, de graisse ni de tout
autre liquide!
• En raison du puissant courant d’air chaud
généré par l’appareil, ne placez pas la main
dans le health fryer lorsqu’il est en position
ouverte et en marche.
• Pendant et après l’utilisation, utilisez des gants
de cuisson pour manipuler le bac-tiroir et le
panier qui peuvent être brûlants. Éteignez
l’appareil après utilisation, retirez la fiche de la
prise de courant et patientez jusqu’à ce qu’il ait
refroidi.
• En cas de non-utilisation, rangez l’appareil dans
un endroit à l’abri de l’humidité.
• Assurez-vous que les appareils ainsi rangés
sont hors de la portée des enfants.
Consignes de sécurité:
• L’appareil est équipé d’une minuterie interne.
Lorsque le temps réglé sur la minuterie est
atteint, la cuisson s’arrête automatiquement.
Appuyez sur le bouton (2) pour remettre
l’appareil en marche.
• Il s’arrête automatiquement lorsque vous retirez
le bac-tiroir (6) avec le panier à friture (5). Tous
les éléments de l’écran tactile (1) s’éteignent.
Lorsque le bac-tiroir est replacé dans l’appareil,
un signal retentit et tous les éléments
s’allument. Le programme ou la minuterie
préréglés reprennent.
Opérations de base:
Cet appareil utilise l’air chaud. Il ne s’agit pas d’une
friteuse traditionnelle où les aliments sont frits
avec beaucoup d’huile. En général, cet appareil
permet de cuire tous les aliments qui peuvent aussi
passer dans un four à chaleur tournante standard.
• Branchez toujours l’appareil à une prise avec
mise à la terre.
CUISSON DES ALIMENTS
1. Placez le panier à friture (5) dans le bac-tiroir
(6). Un clic doit se faire entendre si le panier est
bien en place.
2. Placez l’aliment à cuire dans le panier.
FR

18
3. Placez le bac-tiroir avec le panier dans
l’appareil. Un signal retentit et tous les
éléments doivent s’allumer et s’éteindre une
fois sur l’écran tactile (1). Le bac-tiroir est
maintenant bien en place dans l’appareil.
4. Appuyez sur le bouton (2) pour mettre
l’appareil en marche. Les réglages de base de la
minuterie en minutes (10) et de la température
en °C (12) s’affichent (15 min., 180 °C).
5. Sélectionnez le programme souhaité ou réglez
séparément la température et la minuterie avec
le bouton rotatif (2).
Remarque : La température et la minuterie
peuvent aussi être réglées pendant la cuisson.
6. Appuyez sur le bouton pour démarrer la
cuisson. Les témoins lumineux (19) s’allument
l’un après l’autre pour indiquer que le
ventilateur de l’appareil est en marche. Si
un programme a été sélectionné, le symbole
correspondant clignote pendant la cuisson.
Remarque : celui-ci peut être interrompu
manuellement à n’importe quel moment de la
cuisson en appuyant sur le bouton .
7. Une fois le temps réglé à la minuterie écoulé ou
après l’arrêt manuel de l’appareil, le ventilateur
continue de tourner pendant un moment.
L’écran affiche OFF (arrêt). Tous les éléments
avec témoin lumineux s’éteignent. Au bout de
20 secondes environ, 5 bips doivent retentir et
les témoins lumineux s’allument à nouveau en
continu. Le ventilateur et l’appareil s’arrêtent.
8. Sortez doucement le bac-tiroir avec le
panier à friture de l’appareil (4) en le tirant
par la poignée et posez-le sur une surface
antidérapante et résistante à la chaleur.
9. Retirez le panier du bac-tiroir en faisant glisser
le couvercle vers l’avant et en appuyant sur
le bouton de déblocage placé en dessous (3).
Sortez le panier du bac-tiroir.
10. Retirez soigneusement les aliments du panier.
11. Débranchez le cordon d’alimentation et laissez
l’appareil refroidir complètement.
12. Nettoyez l’appareil après chaque utilisation pour
prévenir la prolifération bactérienne. Ne laissez
pas sécher de restes.
Préparation:
• Le Health Fryer convient pour tous les
aliments pouvant normalement passer dans
un four à chaleur tournante. La cuisson est
souvent bien plus rapide en raison de la
circulation d’air très concentrée et de l’espace
restreint dans lequel les aliments sont cuits.
• Pour la cuisson d’aliments préemballés, par
exemple des frites ou des en-cas surgelés,
nous vous conseillons de choisir la variante
pour cuisson au four, si elle est disponible.
• Vous trouverez également en supermarché
des frites et en-cas de différentes marques
spécialement préparés pour la cuisson
dans une friteuse à air chaud pulsé (aussi
appelée friteuse sans huile ou airfryer) :
pour leur cuisson, suivez les instructions sur
l’emballage.
• Dans le tableau ci-dessous, vous pouvez voir
les types d’aliments pouvant être cuits dans
le Health Fryer. La durée et la température
indiquées sont approximatives, étant donné
qu’il faut aussi tenir compte de la quantité et
de la composition exacte des aliments. Il peut
être parfois nécessaire de faire des essais
avec les réglages.
• Généralement, une plus grande quantité
d’aliments nécessite aussi un temps de
cuisson un peu plus long.
• Le panier laisse passer l’air : ce détail est
important pour permettre au Health Fryer de
bien fonctionner. Ne bloquez dès lors pas la
circulation d’air, par exemple en plaçant une
feuille de papier d’aluminium dans le panier.
• Ne cuisez pas dans le Health Fryer des
aliments très gras ou qui éclaboussent
beaucoup. La graisse risquerait de gicler sur
l’élément de chauffe et de roussir, voire de
prendre feu !
Programmes:
L’appareil dispose de 8 programmes et d’un réglage
de base :
Programme Temp
°C Min Convient pour
(exemples)
Réglage de
base 180 15 Bâtonnets de
légumes, beignets
de mozzarella,
chaussons aux
pommes
Poisson 160 20 Poisson frit,
bâtonnets de
poisson
Cuisson 160 30 Tarte, pain, pizza,
plats à braiser
Viande 180 20 Escalopes panées,
boulettes de
viande hachée
Crustacés 160 20 Crevettes, scampis
FR

19
Sausage 170 10 Saucisse
Frites 200 15 Frites de pommes
de terre et de
patates douces
Poulet 200 20 Ailes, cuisses,
nuggets de poulet
* Utilisable uniquement en combinaison avec le
panier à pain disponible en option.
• Pour chaque programme, la température et le
temps peuvent être réglés individuellement
(voir le chapitre suivant « Éléments de
commande et fonctions »).
• Le symbole correspondant au programme choisi
clignote sur l’écran tactile (1). Si aucun symbole
de programme n’apparait sur l’écran, cela veut
signifie que le réglage de base ou la température
et la minuterie préréglées ont été utilisés.
Éléments de commande et fonctions:
L’appareil possède les éléments de commande et
les fonctions suivants :
Éléments de
commande Fonctions
Minuterie Temps de cuisson
(1 - 30 minutes par
incréments d’une
minute)
Température Température (80 - 200 °C
par incréments de
5 degrés)
Bouton rotatif Réglez les minutes et la
température en tournant
le bouton
- bouton Allumez et arrêtez
l’appareil.
Démarrez la cuisson.
• Vous pouvez régler le temps et la température
que vous voulez en tournant le bouton (2).
• Appuyez sur le bouton (2) pour mettre l’appareil
en marche et l’arrêter. Appuyez encore une
fois pour démarrer le réglage de base, le
programme sélectionné ou le temps de cuisson
réglé individuellement.
La meilleure méthode pour cuire des pommes de
terre fraîches est la suivante :
Les pommes de terre sont des « frites » uniquement
quand elles ont déjà été cuites une fois dans l’huile,
comme c’est le cas pour les frites précuites. On peut
couper des pommes de terre fraîches de différentes
façons, donc aussi en forme de frites. Cependant, le
résultat final aura plus un goût de pommes de terre
sautées que de frites.
• Trempez les pommes de terre coupées en
morceaux 20 à 30 minutes dans de l’eau froide,
égouttez-les et séchez-les avec du papier
essuie-tout ou une serviette de cuisine.
• Versez une cuillère à soupe d’huile (huile de
tournesol ou huile d’olive) dans un plat et
ajoutez du poivre et du sel.
• Ajoutez les morceaux de pomme de terre dans
le plat et passez-les dans l’huile jusqu’à ce qu’ils
soient recouverts d’une légère couche d’huile.
• Sortez les pommes de terre du plat avec une
louche ou une écumoire par ex., et placez-les
dans le panier du Health Fryer. Pour éviter un
excès d’huile, ne videz pas le plat dans le panier.
Huile :
• Le Health Fryer ne nécessite pas l’ajout d’huile.
Les plats sont donc beaucoup moins gras et
contiennent 65 % d’huile en moins qu’avec le
mode de préparation traditionnel (comparé à
une friteuse Bourgini avec huile de friture).
• Seule la cuisson de pommes de terre fraîches
nécessite l’ajout d’une petite quantité d’huile
(une seule cuillère à soupe = 15 ml).
CONSEILS
• Cet appareil utilise l’air chaud. En général, cet
appareil permet de cuire tous les aliments qui
peuvent aussi passer dans un four à chaleur
tournante standard. Il est conçu entre autres
pour la cuisson à l’air chaud des frites et des
pommes de terre fraîches en morceaux, des
frites et autres produits finis surgelés et de
toutes sortes d’aliments coupés en petits
morceaux (légumes frais mais aussi viande ou
poisson frais).
• En général, il n’est pas nécessaire de
préchauffer l’appareil. Pour mieux évaluer le
temps de cuisson ou pour obtenir la cuisson
parfaite de l’aliment, le préchauffage de
l’appareil à la température souhaitée est quand
même recommandé. Il n’y a en principe pas
besoin d’huile pour cuire les aliments dans
l’appareil. L’huile peut être ajoutée aux aliments
pour leur donner du goût : pour cela, aspergez-
les d’un peu d’huile au vaporisateur. Cet
appareil permet également de cuire les aliments
marinés ou panés.
• Les temps de cuisson dépendent de la taille
FR

20
et de la quantité des aliments ainsi que de la
température de cuisson. Toutefois, les temps
de cuisson sont généralement plus courts que
dans un four standard. Nous conseillons de
commencer par un temps de cuisson plus court
et de l’adapter au fur et à mesure selon votre
goût.
• Pour la cuisson des produits surgelés, reportez-
vous aux spécifications du fabricant concernant
le temps et la température. Pour obtenir des
aliments croustillants, n’ajoutez jamais de
gras pour la cuisson des produits surgelés
industriels, car ils sont généralement précuits.
Le temps de cuisson peut être légèrement
raccourci. Contrôlez donc si l’aliment est bien
cuit avant la fin du temps de cuisson réglé.
• Pour certains aliments (par ex. les frites ou
les produits similaires), il est recommandé de
les remuer de temps en temps pour obtenir
une cuisson uniforme. Pour cela, sortez le bac-
tiroir (4) de l’appareil et secouez doucement
le contenu afin de mélanger les aliments.
Remettez ensuite le bac-tiroir et laissez la
cuisson se poursuivre.
NETTOYAGE ET ENTRETIEN
Nettoyez l’appareil après chaque usage.
N’utilisez pas d’ustensiles de cuisine métalliques
ni de produits nettoyants abrasifs pour nettoyer le
plat de cuisson, car ils pourraient endommager le
revêtement anti-adhésif.
Retirez la fiche de la prise de courant et laissez
l’appareil refroidir.
Remarque : Ouvrez le clapet pour laisser le Health
Fryer refroidir plus vite.
Nettoyage de la coque extérieure du Bourgini
Health Fryer :
Nettoyez la coque extérieure de votre Bourgini
Health Fryer à l’aide d’un chiffon humide.
Nettoyage du panier du Bourgini Health Fryer :
Le panier du Bourgini Health Fryer se lave au lave-
vaisselle. Il peut aussi aisément être lavé à la main :
dans ce cas, faites tremper le panier du Bourgini
Health Fryer dans de l’eau chaude additionnée de
liquide vaisselle pendant 8 minutes puis retirez
les résidus alimentaires en utilisant la face non
abrasive d’une éponge. Retournez ensuite le panier
et nettoyez le dessous en utilisant cette fois-ci le
tampon abrasif de l’éponge tout en veillant à ne
pas endommager le revêtement antiadhésif. Pour
neutraliser d’éventuelles mauvaises odeurs, vous
pouvez enduire le panier de jus de citron, le laisser
agir 35 minutes et passer le panier sous le robinet
afin de bien le rincer.
Nettoyage de la cuve du Bourgini Health Fryer :
La cuve du Bourgini Health Fryer se lave au
lave-vaisselle. Elle peut aussi aisément être lavée
à la main : dans ce cas, faites tremper la cuve
du Bourgini Health Fryer dans de l’eau chaude
additionnée de liquide vaisselle pendant 8 minutes
puis retirez les résidus alimentaires en utilisant
la face non abrasive d’une éponge. N’utilisez
JAMAIS de brosse dure, d’éponge à récurer ou
d’autres objets abrasifs sous peine d’endommager
le revêtement antiadhésif. Pour neutraliser
d’éventuelles mauvaises odeurs, vous pouvez
enduire le panier de jus de citron, le laisser agir 35
minutes et passer le panier sous le robinet afin de
bien le rincer.
Nettoyage de la résistance chauffante : Avec du jus
de citron :
La résistance chauffante du Bourgini Health Fryer
ne doit jamais être démontée. DÉBRANCHEZ
L’APPAREIL DE LA PRISE SECTEUR. Placez
le Bourgini Health Fryer de telle sorte que la
résistance chauffante puisse être nettoyée à l’aide
d’une éponge non abrasive et de liquide vaisselle
non agressif. N’utilisez JAMAIS de brosse dure,
d’éponge à récurer ou d’autres objets abrasifs
sous peine d’endommager la résistance chauffante.
Vous pouvez utiliser un bâton entouré d’un chiffon
pour atteindre les endroits difficiles d’accès. Après
son nettoyage, la résistance doit être essuyée
à l’aide d’un chiffon doux. Astuce pour éliminer
d’éventuels résidus gras difficiles d’accès : déposez
un ramequin rempli d’un fond d’eau (1 à 3 mm)
dans le Bourgini Health Fryer. Ajoutez un citron
coupé en quartiers dans l’eau. Faites chauffer le
Health Fryer sur 170 degrés Celsius pendant 10 à
12 minutes. Retirez ensuite le ramequin et nettoyez
l’élément avec un chiffon humide, puis essuyez
soigneusement le tout.
Avec de la levure chimique :
La résistance chauffante du Bourgini Health Fryer
ne doit jamais être démontée. DÉBRANCHEZ
L’APPAREIL DE LA PRISE SECTEUR. Placez
le Bourgini Health Fryer de telle sorte que la
résistance chauffante puisse être nettoyée à l’aide
d’une éponge non abrasive et de liquide vaisselle
non agressif. N’utilisez JAMAIS de brosse dure,
d’éponge à récurer ou d’autres objets abrasifs sous
peine d’endommager la résistance chauffante. Vous
pouvez utiliser un bâton entouré d’un chiffon pour
atteindre les endroits difficiles d’accès. Après son
nettoyage, la résistance doit être essuyée à l’aide
d’un chiffon doux. Astuce pour éliminer d’éventuels
résidus gras difficiles d’accès : Posez le Bourgini
Health Fryer à l’envers. Versez 0,1 litre d’eau
FR
Table of contents
Languages:
Other Bourgini Fryer manuals

Bourgini
Bourgini Health Fryer Plus User manual

Bourgini
Bourgini Health Fryer Pro XL User manual

Bourgini
Bourgini Health Fryer Plus User manual

Bourgini
Bourgini 18.2042.00.00 User manual

Bourgini
Bourgini 18.2041.00.00 User manual

Bourgini
Bourgini 18.2042.00.00 User manual

Bourgini
Bourgini 18.2149.00.00 User manual

Bourgini
Bourgini 18.2147.00.00 User manual

Bourgini
Bourgini 18.1020.00.00 User manual

Bourgini
Bourgini 18.2040.00.00 User manual