bq Hephestos 2 User manual

Hephestos 2
Levelling Guide
Version:
V0.0.0
Author(s):
BQ
May 18th 2018
Revised by:
Approved by:
Jon Goitia
Effect date:
18/05/2018
Project:
Hephestos 2

Levelling Guide
2
Changelog
Version
Date
Changes
Author
V0.0.0
May 18th 2018
Document created
BQ

Levelling Guide
3
Contents
Introduction ..............................................................................................................................................................................4
Updating firmware ..................................................................................................................................................................4
First layer settings...................................................................................................................................................................4
Test Gcode ...............................................................................................................................................................................5
Basic mechanical checks ......................................................................................................................................................6
Front bolt torque......................................................................................................................................................................7
Print bed clamp system .........................................................................................................................................................8
Remove bed suspension .................................................................................................................................................... 10

Levelling Guide
4
Introduction
This guide aims to help customers who have assembled a BQ Hephestos 2 get the maximum out
of their 3D printer and troubleshoot any issues with the auto - levelling feature.
There are some assembly mistakes that can cause the mechanical structure to be deformed,
especially in the Y axis. This means the print bed will not move in a perfect plane over its full area,
causing the levelling algorithm to fail in some places. This can happen even if the print bed and
inductive sensor are in good working order.
There are many factors to consider since each customer assembles the printer in slightly different
ways. The tips and tricks contained in this document are the result of extensive testing and have
proved to fix one or more levelling issues. However, they might not all be appropriate for a particular
printer. Please take this guide as a reference for ideas to try, not as a must-do checklist!
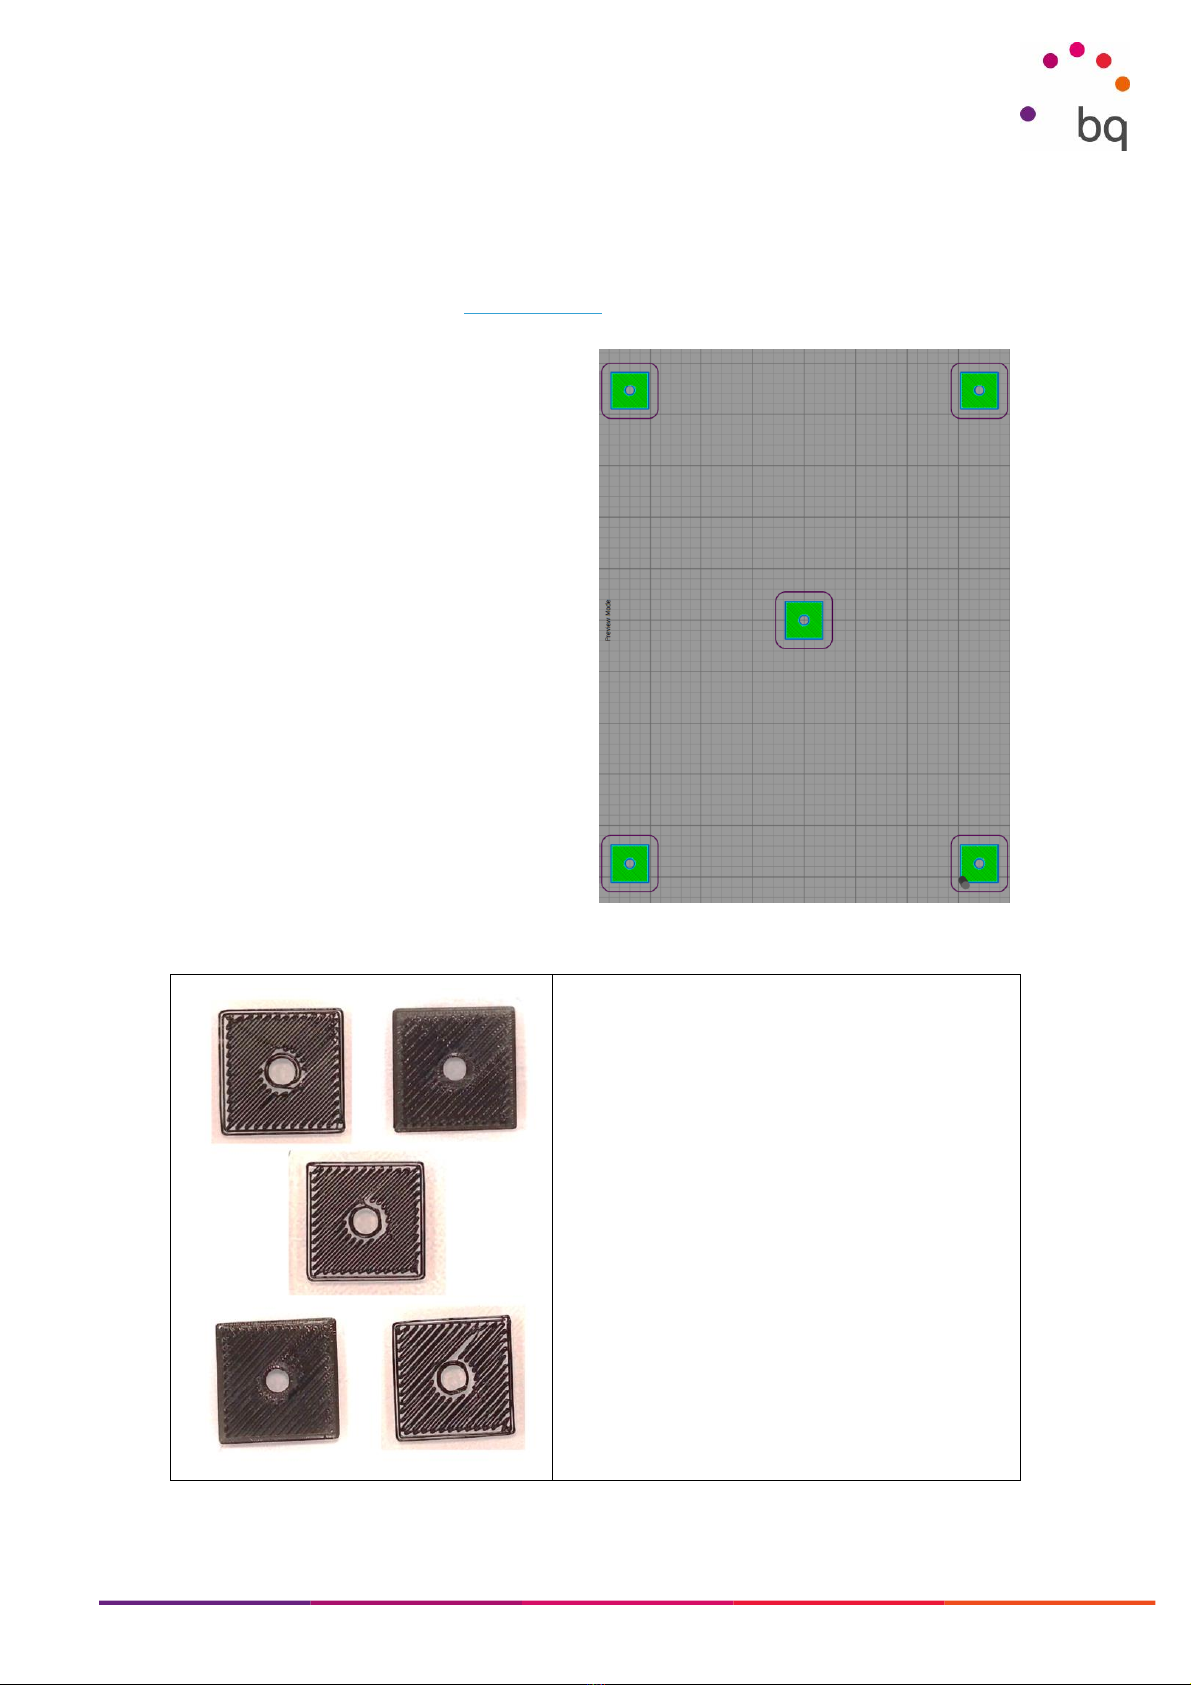
Updating firmware
The first and possibly most effective action is to update the firmware on your Hephestos 2. The
latest version fixes some bugs regarding the heated bed and introduces 9-point mesh levelling.
This adds a few more seconds to the levelling routine at the beginning of each print, but allows the
FW to adjust the Z-height much more accurately, since it does not assume that the print surface is
a plane.
Simply updating the FW can fix many levelling issues. To do so, download the BQ firmware updater
or the latest version of the firmware from this link: https://www.bq.com/es/support/hephestos-
2/support-sheet?ssess=5afe90e1e9ef7&sorigin=productList
First layer settings
The success of the first layer depends greatly on the parameters used. The following table lists the
minimum recommended parameters for the first layer:
Layer height
≥ 0.2mm
Even if the rest of the print uses a different layer height,
make sure the first layer is at least 0.2mm thick.
Extrusion width
≥ 0.4mm
Increasing the extrusion width on the first layer can improve
adhesion to the print bed. Recommended value: 0.48.
Layer speed
15 - 20 mm/s
Printing the first layer slowly dramatically decreases the
chances of a failed print.
Remember these parameters apply only to the first layer. The rest of the part can be printed with
any other values.

Levelling Guide
5
Test Gcode
When making changes to the printer’s mechanics, it is important to always print the same pattern.
This way, we can evaluate if the change had the desired effect.
You can download BQ’s standard test Gcode here.
Before printing the Test Gcode:
•Run the Offset calibration routine so the
nozzle height is correct.
•Make sure that Autolevelling is ON in the
settings menu
•Leave the manual levelling knobs at the
same height (about halfway).
•DO NOT touch the manual knobs when
the Gcode is printing! We need to see the
result without human intervention in the
levelling process.
Test example:
Sample print of the Test Gcode on a printer with
levelling issues. Each picture corresponds to a
square from the Gcode shown above.
The bottom-left and top-right corners have proper
adhesion to the print bed.
The diagonal form the top-left to the bottom-right is
too high, so filament sticks but longer prints will
probably fail.

Levelling Guide
6
Basic mechanical checks
1) Make sure the X-axis is parallel to the print bed. Picture 1a shows an X-axis that is not
leveled because the right side is higher than the left. Adjust the height of one side by turning
the Z-coupling while holding the other in place (picture 1b).
2) Adjust the set screws that hold the Y axis to the printer frame (picture 2a). Do not use
excessive torque but make sure they are firmly in place (picture 2b).
3) Adjust the rubber foot so the front of the printer is properly supported. Start with the foot
above its normal position (picture 3a) and screw it in until you feel the weight that it is
holding (picture 3b)
1a
1b
2a
2b
3a
3b

Levelling Guide
7
Front bolt torque
The most common mechanical issue is over-tightening the 4 bolts that hold the Y-axis in the front
bracket. This warps the Y-axis linear guides and causes the bed to move in a non-planar fashion.
To solve this issue, follow these steps:
1) Unscrew the 4 bolts in the front bracket until they are loose (not creating any pressure
against the bracket)
2) Jiggle the bracket in both directions so the linear guides have a chance to settle in a new
position.
3) Retighten the bolts without any pressure, so you can turn them by hand
Test result:
After loosening the front bolts, the test Gcode
shows that the top-left and the bottom-right
corners have been fixed and have proper adhesion.
The center square still seems to be too high, so
further tweaks are necessary.

Levelling Guide
8
Print bed clamp system
If the bed is not sitting flat on the Y-axis, putting pressure on the tabs to hold it in place could cause
the bed to warp slightly and cause issues in the center area of the bed.
A solution to this problem is to print this part as an alternative. It holds the bed in place without
pressure from the top, using the same holes as the original system.
The bracket holds the side wings
of the print bed and fits in the
holes of the original system
Original clamp system
Alternative system

Levelling Guide
9
Original clamp system
Alternative system
Notes:
This solution constrains the movement of the bed in the Y axis. If the bracket is not properly printed
(or print speed is too high), the bed might move slightly when in use. Make sure the bracket is
properly fitted to the bed.
Depending on the material used to print the bracket, it might not be suitable for use with an
Hephestos 2 fitted with a heated bed.
Test result:
Using the printed bracket, the center area of the
print bed is now well calibrated and the full
surface of the print bed can be used.

Levelling Guide
10
Remove bed suspension
In case the manual levelling is not working correctly due to a problem with the springs, it can be
easily removed to have autolevelling only. In this case, the bed is supported by the lower sheet
metal instead of floating a few millimeters above it. This can help with consistency issues and can
easily be reversed if it does not have the desired effect.
Original assembly with manual levelling
springs
Bed without springs, must always use
autolevelling.
Other manuals for Hephestos 2
1
Table of contents
Other bq 3D Printer manuals