Bradley 8170-158 User manual

P.O. Box 309, Menomonee Falls, WI USA 53052-0309
PHONE 800.BRADLEY (800.272.3539) FAX 262.251.5817
bradleycorp.com
Installation
P20-125 Rev. A; ECN 13-15-016
© 2013 Bradley
Page 1 of 5 8/7/2013
8170-158, 8170-1581
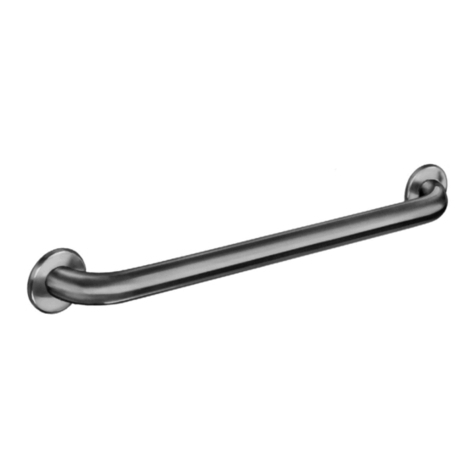
Swing-Away Grab Bar
Table of Contents
Supplies Required ............................... 2
Dimensions .................................... 2
Installation ....................................3-4
Operation...................................... 4
Grab Bar Maintenance ........................... 4
Cleaning and Maintenance of Stainless Steel.......... 5
IMPORTANT!
Read this entire installation manual to ensure proper installation, then file this manual with the
owner or maintenance department. Compliance and conformity to local codes and ordinances is
the responsibility of the installer.
Separate parts from packaging and make sure all parts are accounted for before discarding
any packaging material. If any parts are missing, do not begin installation until you obtain the
missing parts.
Product warranties and other information may be found under "Products" on our website at
www.bradleycorp.com.
Installation
THIS
SIDE
UP
Packing List
•
•
•
•
Model 8170-158 shown

8170-158/1581 Installation
28/7/2013 Bradley • P20-125 Rev. A; ECN 13-15-016
Supplies Required
• (8) wall anchors (supplied by installer)
• (8) hex-head screws (supplied by installer) - Flanges are not compatible with oval-head screws
• Square
• Tool to drill holes in wall and floor
• Tool to mount wall anchors and flanges
Dimensions
Model 8170-158 Model 8170-1581
(with tissue holder)
33-1/4"
(844.5)
30-1/2"
(775.5)
3"
(76.2)
27-1/2"
(669.3)
29"
(736.9)
C
L
C
L
C
L
30-1/2"
(775.5)
27-1/2"
(669.3)
6-1/2"
(165.1)
(mm)
5-1/2"
(140.5)
29"
(736.9)
33-1/4"
(844.5)
C
L
C
L
C
L

Installation 8170-158/1581
Bradley • P20-125 Rev. A; ECN 13-15-016 8/7/2013 3
1Install Anchors
A
Adjust both flanges so that the grab
bar is in the support (locked) position
(both locking pins should be in the deep
notches of the wall and floor flanges.
C
Using the mounting holes on the wall
and floor flanges as templates, mark the
hole positions on the mounting surfaces
and drill holes for mounting anchors.
B
Position the grab bar alongside the wall with
both flanges flush against their mounting
surfaces. The centerline for the floor flange
should be 3" from the wall. The centerline for
the wall flange should be 29" from the floor.
WARNING! The swing-away grab bar is designed to support a load in excess of
300 pounds. Make sure wall backing is adequate before installing.
The swing-away grab bar must be mounted parallel to the wall. It may be necessary to insert
shims under flanges to compensate for an uneven relationship between the floor and the wall.
CAUTION! Improper installation can prevent smooth
operation of the grab bar and can cause
damage to locking pins and flanges. Make sure
the centerlines for the wall and floor flanges are
the correct distance from mounting surfaces.
29"
(736.6mm)
3"
(76.2mm)
C
L
C
L
Wall
Flange
Floor
Flange
DInstall 4 mounting
anchors in the wall
and 4 in the floor.
Grab Bar
in Support
(Locked)
Position
Locking
Pin
Support
Position Notch
Open Position
Notch

8170-158/1581 Installation
48/7/2013 Bradley • P20-125 Rev. A; ECN 13-15-016
2Secure Grab Bar
CAUTION! Improper installation can prevent smooth operation of the grab bar and
can cause damage to locking pins and flanges. Use shims, if necessary, to
achieve a parallel relationship between the grab bar and the wall.
B
Position the grab bar so that both flanges
are aligned with their mounting holes.
If wall and floor ARE perpendicular, install
4 hex-head screws to secure the wall
flange to the wall.
If wall and floor ARE NOT perpendicular,
install 4 hex-head screws to secure the
flange that is not being shimmed to it's
mounting surface. D
If the grab bar does not move freely when
rotated, place shims under the unsecured
flange and rotate the grab bar again to check
for binding. If there is still binding, add more
shims.
If the grab bar moves freely when rotated,
install 4 hex-head screws to secure the flange
to it's mounting surface.
C
Hold the unsecured flange flush against it's
mounting surface and rotate the grab bar
between the support and open positions
several times. When rotated, locking pins
should move freely between the deep and
shallow notches on the flanges without
binding.
Operation
The swing-away grab bar can be rotated to a support (locked) position and an open position. To place the grab bar in the:
• support position, rotate the grab bar forward until the locking pins on the grab bar fit into the deep notches on the wall and
floor flanges.
• open position, rotate the grab bar backward until the locking pins rest in the shallow notches on the wall and floor flanges.
Grab Bar Maintenance
All screws and mounting anchors should be checked to ensure that they are securely mounted to the wall every 6 months. If
the swing-away grab bar is being used in a rehabilitation center or in an area with a high frequency of use, screws and anchors
should be checked monthly.
AUsing a square, make sure the wall and
floor are perpendicular and true.

Installation 8170-158/1581
Bradley • P20-125 Rev. A; ECN 13-15-016 8/7/2013 5
Cleaning and Maintenance for Stainless Steel
Material Description: Stainless steel is extremely durable, and maintenance is simple and inexpensive. Proper care, particularly
under corrosive conditions, is essential. Always start with the simplest solution and work your way toward the more complicated.
Routine cleaning: Daily or as often as needed use a solution of warm water and soap, detergent, or ammonia. Apply the
cleaning solution per the manufacturer's instructions and always use a soft cloth or sponge to avoid damaging the finish.
Stubborn Stains: To remove stains from stainless steel use a stainless steel cleaner and polish such as Ball®stainless steel
cleaner or a soft abrasive. Always follow the manufacturer's instructions and apply in the same direction as the polish lines.
NOTICE! Never use ordinary steel wool or steel brushes on stainless steel. Always use stainless steel wool
or stainless steel brushes.
Special Situations for Material
Fingerprints and Smears: To remove fingerprints or smears use a high quality stainless steel cleaner and polish in accordance
with the manufacturer's instructions. Many of these products leave a protective coating that helps prevent future smears and
fingerprints.
Grease and Oil: To remove grease and oil use a quality commercial detergent or caustic cleaner. Apply in accordance to the
manufacturer's instructions and in the direction of the polish lines.
Precautions: Avoid prolonged contact with chlorides (bleaches, salts), bromides (sanitizing agents), thiocyanates (pesticides,
photography chemicals, and some foods), and iodides on stainless steel equipment, especially if acid conditions exist.
NOTICE! Do not permit salty solutions to evaporate and dry on stainless steel.
The appearance of rust streaks on stainless steel leads to the belief that the stainless steel is rusting. Look for the actual source
of the rust in some iron or steel particles which may be touching, but not actually a part of the stainless steel structure.
NOTICE! Strongly acidic or caustic cleaners may attack the steel causing a reddish film to appear. The use
of these cleaners should be avoided.
Brand Names
Use of brand names is intended only to indicate a type of cleaner. This does not constitute an endorsement, nor does the
omission of any brand name cleaner imply inadequacy. Many products named are regional in distribution, and can be found in
local supermarkets, department and hardware stores, or through your cleaning service. It is emphasized that all products should
be used in strict accordance with package instructions.
This manual suits for next models
1
Table of contents
Other Bradley Bathroom Aid manuals
Popular Bathroom Aid manuals by other brands

Invacare
Invacare H160 user manual

Drive DeVilbiss Healthcare
Drive DeVilbiss Healthcare Benny operating instructions

SmitCare
SmitCare Myco MBAX User instructions

Pressalit Care
Pressalit Care R3107 Mounting instruction

EZee Life
EZee Life CRP0196 quick start guide

dr. Mercola
dr. Mercola SSB - 1000 Installation and use instructions