BraunAbility EntervanII Application guide

Read manual
before operation.
Failure to do so
may result in
serious bodily
injury and/or
property damage.
Keep manual in
Entervan.
W
ARNING
Owner's
Manual
ENTER
ENTER
TM
1996 and newer Chrysler Entervan II
®
®
Braun Series 03 and later
Note to Dealer:
Provide this manual
to the consumer
See inside cover for
warranty/registration
information
"Providing Access to the World"
International Corporate Hdqrs: P.O. Box 310 Winamac, IN 46996 USA
1-800-THE LIFT (219) 946-6153 FAX: (219) 946-4670
®
5230096-03
September 1996
August 1998
Revision
Braun
Series 03 and later 1996 and newer Chrysler
Entervan II
Braun
Series 03 and later 1996 and newer Chrysler
Entervan II
®
®
Owner's/Service Manual for
Series 03 and later
Fully-Automatic
1996 and newer Chrysler
Entervan®II
ENTER
TM

Congratulations
We at The Braun Corporation wish to express our fullest appreciation
on your new purchase.
With you in mind, our skilled craftsmen have designed and
assembled the finest lowered floor vehicle available.
This manual includes operating instructions, servicing instructions,
and instructions for troubleshooting, if needed.
Your Entervan®II is built for dependability, and will bring you years of
pleasure and independence, as long as the maintenance is performed regularly
and the Entervan®is operated by an instructed person.
THE BRAUN CORPORATION
Ralph W. Braun
Chief Executive Officer
Immediately upon receiving:
Warranty/Registration Instructions
Examine your Entervan®for any damage. Notify
the carrier at once with any claims.
Two warranty/registration cards (shown right)
are supplied with each Entervan®. One is
labeled “Dealer” and the other is labeled
“Owner." The dealer must process the card
labeled “Dealer." The consumer must fill out the
card labeled “Owner” and mail it to The Braun
Corporation. Warranty details are provided in
the Warranty section within this manual.
•
•
The Braun Serial No./Series No. identification decal (shown below) is located on the Entervan® driver's
door jamb. This I.D. tag contains the product identification information provided on the Warranty/
Registration card. Record the information in the space provided below. This information must be
provided when filing a warranty claim or ordering parts. See the Return Authorization section
for further details.
RETAIN THIS INFORMATION FOR FUTURE USE. HAVE THIS INFORMATION WHEN FILING A
WARRANTY CLAIM OR ORDERING PARTS!
•
Sincerely,
1014 S. MONTICELLO P.O. BOX 310 WINAMAC, IN. 46996 219•946•6153
VIN # 1B4GP54R4TB154992
ENTERVAN # 5200096-03 SERIAL 1203
ENG. SERIES 03 ENG. RAMP SERIES 02
MFG 07/20/96 DOOR OP. SERIES 02
PAINT CODE INT - DIU35799
KNEELING 1 EXT - DBU5069
Sample: Identification Decal
Entervan®Model No.
Engineering Series No.
Serial No.
Ramp Series No.
Door Operator Series No.
Date of Manufacture
•
Sample: Warranty/Registration Card
Entervan
Model No. Kneeling
Door Operator
Series No.
Serial No.
Ramp
Series No.
Engineering
Series No.
5200096 - 03 - 1203 - 02 - 02 - 1

Page 1
Contents
Section 1: Operation
Entervan II Features and Options ....................... 2, 3
Safety Precautions ................................................ 4-6
Pre-Operation Notes and Details
Control Switches ............................................. 7-10
Dash-Mounted Kneel and
Open/Close Switches .................................... 8
Rear Wall-Mounted Manual/Auto and
Open/Close Switches .................................... 8
Mini Remote Control Transmitter .................. 9
Full Size Remote Control Transmitter ........... 9
Passenger Door Outside Key Entry ............ 10
Kneel Actuator Manual/Auto Switch ............ 10
Kneeling Feature .......................................... 11, 12
Automatic Power Door ........................................12
Automatic Power Ramp ................................13, 14
Driver Side Slide Door ........................................14
Ramp Safety .......................................................15
Wheelchair-Equipped Occupant Seat Belts ........15
Stabilizing Wheelchairs ................................ 15, 16
Wheelchair Orientation and Securement
During Transport ................................................ 16
Operation Procedure Review ............................. 16
Preventative Maintenance ..................................17
Door Locks and Anti-Theft (Alarm) System ........17
Power Operating Instructions ................................18
Passive Access (Non-Wheelchair) Instructions ...19
Ramp Removal Instructions ............................ 20, 21
Manual Operation
Door and Ramp Manual
Operating Instructions .................................. 21, 22
Kneel Actuator Manual Release
Instructions .................................................. 23, 24
Wheelchair and Occupant Restraint ................ 25-29
Chrysler Easy-Out Roller™Rear Bench Seat ........ 29
Quick-Release Front Seats .............................. 30, 31
Spare Tire Mount and Storage Cabinet .................32
Tire Changing .................................................... 32, 33
Section 2: Maintenance
Maintenance and Lubrication Schedule .......... 34-36
Section 3: Troubleshooting
Troubleshooting Diagnosis Chart .................... 37-42
Auxiliary Power Supply for Dealer-Installed
Power Seat or Tie-Down ......................................... 44
Wiring Diagram (Fold Out) ........................... 45A, 46A
Electrical Schematic (Fold Out) .................. 45B, 46B
Section 4: Repair Parts
Power Door Operator Assembly ............................47
Power Ramp Motor Assembly ............................... 48
Ramp Assembly ...................................................... 49
Kneel Actuator Assembly ...................................... 50
Kneel Actuator Manual Release
Lever Assembly ...................................................... 51
Passenger Door Outside Key Entry Assembly .... 51
Decals ................................................................. 52-57
Section 5: Specifications and Dimensions
Specifications ......................................................... 58
Dimensions ............................................................. 59
Section 6: Warranty
Warranty ............................................................ 60, 61
Return Authorization Procedure ........................... 61
Troubleshooting Repair Parts Specifications & Dimensions Warranty
Operation Maintenance

Page 2
Entervan II Features and Options
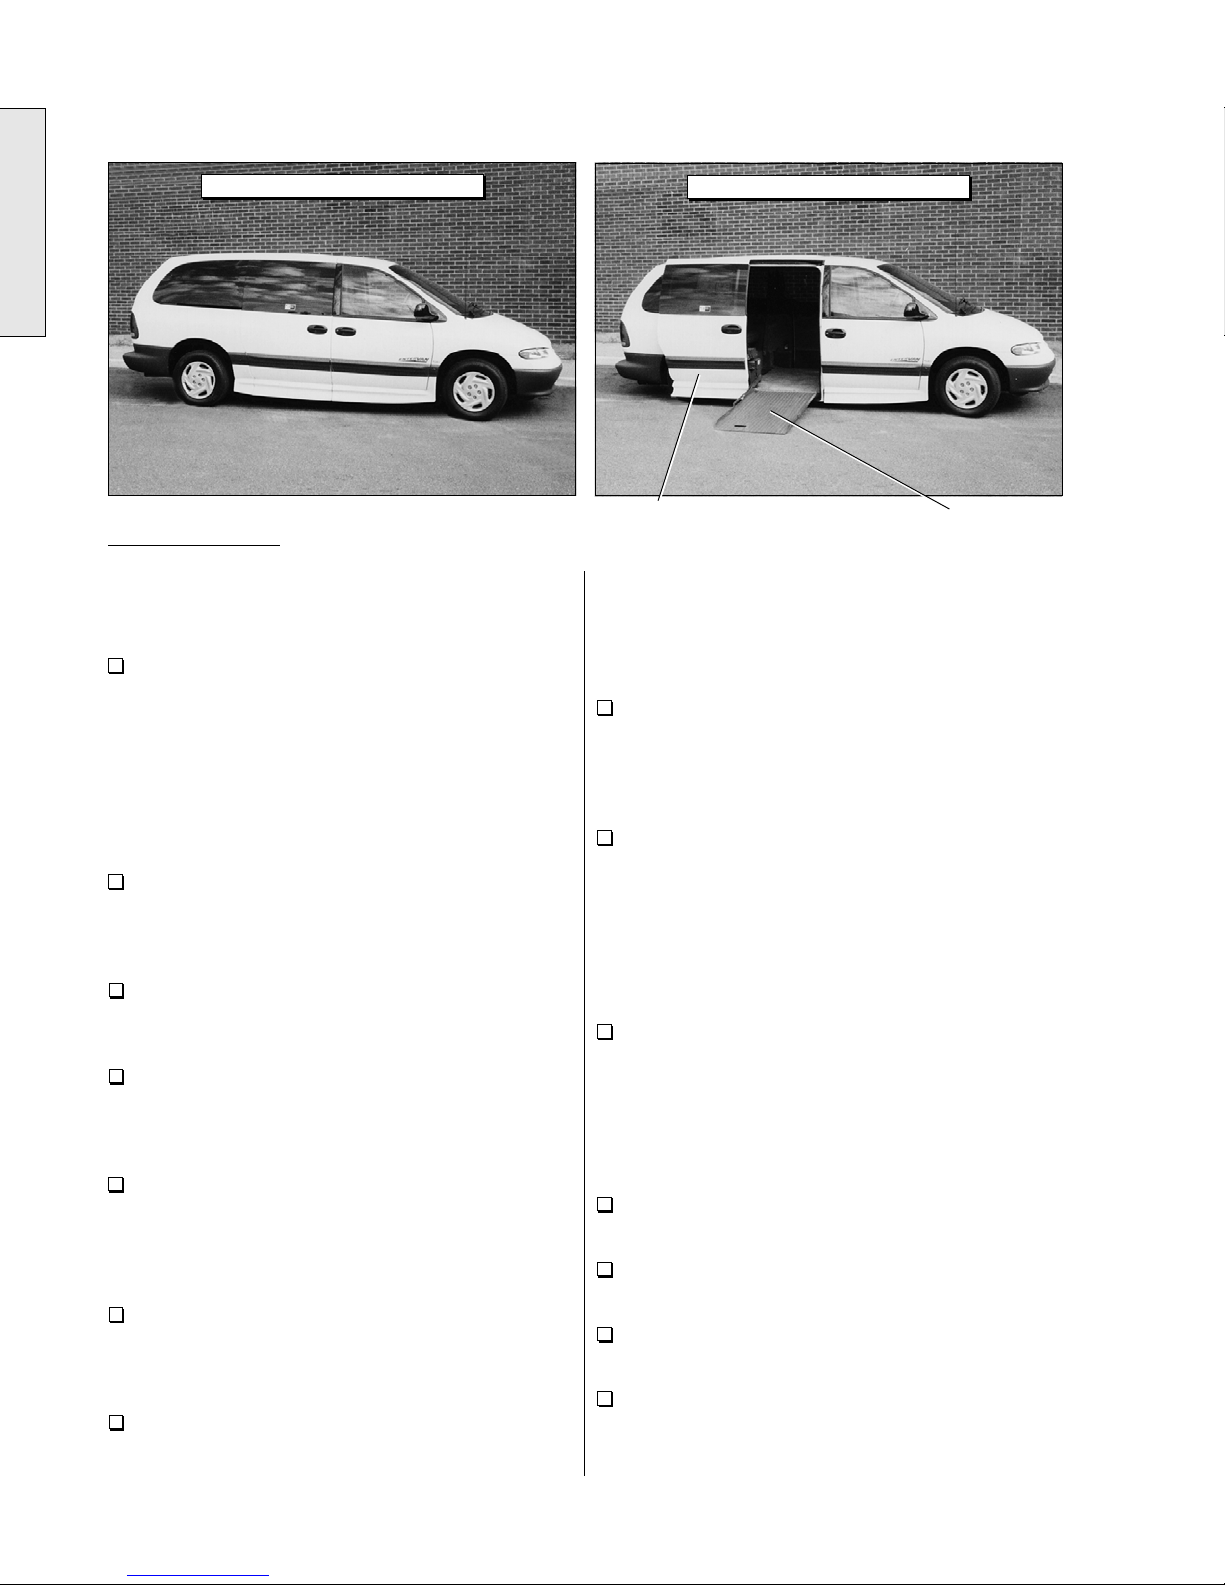
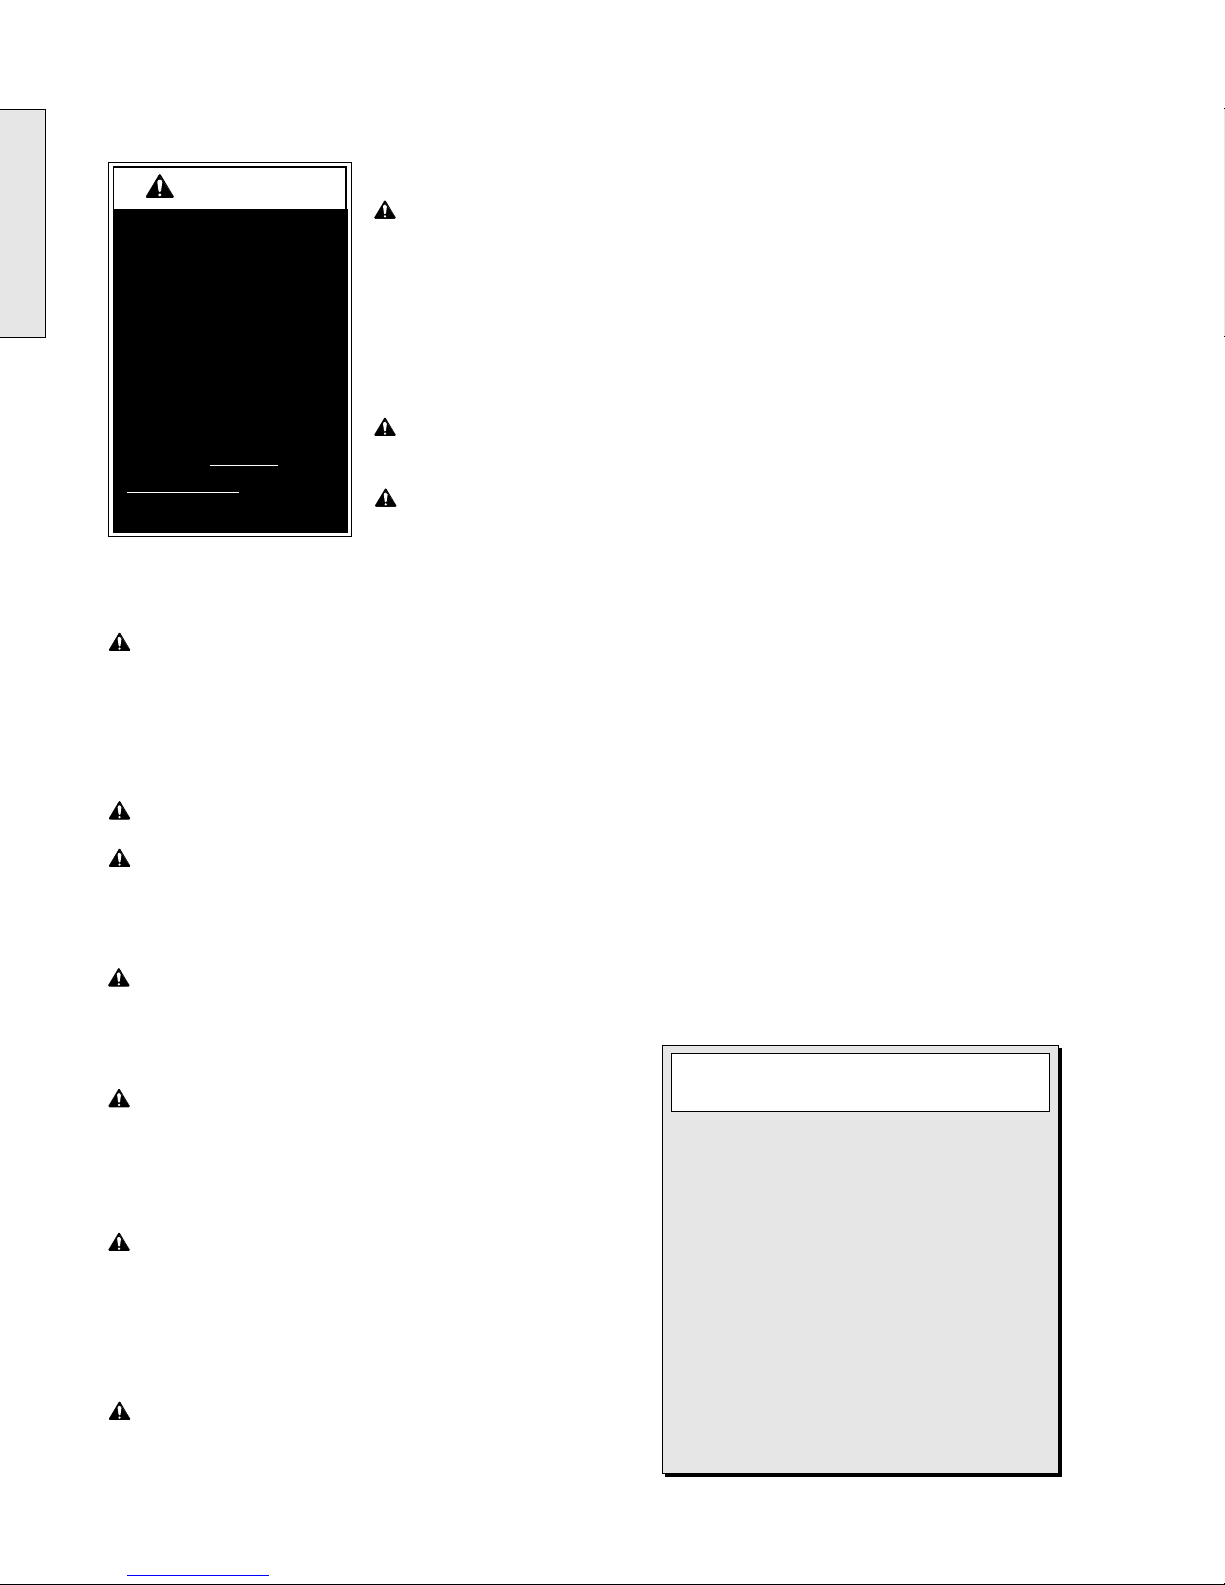
Normal (Non-Kneeled) Position Kneeled (Lowered) Position
Power Slide Door Power Ramp
Standard Features:
The Braun Series 03 1996 and newer Chrysler Entervan II
conversion offers the following standard features in
addition to the Chrysler Mini-Van chassis equipment.
Electromechanical Power Kneeling Rear Suspen-
sion with On/Off and Override Features: “Kneeling” is
the lowering and raising motion of the Entervan electro-
mechanical rear suspension (shown above). The kneel
feature reduces the slope of the ramp when deployed. A
Kneel On/Off Switch, an Out-of-Park Override and a
Mechanical Override are incorporated in the electrome-
chanical power kneeling system. See pages 11 and 12
for further details.
Power Slide Door with Manual Release Feature:
The power door and lowered floor configuration provides
52-3/4" clear vertical passageway. See page 12 for
details.
Removable Power Ramp with Manual Release
Feature and Passive Access Feature: See pages 13
and 14 for further details.
Passive (Non-Wheelchair) Access: This feature
allows passive (non-wheelchair) access to the passenger
side slide door opening when desired. See page 19 for
further details.
Lowered Floor from Rear Axle to Firewall: This
feature provides additional headroom (57-1/2" floor-to-
ceiling at center of van), and further reduces the slope of
the power ramp when deployed. See Position Cin the
illustration and photos on the opposite page.
Lowered Driver-Side Second Sliding Door: The
Braun Corporation Entervan II conversion is available for
Chrysler Mini-Van chassis equipped with the driver-side
second sliding door option only.
Quick-Release Driver Seat: For the wheelchair
occupant who chooses to drive the Entervan II, this seat
(Position A) can be removed and adaptive driving
systems custom tailored for the individual can be pur-
chased from and installed by your local dealer. 56" floor-
to-ceiling headroom is provided at this seating position.
See pages 30 and 31 for seat removal and installation
instructions.
Quick-Release Front Passenger Seat with Floor
Track for Wheelchair and Occupant Securement: This
seat (Position B) can be removed and the seat location
can be utililized by a wheelchair occupant. 56" floor-to-
ceiling headroom is provided at this seating position.
Floor Track for Wheelchair and Occupant Secure-
ment in Mid-Point Lowered Floor Area: Floor track
provided in the mid-point lowered floor area (Position C)
can be utililized for restraint of wheelchair passenger(s).
Wheelchair capacity at mid-point may have limitations
based on the physical dimensions of specific wheelchairs.
See pages 25-29 for details and instructions for wheel-
chair and occupant restraint.
Forward-Facing Wheelchair and Occupant Belt/
Track System: One Forward-Facing Wheelchair and
Occupant Belt Kit is supplied for the restraint of one
wheelchair and occupant only. Additional belt kits can be
purchased. The belt kit is used in conjunction with the
floor track. See pages 25-29 for details and instructions
for wheelchair and occupant restraint.
Easy-Out Roller™3-Passenger Bench Seat at Rear
of Vehicle: See page 29 for further details.
Auxiliary Power Supply for Dealer-Installed Power
Seat or Electric Tie-Downs: See page 44 for details.
Interior Spare Tire Mount/Storage Cabinet: See
pages 32 and 33 for details.
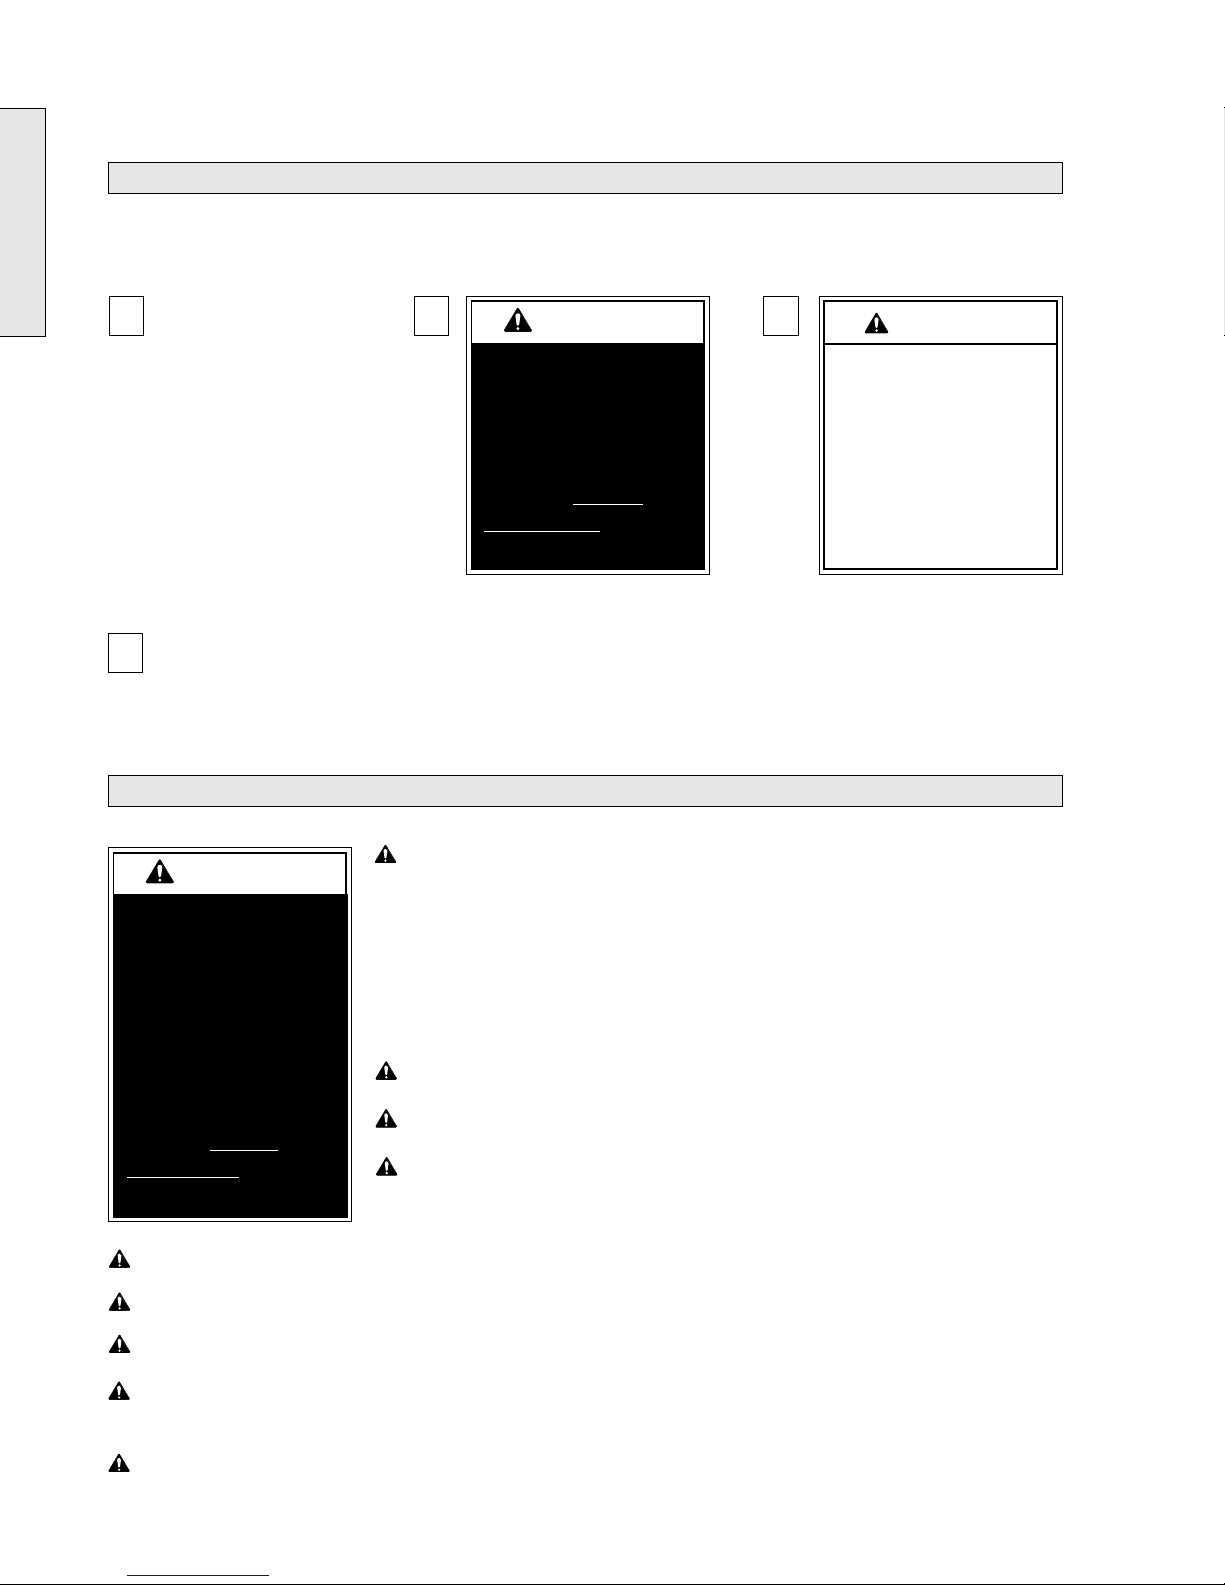
Color-Coded Control Switches: Color-coded and
function-labeled control switches that correspond to the
color coding and switch function labels which appear on
the Power Operation Instructions decal are provided
Operation

Page 3
Entervan II Features and Options
B
A
Horizontal “A” Track
Wheelchair Seating Positions: Wheelchair
passengers shown depict the available
wheelchair seating positions. Wheelchair
capacity at mid-point (Position C) may have
limitations based on the physical dimensions
of specific wheelchairs.
Horizontal “A” Track
Mid-Point
C
Rear Wall-Mounted
Control Switches
Easy-Out®3-Passenger
Bench Seat
Mid-Point
C
Dash-Mounted Control Switches
Power Ramp Operator Horizontal “A” Track
B
A
Horizontal
“A” Track
Horizontal
“A” Track
Wheelchair Positions
inside the Entervan (dash and rear wall locations).
See pages 7-10 for details.
Remote Control: Two mini remote control
transmitters are supplied for automatic operation
of kneeling, door and ramp functions. See page 9
for details.
Passenger Door Outside Key Entry System:
An outside key entry incorporated in the front
passenger side door lock activates the automatic
operation of kneeling, door and ramp functions as
well as operating the passenger door lock. See
page 10 for details.
C
Options:
• Extra Wheelchair and Occupant Securement System
• Full Size Remote Control Transmitter
• Extra Mini Remote Control Transmitter
• Remote Start
Operation

Page 4
A
This symbol indicates
important information
regarding how to
avoid a hazardous
situation that could
result in minor per-
sonal injury or prop-
erty damage.
C
CAUTION
ments (if included) is provided
for your safety. Familiarity with
proper operation instructions
as well as proper maintenance
procedures are necessary to
ensure safe, troublefree
operation. Safety precautions
are provided to identify poten-
tially hazardous situations and
provide instruction on how to
avoid them.
All information contained
in this manual and supple-
Safety Precautions
SAFETY FIRST! Know That....
Note: Additional information provided to help clarify or detail a specific subject.
These symbols will appear throughout this manual as well as on the labels posted on your Entervan.
Recognize the seriousness of this information.
D
If the operating
instructions, manual
operating instructions
and/or safety precau-
tions are not fully
understood, contact
The Braun Corpora-
tion immediately.
Failure to do so may
result in serious
bodily injury and/or
property damage.
Read this manual, supplement(s) and the Chrysler-supplied
vehicle owner's manual before operation. Read and become
familiar with all safety precautions, pre-operation notes and
details, operating instructions and manual operating instruc-
tions before operation. Note: Wheelchair passengers,
wheelchair attendants, Entervan drivers and Entervan
operators must read and become familiar with the contents
of this manual and supplement(s) before operation.
Load and unload on level surface only.
Engage vehicle parking brake before operation.
Provide adequate clearance outside the vehicle to accom-
modate the ramp.
Safety Symbols
Safety Precautions
W
ARNING
W
ARNING
B
This symbol indicates
important safety infor-
mation regarding a
potentially hazardous
situation that could
result in serious
bodily injury and/or
property damage.
W
ARNING
Do not operate Entervan if you suspect damage, wear or any abnormal condition.
Keep clear of area in which the door and ramp operate.
Close driver-side slide door before loading and unloading wheelchair passengers.
Wheelchair passengers must position and secure (buckle, engage, fasten, etc.) the
wheelchair-equipped occupant seat belt before loading onto the wheelchair ramp.
Be aware of the Entervan ramp slope (angle).
W
ARNING
W
ARNING
W
ARNING
W
ARNING
Operation
W
ARNING
W
ARNING
W
ARNING
W
ARNING

Page 5
Safety Precautions
Do not board an Entervan ramp if you or your attendant are intoxicated.
The wheelchair must be positioned in the center of the ramp when loading and unloading.
Load and unload clear of vehicular traffic.
Keep clear of area in which the vehicle kneels (lowers).
Do not activate control switches when anyone is near the area in which door operates,
ramp operates or vehicle kneels.
Do not disengage vehicle transmission from Park “P” when a wheelchair passenger is on
the ramp.
Do not press KNEEL switch to NO position when a wheelchair passenger is on the ramp.
Do not overload or abuse the ramp. The design load capacity is 600 pounds.
Do not grip detachable wheelchair parts when assisting to stabilize wheelchair.
Do not drive Entervan with the rear of the vehicle in the kneeled (lowered) position.
Keep this manual and the Chrysler-supplied vehicle manual in the Entervan at all times.
Replace missing, worn or illegible decals.
Do not remove any guards or covers.
Do not use accessory devices* not authorized by The Braun Corporation.
Do not use an Entervan for towing. Towing with an Entervan is prohibited.
Do not install a raised top kit on an Entervan.
Never modify (alter) a Braun Corporation Entervan.
Manual Operation
Clear ramp path before performing manual unfold procedures. Ramp will free-fall.
Be certain door is fully open when manually unfolding and folding the ramp during manual
operating procedures.
Keep clear of moving parts when manually operating door and/or ramp.
Remote Control
Be aware of the location and condition of the remote control transmitter at all times.
Accidental activation of switches may cause unintended operation.
Do not operate remote control unit with anyone on the ramp or near the area in which door
operates, ramp operates or vehicle kneels.
Discontinue remote control use immediately if any unexplained and/or improper operation
occurs. Contact your dealer or call The Braun Corporation at 1-800-THE LIFT.
Do not interface after-market control systems* with a Braun Entervan.
W
ARNING
* See page 6 for The Braun Corporation After-Market Control Systems Policy.
no
ita
repO
W
ARNING
W
ARNING
W
ARNING
W
ARNING
W
ARNING
W
ARNING
W
ARNING
W
ARNING
W
ARNING
W
ARNING
W
ARNING
W
ARNING
W
ARNING
W
ARNING
W
ARNING
W
ARNING
W
ARNING
W
ARNING
W
ARNING
W
ARNING
W
ARNING
W
ARNING
W
ARNING

Page 6
Safety Precautions
Wheelchair and Occupant Restraint
No product developed to date can guarantee successful
securement of the wheelchair, even at low speeds, in the
event of an accident. The Braun Wheelchair and Occupant
Belt/Track System does meet the most widely referenced
Federal Motor Vehicle Safety Standards used for contempo-
rary restraint equipment. However, this equipment does not
ensure stability of the wheelchair in the event of an accident
at any speed.
The Wheelchair and Occupant Belt/Track System supplied
with this unit must be utilized as specified within this manual.
Read and become familiar with all Forward-Facing Wheel-
chair and Occupant Belt/Track System Instructions as
specified in this manual prior to installation or operation
procedures. If the instructions are not fully understood,
contact The Braun Corporation immediately.
W
ARNING
If the operating
instructions, manual
operating instructions
and/or safety precau-
tions are not fully
understood, contact
The Braun Corpora-
tion immediately.
Failure to do so may
result in serious
bodily injury and/or
property damage.
W
ARNING
W
ARNING
W
ARNING
When using wheelchair restraints not supplied with the Entervan, read and become familiar
with all installation and operation instructions supplied with your particular wheelchair
restraint system prior to installation or operation procedures. If the instructions are not fully
understood, contact the manufacturer immediately.
Non-Wheelchair Passenger Restraint
Observe all local, state and federal laws for specific seat belt usage requirements.
Refer to Chrysler-supplied owner's manual for instructions regarding passenger (children
and adults) restraints.
Quick-Release Front Seats
Quick-release front seat securement devices must be fully engaged before occupying
seats or operating vehicle.
W
ARNING
W
ARNING
W
ARNING
W
ARNING
W
ARNING
Chrysler Easy-Out Roller™Seats
Install, remove and operate Chrysler
Easy-Out Roller™seats as detailed in
Chrysler owner's manual.
Tire Changing and Jacking
Follow all jacking and tire changing
instructions and safety precautions in the
Chrysler-supplied owner's manual when
changing a flat tire or raising the vehicle.
All Precautions
Failure to follow these safety precautions
may result in serious bodily injury and/or
property damage.
W
ARNING
W
ARNING
The Braun Corporation manufactures
dedicated control systems for it's products
(i.e., wheelchair lifts, door operators, ramp
systems, kneeling systems). These control
systems have been designed and tested for
use in conjunction with specific Braun
products. Braun control systems are the
only control systems authorized for use with
Braun products. Do not attempt to interface
after-market control systems with Braun
products. To do so may result in serious
bodily injury and/or property damage.
For information about the proper control
system for a specific Braun product, contact
The Braun Corporation at 1-800-THE LIFT.
Braun Corporation After-Market
Control Systems Policy
Operation

Page 7
Pre-Operation Notes and Details
The Entervan II provides fully
automatic operation of the
electromechanical “kneeling”
system, the passenger side slide
door and the ramp. Refer to
Entervan II Features and Options
(pages 2 and 3), and referenced
sections in this manual for
identification and explanation of
Entervan features and functions.
Terminology: The term
“KNEEL” appearing within this
manual and on operating instruc-
tions decals is a reference to the
lowering and raising motion of the
Entervan electromechanical rear
suspension. The term “OPEN”
indicates the opening motion of
the power slide door, and
“CLOSE” indicates the closing
motion of the power slide door.
The term “UNFOLD” indicates the
lowering motion of the ramp to
the deployed position. The term
“FOLD” indicates the raising
motion of the ramp to the vertical
(stowed) position.
Contact The Braun Corporation
immediately if any of this informa-
tion is not understood. Call 1-
800-THE LIFT.
Read and become
familiar with all safety
precautions, pre-
operation notes and
details, operating
instructions and
manual operating
instructions prior to
operation. Contact
The Braun Corpora-
tion immediately if
this information is not
fully understood.
Failure to do so may
result in serious
bodily injury and/or
property damage.
W
ARNING
Color Coding: Entervan II
interior-mounted control switches
are color-coded and function-
labeled to correspond to the color
coding and switch-function labels
that appear on the Power Opera-
tion Instructions decal (posted on
the interior wall panel above the
power door operator).
The color of the symbol corre-
sponds to the color of the switch
to be used. Color coding applies
to the interior-mounted control
switches only.
Triangular-shaped color-coded
symbols appear on the Power
Operation Instructions decal. The
direction of the symbol corre-
sponds with the direction the
switch should be activated
(pressed) to produce the intended
Control Switches
function. = Press switch UP,
and = press switch DOWN.
Although the remote control
transmitter OPEN and CLOSE
switches are not color-coded,
the functions activated by remote
control transmitter OPEN and
CLOSE switches are identical to
the functions activated by the
interior-mounted OPEN/CLOSE
switches.
The outside key entry activates
the same functions as the interior-
mounted yellow OPEN/CLOSE
switches and the remote control
transmitter OPEN and CLOSE
switches.
Control switch details are pro-
vided in this section.
Do not activate
control switches when
anyone is near the
area in which door
operates, ramp
operates or vehicle
kneels. Failure to
follow this rule may
result in serious
bodily injury and/or
property damage.
W
ARNING
Operation

Page 8
Pre-Operation Notes and Details
Control Switches (continued)
Rear Wall-Mounted Control Switches
Control Switches
(Detail Photo Below)
Black MANUAL/AUTO Switch
Press the black MANUAL/AUTO
switch to the MANUAL (up)
position before performing
Manual Ramp Operating Proce-
dures.
Press the black MANUAL/AUTO
switch to the AUTO (down)
position before performing
automatic Power Operating
Procedures.
MANUAL/AUTO Override
Switch: This switch must be
pressed to the AUTO position
before automatic (power) ramp
functions can be activated.
Pressing this switch to the
MANUAL position allows the
power ramp to be manually
operated in event of power or
equipment failure. This switch
must be in the MANUAL position
when performing Manual Ramp
Operating Procedures.
OPEN/CLOSE Switch: This
switch is identical to the dash-
mounted OPEN/CLOSE switch in
appearance and operation.
Yellow OPEN/CLOSE Switch
Press the yellow OPEN/CLOSE
switch to the CLOSE (up)
position to fold (raise) the ramp,
close the automatic door and
activate the “kneel” system*.
Press the yellow OPEN/CLOSE
switch to the OPEN (down)
position to open the automatic
door, unfold (lower) the ramp and
activate the “kneel” system*.
Yellow OPEN/CLOSE Switch
Press the yellow OPEN/CLOSE
switch to the CLOSE (up) posi-
tion to fold (raise) the ramp, close
the automatic door and activate
the “kneel” system*.
Press the yellow OPEN/CLOSE
switch to the OPEN (down)
position to open the automatic
door, unfold (lower) the ramp and
activate the “kneel” system*.
Red KNEEL Switch:
Press the red KNEEL switch to
the YES (up) position to turn
the “kneel” system* on.
Press the red KNEEL switch to
the NO (down) position to turn
the “kneel” system* off.
Dash-Mounted Control Switches
* The KNEEL switch turns the
“kneeling” system on and off
only. Pressing the OPEN/
CLOSE switch automatically
activates the “kneeling” feature
to lower the vehicle if the red
dash-mounted KNEEL switch
is in the YES (up) position.
Pressing the CLOSE switch
activates the “kneeling” feature
to raise the vehicle if the red
dash-mounted KNEEL switch
is in the YES (up) position.
See page 11 for overall view of
dash-mounted control switches.
Operation

Page 9
Pre-Operation Notes and Details
The remote control OPEN and
CLOSE switches activate the
same functions as the Entervan-
mounted yellow OPEN/CLOSE
switches. Two mini remote
control transmitters (shown here)
are supplied with all Entervans.
Press the OPEN switch to open
the automatic door and unfold
(lower) the ramp. Note: Press-
ing the OPEN switch also acti-
vates the “kneeling” feature to
lower the vehicle if the red dash-
mounted KNEEL switch is in the
YES (up) position.
Mini Remote Control Transmitter Switches
Note: A full size (larger) remote
control transmitter (shown below) is
available as an option. Operation
procedures for both transmitters
are identical. The remote control
system has an operating range of
35 feet.
Press the CLOSE switch to fold
(raise) the ramp and close the
automatic door. Note: Pressing
the CLOSE switch also activates
the “kneeling” feature to raise the
vehicle if the red dash-mounted
KNEEL switch is in the YES (up)
position.
W
ARNING
Read manual before operating.
Do not operate this control unit
with anyone on or near the area
in which the ramp operates or
the vehicle kneels (lowers).
Failure to follow these rules
may result in serious bodily
injury and/or property damage.
19969
19968
OPEN CLOSE
Do not interface after-
market control systems**
with a Braun Entervan.
The remote control OPEN and
CLOSE switches activate the
same functions as the Entervan-
mounted yellow OPEN/CLOSE
switches. The full size remote
control transmitter (shown here)
is available as an option only.
Press the OPEN switch to open
the automatic door and unfold
(lower) the ramp. Note: Press-
ing the OPEN switch also acti-
vates the “kneeling” feature to
lower the vehicle if the red dash-
mounted KNEEL switch is in the
YES (up) position.
Full Size Remote Control Transmitter (Option) Switches
Note: Two mini remote control
transmitters (shown above) are
supplied with all Entervans. Op-
eration procedures for both trans-
mitters are identical. The remote
control system has an operating
range of 35 feet.
Press the CLOSE switch to fold
(raise) the ramp and close the
automatic door. Note: Pressing
the CLOSE switch also activates
the “kneeling” feature to raise the
vehicle if the red dash-mounted
KNEEL switch is in the YES (up)
position.
W
ARNING
Read manual before operating. Do
not operate this control unit with
anyone on or near the area in which
the ramp operates or the vehicle
kneels (lowers). Failure to follow
these rules may result in serious
bodily injury and/or property damage.
Remote Control Unit
OPEN CLOSE
18563
18564
ENTER
TM
Do not interface after-
market control systems**
with a Braun Entervan.
Operation
The Braun Corporation manu-
factures dedicated control
systems for it's products (i.e.,
wheelchair lifts, door operators,
ramp systems, kneeling sys-
tems). These control systems
have been designed and tested
for use in conjunction with
specific Braun products. Braun
control systems are the only
control systems authorized for
use with Braun products.
Do not attempt to interface after-
market control systems with
Braun products. To do so may
result in serious bodily injury
and/or property damage.
For information about the
proper control system for a
specific Braun product, contact
The Braun Corporation at 1-
800-THE LIFT.
** Braun Corporation After-Market Control Systems Policy:

Page 10
Pre-Operation Notes and Details
Passenger Door Outside Key Entry
Control Switches (continued)
An outside key entry is incorpo-
rated in the passenger side front
door lock. The outside key entry
activates the same functions as
the interior-mounted yellow
OPEN/CLOSE switches and the
remote control transmitter OPEN
and CLOSE switches. The
vehicle OEM door key activates
the outside key entry system as
well as operating the passenger
door lock. See your Chrysler
owner's manual for details
regarding door locks.
OPEN: Insert the key and turn it
clockwise (toward front of vehicle)
to open the automatic door and
unfold (lower) the ramp. Note:
Turning the key clockwise also
activates the “kneeling” feature to
lower the vehicle if the red dash-
mounted KNEEL switch is in the
YES (up) position.
CLOSE: Insert the key and turn it
counterclockwise (toward rear of
vehicle) to fold (raise) the ramp
and close the automatic door.
Note: Turning the key counter-
clockwise also activates the
“kneeling” feature to raise the
vehicle if the red dash-mounted
KNEEL switch is in the YES (up)
position.
C
L
O
S
E
O
P
E
N
Delay Feature: When activating
the OPEN functions using the
outside key entry, the key unlocks
the door and then there is a two
second delay before the Enter-
van power functions are acti-
vated. This delay feature only
occurs when activating the
outside key entry and only occurs
during the OPEN function.
1. Press MANUAL/AUTO switch
to MANUAL position.
2. Pull detent pin.
3. Pull red handled lever fully.
4. Insert detent pin in lever hole.
Note: Pull detent pin, return lever
to original position and press
MANUAL/AUTO switch to AUTO
position before performing electric
procedures.
KNEEL ACTUATOR
MANUAL RELEASE
Use only if vehicle will not
raise electrically.
52215
MANUA
L
AUTO
MANUA
L
AUTO
Kneel Actuator Manual Release
Assembly
Kneel Actuator MANUAL/AUTO Switch
The Kneel Actuator MANUAL/
AUTO switch is mounted in the
Kneel Actuator Manual Release
assembly. The Kneel Actuator
Manual Release assembly is
located behind the driver's side
slide door. This switch must be
in the AUTO position before the
electromechanical power kneeling
system can be activated. The
MANUAL/AUTO switch must be
pressed to the MANUAL position
in order to manually release the
kneel actuator.
Do not press this switch to the
MANUAL position unless you
have experienced kneel actuator
power or equipment failure. See
pages 23 and 24 for further details.
Kneel Actuator MANUAL/AUTO Switch
Press the black MANUAL/AUTO
switch to the MANUAL (up) position
before performing Kneel Actuator
Manual Release Procedures.
Press the black MANUAL/AUTO
switch to the AUTO (down)
position before performing auto-
matic Power Kneeling Operations.
Operation

Page 11
MANUAL/AUTO
Override Switch
Pre-Operation Notes and Details
Whenever parking your
Entervan and before utilizing
any Entervan features, always
engage the vehicle transmis-
sion in Park “P” and engage
the vehicle parking brake.
Transmission: The vehicle
transmission must be engaged
in Park “P,” before operating
the Entervan automatic fea-
tures. Entervan power function
control switches cannot be
activated if the vehicle transmis-
sion is not in Park.
MANUAL/AUTO Override
Switch: The MANUAL/AUTO
override switch must be
pressed to the AUTO
position before the auto-
matic ramp can be acti-
vated. This switch is
located on the passenger-
side interior wall panel,
above the power door
operator as shown at right.
See Control Switches on
page 8 also.
Kneel Actuator MANUAL/
AUTO Switch: The Kneel
Actuator MANUAL/AUTO
switch must be pressed to the
AUTO position before the electro-
mechanical “kneeling” system can
Kneeling Feature
Red Kneel Switch
The red dash-mounted KNEEL
switch turns the “kneeling” system
on and off. This switch provides
the option of kneeling the vehicle
when operating the power door
and power ramp. The optional
“kneeling” feature can only be
turned on and off by the dash-
mounted red KNEEL switch. See
Control Switches on page 8.
Press the red KNEEL switch to
the YES position to turn the
“kneel” system on. Press the red
KNEEL switch to the NO position
to turn the “kneel” system off.
With the KNEEL switch in the
YES position, the rear of the
vehicle will automatically lower
when either of the two interior-
mounted yellow OPEN/CLOSE
switches is pressed to the OPEN
position for two seconds or
longer.
Delay Feature: The OPEN
switch must be pressed for two
seconds or longer before the
“kneel” system is activated. Once
the “kneel” system is activated,
be activated. See photos and
details on opposite page.
“Kneeling” is the lowering and
raising motion of the Entervan
electromechanical rear suspen-
sion. The kneel feature lowers
the rear of the vehicle. See the
photos on page 2.
The Entervan operator has the
option of using the kneel
feature or not. Activating the
kneel feature to lower the rear
of the vehicle reduces the slope
of the ramp when deployed.
W
ARNING
Keep clear of area
in which the vehicle
kneels (lowers).
Failure to do so may
result in serious
bodily injury.
Do not activate the kneel
system when anyone is near
the underside of the vehicle.
Kneel (lower) the Entervan
on level surfaces only.
the rear of the Entervan will con-
tinue to lower regardless if one of
the control switches is continued to
be pressed.
Pressing the remote control OPEN
switch or turning the passenger
door outside key entry key clock-
wise (toward front of vehicle)
activates the “kneel” function in the
same manner.
Operation

Page 12
W
ARNING
Driving an Entervan
in the kneeled (low-
ered) position may
result in serious
bodily injury and/or
property damage.
Pre-Operation Notes and Details
W
ARNING
Keep clear of area in
which the door
operates. Failure to
do so may result in
serious bodily injury.
Keep clear of area
in which the auto-
matic power door
operates. Be
certain no person or
obstruction is within
the path of the door
when opening or
closing the door.
Keep children clear of the door and ramp paths
(operating areas) during door and ramp opera-
tion. Keep body parts and obstructions clear of
area in which door operates. Keep clear of all
power door moving parts. Do not place any
body part or obstruction in the path of the
automatic door, the door gear rack or other
power door moving parts. Do not attempt to
grip or hold the door or door gear rack.
The automatic door can be activated by either
interior-mounted yellow OPEN/CLOSE switch, the
remote control switches or the passenger door
outside key entry. See pages 7-9 for further details
regarding these Entervan controls.
You must continue to press the OPEN switch or
turn the outside key entry key clockwise throughout
the entire door opening function (until the door
stops - opens fully). You must continue to press
the CLOSE switch or turn the outside key entry key
counterclockwise throughout the entire door closing
function to close the door fully.
Manual Operation: If you experience power or
equipment failure, refer to the Door and Ramp
Manual Operating Instructions on pages 21 and 22.
Automatic Power Door
When the red KNEEL switch is in the YES position,
the vehicle will automatically raise when either of the
two Entervan-mounted yellow OPEN/CLOSE
switches are pressed to the CLOSE position.
Pressing the remote control CLOSE switch or
turning the passenger door outside key entry key
counterclockwise (toward rear of vehicle) activates
the “kneel” function to raise the rear of the Entervan
in the same manner.
Note: If the vehicle is in the kneeled position and
the red KNEEL switch is pressed to the NO position,
the rear of the vehicle will raise automatically. Do
not press the KNEEL switch to the NO position
when a wheelchair passenger is on the ramp!
Out-of-Park Kneeling Override: If the Entervan is
in the kneeled position and the vehicle transmission
is disengaged from Park “P,” the rear of the vehicle
will automatically raise. This feature eliminates
the possibility of unintentionally driving the Entervan
with the rear of the vehicle in the lowered position.
When the transmission is disengaged from Park, the
kneel actuator is electrically activated. When
activated, the actuator shaft extends to raise the
rear of the vehicle to the normal position. Do not
disengage the transmission from Park when a
Kneeling Feature (continued)
wheelchair passenger is on the ramp!
Mechanical Kneeling Override: In the event that
the Entervan is in the kneeled position and you
experience power or equipment failure, the Kneel
Actuator Manual Release (Override) feature allows
the rear of the vehicle to be raised to the normal
position. Further details and Kneel Actuator Manual
Release Instructions are provided on pages 23 and
24.
Do not continue to
drive the Entervan
with the rear of the
vehicle in the lowered
position. Attempting
to drive the Entervan
with the rear of the
vehicle in the lowered
position will result in an
extremely rough and
unstable ride, and
could possibly result in injury and/or vehicle
damage. The vehicle would ride as if it did not have
any rear suspension. In the event of a kneel
system failure, have the kneel system repaired
immediately.
Operation

Page 13
Pre-Operation Notes and Details
Automatic Power Ramp
W
ARNING
Be certain there is
adequate clearance
outside the Entervan
before unfolding the
automatic ramp.
Approximately 56
inches clearance
must be provided to
accommodate the
ramp.
Provide adequate
clearance outside of
vehicle to accom-
modate ramp.
Failure to do so may
result in serious
bodily injury and/or
property damage.
Keep clear of area in which the automatic power
ramp operates. Be certain no person or obstruc-
tion is within the path of the ramp when unfolding or
folding the ramp.
Keep all passengers and bystanders clear of the
area in which the ramp unfolds and folds (inside and
outside the vehicle). Keep children clear of the
ramp path (operating area) during ramp opera-
tion. When inside the vehicle, all non-wheelchair
passengers should be seated and restrained using
the Chrysler-equipped (OEM) seat belts as detailed
Do not grip or hold
ramp fold arm!
in your Chrysler-supplied owner's manual. Wheel-
chair passengers must be positioned and restrained
as detailed in the Wheelchair and Occupant Re-
straint instructions on pages 25-29. Properly seated
and restained passengers will be clear of ramp
movement.
Keep body parts and obstructions clear of the
area in which the ramp operates. Keep clear of
all power ramp moving parts. Do not attempt to
grip or hold the ramp or ramp folding mecha-
nism (fold arm and bearing assembly).
W
ARNING
Keep clear of
area in which
ramp operates.
52205
W
ARNING
Keep body parts
and obstructions
clear of area in
which ramp
operates.
52206
W
ARNING
Keep body parts
and obstructions
clear of area in
which ramp
operates.
52207
Wall
Keep clear of the area
in which the ramp folds
into the door opening.
Operation

Page 14
Pre-Operation Notes and Details
W
ARNING
Close slide door
before loading
and unloading
wheelchair
passengers.
52208
Door
Driver Side Slide Door
Close the driver-side slide door before loading
and unloading wheelchair passengers. Operate
this slide door as detailed in your Chrysler-supplied
owner's manual. To provide a safer environment for
small children and wheelchair passengers, activate
the Child Protection Door Lock as outlined in your
Chrysler-supplied manual. When the child lock
system is engaged, the door can only be opened
from the outside. Always make sure the sliding door
is fully latched any time the vehicle is in motion.
Close the driver-side slide door
before loading and unloading
wheelchair passengers!
The automatic ramp can be activated by either
interior-mounted yellow OPEN/CLOSE switch, the
remote control switches or the outside key entry.
See pages 7-10 for further details regarding these
Entervan controls.
Delay Feature: After the door is fully open, a
minimum two second delay will occur before the
ramp starts to unfold. This delay feature is required
in order to utilize the Passive (Non-Wheelchair)
Access feature. The delay allows the operator
adequate time to release the OPEN switch once the
door is open - preventing the automatic ramp
unfolding operation from starting. The ramp assem-
bly can then be manually rotated out of the vehicle
allowing passive (non-wheelchair) access to the
door opening if so desired. See page 19 for Pas-
sive (Non-Wheelchair) Access details.
Ramp Unfolding Notes: When unfolding the ramp,
the ramp motor stops running when the ramp
reaches the nearly-horizontal position (approxi-
mately 6" - 8" above ground level). The ramp
continues to slowly lower the remaining distance
by the force of gravity.
When the ramp has unfolded beyond the vertical
(90°) position and you stop activating the DOWN
function, the ramp may continue to unfold very
slowly. This gravity-activated unfolding of the ramp
may not be visibly detected until an approximate 75°
angle is reached.
Ramp Folding Note: You must continue to press
the CLOSE switch or turn the outside key entry key
counterclockwise through the entire ramp folding
function to fold the ramp fully (stowed position). If
the ramp has not folded fully (beyond vertical - 90°
position) and you stop activating the CLOSE func-
tion, the ramp may unfold (deploy) by the force of
gravity as explained above.
Manual Operation: If you experience power or
equipment failure, refer to the Door and Ramp
Manual Operating Instructions on pages 21 and
22.
Automatic Power Ramp (continued)
Operation

Page 15
Pre-Operation Notes and Details
Operation
Ramp Safety
Wheelchair passengers and attendants (when
applicable), must use basic common sense and
good judgement regarding ramp safety. The Braun
Corporation recognizes that each wheelchair
passenger has a unique set of physical abilities
combined with the physical characteristics of his or
her wheelchair that dictate the method in which he
or she will enter and exit their Entervan. Conse-
quently, the procedures for safe operation outlined
in this manual are general in nature.
Follow all safety instructions regarding torso re-
straints, stability, balance, weight distribution and
use of attendants as specified in the owner's manual
supplied with your wheelchair. Determine, establish
and practice ramp boarding and exiting procedures
under the direction of your health care professional,
your wheelchair representative, and your Entervan
sales representative (dealer) to ensure your ability
to do so safely.
Never board an Entervan ramp if you or your
attendant are intoxicated. The wheelchair must be
positioned in the center of the ramp at all times.
You must be able to clearly view the ramp whenever
boarding and and exiting the vehicle.
It is the responsibility of the wheelchair operator
to enter and exit the Entervan on the ramp in the
safest manner.
Stabilizing Wheelchairs
Powered and manual wheelchairs are designed to
remain upright and stable during normal operation.
All activities which involve movement in a wheel-
chair have an effect on the combined center of
gravity of the occupant and wheelchair. Be aware
of the Entervan ramp slope (angle). The slope of
the ramp has a direct effect on the center of gravity.
Keep in mind your center of gravity and your ability
to maintain stability and balance.
Do not operate your wheelchair on the Entervan
ramp without assistance if your are unable to
W
ARNING
Be aware of
ramp slope.
52217
maintain stability and balance.
Counterbalance devices (anti-
tippers) may be available from
your wheelchair representative
to enhance stability and
balance.
Do not tilt your wheelchair
without assistance. Operate
the wheelchair at a slow and
constant speed when on the
W
ARNING
Position and secure
(buckle, engage,
fasten, etc.) the
wheelchair-equipped
occupant seat belt
before loading onto
the wheelchair ramp.
Failure to do so may
result in serious
bodily injury and/or
property damage.
Different types of disabilities require different types
of wheelchairs and different types of wheelchair-
equipped occupant restraint belt systems (torso
restraint). It is the responsibility of the wheelchair
passenger to have his or her wheelchair equipped
with an occupant restraint (seat belt) under the
direction of their health care professional.
Wheelchair attendants should be instructed on any
special needs and/or procedures required for safe
transport of wheelchair passengers.
The Braun Corpora-
tion recommends
wheelchair passen-
gers position and
buckle their wheel-
chair-equipped seat
belt (torso restraint),
as specified by the
manufacturer, before
loading onto a
wheelchair ramp.
Wheelchair-Equipped Occupant Seat Belts

Page 16
Operation
Pre-Operation Notes and Details
Stabilizing Wheelchairs (continued)
W
ARNING
Be aware of
ramp slope.
52217
ramp. Do not accelerate
suddenly when on the ramp.
Do not raise the front wheel-
chair wheels (pull wheelie)
when on the Entervan ramp.
The aid of an attendant stabiliz-
ing the wheelchair is recom-
mended for optimum safety.
Wheelchair passengers who
intend to enter and exit their
Entervan without the assistance of an attendant
must determine the safest and most practical
method and orientation of entering and exiting the
Entervan based on the physical characteristics of
their personal wheelchair and his or her physical
capabilities to maintain stability while the wheelchair
is in motion on the Entervan ramp.
It is the responsibility of the wheelchair operator
to enter and exit the Entervan on the ramp in the
safest manner.
attendant must grasp
the push handles (or
other) securely.
Detachable wheel-
chair parts such as
arms or legrests must
never be used for
hand holds or lifting
supports. Doing so
could result in the
detachable parts
being inadvertently
detached from the
W
ARNING
Do not grip detach-
able wheelchair parts
when assisting to
stabilize wheelchair.
Doing so may result
in serious bodily
injury and/or property
damage.
wheelchair resulting in possible injury to the
wheelchair occupant and/or the attendant.
Wheelchair Attendants: When assisting a wheel-
chair occupant, remember to use good body me-
chanics. Keep your back straight and bend your
knees. When the wheelchair is on the ramp, the
The Braun Corporation recommends wheelchair
passengers and their attendant(s) review the
material contained in this manual with your Entervan
sales representative (dealer), before attempting
operation. Any questions or concerns can be
answered by your dealer at that time.
Using your own wheelchair and personal atten-
dant (if applicable), operate the Entervan through all
Operation Procedure Review
functions and enter and exit the vehicle with your
dealer on hand to ensure the Entervan is right for
you as the end user, (applicable for your use based
on your physical abilities and the physical character-
istics of your personal wheelchair). Practice using
the wheelchair and occupant belt/track system with
your sales representative on hand. Become familiar
with the proper operation of all Entervan features.
Wheelchair Orientation and Securement During Transport:
The wheelchair and occupant must face the front of
the vehicle and must be secured using the For-
ward-Facing Wheelchair and Occupant Belt/
Track System when riding in the Entervan. See
pages 25-29 for Wheelchair and Occupant Re-
straint details.

Page 17
Operation
Pre-Operation Notes and Details
Preventive maintenance consisting of careful
inspections of your Entervan systems should be a
part of your routine. Simple inspections can detect
potential kneel, door or ramp malfunctions. Regular
preventive maintenance evaluations will reduce
potential operation down time and increase the
service life of the Entervan, as well as enhancing
safety. During routine inspections, operate all
Entervan systems and note the following:
• Do the control switches function properly?
• Does the kneel feature function properly?
• Does the automatic door function properly?
• Does the automatic ramp unfold and fold properly?
• Is the power source adequate or weak?
Inspect the wheelchair and occupant restraint belts,
buckles and hardware. If there is any sign of
damage, wear, abnormal condition or improper
operation, discontinue Entervan use immediately.
Contact your dealer or call The Braun Corporation at
Preventive Maintenance
1-800-THE LIFT. One of our national service
representatives will direct you to an authorized
service repairman who will inspect your Entervan.
Preventive maintenance visual inspections do not
take the place of the procedures specified in the
Maintenance/Lubrication Schedule. The procedures
outlined in the detailed Maintenance/Lubrication
Schedule provided in this manual must be per-
formed at the recommended scheduled intervals.
Exposure to harsh weather elements or environmen-
tal conditions may reduce the service life of Entervan
systems. Road salt used to melt snow and ice in
northern climates as well as salt water climates tend
to corrode components more rapidly. Extreme dusty
or sandy conditions can cause contamination and
reduce the effectiveness of lubrication. If your
Entervan is exposed to these types of harsh condi-
tions, have your maintenance and lubrication
procedures performed often.
Opening the power slide door using either interior-
mounted yellow OPEN/CLOSE switch or using the
remote control OPEN switch does not disarm the
Chrysler factory-equipped (OEM) Anti-Theft System
(if equipped). If you open the power slide door
using one of these Entervan controls before unlock-
ing a vehicle door, the alarm system will be
triggered.
Always disarm the alarm system before opening
Door Locks and Anti-Theft (Alarm) System
the power slide door. You can disarm the alarm
system by unlocking the driver door, front passenger
door or liftgate with the door key. You can also
disarm the system by pressing the OEM remote
keyless entry transmitter UNLOCK button.
See your Chrysler-supplied (OEM) owner’s manual
for further details regarding the Remote Keyless
Entry System (if equipped) and the Anti-Theft
System (if equipped).

Page 18
Entervan II Power Operating Instructions
TO FOLD RAMP AND CLOSE DOOR:
Press the CLOSE switch or turn the Outside Key
Entry key counterclockwise until the ramp folds
fully and the door closes fully.
Note: You must continue to press the CLOSE
switch or turn the Outside Key Entry key counter-
clockwise through the entire ramp folding and
door closing functions.
TO TURN POWER KNEELING OFF:
Press the red KNEEL switch to the NO (down)
position.
FOR POWER KNEELING:
Press the red KNEEL switch to the YES (up)
position. Note: See Kneeling Delay above.
TO OPEN DOOR AND UNFOLD RAMP:
Press the OPEN switch or turn the Passenger
Door Outside Key Entry key clockwise until the
door opens fully and the ramp unfolds fully.
Release switch or key. Note: See Key Entry
Delay above.
Note: After the door is fully open, a minimum
two second delay will occur before the ramp
starts to unfold. Note: See Ramp Delay above.
Note: Engage the vehicle transmission in
“Park,” engage the vehicle parking brake and
press the MANUAL/AUTO override switch to
the AUTO position before operation.
Operation
Read and become
familiar with all safety
precautions, pre-
operation notes and
details, operating
instructions and
manual operating
instructions before
operation. Failure to
do so may result in
serious bodily injury
and/or property
damage.
W
ARNING
W
ARNING
Be aware of
ramp slope.
52217
The instructions provided below outline the step-by-
step procedures required to operate the automatic
kneel, door and ramp systems. These instructions
also appear on Power Operation instructions decal
#52211 (posted on the interior wall panel above the
power ramp motor assembly).
Review the Pre-Operation Notes and Details
section for detailed information regarding all
Entervan control
switches, functions and
operating procedures.
Manual Instructions:
Refer to the Manual
Operating Instructions
on pages 21-24 if you experience power or equip-
ment failure.
Kneeling Delay: The red dash-mounted KNEEL
switch turns the “kneeling” system on and off. The
rear of the vehicle will automatically “kneel” (lower)
when one of the OPEN controls is activated for two
seconds or longer. The OPEN control must be
activated for two seconds or longer before the
“kneel” system lower function is activated. See
pages 11 and 12 for further details.
Ramp Delay: After the door is fully open, a mini-
mum two second delay will occur before the ramp
starts to unfold. See Passive (Non-Wheelchair)
Access on the following page for further details.
Key Entry Delay: When activating OPEN functions
using the outside key entry, the key unlocks the
door and then there is a two second delay before
the Entervan power functions are activated.
Table of contents
Other BraunAbility Automobile Accessories manuals

BraunAbility
BraunAbility Simple Stow User manual

BraunAbility
BraunAbility Simple Stow User manual

BraunAbility
BraunAbility Kit 6 User manual

BraunAbility
BraunAbility UVL Series User guide

BraunAbility
BraunAbility Carolock User manual

BraunAbility
BraunAbility Simple Stow Infloor User manual

BraunAbility
BraunAbility Rampvan XT User guide

BraunAbility
BraunAbility Entervan XT Manual

BraunAbility
BraunAbility ULB User manual

BraunAbility
BraunAbility Pedal Extension Mini User manual