Bridge City Pencil Precision PP-1 User manual


1
ENGLISH VERSION

2
Pencil Precision User Manual
Congratulations on your purchase of the Pencil Precision! The Pencil Precision is easy to use and
allows young and old alike to make professional-grade pencils without woodworking experience
or ability.
IOverview
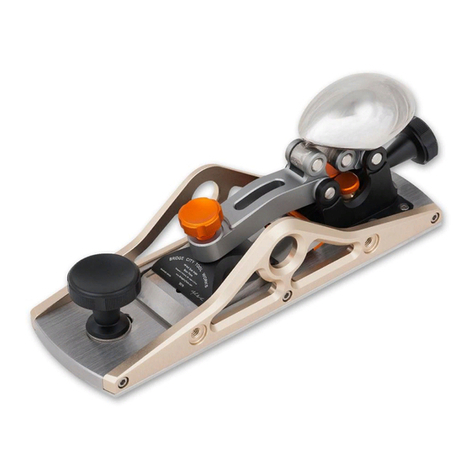
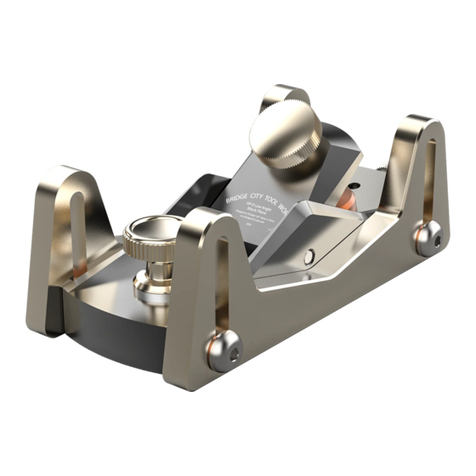
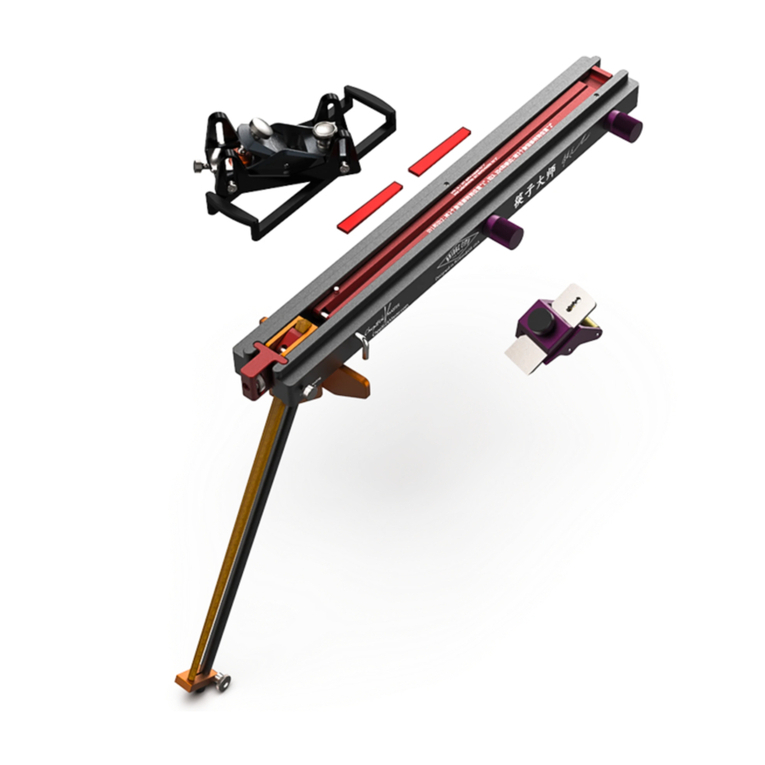
The Pencil Precision kit consists of a special Block Plane, the Plane Sled Unit, the Extrusion Unit,
the Ferrule Unit, 25 sets (50 pcs) of pencil blanks and pencil leads, ferrules, and erasers, as shown
in Figure 1.
Figure 1: Pencil Precision Components
Most of the parts of Pencil Precision are CNC machined from solid aluminum and anodized
creating a beautiful finish that is almost as hard as a diamond. The plane iron and dies are made
from hardened tool steel.
By using the Pencil Precision Block Plane with the Plane Sled Unit, the default pencil is a
hexagonal pencil. To make round, beaded or Reuleaux pencils, a hexagonal pencil is fed into the
extrusion unit. A series of progressive dies remove material to create the desired pencil shape.
Your pencils can also be painted in different colors if you like. All of the steps are easy to achieve,
the process is fun and the results are very rewarding.
Plane Sled Unit
Erasers
Pencil Leads
Pencil Blanks
Extrusion Unit
Ferrule Unit
Block Plane
ferrules
Clamps

3
II Before using the Pencil Precision
i Setting the Plane Depth Skids
Before starting to make your first pencil, it is important to properly set the depth skids. This
can be done following the illustration in Figure 2, using the gauge built in the back of the
Ferrule Unit. This is a one-time setting and should not require subsequent adjustment —
unless the plane is dropped, or the depth skids removed.
Set the plane on the ferrule unit with the depth skids aligned with grooves in the ferrule unit.
Loosen the depth skids with the hex key wrench provided and allow them to drop until they
touch the bottom of the grooves in the Ferrule Unit. Once the skids rest on the grooves in
the Ferrule Unit, tighten all four screws with the included hex key wrench. When properly
adjusted, the plane sole rests on the rails, and the skids rest on the bottom of the grooves.
You should not set the depth skids on a flat surface and make sure they are planar with each
other and to not allow the plane to wiggle or rock.
Figure 2: Setting the Plane Depth Skids.
ii Setting the Cutting Depth of the Block Plane
The small block plane (as shown in Figure 3) included with the Pencil Precision is a precision
tool with a sharp iron; when properly set-up, it will give you silky shavings with minimal
effort.
The cutting blade (the “iron”) is always inserted into the plane body with the bevel up —
this is a bevel-up block plane. The depth of cut of the iron is adjusted by rotating the iron
depth adjuster at the back of the plane (clockwise advances the iron, counterclockwise
retracts the iron).
Figure 3: Block Plane
Iron Cap Lock Knob
Iron Depth Adjustor
Iron
Iron Bevel
Magnetic Pad
Iron Cap
Plane Body
Mouth Opening
Depth Skid
Depth Skid

4
Follow the steps below to properly set-up the iron to the correct cutting depth:
1. Advance the sharp iron until you can feel it barely protruding from the bottom of the
plane by brushing lightly with your fingers. Gently tighten the iron (lever) cap to lock it
in place. You do not need to tighten the lever cap knob very much to hold the blade in
place. The iron edge should be parallel with the throat plate. If it is not, rotate the iron
slightly sideways until it is parallel with the throat plate.
2. Adjust the iron depth until the shaving is thin and easy. Once the iron depth has been
set, make sure the iron cap is tight. You may find that tightening the iron cap makes the
depth of cut too deep. If so, loosen the cap, slightly retract the iron, and re-tighten the
cap. The gap between the iron and the throat plate should be just large enough for the
shavings to clear.
iii Choosing a Working Location for the Pencil Precision
The Pencil Precision can be used on workbenches or sturdy tables but is primarily designed
to be used on counters with the user standing. There is an anti-skid pad on the back of the
Plane Sled Unit, it will sit firmly on your table without damaging the surface.
If you desire, the Extrusion Unit can be permanently attached to a working surface or a
user-designed hook using 2 screws.
Although the Pencil Precision makes very little dust, it does make lots of shavings. These are
easy to clean up with a vacuum but can also be easily picked up by placing an old newspaper
on the counter prior to beginning; the shavings can simply be rolled up and disposed of with
the newspaper upon completion. We have found it useful to have a wastebasket on the floor
beside the user to empty the plane shavings as they build up within the plane body.
iv Pencil Blanks
The Pencil Precision is designed for a specific sized pencil blank: 4.3mm x 9.25mm x 170mm.
If you choose to make your own blanks, understand that if your blanks are less than 4mm
thickness, your results will be an asymmetrical hexagonal pencil. Blanks thicker than 4.3mm
will require extra work in planing. If your blanks are wider than 9.25mm, they cannot be
mounted in the planing slot. If your blanks are narrower than 9mm, your results will be a
asymmetrical hexagonal pencil. Blanks over 174mm in length will not fit in the Plane Sled
clamp. Blanks less than 165mm will not be clamped in the Plane Sled Unit.
The best pencil blanks are typically made from a straight-grained basswood, though many
woods will make excellent pencils. We caution you to think about your custom wood ideas
because many pencil sharpeners will not cut harder woods.
Wood is nature grown material, it may warp during storage or in uncontrolled climates. Prior
to inserting the blank in the Plan Sled, check if the pencil blank is warped. A straight blank
will help you to make a perfect pencil easily.
5
Wood can have grain direction or other defects that will make the pencil making process
difficult or impossible. The Pencil Precision Kit includes enough blanks for 25 pencils.
However, your yield may, or may not, make 25 pencils but we fully expect that you can count
on 20-22 successful pencils with each 50 pc. blank set.
To determine the grain direction, please proceed as follows:
If you can "read" the grain before starting, place a small black dot on the end of the blank
where the plane would BEGIN cutting. Reading the grain is not easy in basswood, but if you
can see on the side of the blank the grain direction, this black dot is a big deal.
If not, use the method described next.
1) If during the first plane pass or two you notice the grain is tearing, reverse the blank and
put a small black dot on the blank where the plane will begin cutting.
2) When it comes time to put the blanks in the fixture to plane the sides, BOTH blanks with
black dots will be placed in the fixture with the dots on the same end where the plane will
BEGIN cutting.
3) When the blanks are ready to be glued, both black dots are on the same end.
4) When it comes time to insert the hex pencil in the extrusion unit, the black dotted end
will be the first end of the pencil heading into the dies.
III Using the Plane Sled Unit to make a Hexagonal Pencil
i Planing the Blanks
1. As shown in Figure 4, install one blank in the square slot in the middle of the Plane Sled
Unit. Tighten the locking knob in the rear of the Plane Sled Unit to clamp the blank in
place.
Figure 4: Install the Blank in the Plane Sled Unit.
CAUTION: Over tighten the clamp may cause the black wrap or bow.
Locking Knob
Pencil Blank
End View of Plane Sled Unit

6
2. With the plane skids straddling the rails of the Plane Sled Unit, take full strokes pushing
the plane forward with downward pressure. Make multiple passes with the plane until
it is obvious that the plane is no longer cutting wood —the depth skids will limit the
amount of material that can be removed. After every few passes, empty the shavings
out of the plane into the wastebasket, and ensure that the mouth is not blocked with
any shavings. Planing should feel almost effortless when the shavings are thin. When
the plane no longer cuts, you have cut a 1 mm radius groove and thickness planed the
blank to the correct thickness.
NOTE: If on your first or second pass using the plane, you notice the grain is rough,
you are cutting against the grain of the blank. Now is the time to reverse the blank in
the plane sled unit. We also recommend that you mark the end of the blank that is
now NOT resting against the end stop. This is important because when it comes time
to assemble two halves into a pencil, you want to make sure that the marked ends
are adjacent to each other. These marked ends on the hex pencil indicate this is the
end to insert into the extrusion dies first and will allow the cutting dies to also cut
with the grain. Failure to do this can result in pencils that are extremely crude and will
likely need to be rejected.
3. Loosen the locking screw in the rear of the Plane Sled Unit to remove the blank and
install a new blank. Repeat the Step 1 & 2 to plane the second blank to the correct the
thickness.
4. As shown in Figure 5, install the two blanks into the side groove by facing the 1mm
radius groove inward. Make sure the marked end is the lead-in end and the first to be
cut. Hopefully you bevel both halves simultaneously cutting with the grain. If that is not
possible because of the location of the pencil groove, cut each half separately.
Figure 5: Install the Blanks into the Side Grooves
CAUTION: You cannot make a Hexagonal Pencil by facing the 1mm radius groove outward.
5. Without changing a thing on the plane, you plane until the skids hit the fixture and the
plane no longer cuts.
End View of Plane Sled Unit

7
6. Loosen the locking screw, flip the blanks as shown in Figure 6: facing the 1mm radius
groove inward and the bevel side downward. Then tighten the locking screw to clamp
the blanks in place.
Figure 6: Flip the Blanks
CAUTION: You can not make a Hexagonal Pencil by facing the 1mm radius groove outward.
7. Repeat cutting by using the Block Plane without changing a thing until the skids hits the
fixture and the plane no longer cuts.
8. Loosen the locking screw and take out the two pencil blanks. Now the hexagonal pencil
blanks are ready to mount the lead.
ii Install the Lead
1. As shown in Figure 7, apply the glue evenly on the inside of one of the pencil blanks,
including the 1mm radius groove. You can apply the glue by a silicon brush or thin wood
pieces. Try not to get glue on the outside of the pencil blanks, because it will need to be
removed later by sanding.
2. Put the lead in the 1mm radius groove of the pencil blank without glue. Put the two
halves together, the lead will align the two halves perfectly. Ensure that both ends of
the two halves are aligned as well, and if the ends are marked as we recommend, make
sure the marks are adjacent to each other.
Figure 7: Apply Glue and Assemble the Pencil Blanks and Lead
End View of Plane Sled Unit

8
NOTE: Pencil Precision does NOT contain glue or silicon brush. The wood glue is
commended to achieve the maximum bond strength. Please test the bonding strength on
the other wood pieces if you are not sure whether the glue will work in this application.
CAUTION: Do not apply too much glue, the excess glue may drop on the Plane Sled Unit,
causing the pencil to bond with the Plane Sled Unit or damage the Plane Sled Unit.
CAUTION: The pencil lead is very easy to break. Please be careful to prevent the lead from
breaking when taking out or installing it.
3. As shown in Figure 8, Stand the pencil on end and slide on the tapered aluminum clamp
until it holds the upper end and then place another clamp on the other ends of the
pencil.
4. Put the entire assembly back in the Plane Sled Unit and rest the two clamps on the
table. Tighten the locking screw to clamp the pencil in the middle section.
Figure 8: Clamping the Pencil.
CAUTION: Do NOT over-tighten the clamps, it may cause the bond failure.
5. Keep the whole assembly clamped in position for a minimum of 30mins. Remove the
clamps and rest it on the table or somewhere else for about 2 hours for the glue to dry
and reach its maximum bonding strength.
6. CONGRATULAITIONS, you have made a hexagonal pencil blank. If you want to use this
pencil directly, please read the section: Sanding and Painting directly. Or, you can now
proceed to fit the ferrule to the blank. If you want to make a pencil that is
environmentally friendly, simply finish the outside of your pencil with food grade
mineral oil.
NOTE: Different type of glue or environment will cause different clamping times. Please
read the glue manufacturers recommended clamping time.
Clamps
Pencil

9
IV Using the Extrusion Unit to Make Different Pencil Profiles
i Preparing the Extrusion Unit
1. Take out the dies set. One die set is a combination of multiple dies as shown in Figure 9.
The orange die has a hexagonal inner profile, which is used to guide the hex pencil into
the cutting dies. There are three sets of cutting dies: Round, Beaded and Reuleaux. The
Round and Reuleaux profiles have three dies in each set. The Beaded profile set has two
dies, which follow the number 1 die of the Round sets. Each die is lasered engraved
number 1/2/3 used to locate the dies into the correct sequence in the Extrusion Unit.
Figure 9: Dies Figure 10: Install the Dies
NOTE: Die No.1 has the maximum inner profile, Die No.2 has a smaller inner profile, Die
No.3 has the minimum inner profile.
2. As shown in Figure 10, place the dies in the right position of the Extrusion Unit and
tighten the locking screw. The base unit will keep the dies center on the same axis.
Figure 11: Retract the drive rest and steady rest
Drive Rest
Steady Rest
1
2
3
1
2
3
2
3
1 (Round)
Round
Reuleaux
Beaded

10
3. Turn the handle counterclockwise to retract the drive rest and steady rest as shown in
Fig.11. This will leave enough space to install the pencil.
ii Shaping the Pencil Profile
1. As shown in Figure 12, install the hexagonal pencil into the orange die, turn the handle
to advance the ram rod to hold the other side of the pencil.
Figure 12: Install the Pencil in the Extrusion Unit.
2. Move the steady rest to the head of the rod near the end of the pencil, which will
prevent the ram rod from cranking.
3. Clockwise turn the handle. The ram rod will push the pencil into the dies. The pencil
profile will be cut to the shape of the dies inner profile.
4. Keep turning the handle until the ram rod pushes the pencil out of the dies completely.
Now the pencil is cut to the final section profile.
V Sanding and Painting
i Sanding
Your newly made pencil should feel smooth. If there are corners that feel sharp, lightly sand
with 400 grit sandpaper. You do not need to sand the entire pencil, just those areas that feel
either sharp or rough.
ii Painting
1. If you desire your pencil to be painted, you can put the orange arm on the Plane Sled
Unit aside as shown in Fig.13. Push the steady rest against the Dies rest and move the
drive rest closely to the handle.
Pencil
Ram Rod
Locking Screws
Base Unit

11
Figure 13: Put the orange rest arm aside
2. Move the pencil against the orange rest arm by clockwise turning the handle.
3. You can use the small paint brush to paint the pencil. Since the pencil will eventually
need to be sharpened, and most likely will receive an eraser ferrule, you can rotate the
ends of the blank with your fingers to paint all six faces without fear of marring the
paint job. Other finishing options include varnish, paint, lacquer, or shellac.
VI Install the Ferrule and eraser
i Scoring the Pencil End
1. As shown in Figure 14, choose the right hole to your pencil: Hexagonal pencil choose
hole 1, Round and Beaded pencil choose hole 2.
Figure 14: Ring Cut the Pencil End
NOTE: The Reuleaux profile pencil cannot be fitted with a ferrule as of this writing.
2. Lift the scoring arm, insert the pencil to the right hole until it stops.
3. Push down the scoring arm and spin the pencil until the cutter is parallel with the
fixture.
Orange Rest Arm
Orange Rest Arm
Pencil
Hole 1
Hole 2
Scoring Arm

12
ii Tenoning the Pencil End
1. As shown in Figure 15, choose the right hole to your pencil: Hexagonal pencil choose
hole 3, Round and Beaded pencil choose hole 4.
Figure 15: Tenoning the Pencil End
2. Insert the pencil to the right hole, the cutter will peel off some wood back to the
shoulder cut.
3. Pull out the pencil and rotate it.
4. Insert the pencil again.
5. Repeat the Step 2, 3 and 4. Do not to create a perfect cylindrical tenon, the irregularity
of this helps create a firm fit with the ferrule.
iii Insert the Ferrule and Eraser
1. As shown in Figure 16, the Ferrule is an Aluminum Part with holes on both ends. The
hole on one end is large, which is used to insert the Eraser. The smaller hole is used to
mount to the pencil.
Figure 16: Ferrule
Hole 4
Hole 3

13
2. As shown in Figure 17, drop one Ferrule into the pocket. Hold the blank in the
alignment channel and tap the pencil into the Ferrule.
Figure 17: Install the Ferrule
3. Take out the pencil and insert an Eraser into the Ferrule.
4. Sharpen the pencil with the supplied pencil sharpener.
VII Care and Maintenance
Most parts of Pencil Precision are CNC machined from solid aluminum and anodized. With very
limited maintenance they can be used for long time.
i Iron Sharpening
The plane iron that comes with the Pencil Precision has been sharpened at the factory.
Keeping the iron sharp will make the planing smoother and easier. The easiest way to keep
the iron sharp is to prevent it from getting dull with frequent sharpening.
NOTE: If you are not comfortable honing the entire beveled face of the iron by hand, a
honing guide is highly recommended to sharpen the iron.
Loosen the iron cap lock knob on the block plane and remove the iron by lifting it up off the
pin, and back out of the plane.
With the iron bevel facing DOWN, insert the iron into the honing guide (not included) and
set the honing guide to 33 degrees or until the entire face of the iron is in contact with stone
or abrasive paper. Place the honing guide on the sharpening stone (not included) and stroke
back and forth, using your fingers to put a light pressure on the front of the iron. Check the
edge after every 4 to 6 strokes; you can test for sharpness by slicing a piece of paper. Once
sharp, insert the iron into the plane body with the bevel UP, adjust the depth of cut, and you
are ready to make more Pencils!

14
Apply a light coat of thin oil or WD-40 on the blade if the blade will be stored for long
periods of time or in high-humidity locations. Wipe the blade clean of finger prints by clean
cloth after each sharpening.
ii Dies Honing
The dies that come with the Pencil Precision have been sharpened at the factory. Keeping
the dies sharp will make the extrusion smoother and easier.
Dies are made of from D2 tool steel and hardened to 60-62 HRC. If the extrusion process
cuts is not smooth or the cutting edge is blunt or chipped, this means you should hone the
dies.
NOTE: Honing dies requires high skills or special equipment.
Take the dies out from the Extrusion Unit, the circular dies can be chucked in a 1/2” chuck
and the bevel can be honed while the chuck is spinning by holding a honing stone (not
included) or abrasive paper (5000~8000 Grits) lightly against the entire bevel of the die.
Apply a light coat of thin oil or WD-40 on the dies if the dies will be stored for long periods
of time or in high-humidity locations. Wipe the blade clean of finger prints by clean cloth
after each sharpening.
iii Ferrules and Pencil Sharpener Cutters
The Ferrules and Pencil Sharpener Cutters are disposable cutters. It is recommended to
repurchase these cutters after they are blunt or chipped.
iv Lubrication
Apply one drop of light machine oil in the top of the lead screw and the index pin that fits
inside the iron once a year or upon the frequency of use to prevent premature wear or rust.
v Store
If you plane to store the Pencil Precision for long periods, we recommend you wipe out the
dust from the plane, lubricate all the moving parts and rub off the finger prints and spilled
oil with a clean cloth. Put the Pencil Precision back into the box place it in a safe place.
vi Warranty
All returns, replacements, technical services, and support shall be handled by distributor’s
customer service organization.
If there is a defect on the workmanship of the tool (with no fault of the customer) within
one year from the original date of purchase, please contact with the distributor’s customer
service organization and they will determine whether to repair or replace the tool.

15
中文版本

16
铅笔大师
恭喜您购买了一台铅笔大师!铅笔大师使用简单,可以让没有任何经验的老年人和孩子
制作出具有专业水准的铅笔,绝对会让您眼前一亮!
一、综述
铅笔大师由多个组件组成,其中包含一个特制的短刨、刨削组件、挤压组件、抱箍和深
度校准工具、25 套(50 根)铅笔木料、铅芯、抱箍和橡皮,如图一:
图一:铅笔大师组成与名称
铅笔大师上大多数零件使用铝合金通过 CNC 加工中心制作,表面进行阳极氧化处理,刨
刀和拉刀使用工具钢制作。
使用短刨配合刨削组件可以制作出一支截面为六边形铅笔。配合挤压组件可以制作出截
面为圆形、滚花和罗勒三角形(三叶型)的铅笔。使用抱箍和深度校准工具可以在铅笔的一
端安装橡皮。您也可以根据自己的喜好将铅笔涂上不同颜色和花纹,这一切都非常简单并且
充满了乐趣。
二、使用铅笔大师前的准备工作
i设置深度限位导向板
在开始制作铅笔前,正确的设置深度限位导向板非常重要。一般情况下,只需进行一次
深度调节即可。使用图二所示的抱箍和深度校准工具即可设置深度限度。除非短刨摔落在地
上发生错位或深度限位导向板出现移动,否则不再需要第二次的调节。
如图二所示,将短刨的底座放置在抱箍和深度校准工具背面两个凹进去的深度调节槽之
刨削组件
橡皮
铅芯
铅笔木料
挤压组件
抱箍和深度校准工具
短刨
抱箍
铅笔粘合固定夹

17
间的平台上,并将刨刀刃口置于抱箍和深度校准工具的横槽内,以避免损伤刨刀刃口,使用
标配的内六角扳手拧松深度限位导向板锁紧螺母,让深度限位导向板自动落在深度调节槽
内。当两个深度限位导向板都正确落在深度调节槽上后,再使用内六角扳手拧紧所有螺母。
如果调节操作是正确的,那么短刨的底面与抱箍和深度校准工具的背面接触,而深度限位导
向板与深度调节槽面接触。
注意:调节至理想状态后,深度限位导向板底部应高出刨底 12mm。
图二:设置深度限位
ii 设置短刨的刨削深度
通过调节刨刀位置来设置刨削深度。短刨是一个非常精密的工具,配有锋利的刨刀,刨
刀上有一个凸起用于制作安装铅笔芯的圆槽。正确的设置之后,不费吹灰之力即可刨削出丝
绸般的刨花。
这是一个低角度刨,安装刨刀时,应一直保持刨刀斜面向上。若需要调节刨刀的深度,
只需要旋转短刨后侧的刨刀深度调节旋钮即可(顺时针旋转增加刨刀深度,逆时针旋转减少
刨刀深度)。
注意:不要在平面上设置深度限位,确保两个深度限位滑块共面并且短刨在平面上不会晃动。
图三:短刨
短刨(如图三)需要与抱箍和深度校准工具和刨削组件配合使用。请根据以下步骤设置
短刨以达到最佳体验:
1. 调节刨刀深度直至指腹轻抚刨底时能感觉到刀刃。轻轻地锁紧刨刀压紧盖,此时无须
用力。
2. 适当调节刨刀深度,使刨削轻松自如,刨花薄透。一旦刨刀深度设置好后请锁紧刨刀
压紧盖。如果锁紧刨刀压紧盖后发现刨刀深度增加,超过了预期深度,请拧松刨刀锁紧旋钮,
刨刀锁紧旋钮
刨刀深度锁紧旋钮
刨刀
刨刀斜面
磁垫
刨刀压紧盖
刨身
刨口
深度限位导向板
深度限位导向板

18
稍微减少一点刨刀深度之后再次锁紧。
iii 选择铅笔大师的操作位置
铅笔大师可以在木工桌或任何稳定的桌面上使用,其设计的初衷是为了方便操作者可以
站立使用。刨削组件的背部有防滑垫,尾端设有挡板,可以放置在桌面上使用而不会损坏您
的桌面。挤压组件则可以通过两个沉头螺丝固定在自制挡板或工作台上。
虽然铅笔大师只产生极少的灰尘,但却会产生大量的刨花。这些刨花可以用吸尘器轻易
清除,但是如果使用前即在铅笔大师底部铺垫报纸,这样使用完后,用报纸包裹走刨花则更
加快速简便,同时可以防止在给铅笔上色时将颜料涂抹到工作台表面。在使用者身边放置一
个垃圾篓也可以更加有效地清理刨花。
iv 准备木料
铅笔大师需要使用精确尺寸的木料制作铅笔,尺寸为 4.3mm x 9.25mm x 170mm。请注
意,如果木料厚度小于 4mm,则无法制作标准的六边形铅笔;如果木料厚度大于 4.3mm,
则会需要更大量的刨削工作;如果木料宽度大于 9.25mm,则无法装入铅笔大师;如果木料
宽度小于 9mm,则无法制作标准的六边形铅笔;木料如果长于 174mm,则无法装入铅笔大
师;如果木料长度小于 165mm 则无法在铅笔大师中夹紧。
最佳的选择是直纹理的椴木。尽管很多木材都是制作铅笔的优秀材料,我们建议您在自
己制作木料前注意木料的硬度,因为很多卷笔刀无法切割较硬的木料。
木料是天然材质,在储存过程中可能会发生一些变形。在制作铅笔前检查木料是否出现
弯曲或变形等情况,尽可能的选择直木料用于制作铅笔。
木料的纹理方向或者其他的的缺陷问题会影响到铅笔制作过程的难易程度。铅笔大师标
配了足以制作 25 支铅笔的木料,你最终做出的可能没有 25 支铅笔,但我们真诚的期望你能
将这 50 支铅笔木料物尽其用,成功地做出更多铅笔。
正确选择木料刨削的方向可获得光滑的加工表面,否则会产生非常粗糙的加工表面,甚
至出现木纹撕裂的现象,导致无法加工出铅笔。
按以下步骤确定纹理方向:
如果开始刨削前,你能看懂木料的纹理,在木料上刨削开始的一端标上一个小黑点。椴
木上的纹理不易看懂,但是如果你能看懂的话,标上黑点能起到很大的作用。
如果你看不懂木纹,按以下步骤操作:
1. 如果在第一次或者第二次刨削时木纹撕裂了,翻转木料,进行刨削,并在刨削开始的地
方标上一个小黑点。
2. 在将木料放入刨削组件里进行侧边刨削前,两个木料带有黑点的一端在刨削开始位置上
的朝向应该相同。
3. 在木料已经准备好进行粘合时,两个木料上的黑点是在同样的端头上。
4. 在将六边形铅笔插入挤压组件时,带有黑色端点的一端朝向拉刀。
Table of contents
Other Bridge City Tools manuals

Bridge City
Bridge City HP-14 User manual

Bridge City
Bridge City HP-12 User manual

Bridge City
Bridge City Chopstick Master User manual

Bridge City
Bridge City Signature Series User manual

Bridge City
Bridge City DJ-3 User manual

Bridge City
Bridge City Chopstick Master User manual

Bridge City
Bridge City HP-9v2 User manual

Bridge City
Bridge City HP-9v2 User manual

Bridge City
Bridge City HP-8 User manual