manuals.online logo
Brands
  1. Home
  2. •
  3. Brands
  4. •
  5. Bridge City
  6. •
  7. Tools
  8. •
  9. Bridge City Chopstick Master User manual

Bridge City Chopstick Master User manual

English Version
Chopstick Master™
User Manual
For your optimal enjoyment, please read this manual
completely before beginning.
Congratulations on your purchase of the Chopstick Master™!
The Chopstick Master™ is easy to use and allows young and
old alike to make professional-grade, reusable chopsticks
without woodworking experience or ability. A set of chopsticks
typically takes less than ten minutes to produce and making
your own chopsticks is a rewarding and fun experience that is
sure to bring a smile to your face!
I.How the Chopstick Master™ Works
The Chopstick Master™ works by tapering all four sides of the
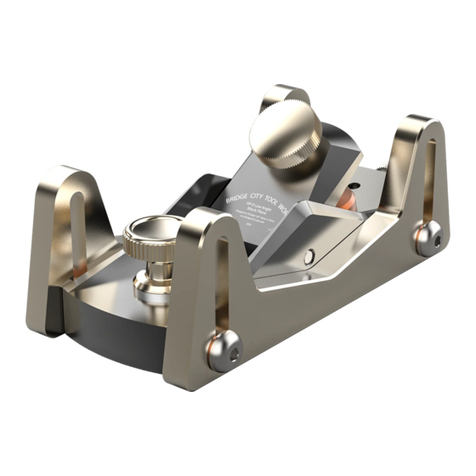
chopstick blank using a fxed cutting plane (HP-8 block plane
with depth skids). All four sides are tapered to keep the wood
grain running down the centerline of the chopstick blank.
Before beginning, you will need to determine the style
of chopstick you want to make. Generally speaking, the
Chinese prefer chopsticks with a tip diameter of 5 mm. Other
cultures, most notably the Japanese, prefer a tip diameter of
approximately 2 mm. The Chopstick Master™ will allow you
to do either simply by changing the colored adjustable arms:
the red arm is for making chopsticks with 5 mm tips and the
optional green arm will make chopsticks with 2 mm tips.
II.Before Using the Chopstick Master™
A.Setting the Plane Depth Skids
Before starting to make the chopsticks, it is important to
properly set the depth skids. This can be done following
the illustration in Figure 1, using the gauge built into the
Chopstick Master™ body. This is a one-time setting and
should not require subsequent adjustment — unless the
plane is dropped or the depth skids are removed.
With the plane sole sitting on the top rails, loosen the
depth skids with the hex key wrench provided and allow
them to drop until they touch the bottom of the grooves
in the Chopstick Master™ body. Once the skids rest on
the Chopstick Master™ body, tighten all four screws with
the included hex key wrench. When properly adjusted,
the plane sole rests on the rails, and the skids rest on the
bottom of the grooves.
Figure 1
B.Setting the Cutting Depth of the Hand Plane
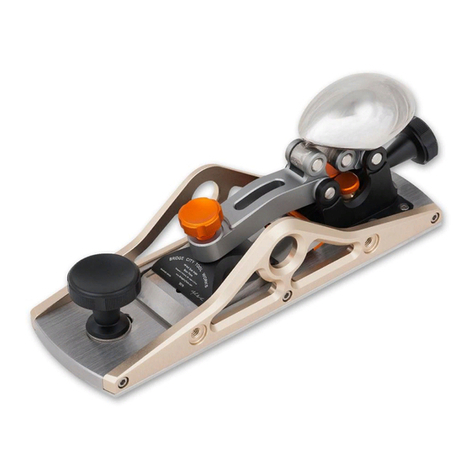
The small block plane (Fig. 2) included with the Chopstick
Master™ is a precision tool with a sharp iron; when
properly set-up, it will give you silky shavings with minimal
effort.
The cutting blade (the “iron”) is always inserted into the
plane body with the bevel up — this is a bevel-up block
plane. The depth of cut of the iron is adjusted by rotating
the iron depth adjustor at the back of the plane (clockwise
advances the iron, counterclockwise retracts the iron). This
plane also features an adjustable mouth that is adjusted
by loosening the throat plate lock knob, sliding the throat
plate forwards or backwards to the correct position and
then locking in place by retightening the knob.
The following steps should allow you to have the
plane working optimally.
1. Open the mouth as far as it will go and lock it in place.
2. Advance the sharp iron until you can feel it barely
protruding from the bottom of the plane by brushing
lightly with your finger. Gently tighten the iron (lever)
cap to lock it in place. You do not need to tighten the
lever cap knob very much to hold the blade in place.
3. Close the mouth so you can still see light between the
cutting edge of the iron and the throat plate. The iron
edge should be parallel with the throat plate. If it is
not, rotate the iron slightly sideways until it is parallel
with the throat plate. The gap between the iron and
the throat plate should be just large enough for the
shavings to clear.
4. Adjust the iron depth until the shaving is thin and easy.
Once the iron depth has been set, make sure the iron
cap is tight. You may nd that tightening the iron cap
makes the depth of cut too deep. If so, loosen the cap,
slightly retract the iron, and re-tighten the cap.
C.Determining Chopstick Tip Diameter: 5 mm or 2 mm?
For “Chinese-style” chopsticks with 5 mm tips (approx.
3/16”), use the red arm. For “Japanese-style” chopsticks
with 2 mm tips (approx. 5/64”), use the optional green arm.
To switch arms, remove the “L” shaped pivot pin, insert the
arm of your choice and re-insert the pivot pin (Fig. 3).
Figure 2
Figure 3
D.Choosing a Working Location for the Chopstick
Master™
The Chopstick Master™ can be used on workbenches
or sturdy tables but is primarily designed to be used on
counters with the user standing.
Although the Chopstick Master™ makes very little dust, it
does make lots of shavings. These are easy to clean up
with a vacuum, but can also be easily picked up by placing
an old newspaper on the counter prior to beginning; the
shavings can simply be rolled up and disposed of with the
newspaper upon completion. We have found it useful to
have a wastebasket on the oor beside the user to empty
the plane shavings as they build up within the plane body.
The orange bench hook is milled from aluminum and
should not harm the counter edges. If this is a concern
however, run paper under the Chopstick Master™ so it
falls between the counter edge and the hook.
If you desire, the orange bench hook can be removed, and
the Chopstick Master™ body permanently attached to a
working surface or a user-designed hook using 2 athead
screws.
E.Chopstick Blanks
The Chopstick Master™ is designed for a specific sized
chopstick blank: 7 mm square by 270 mm in length. If you
choose to make your own blanks, understand that if your
blanks are less than 7 mm square, your results will yield
chopsticks with an uneven taper. Blanks larger than 7 mm
square will require extra work in planing. Blanks over 270
mm in length will not t in the Chopstick Master™. Blanks
less than 270 mm can cause clamping problems in the
event of reverse grain.
The best chopstick blanks are typically made from a
straight-grained hardwood, though many woods will make
excellent chopsticks. If you are using a wood that is known
to be toxic, you will want to apply a surface finish such
as varnish or lacquer to prevent the wood toxins from
contacting your food or skin.
F.Sharpening the Plane Iron
The plane blade (the “iron”) that comes with the Chopstick
Master™ has been sharpened at the factory; you should be
able to make up to 10 sets of chopsticks before it needs to
be sharpened. Keeping the iron sharp will make the planing
smoother and easier. It is easy to do with the included
honing guide (Fig 4).
1. Loosen the iron cap lock knob on the block plane and
remove the iron by lifting it up off the pin, and back out
of the plane.
2. With the iron bevel facing DOWN, insert the iron into the
honing guide as illustrated in Figure 4. Lightly tighten
the iron locking knob so that you can still move the iron.
3. With both rollers of the honing guide touching a flat
surface (a granite countertop or piece of glass is ideal),
advance or retract the iron so that the cutting edge is
touching the surface. Make sure the right-hand side of
the iron is flush against the side of the honing guide
groove. The iron is now pitched at exactly 30 degrees.
Tighten the iron locking knob so the iron is rmly held in
place.
4. Loosen the locking knob of the orange bench hook
on the Chopstick Master™ and rotate the hook 180
degrees and re-tighten the knob (Fig.5).
5. The 1 micron abrasive strip on the underside of the
Figure 4
Chopstick Master™ body is equivalent to an 8000 grit
honing stone. Place the honing guide in the channel
and stroke back and forth on the abrasive strip, using
your ngers to put a light pressure on the front of the
iron. Check the edge after every 4 to 6 strokes; you can
test for sharpness by slicing a piece of paper. Once
sharp, insert the iron into the plane body with the bevel
UP, adjust the depth of cut, and you are ready to make
more chopsticks! Replacement abrasive strips can be
ordered at www.ChopstickMaster.com or from your local
dealer.
Figure 5
III.How to Make Chopsticks with the Chopstick
Master™
Step-By-Step Instructions
1. Numbering the Faces of Each Chopstick Blank
Prior to tapering the blanks, the faces need to be
numbered sequentially 1, 2, 3, and 4 at one end of
each chopstick. This will allow you to keep track of the
chopstick-blank faces as you progress through the planing
process for each face. Place the numbers within a few mm
of the end – this end will be cut off once the chopsticks are
planed, and the numbers will be removed. The numbered
end will be placed closest to the orange bench hook in the
Chopstick Master™.
2. Setting the Adjustor Knobs to the Proper Setting
If you are using the red arm, set both adjustor knobs to “1”
as you look down on the knobs. If you are using the green
arm, begin with both adjustors set to “2”.
Initial Adjustor Settings with the Red Arm (Fig. 6)
Figure 6
3. Inserting the Chopstick Blank in the Chopstick
Master™
Chopstick blanks are positioned diagonally in the
Chopstick Master™ to utilize the entire width of the plane
iron. They are held in place with two tapered wedges as
illustrated in Figure 7. Notice that side “1” of the chopstick
blank is up, both knobs are set to “1” (red arm) and the
rear of the chopstick blank is adjacent to the reverse grain
stop pin (Fig. 3). Slide the locking wedges towards each
other until the chopstick blank is rmly secured.
Figure 7
4. Planing Adjacent Sides 1 and 2 of the Chopstick
Blanks
With the Chopstick Master™ properly positioned and side
“1” of the chopstick blank facing up, you are ready to taper
side “1”. With the plane skids straddling the rails of the
Chopstick Master™, take full strokes pushing the plane
forward with downward pressure. Make multiple passes
with the plane until it is obvious that the plane is no longer
cutting wood — the depth skids will limit the amount of
material that can be removed. After every few passes,
empty the shavings out of the plane into the wastebasket,
and ensure that the mouth is not blocked with any
shavings. Planing should feel almost effortless when the
shavings are thin.
Remove the two locking wedges, and turn the blank so
that side “2” is up. Lock the blank in place with the two
locking wedges. Repeat the planing process.
Set this chopstick blank aside and repeat the above steps
for sides “1” and “2” of your second blank.
5. Planing Adjacent Sides 3 and 4 of the Chopstick
Blanks
If you are using the red arm, rotate both knobs to read “2”.
If you are using the optional green arm, rotate both knobs
to read “3”. You may need to lift the far end of the arm up
slightly to rotate the knobs.
With side “3” facing up, lock your chopstick with the
locking wedges, and plane until the plane quits cutting.
Remove the locking wedges, place side “4” up and wedge
in place with the locking wedges. Plane until the plane
quits cutting.
Set aside this blank and repeat the above steps for sides
“3” and “4” of your second chopstick.
You should now have two chopstick blanks that are
perfectly tapered on all four sides with both ends perfectly
square.
NOTES: There will be times when it is impossible to
get a smooth nish because the grain of the chopstick
blank is running the against the direction of the plane.
In these cases, you will need to pull the plane toward
you while holding the orange bench hook against the
work surface with your free hand. In rare cases, the
grain switches direction several times and no matter
what direction you plane, you cannot get a smooth
surface. When this occurs we recommend you discard
the blank. A sharp plane blade will help to minimize
these problems.
If your chopstick blank is warped, you will still be able to
make a chopstick, it will however, retain the warp when
complete.
6. Shaping the Octagon Tip
The adjustor settings for creating the octagon are the
same settings used for planing sides “3” and “4” (“2” for
the red arm, or “3” for the green arm).
Place one corner edge of the chopstick blank in the “V”
groove located in the arm as illustrated (Fig. 8). The
narrow end of the chopstick should be against the stop at
the far end of the arm. Hold the plane in your favorite hand
and with the opposite thumb push the blank into the stop
at the end of the arm. Plane the corner of the blank that is
facing up until the plane quits cutting. You will only need
to plane the far one-half to one-third of the length of the
chopstick. Repeat for the other 3 edge corners.
Figure 8
Figure 9
When complete, you should have a perfectly shaped
octagon on the tip of each blank.
NOTE: The accuracy of the octagon is dependent on
the shaving thickness. If it appears that your corners
are too short for all eight tip edges to be the same
length, you can either increase the cutting depth of the
plane, or slide a piece of paper under the arm where
the magnet meets the adjustor (which is typically
much faster). Re-plane all four CORNERS. Before you
make another set of chopsticks, slightly advance the
cutting edge so this problem is not repeated.
If it appears that the chamfered corners are too long at the
tip, you can slide a piece of paper between the magnet
and the arm and re-plane all four SIDES. Before you make
another set of chopsticks, slightly retract the cutting edge
so this problem is not repeated.
7. Sawing the Pyramidal Finial
Adding a pyramidal nial (Fig. 9) adds a professional touch
to your chopsticks and is very easy to accomplish with the
Chopstick Master™.
Attach the sliding table to the Chopstick Master™ body.
It should slide smoothly without any slop. If it needs
Figure 10
adjusting, loosen the two thumb screws that attach the
clear blade guard and use the included hex key wrench to
either tighten or loosen the dovetail gib screws. The goal
is to have a smooth-sliding table without any wiggle. When
properly adjusted, tighten the two thumb screws securing
both the gib and the blade guard.
Loosen all three thumb screws on the side of the
Chopstick Master™ and insert the saw blade between
the body and the blade clamp, with the narrow end of the
blade closest to the orange bench hook and the teeth
pointing upward (Fig. 10). The three slots in the blade will
t over the shafts of the three thumbscrews, aligning the
blade. Tighten the three thumbscrews. The blade should
now be angled out from the Chopstick Master™ body at
22.5 degrees from the vertical.
Place the chopstick on the sliding table as illustrated in
Figure 11; the narrow end of the chopstick should be
against the adjustable stop at the right.
Place your right thumb in the indent at the rear of the
sliding table, and use your right index and middle ngers
to firmly hold the chopstick down, while pushing the
chopstick gently to the right against the stop of the sliding
table.
IMPORTANT: Firmly hold the chopstick on the sliding
table on both the push stroke and the return. You only
let up on the finger pressure when you are ready to
rotate the chopstick for a subsequent cut.
Never push the chopstick all the way off the blade! Use
90% of the blade and start your return stroke before the
blank passes off the end of the blade. If you push the
chopstick off the far end of the blade, remove the chopstick
from the sliding table before pulling the table back. Failure
to do so may damage the blade. The chopstick can be
rotated and reinserted on the sliding table once the table is
pulled back.
Using a smooth steady stroke, make the first cut and
Figure 11
return. Remember: hold the chopstick tightly on both
the push and the return stroke. Rotate the chopstick 90
degrees, make sure it is against the stop and make the
second cut. Repeat for the 3rd and 4th cuts. The result
should be a perfect pyramidal finial at the end of each
chopstick (Fig. 9).
NOTE: ALWAYS REMOVE THE SAW BLADE AFTER
CUTTING THE ENDS OF YOUR CHOPSTICKS. NEVER
USE THE PLANE OR ALLOW OTHERS TO USE THE
PLANE WITH THE SAW BLADE INSTALLED!
If (for whatever reason), the finial is not perfect, loosen
the adjustable stop and move it toward the sliding table a
small distance. Re-tighten the stop and re-cut the nials on
both chopsticks so they are now the same (shorter) length.
8. Finishing the Chopsticks
Your newly made chopsticks should feel smooth in the
hand. If there are corners that feel sharp, lightly sand with
400 grit sandpaper. You do not need to sand the entire
chopstick, just those areas that feel either sharp or rough.
For multiple-use chopsticks, you need to apply a finish.
Included with your Chopstick Master™ is a small amount
of food-grade mineral oil. With a paper towel, apply a small
amount to each chopstick, let sit for a couple of minutes
and wipe clean. After each use, wipe your chopsticks
clean. For a thorough cleaning, wipe with rubbing alcohol.
Do not wash chopsticks nished with mineral oil in water. If
the chopsticks look dull, apply another coat of food-grade
mineral oil (depending on use, this may be several times
a year). With proper care, a pair of handmade chopsticks
can last a lifetime.
Other nishing options include varnish, paint, lacquer, or
shellac. You can also gild with metal leaf, or explore many
other decorative ideas to make your chopsticks unique!

Other manuals for Chopstick Master

1

This manual suits for next models

1

Other Bridge City Tools manuals

Bridge City HP-9v2 User manual

Bridge City

Bridge City HP-9v2 User manual

Bridge City Chopstick Master User manual

Bridge City

Bridge City Chopstick Master User manual

Bridge City HP-12 User manual

Bridge City

Bridge City HP-12 User manual

Bridge City HP-8 User manual

Bridge City

Bridge City HP-8 User manual

Bridge City Signature Series User manual

Bridge City

Bridge City Signature Series User manual

Bridge City Pencil Precision PP-1 User manual

Bridge City

Bridge City Pencil Precision PP-1 User manual

Bridge City DJ-3 User manual

Bridge City

Bridge City DJ-3 User manual

Bridge City HP-9v2 User manual

Bridge City

Bridge City HP-9v2 User manual

Bridge City HP-14 User manual

Bridge City

Bridge City HP-14 User manual

Popular Tools manuals by other brands

Sioux Tools 65589 instructions

Sioux Tools

Sioux Tools 65589 instructions

Harbor Freight Tools Pittsburgh 64983 Operator/owner manual & safety instructions

Harbor Freight Tools

Harbor Freight Tools Pittsburgh 64983 Operator/owner manual & safety instructions

Panasonic IO-Link SC-LG-CEF user manual

Panasonic

Panasonic IO-Link SC-LG-CEF user manual

ReelCraft RS7000 Series operating instructions

ReelCraft

ReelCraft RS7000 Series operating instructions

molex 57225-7100 operating manual

molex

molex 57225-7100 operating manual

Gesswein Power Hand 2X Z-STX instruction manual

Gesswein

Gesswein Power Hand 2X Z-STX instruction manual

Multiplex Merlin Tuning operating instructions

Multiplex

Multiplex Merlin Tuning operating instructions

Cessna 150 1968 owner's manual

Cessna

Cessna 150 1968 owner's manual

Skil 1758 Original instructions

Skil

Skil 1758 Original instructions

Sealey AK4404 instructions

Sealey

Sealey AK4404 instructions

Forch 4915 21 manual

Forch

Forch 4915 21 manual

Facom VR.RJ2500 Original instructions

Facom

Facom VR.RJ2500 Original instructions

Cornwell Tools CAT-2PST Operating instructions, warning information, parts breakdown

Cornwell Tools

Cornwell Tools CAT-2PST Operating instructions, warning information, parts breakdown

ete IR1759-MK5-AT3130-EDCont Operation and maintenance manual

ete

ete IR1759-MK5-AT3130-EDCont Operation and maintenance manual

Greenlee 1904Pg instruction manual

Greenlee

Greenlee 1904Pg instruction manual

Ingersoll-Rand 121 Product information

Ingersoll-Rand

Ingersoll-Rand 121 Product information

Parkside PAMFW 10.8 A1 Operation and safety notes

Parkside

Parkside PAMFW 10.8 A1 Operation and safety notes

CAN Smart Tweezers user manual

CAN

CAN Smart Tweezers user manual

manuals.online logo
manuals.online logoBrands
  • About & Mission
  • Contact us
  • Privacy Policy
  • Terms and Conditions

Copyright 2025 Manuals.Online. All Rights Reserved.