Ph: 905.636.9865 Fax: 905.636.9879
E-mail: info@bti-chargers.com Website: www.bti-chargers.com
•Make sure the AC supply cord is in good condition and that it is securely connected to the
charger before use.
•Make sure the DC cables and DC connector are good condition before use.
•Do not use the battery charger if there are any signs of physical damage that may have
affected the integrity of the case, exposing internal components.
•Never disconnect the battery while charging: this could cause sparks.
•Never use the equipment in the rain, in areas used for washing down equipment or in damp
areas.
•Gases generated by some battery types during charging are explosive. Do not smoke in the
vicinity of the batteries.
•Do not operate the charger in an explosive environment.
•Do not operate the charger near flammable liquid such as gasoline, oil or other volatile
substances.
•Do not use on damaged battery packs.
•Never charge a frozen battery.
•Pay attention to any warnings provided by the battery manufacturer and equipment
manufacturer.
HEALTH HAZARD
•Use protective glasses and gloves during battery maintenance. A damaged or leaking battery
can cause chemical burns on contact.
•In case of contact with battery acid, wash the affected parts with fresh water and seek
medical attention.
OPERATION
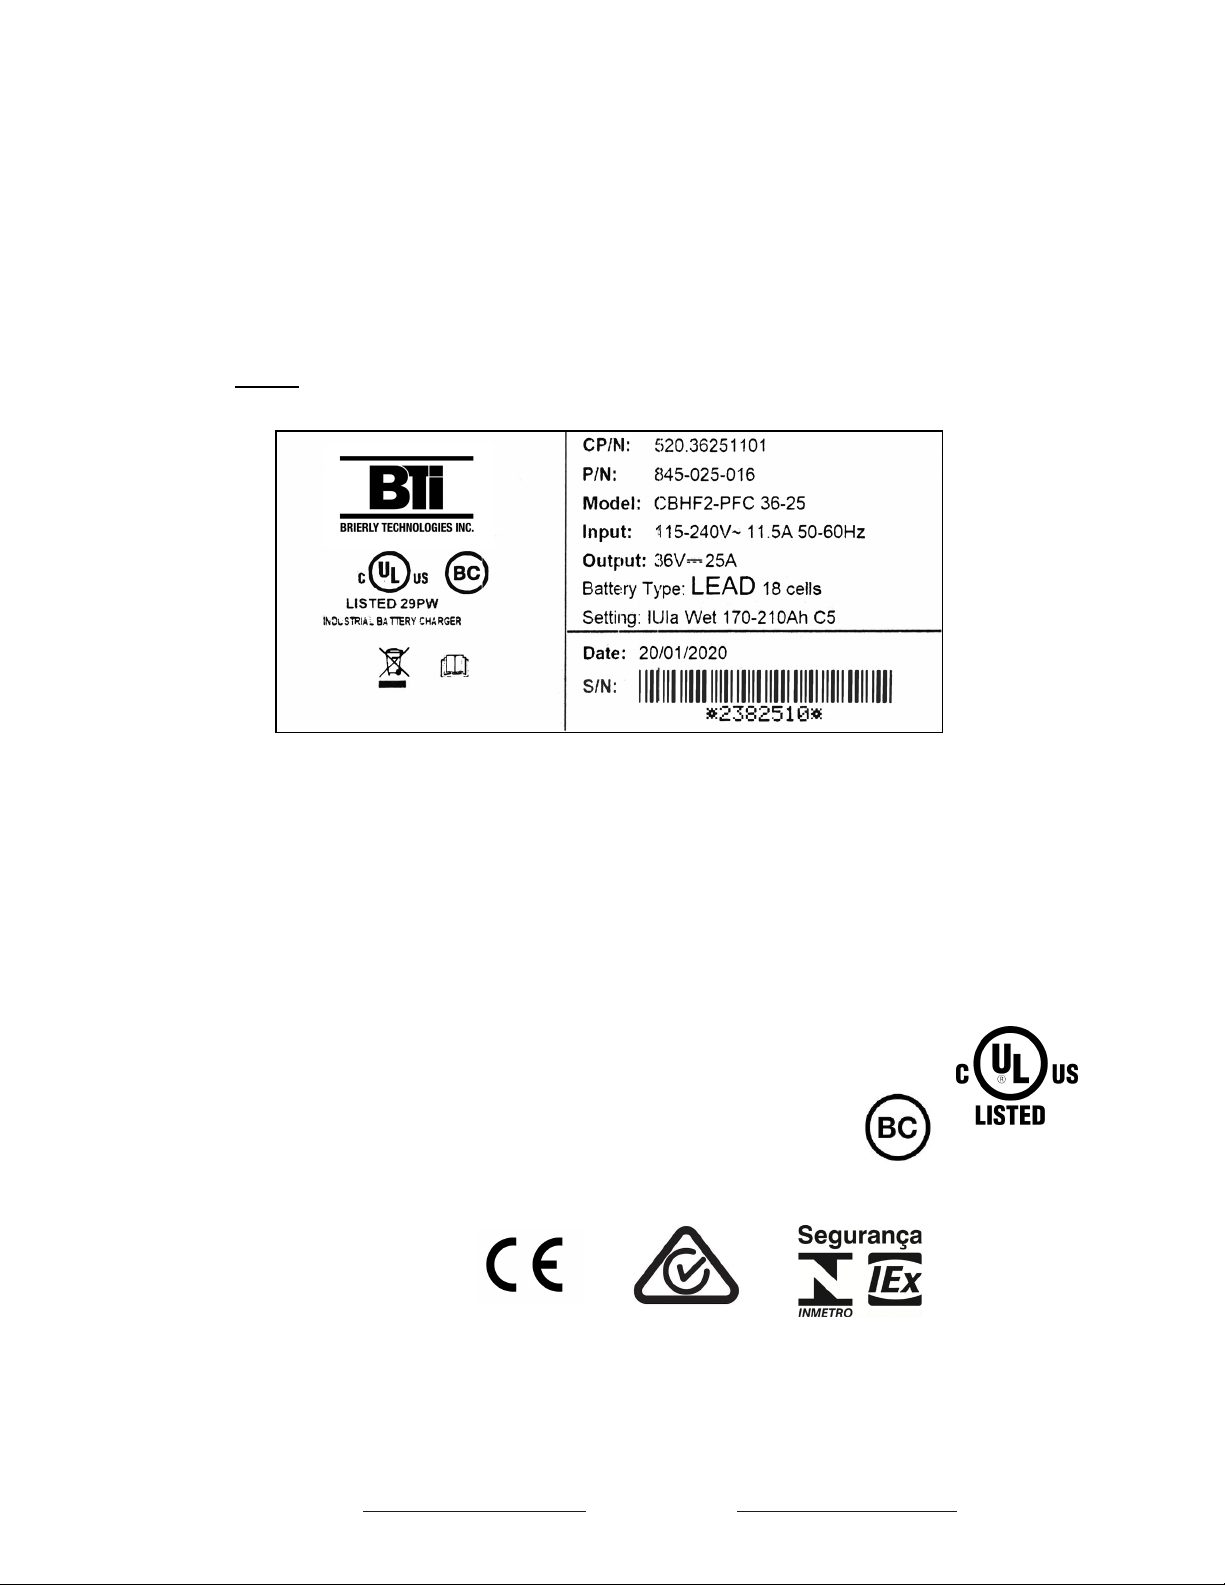
•IMPORTANT:Check that the battery type setting of the charger is suitable for the battery type
•Check the polarity of the battery pack, and connect to the battery charger to the batteries.
•Plug the charger into the AC supply.
•The charger will display the following during start-up:
“bti”
the firmware version number in 3 successive screens, example:
o010-
o103-
o000
The nominal voltage setting, example: 24.0U
The current setting, example: 25.0A
The selection of charging curve memory location, example: 014c
An indicator of the battery type setting, example: AGM
•The charger will then read the battery pack voltage, example: 25.2U
•If the battery pack voltage cannot be read, the error “bat”will be shown.
•If all is OK, a relay click will be heard, and the output begins with the bulk charging phase, with
the red led ON.
•When the red led is ON and the yellow led is ON, the charger is in the second phase.
•When the yellow led is ON the charger is in the final phase
•When the green led is ON, it indicates the charge is complete. There may still be output to the
batteries depending on the charging curve selected.
•Before using the batteries, disconnect the AC power to the charger, then disconnect the
charger from the battery pack.
•If errors occur, the charging process will stop and an error code will be shown on the display.
See the table of errors on the following page.