manuals.online logo
Brands
  1. Home
  2. •
  3. Brands
  4. •
  5. Brinly
  6. •
  7. Farm Equipment
  8. •
  9. Brinly DT-400 BH User manual

Brinly DT-400 BH User manual

L-1383-02
OWNER'S MANUAL
For the latest product updates and setup tips:
Visit us on the web!
www.brinly.com
MODEL:
DT-400 BH
Important: This manual contains information for the safety of
persons and property. Read it carefully before assembly and
operation of the equipment!
Assembly
Installation
Operation
Repair Parts
DETHATCHER
All manuals and user guides at all-guides.com
all-guides.com
L-1383-02
CONGRATULATIONS on your new Brinly-Hardy Dethatcher!
Your dethatcher has been designed, engineered and
manufactured to give you the best possible dependablility and
performance.
Should you experience any problem you can not easily
remedy, please do not hesitate to contact our knowledgable
customer service department toll-free at 1-877-728-8224. We
have competent, well trained technicians to help you.
Please read and retain this manual. The instructions will
enable you to assemble and maintain your dethatcher
properly. And please, always observe the "Safety Rules".
Read and Observe the "Safety Rules".
Follow a regular schedule in maintaining, caring-for and using
your Brinly-Hardy Dethatcher.
SAFETY RULES .............................................................2
REFERENCE...................................................................3
EXPLODED REFERENCE .............................................4
PARTS REFERENCE......................................................5
ASSEMBLY .....................................................................6-9
MAINTENANCE...............................................................10
OPERATION....................................................................10
PRODUCTS.....................................................................11
WARRANTY.....................................................................11
RULES FOR SAFE OPERATION
Know controls and how to stop safely, READ THE
OWNER'S MANUAL before operating.
Do not allow children to operate the vehicle, do not
allow adults to operate without proper instruction or
without having read the owner's manual.
Do not carry passengers. Keep children and pets a
safe distance away.
Always wear substantial footwear. Do not wear loose
fitting clothing that can get caught in moving parts.
Keep your eyes and mind on your tractor/attachment
and area being covered. Do not let other interests
distract you.
Stay alert for holes in the terrain and other hidden
hazards.
Do not drive close to creeks, ditches and public
highways.
Watch out for traffic when crossing or near roadways.
When using any attachment, don't allow anyone near
the vehicle while in operation.
Keep the vehicle and attachment in good operating
condition and keep safety devices in place.
Keep all nuts, bolts and screws tight to be sure the
equipment is in safe working condition.
The vehicle and attachment should be stopped and
inspected for damage after striking a foreign object.
The damage should be repaired before restarting and
operating the equipment.
See tractor equipment owner's manual for safe
. operation of the equipment.
OPERATING HINTS
2.
CUSTOMER RESPONSIBILITIES
TABLE OF CONTENTS
!
This symbol will help to point out important
safety precautions throughout this manual. It
means - ATTENTION!
BECOME ALERT! Your safety is involved.
Never operate De-thatcher without safety wires
installed.
Always disconnect De-thatcher from tractor
when cleaning or servicing unit.
Do not stand or ride on De-thatcher, bodily
injury could result.
Only tow your De-thatcher behind vehicles for
which it was designed, riders and lawn/
garden tractors.
To avoid personal injury and/or equipment
damage, never exceed the recommended
operating speed range of 3 to 5 M.P.H.
When backing, carefully back straight to avoid
jack-knifing which could result in damage to
equipment.
!
!
!
All manuals and user guides at all-guides.com
L-1383-02
Tools Required for Assembly:
* 1/2" wrench (2)
* Medium Size Adjustable Wrenches
or20
* Adjustable Wrench and set of open wrenches
3
All manuals and user guides at all-guides.com
L-1383-02
Parts Reference
4.
18
14
16
23
23 20
8
19 21 9
18 24
18
19
21 22
13 6 18
17
12
2
3
11
21
19
19 21
5
4
15
All manuals and user guides at all-guides.com
L-1383-02
5.
REF. NO.
1
2
3
4
5
6
7
8
9
10
11
12
13
14
15
16
17
18
19
20
21
22
23
PART NO.
B-5925
B-3861
D-146P
R-616
R-618
R-713-10
R-1541
R-887-10
R-889-10
R-890-10
R-891
R-892-10
R-1455-10
R-885-10
R-1504
1M1648P
10M1032P
11M1016P
30M1000P
30M1600P
40M1000P
45M1111P
45M1717P
DESCRIPTION
Logo Decal
Drawbar Pin
Hairpin Cotter, 1/8"
Tine
Special Washer
Tray Mount Bracket
Adjustment Decal
Wheel Mount Bracket
End Plate (R.H.)
End Plate (L.H.)
Wheel
Clevis
Pull Bar
Tine Tray
Safety Wire
Hex Head Bolt, 1/2" x 3"
Carriage Bolt, 5/16" x 2"
Carriage Bolt, 5/16" x 1"
Hex Nut, 5/16"
Hex Nut, 1/2"
Lock Washer, 5/16"
Flat Washer, 5/16"
Flat Washer, 1/2"
QTY.
1
1
1
10
10
2
1
2
1
1
2
2
2
1
2
2
2
26
28
4
28
4
4
Parts List
INST
ALLA
T
T
TION
A
A
QUESTIONS
?
MISSING P
ARTS?
P
P
REPLACEMENT P
ARTS?
P
P
ST
T
G
T
OP
S
ST
E
T
O
OP
P
lease call our
C
ustomer
S
ervice
Department
T
oll-Free at
T
T
8
77.7
28
.
822
4
or
w
www.customerservice
@y
@
brinl
y
.com
To Order Parts Call:
877-728-8224
Visit us on the web:
www.brinly.com
All manuals and user guides at all-guides.com
L-1383-02
6.
Figure 1.
Figure 2.
Dimples up
5/16" Hex Nut
Qty. 10
19
5/16" Lock Washer
Qty. 10
21
5/16" x 1" Carriage Bolt
Qty. 10
18
19
21
5
18
Special
W
ashe
W
r
Qt
y
t
. 1
y
0
5
S
e
ci
W
a
W
W
Qt
y
t
.1
yy
5
15 15
15
FRONT
NOTE: Insert each of the two safety wires
(13) through the coils as shown.
Be sure each end is bent completely over
the straight portion of the safety wire.
!
Failure to install safety wires can result
in personal injury if a tine should dis-engage
from the tine tray.
WARNING!
Safety Wire
bent end
All manuals and user guides at all-guides.com
all-guides.com
L-1383-02
7.
Figure 3.
Figure 4.
5/16" Hex Nut
Qty. 4
19
5/16" Lock Washer
Qty. 4
21
5/16" x 1" Carriage Bolt
Qty. 4
18
5/16" x 1" Carriage Bolt
Qty. 4
18
5/16" Lock Washer
Qty. 4
21
5/16" Hex Nut
Qty. 4
19
5/16" Flat Washer
Qty. 4
22
NOTE: Hand tighten drawbar
fasteners until final adjustments
are complete. (see fig. 9)
18
22
21
19
19
21
18
NOTE: Tine and Tray Mount
Bracket share the back, left
tray hole.
All manuals and user guides at all-guides.com
L-1383-02
8.
Figure 5.
5/16" Hex Nut
Qty. 4
19
5/16" Lock Washer
Qty. 4
21
5/16" x 1" Carriage Bolt
Qty. 4
18
Figure 6.
18
21
19
5/16" Lock Washer
Qty. 2
21
5/16" x 2" Carriage Bolt
Qty. 2
17
Drawbar Pin
Qty. 1
2Hairpin Cotter, 1/8"
Qty. 1
3
5/16" Hex Nut
Qty. 2
19
17
2
21
19 3
All manuals and user guides at all-guides.com
L-1383-02
9.
Figure 8.
Figure 7.
1/2" Flat Washer
Qty. 4
23
1/2" x 3", Hex Bolt
Qty. 2
16 1/2" Hex Nut
Qty. 4
20
16
20
20
23
23
5/16" Hex Nut
Qty. 4
19
5/16" Lock Washer
Qty. 4
21
5/16" x 1" Carriage Bolt
Qty. 4
18
19
21
18
All manuals and user guides at all-guides.com
L-1383-02
OPERATION
Tine ACTION- Grass should be less than 3" tall for proper
tine action.
When in use, all tines on the De-thatcher should deflect
back and "flip" the thatch forward as shown in Fig. 6.
If the tines seem to drag without flipping forward, the tine
tray is too low and should be raised.
If all the tines stay in the free position, the tray should be
lowered.
Make adjustments as necessary, up or down, by no more
than 1/4" each time, until proper results are achieved.
MAINTENANCE
The key to years of trouble-free service is to keep your
Sweeper clean and dry.
Occasionally check all moving parts for free movement and,
if necessary, lubricate with oil.
Should rust develop, sand lightly and then paint area with
enamel.
Periodically check all fasteners for tightness.
!
!
10
Level Adjustment
Height Adjustment
Flat Surface 1/2” Shim (board)
Figure 9.
Select a smooth flat surface such as a driveway,
sidewalk, garage floor etc.
Attach the Dethatcher to your rider tractor using
Drawbar Pin (2) and Hairpin Cotter (3)
Place tines on 1/2” shim to support the front and
back row of tines.
Wheels must be on the flat surface as shown
Tighten all bolts from Fig. 2 and Fig. 6 to hold this
position
MOUNTING AND ADJUSTMENT
All manuals and user guides at all-guides.com
L-1383-02
WARRANTY REGISTRATION CARD
To register your new product for warranty, please complete and return this
card.
Name:______________________________________________
Address:____________________________________________
City:_______________________ State:_____ Zip:__________
Phone:______________________________________________
Product Purchased:___________________ Model#:_________
Packing# (on carton):__________________________________
Where purchased:_____________________Date:___________
Type of ATV Owned: Make: __________________________
Model:__________________________
Engine CC:_____________________________
Size of Lawn:___1/4-1/2acre ___1/2-1acre___1-5 acre___5+
Do you garden?______ Use a tractor?______ Tiller?______
Your Occupation?_____________________________________
Your Email Address?__________________________________
Quality Insurance
Dear Customer,
We are very proud of our quality and endeavor to
produce each product to meet high standards. Should
your purchase not meet your expectations, we have a
Quality Insurance Policy.
If you purchase a product and a part is missing or
defective, please inform us of the problem on the
"Comments" section of the Warranty Registration Card
in this manual or online, or feel free to contact us toll
free at 1-877-728-8224.PLEASE DO NOT RETURN THE
PRODUCT TO THE STORE!
We will make every effort to ship a new replacement
part to you within 24 hours at no charge.
Thank you,
Jane Hardy
President,
Brinly-Hardy Company
Limited Warranty
Brinly-Hardy Company warrants only to the original retail purchaser that this product will remain free of defects in
workmanship and materials under normal use and service for a period of two (2) years (NOTE: ninety (90) days for
commercial or rental use) commencing with the date of purchase.
Any parts found to be defective within the warranty period will be replaced, with proof of date of purchase, at Brinly-Hardy
Company's expense. Our obligation under this warranty is expressly limited to replacement or repair, at our option of parts,
which are defective in material or workmanship within thirty (30) days of receipt of the parts. This warranty does not apply to
damage caused by unreasonable use, including failure to provide necessary maintenance, nor does it apply to any
transportation or labor charges.
WE MAKE NO OTHER EXPRESS WARRANTY NOR IS ANYONE AUTHORIZED TO MAKE ANY ON OUR BEHALF. ANY
IMPLIED OR STATUTORY WARRANTIES, INCLUDING ANY WARRANTY OF MERCHANTABILITY OR FITNESS FOR A
PARTICULAR PURPOSE, ARE LIMITED TO THE DURATION OF THIS WRITTEN WARRANTY. WE SHALL NOT BE LIABLE
FOR CONSEQUENTIAL OR INCIDENTAL DAMAGES OF ANY KIND.
MADE IN THE U.S.A.
BRINLY-HARDY COMPANY TOLL-FREE 1-877-728-8224
11.
Brinly sprayers are designed to be easy to
use, extremely accurate, and long lasting.
Our in-line mounted tank design means that
even the biggest tank is easy to maneuver
and can fit through a garden gate. Each unit
comes with a tractor-mounted on/off control.
No more rust or dents with these poly lawn
rollers. These units are much easier to deal
with than the steel versions. They have
rounded end caps that won’t tear or gouge
the lawn when truning. Erase the harmful
effects of frost heaving and moles, or pack
down newly sewn seed or sod.
Brinly’s garden tractor items offer the
largest selection to turn your garden
tractor into a year-round tool. We have
box scrapers, blades, cultivators, disk
harrows, and even a plow! Remember
that a sleeve hitch is required to hook up
these items to your garden tractor.
Caring for the quality of your lawn
with the products from
Brinly-Hardy Company
Register Online at: www.brinly.com
All manuals and user guides at all-guides.com
all-guides.com

Other manuals for DT-400 BH

1

Other Brinly Farm Equipment manuals

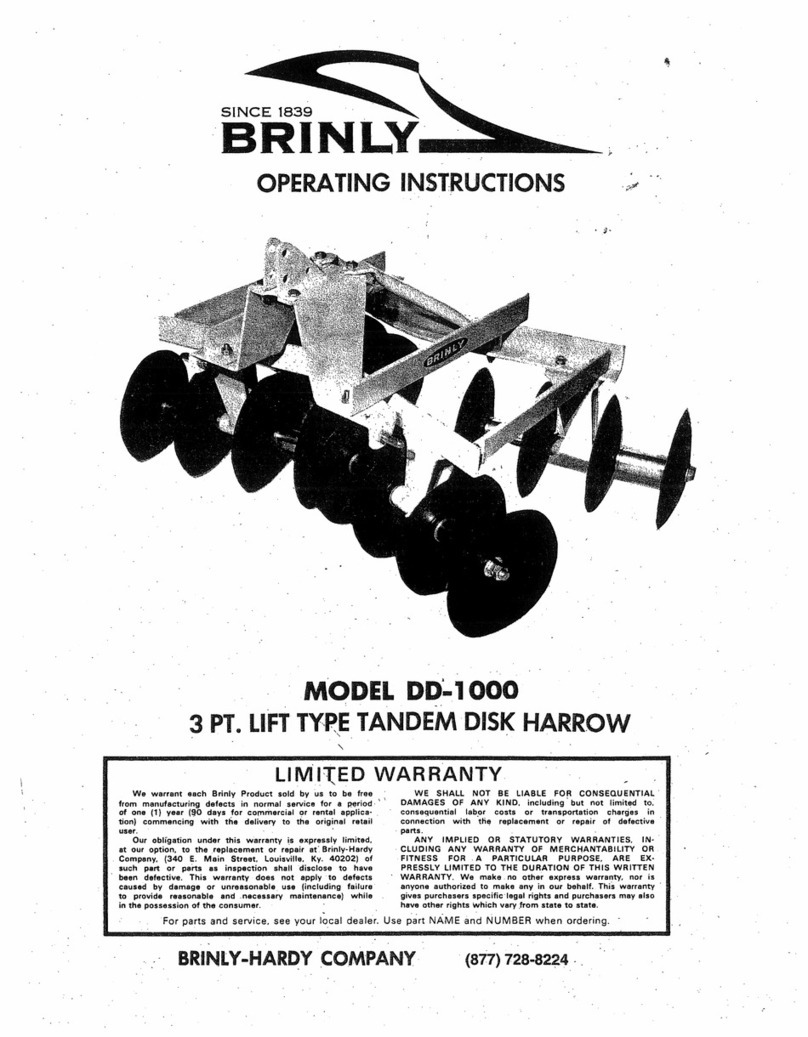
Brinly DD-1000 User manual

Brinly

Brinly DD-1000 User manual

Brinly SAT2-40BH1-P User manual

Brinly

Brinly SAT2-40BH1-P User manual

Brinly SPZ-9 User manual

Brinly

Brinly SPZ-9 User manual

Brinly PP-1200 User manual

Brinly

Brinly PP-1200 User manual

Brinly PP-51 Series User manual

Brinly

Brinly PP-51 Series User manual

Brinly PRC-241BH User manual

Brinly

Brinly PRC-241BH User manual

Brinly DT-48BH User manual

Brinly

Brinly DT-48BH User manual

Brinly SA2-40BH1-P User manual

Brinly

Brinly SA2-40BH1-P User manual

Popular Farm Equipment manuals by other brands

Cub Cadet FastAttach 19A30037100 Operator's manual

Cub Cadet

Cub Cadet FastAttach 19A30037100 Operator's manual

FarmTek FodderPro 2.0 Micro System manual

FarmTek

FarmTek FodderPro 2.0 Micro System manual

Unverferth BRENT V1100 manual

Unverferth

Unverferth BRENT V1100 manual

KLUNDER KL 2000 Operating and maintenance instructions

KLUNDER

KLUNDER KL 2000 Operating and maintenance instructions

Raven AutoBoom Willmar Eagle 8500 installation manual

Raven

Raven AutoBoom Willmar Eagle 8500 installation manual

Landoll 4620-24 Operator's manual

Landoll

Landoll 4620-24 Operator's manual

Simplicity LC Instructions and parts list

Simplicity

Simplicity LC Instructions and parts list

Redexim VERTI-DRAIN 7626 user manual

Redexim

Redexim VERTI-DRAIN 7626 user manual

Teagle Tomahawk 404M installation guide

Teagle

Teagle Tomahawk 404M installation guide

FIELDKING No Till Multi Crop Drill Operator's manual

FIELDKING

FIELDKING No Till Multi Crop Drill Operator's manual

Raven SmarTrax MD installation manual

Raven

Raven SmarTrax MD installation manual

Raven SmarTrax installation manual

Raven

Raven SmarTrax installation manual

Farmi Forest Corporation 90 OPERATION, MAINTENANCE AND SPARE PARTS MANUAL

Farmi Forest Corporation

Farmi Forest Corporation 90 OPERATION, MAINTENANCE AND SPARE PARTS MANUAL

Land Pride RB3772 Operator's manual

Land Pride

Land Pride RB3772 Operator's manual

CZAJKOWSKI STK300 user manual

CZAJKOWSKI

CZAJKOWSKI STK300 user manual

Pottinger TOP 612 Operator's manual

Pottinger

Pottinger TOP 612 Operator's manual

Redexim Level-Spike 1700 Operator and parts manual

Redexim

Redexim Level-Spike 1700 Operator and parts manual

aivituvin AIR 26 instruction manual

aivituvin

aivituvin AIR 26 instruction manual

manuals.online logo
manuals.online logoBrands
  • About & Mission
  • Contact us
  • Privacy Policy
  • Terms and Conditions

Copyright 2025 Manuals.Online. All Rights Reserved.