Brinly SAT-40 BH User manual

L-1643-01-BH
OWNER'S MANUAL
For the latest product updates and setup tips:
Visit us on the web!
www.brinly.com
MODEL:
SAT-40 BH
Important: This manual contains information for the safety of
persons and property. Read it carefully before assembly and
operation of the equipment!
Assembly
Installation
Operation
Repair Parts
40” LAWN AERATOR

L-1643-01-BH
the vehicle while in operation.
Keep the vehicle and attachment in good operating
condition and keep safety devices in place.
Keep all nuts, bolts and screws tight to be sure the
equipment is in safe working condition.
The vehicle and attachment should be stopped and
inspected for damage after striking a foreign object.
The damage should be repaired before restarting and
operating the equipment.
See tractor equipment owner's manual for safe
. operation of the equipment.
OPERATING HINTS
CONGRATULATIONS on your new Brinly-Hardy Lawn
Aerator! Your aerator has been designed, engineered and
manufactured to give you the best possible dependablility and
performance.
Should you experience any problem you can not easily
remedy, please do not hesitate to contact our knowledgable
customer service department toll-free at 1-877-728-8224. We
have competent, well trained technicians to help you.
Please read and retain this manual. The instructions will
enable you to assemble and maintain your dethatcher
properly. And please, always observe the "Safety Rules".
Read and Observe the "Safety Rules".
Follow a regular schedule in maintaining, caring-for and using
your Brinly-Hardy Lawn Aerator.
SAFETY RULES .............................................................2
TOOL REFERENCE........................................................3
EXPLODED REFERENCE..............................................4
PARTS REFERENCE.....................................................5
ASSEMBLY .....................................................................6-8
MAINTENANCE...............................................................9
OPERATION....................................................................9
PRODUCTS.....................................................................11
WARRANTY.....................................................................11
RULES FOR SAFE OPERATION
Know controls and how to stop safely, READ THE
OWNER'S MANUAL before operating.
Do not allow children to operate the vehicle, do not
allow adults to operate without proper instruction or
without having read the owner's manual.
Do not carry passengers. Keep children and pets a
safe distance away.
Always wear substantial footwear. Do not wear loose
fitting clothing that can get caught in moving parts.
Keep your eyes and mind on your tractor/attachment
and area being covered. Do not let other interests
distract you.
Stay alert for holes in the terrain and other hidden
hazards.
Do not drive close to creeks, ditches and public
highways.
Watch out for traffic when crossing or near roadways.
When using any attachment, don't allow anyone near
2.
CUSTOMER RESPONSIBILITIES
TABLE OF CONTENTS
!
This symbol will help to point out important
safety precautions throughout this manual. It
means - ATTENTION!
BECOME ALERT! Your safety is involved.
Tines have extremely sharp points. Wear
gloves handle with care.
Always disconnect Aerator from tractor
when cleaning or servicing unit.
Do not stand or ride on Aerator, bodily
injury could result.
Only tow your Aeroator behind vehicles for
which it was designed, riders and lawn/
garden tractors.
To avoid personal injury and/or equipment
damage, never exceed the recommended
operating speed range of 3 to 5 M.P.H.
When backing, carefully back straight to avoid
jack-knifing which could result in damage to
equipment.
To avoid damage to Tines, always engage trans-
port wheels when crossing concrete or asphalt
walks, drives and roads.
Do not overload tray, Maximum capacity, 100 lbs.
Store unit with tines against a wall or floor, to
avoid accidental contact.
Do not attempt to disconnect Aerator from
tractor with weight on tray.
!
!
!

L-1643-01-BH
Tools Required for Assembly:
* 1- Pair of work gloves
* 1- Pair of Pliers
* 1- Screwdriver (flat blade)
* 2- 7/16” Wrenches
* 1- 1/2” Wrech
or
* 2- Adjustable Wrenches
3

L-1643-01-BH
Parts Reference
4.
1
29
28
15
14
27
13
26
12
11
25
24
10
23
9
22
8
721
6
5
20
4
19
18
17
3
16
2
15
16
27
16 15
29
16
15
17
13
23
15
16

L-1643-01-BH
5.
REF. NO.
1
2
3
4
5
6
7
8
9
10
11
12
13
14
15
16
17
18
19
20
21
22
23
24
25
26
27
28
29
PART NO.
R-821-10
B-5925
B-5453-10
B-3593-10
B-4892-10
B-5832-10
B-5423-10
B-4888-10
R-891
B-4867
R-1946
D-146P
20M1012P
20M1016P
30M1000P
40M1000P
B-5456
B-3861
B-3922
1M1648P
30M1600P
40M1600P
45M1717P
B-3307-S
2M0820P
B-1673P
B-5425
B-4768
45M1111P
DESCRIPTION
Drawbar Clevis
Logo Decal
Tray
Drawbar
End Panel
Axel Assembly
Tine
Handle Assembly
Wheel
Handle Grip
Caution Decal
Hairpin Cotter
Round Head Screw, 5/16”x3/4”
Round Head Screw, 5/16”x1”
Hex Nut, 5/16”
Lock Washer, 5/16”
Flat Washer, 5/8” (thick)
Drawbar Pin
Caution Decal
Hex Bolt, 1/2”x3”
Hex Nut, 1/2”
Lock Washer, 1/2”
Flat Washer, 1/2"
Transport Lock Pin
Hex Bolt, 1/4”x1-1/4”
Hex Lock Nut, 1/4”
Spacer/Bearing Tube
Flat Washer, 5/8” (thin)
Flat Washer, 5/16”
QTY.
1
1
1
1
2
1
11
1
2
1
1
1
8
2
11
11
5
1
1
2
4
2
4
1
1
1
22
2
6
Parts List
INST
ALLA
T
T
TION
A
A
QUESTIONS
?
MISSING P
ARTS?
P
P
REPLACEMENT P
ARTS?
P
P
ST
T
G
T
OP
S
ST
E
T
O
OP
P
lease call our
C
ustomer
S
ervice
Department
T
oll-Free at
T
T
8
77.7
28
.
822
4
or
w
www.customerservice
@y
@
brinl
y
.com
To Order Parts Call:
877-728-8224
Visit us on the web:
www.brinly.com
L-1643-01-BH
6.
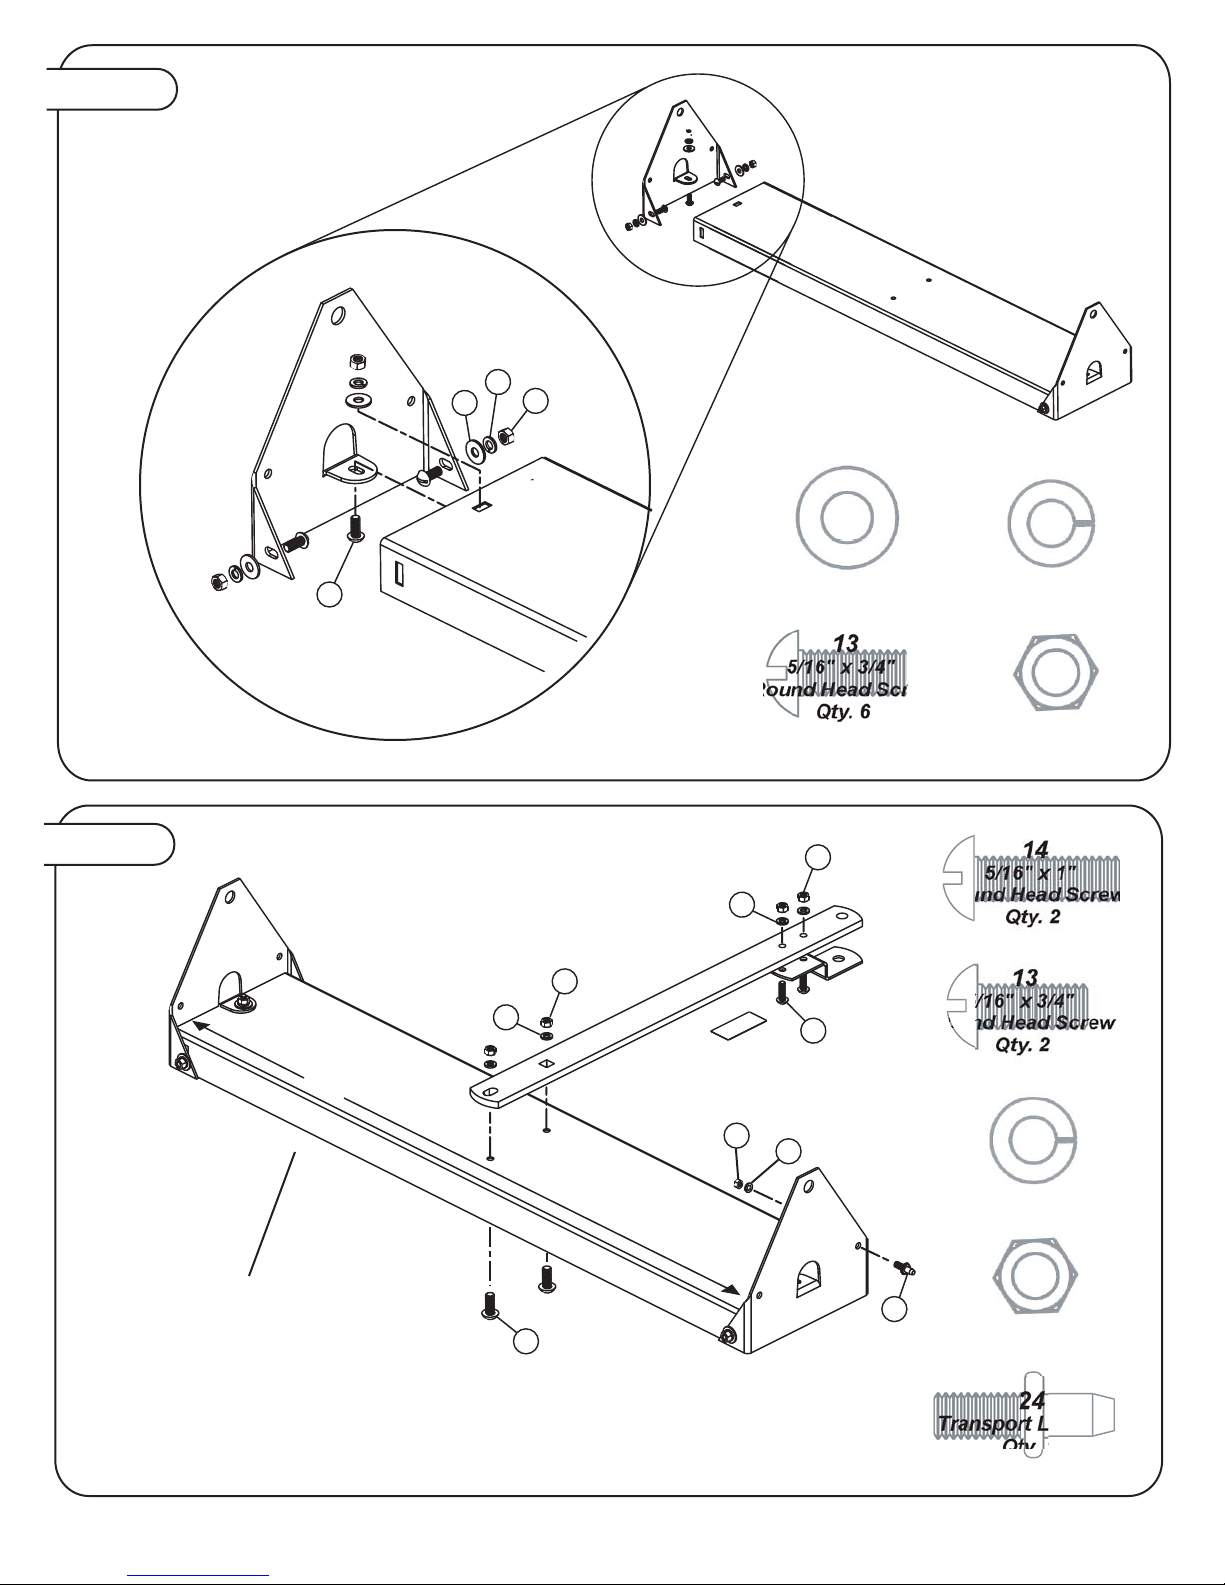
Figure 1.
Figure 2.
5/16" Hex Nut
Qty. 6
15
5/16" Lock Washer
Qty. 6
16
5/16" Flat Washer
Qty. 6
29
Round Head Screw
Qty. 6
r
r
5/16" Lock Washer
Qty. 5
16
5/16" Hex Nut
Qty. 5
15
5/
Roun
Qty. 2
o
5
5/16" x 1"
Round Head Screw
Qty. 2
14
Transport Lock Pin
Qty. 1
24
29
16
15
13
14
16
15
13
15
16
24
41”
Note: The inside distance between
the two end panels should be 41”
for proper assembly.
16
15
L-1643-01-BH
7.
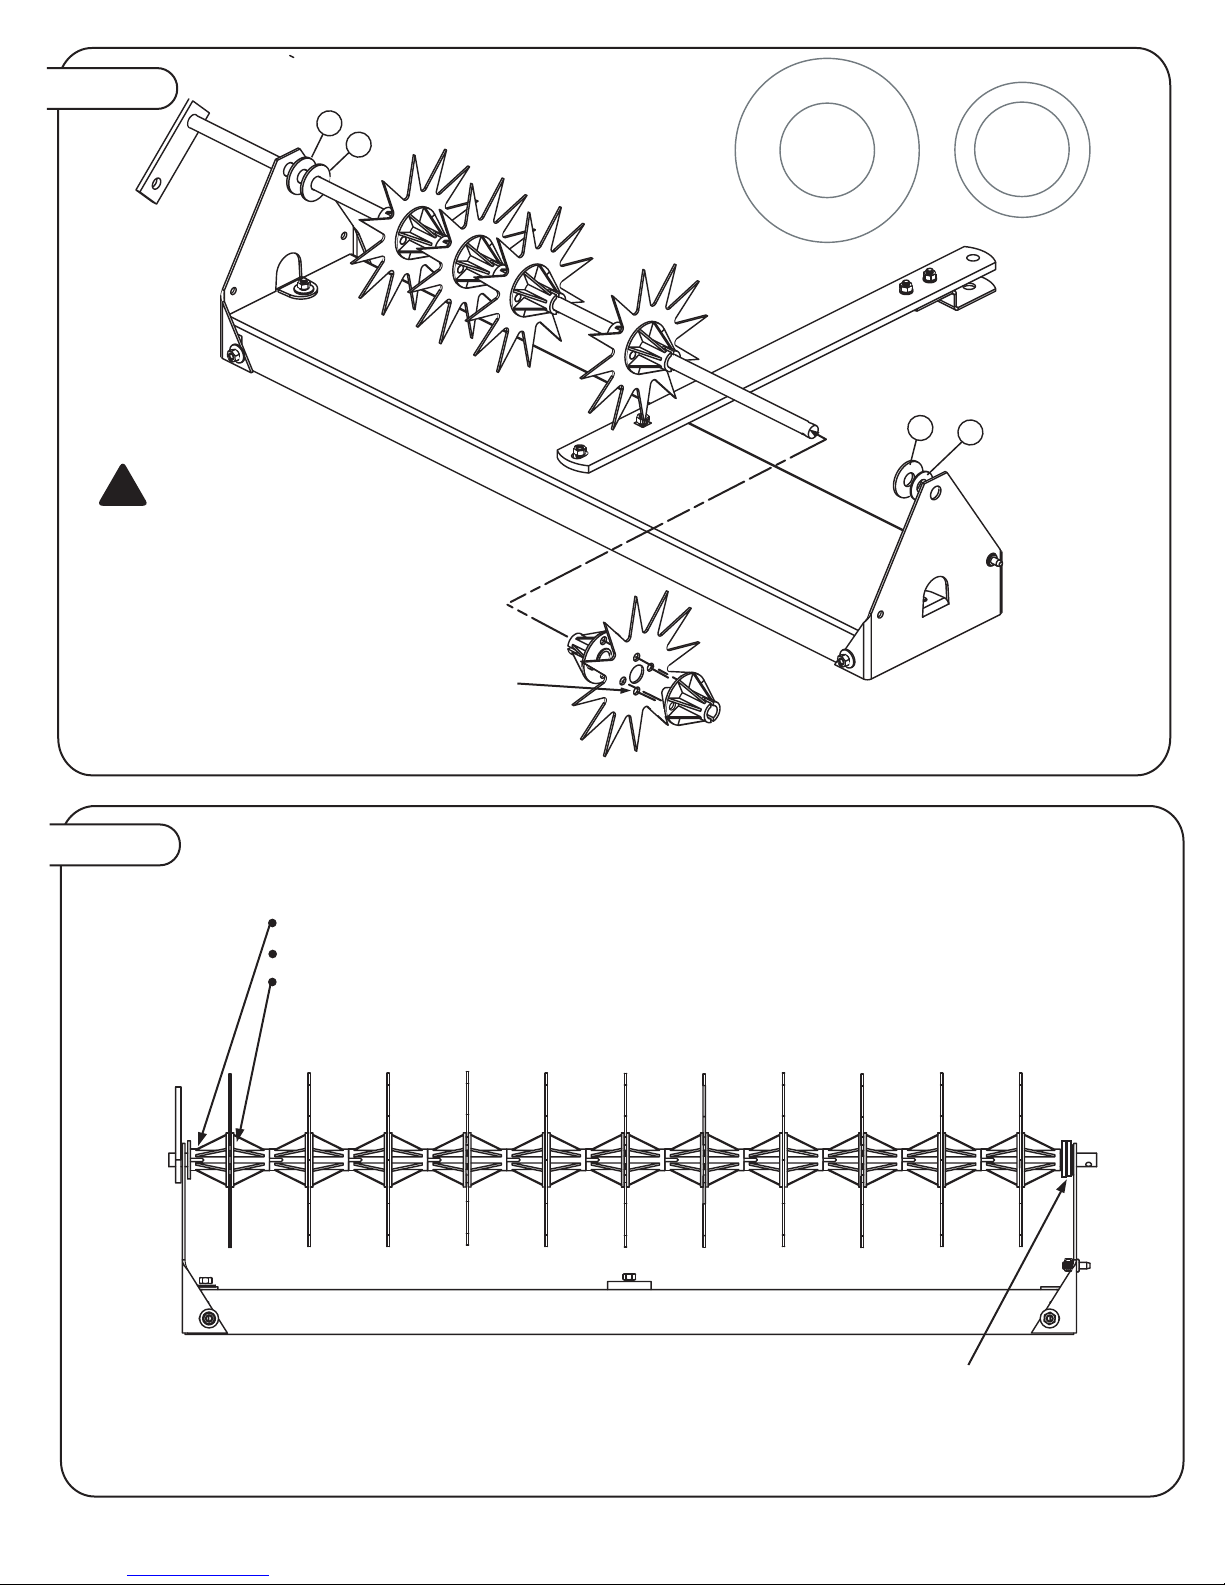
Figure 3.
5/8” Washer (thick)
Qty. 4
17
5/8” Washer (thin)
Qty. 2
28
Figure 4.
Note: Round projections on Spacer/Bearing
flanges must fit into small holes in Aerator
tines and into holes of opposite Spacer/
Bearing flange.
WARNING!
Tines have extremely sharp
points. Wear gloves and handle
with care
Note: Tines must not move from side to side inside opening of end panels.
If looseness exists, use additional 5/8” Thick or Thin Washers (17 or 28) inside
End Panel to eliminate any side movement.
Tine and Spacer/Bearing Tube Layout
Spacer Bearing Tube, small end first
Aerator Tine
Spacer Bearing Tube, large flange first
!
17
17
17 28
L-1643-01-BH
8.
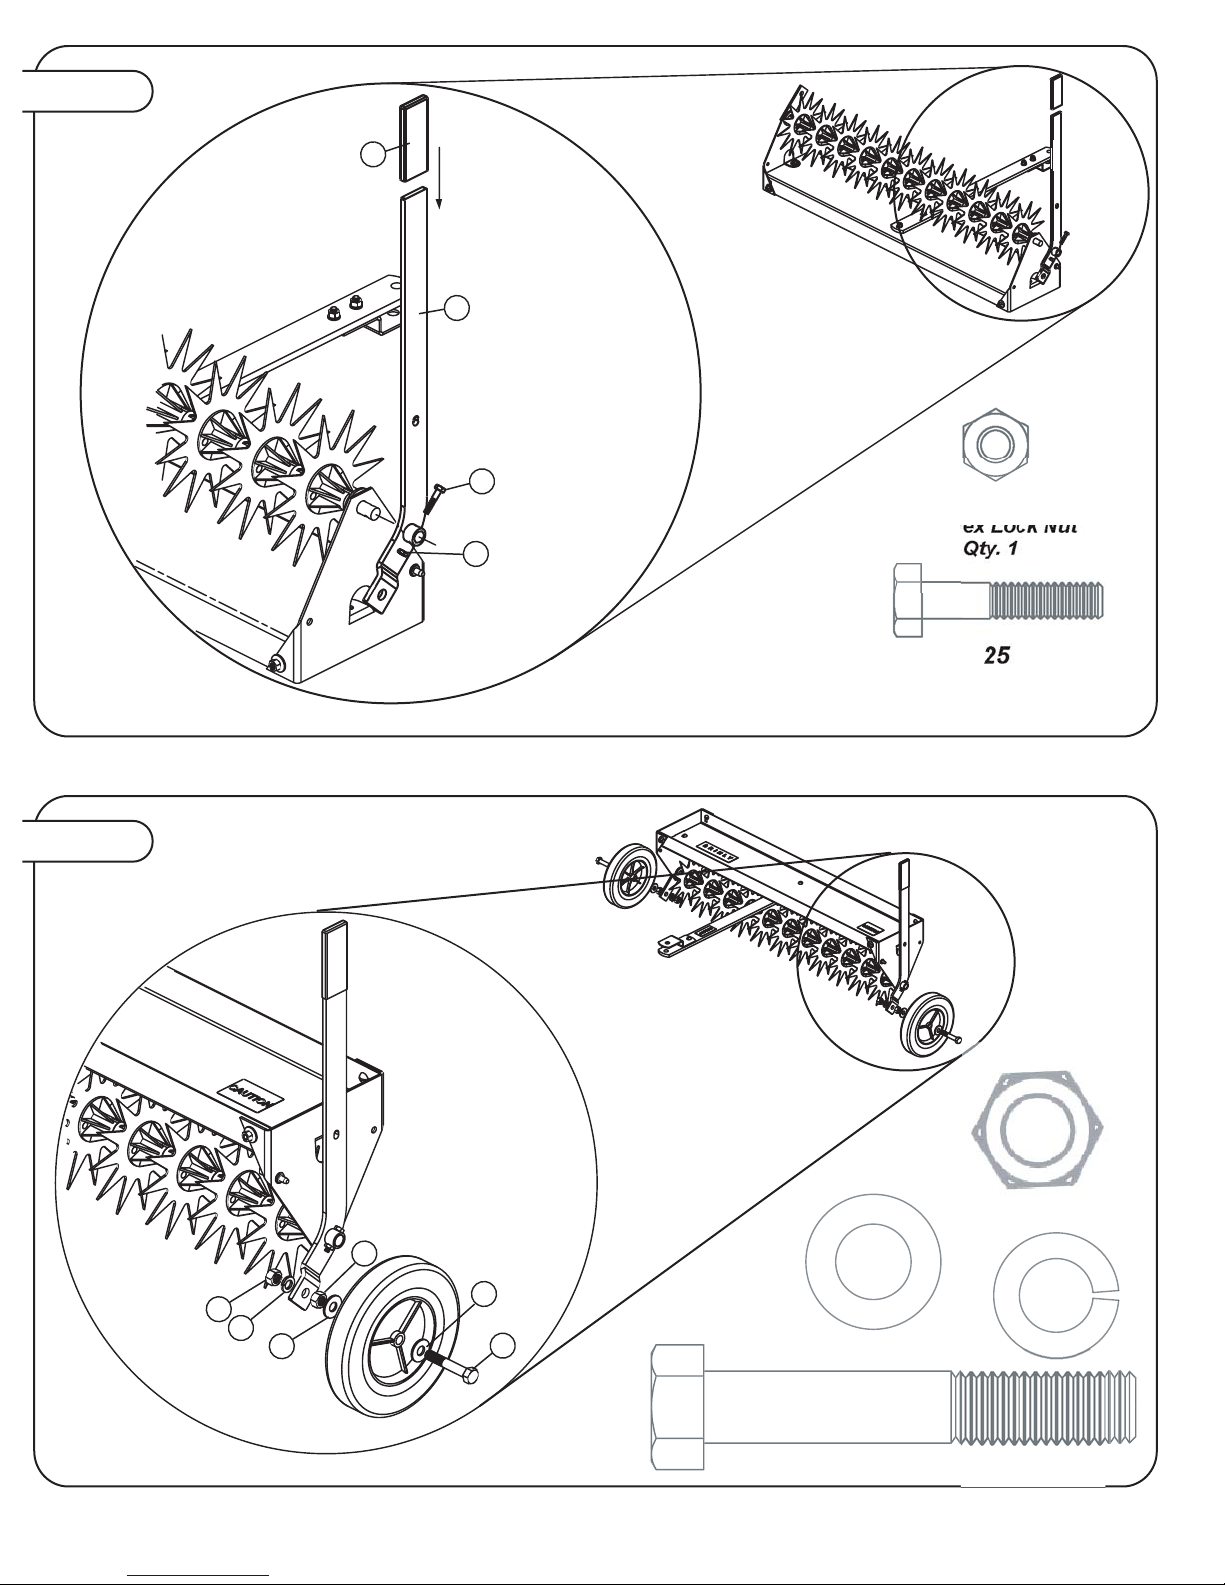
Figure 5.
Figure 6.
1/4" Hex Bolt
Qty. 1
25
1/4" Hex Lock Nut
Qty. 1
26
1/2" Flat Washer
Qty. 4
23
1/2” Lock Washer
Qty. 2
22
1/2"x3” Hex Bolt
Qty. 2
20
1/2" Hex Nut
Qty. 4
21
25
26
10
8
20
29
23
21
21
29
L-1643-01-BH
9.
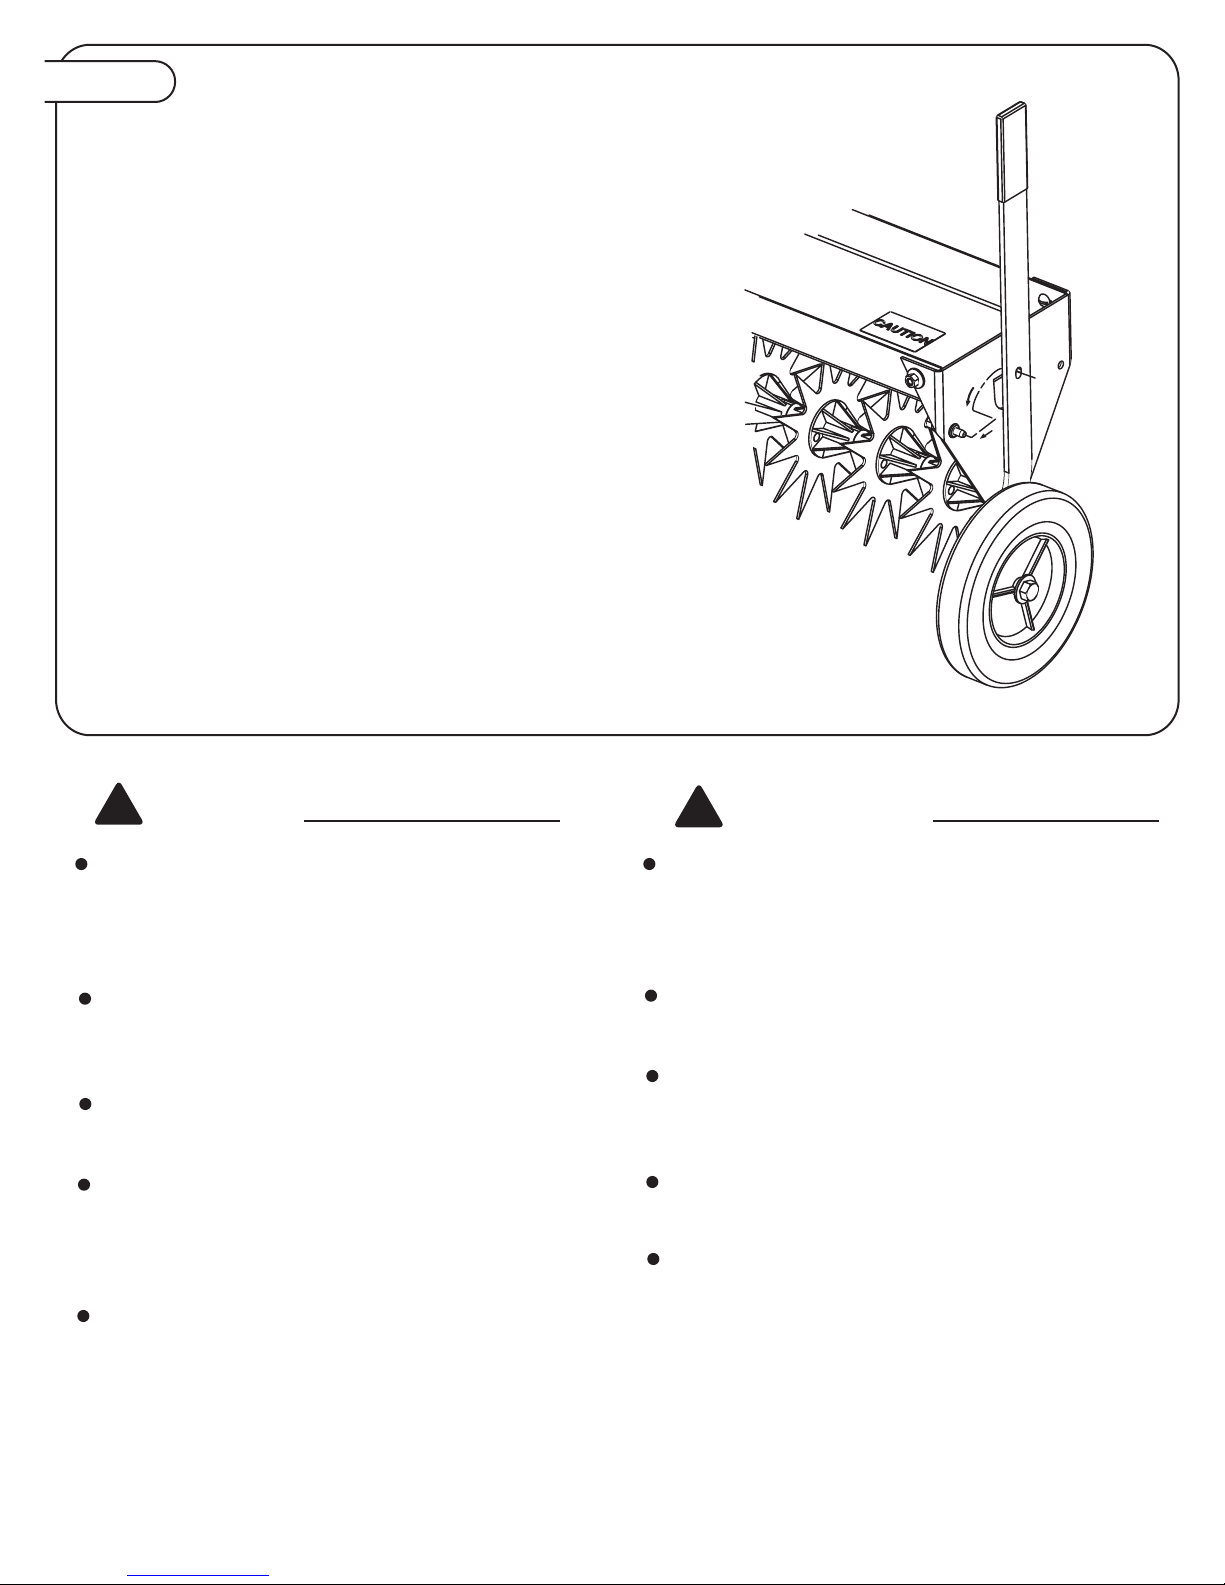
MOUNTING AND TRANSPORTING
Figure 7.
Attatch Aerator to your rider using Pin (18) and Hairpin
Cotter (12) supplied.
To place in Transport Position: Pull FORWARD on
Handle Assembly (8), pull out slightly and position
over Transport Lock Pin (24). Aerator rests on
wheels.
To place in Operating Position: Pull OUT on Handle
Assembly (releasing from Transport Position) and
move Handle BACK. Aerator should rest on Tines.
OPERATION
A moderate soil moisture content is important to
proper operation of the Aerator. Penetration will
not occur in extremely dry soil, and wet conditions
will cause the unit to “bog down”.
For best penetration, add extra weight to the Tray.
Concrete Patio Blocks are recommended, how-
ever any weight is suitable if it can be tied down.
If blocks are used, normally two are sufficient for
good penetration, provided lawn is not too dry.
Weight should be added with Drawbar attached to
Tractor Drawbar and may be secured with rubber
tie down straps, bailing wire, rope etc. Hole in
Tray End Plates can be used to secure bindings.
The Aerator may be used as a single independent
operation, or in most circumstances, can be used
while mowing your grass.
MAINTENANCE
The Aerator is essentially maintenance free. How-
ever, as with any steel product, it can rust. To
prevent or eliminate rust on Tines, apply a light coat
of oil.
For rust appearing on Tray or Mounting Brackets,
sand lightly and coat with enamel.
Periodically check the Aerating Tines and remove
any debris that might build up and restrict their
action.
Apply a drop of lubricating oil at each Tine/Bearing
Assembly before use.
Always store in a dry area.
!!

L-1643-01-BH
10
Notes:

L-1643-01-BH
WARRANTY REGISTRATION CARD
To register your new product for warranty, please complete and return this
card.
Name:______________________________________________
Address:____________________________________________
City:_______________________ State:_____ Zip:__________
Phone:______________________________________________
Product Purchased:___________________ Model#:_________
Packing# (on carton):__________________________________
Where purchased:_____________________Date:___________
Type of ATV Owned: Make: __________________________
Model:__________________________
Engine CC:_____________________________
Size of Lawn:___1/4-1/2acre ___1/2-1acre___1-5 acre___5+
Do you garden?______ Use a tractor?______ Tiller?______
Your Occupation?_____________________________________
Your Email Address?__________________________________
Quality Insurance
Dear Customer,
We are very proud of our quality and endeavor to
produce each product to meet high standards. Should
your purchase not meet your expectations, we have a
Quality Insurance Policy.
If you purchase a product and a part is missing or
defective, please inform us of the problem on the
"Comments" section of the Warranty Registration Card
in this manual or online, or feel free to contact us toll
free at 1-877-728-8224.PLEASE DO NOT RETURN THE
PRODUCT TO THE STORE!
We will make every effort to ship a new replacement
part to you within 24 hours at no charge.
Thank you,
Jane Hardy
President,
Brinly-Hardy Company
Limited Warranty
Brinly-Hardy Company warrants only to the original retail purchaser that this product will remain free of defects in
workmanship and materials under normal use and service for a period of two (2) years (NOTE: ninety (90) days for
commercial or rental use) commencing with the date of purchase.
Any parts found to be defective within the warranty period will be replaced, with proof of date of purchase, at Brinly-Hardy
Company's expense. Our obligation under this warranty is expressly limited to replacement or repair, at our option of parts,
which are defective in material or workmanship within thirty (30) days of receipt of the parts. This warranty does not apply to
damage caused by unreasonable use, including failure to provide necessary maintenance, nor does it apply to any
transportation or labor charges.
WE MAKE NO OTHER EXPRESS WARRANTY NOR IS ANYONE AUTHORIZED TO MAKE ANY ON OUR BEHALF. ANY
IMPLIED OR STATUTORY WARRANTIES, INCLUDING ANY WARRANTY OF MERCHANTABILITY OR FITNESS FOR A
PARTICULAR PURPOSE, ARE LIMITED TO THE DURATION OF THIS WRITTEN WARRANTY. WE SHALL NOT BE LIABLE
FOR CONSEQUENTIAL OR INCIDENTAL DAMAGES OF ANY KIND.
MADE IN THE U.S.A.
BRINLY-HARDY COMPANY TOLL-FREE 1-877-728-8224
11.
Brinly sprayers are designed to be easy to
use, extremely accurate, and long lasting.
Our in-line mounted tank design means that
even the biggest tank is easy to maneuver
and can fit through a garden gate. Each unit
comes with a tractor-mounted on/off control.
No more rust or dents with these poly lawn
rollers. These units are much easier to deal
with than the steel versions. They have
rounded end caps that won’t tear or gouge
the lawn when truning. Erase the harmful
effects of frost heaving and moles, or pack
down newly sewn seed or sod.
Brinly’s garden tractor items offer the
largest selection to turn your garden
tractor into a year-round tool. We have
box scrapers, blades, cultivators, disk
harrows, and even a plow! Remember
that a sleeve hitch is required to hook up
these items to your garden tractor.
Caring for the quality of your lawn
with the products from
Brinly-Hardy Company
Register Online at: www.brinly.com
Other manuals for SAT-40 BH
3
Table of contents
Other Brinly Tiller manuals

Brinly
Brinly SAT2-40BH-S User manual

Brinly
Brinly CC-1000 User manual

Brinly
Brinly VV-100 User manual

Brinly
Brinly SAT-401BH User manual

Brinly
Brinly SAT-40 BH User manual

Brinly
Brinly SA2-40BH1-G User manual

Brinly
Brinly SAT2-40BH-P User manual

Brinly
Brinly DD-550 Installation and operating instructions

Brinly
Brinly SAT-40 BH User manual

Brinly
Brinly PA-40 BH User manual


