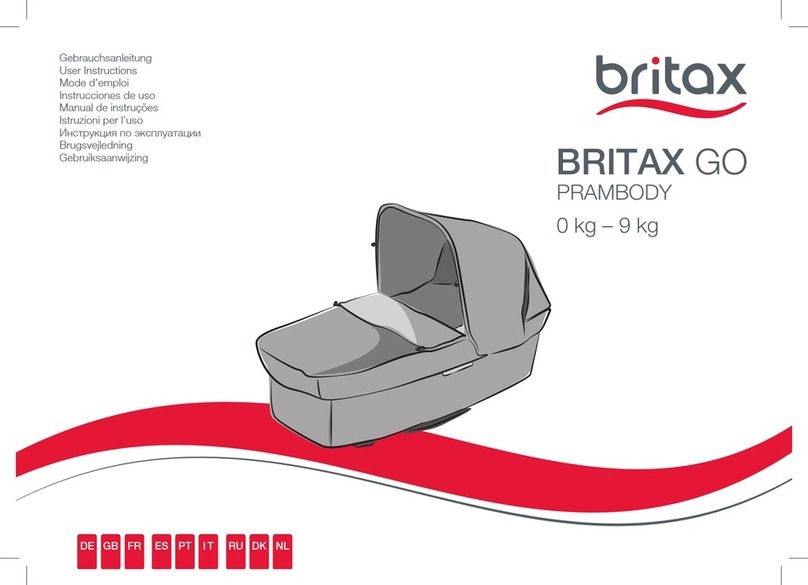
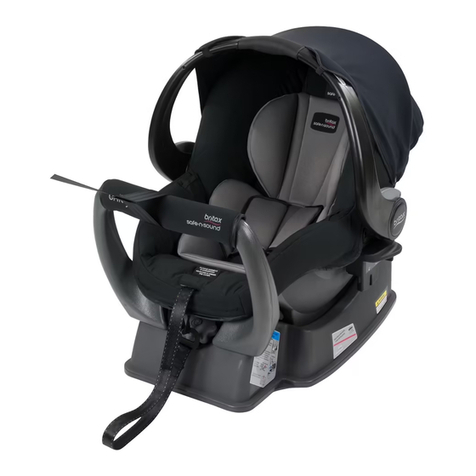
Britax BABY-SAFE User manual

BABY-SAFE SLEEPER
0 kg – 10 kg
BABY-SAFE
DE
GB
FR
ES
PT
IT
RU
DK
NL
Gebrauchsanleitung
User Instructions
Mode d'emploi
Instrucciones de uso
Manual de instruções
Istruzioni per l’uso
Инструкция по эксплуатации
Brugsvejledning
Gebruiksaanwijzing

1
Gebrauchsanleitung
Wir freuen uns, dass unser BABY-SAFE SLEEPER
Ihr Kind sicher durch die ersten Monate seines
Lebens begleiten darf.
Um Ihr Baby richtig schützen zu können, muss
der BABY-SAFE SLEEPER unbedingt so
verwendet und eingebaut werden, wie wir es
Ihnen in dieser Anleitung beschreiben.
Wenn Sie noch Fragen zur Benutzung haben,
wenden Sie sich bitte an uns.
BRITAX RÖMER Kindersicherheit GmbH
Britax Excelsior Ltd.
Inhalt
1. Eignung ...............................................................5
2. Gebrauch Ihrer Babywanne ...............................9
2.1 Verstellen des Tragebügel .......................... 11
2.2 Klappen des Sonnenverdeckes.................. 13
2.3 Anbringen des Windschutzes .....................13
2.4 Einstellen der Rückenlehne ........................15
3. Sichern Ihres Babys .........................................17
3.1 Lockern der Schultergurte ..........................17
BABY-SAFESLEEPER

2
User instructions
We are pleased that our BABY-SAFE SLEEPER
may accompany your child safely through the first
months of his or her life.
In order to protect your baby correctly, the
BABY-SAFE SLEEPER must always be used
and installed as described in these instructions.
If you have any further questions regarding its use,
please feel free to contact us.
BRITAX RÖMER Kindersicherheit GmbH
Britax Excelsior Ltd.
Contents
1. Suitability .............................................................6
2. Using the carrycot ............................................10
2.1 Adjusting the handle ...................................12
2.2 Folding the sunshade ..................................14
2.3 Fitting the apron ..........................................14
2.4 Adjusting the backrest .................................16
3. Securing your baby ..........................................18
3.1 Loosening the shoulder straps ....................18
Mode d’emploi
Nous sommes heureux que notre BABY-SAFE
SLEEPER puisse accompagner votre enfant en
toute sécurité durant les premiers mois de sa vie.
Pour protéger efficacement votre bébé, le
BABY-SAFE SLEEPER doit impérativement être
utilisé et installé de la manière décrite dans le
présent mode d’emploi.
Pour toute question complémentaire, n'hésitez pas
à nous contacter.
BRITAX RÖMER Kindersicherheit GmbH
Britax Excelsior Ltd.
Table des matières
1. Habilitation ..........................................................6
2. Utilisation de votre nacelle pour bébé ............ 10
2.1 Ajustage de l’anse ......................................12
2.2 Repliage du pare-soleil ...............................14
2.3 Fixation du coupe-vent ...............................14
2.4 Réglage du dossier .....................................16
3. Protection de votre bébé .................................18
3.1 Desserrage des bretelles ............................18

3
3.2 Anschnallen des Babys ..............................19
3.3 Straffen der Schultergurte ...........................21
3.4 So ist Ihr Baby richtig
gesichert .....................................................21
4. Verwendung im Fahrzeug ................................23
4.1 Einbau im Fahrzeug ...................................27
4.2 Ausbau aus dem Fahrzeug ........................37
4.3 So ist Ihre Babywanne
im Fahrzeug richtig eingebaut ....................39
5. Verwendung als Kinderwagen-Aufsatz .......... 41
5.1 Anbringen auf dem Kinderwagen ...............45
5.2 Abnehmen vom Kinderwagen ....................47
6. Pflegeanleitung .................................................49
6.1 Pflege des Gurtschlosses ...........................53
6.2 Reinigung ....................................................55
6.3 Aushängen des Sonnenverdeckes .............57
6.4 Einhängen des Sonnenverdeckes ..............57
6.5 Abziehen des Bezuges ...............................59
6.6 Aufziehen des Bezuges ..............................63
7. Hinweise zur Entsorgung .................................63
8. Folgesitze ..........................................................65
9. 2 Jahre Garantie ...............................................65
10. Garantiekarte / Übergabe-Check .....................72

4
3.2 Securing your baby using the harness ........20
3.3 Tightening the harness ................................22
3.4 Checklist to ensure that
your baby is buckled up correctly ................22
4. Use in the vehicle ..............................................24
4.1 Installation in the vehicle .............................28
4.2 Removing from the vehicle .........................38
4.3 Checklist to ensure that your carrycot is
installed correctly in the vehicle ..................40
5. Use as a pram attachment ................................42
5.1 Fitting on a pram .........................................46
5.2 Removing from the pram ............................48
6. Care instructions ..............................................50
6.1 Care for the harness buckle ........................54
6.2 Cleaning ......................................................56
6.3 Unhooking the sunshade ............................58
6.4 Hooking the sunshade in ............................58
6.5 Removing the cover ....................................60
6.6 Re-fitting the cover ......................................64
7. Notes regarding disposal .................................64
8. Next child safety seat .......................................66
9. 2-year warranty .................................................66
10. Warranty Card / Transfer Check ......................74
3.2 Mise en place de la ceinture du bébé .........20
3.3 Tendre les bretelles ....................................22
3.4 Comment savoir si votre bébé est bien
protégé .......................................................22
4. Utilisation dans le véhicule .............................24
4.1 Montage dans le véhicule ...........................28
4.2 Démontage du véhicule ..............................38
4.3 Montage correct de votre nacelle pour bébé
dans le véhicule ..........................................40
5. Utilisation comme nacelle de poussette ........42
5.1 Mise en place sur la poussette ...................46
5.2 Retrait de la poussette ................................48
6. Consignes d’entretien ......................................50
6.1 Entretien du fermoir de ceinture .................54
6.2 Nettoyage ...................................................56
6.3 Décrochage du pare-soleil ..........................58
6.4 Fixation du pare-soleil ................................58
6.5 Retrait de la housse ....................................60
6.6 Remise en place de la housse ...................64
7. Remarques relatives à l’élimination ............... 64
8. Sièges ultérieurs ...............................................66
9. 2 ans de garantie ..............................................66
10. Carte de garantie / Procès-verbal de remise ..76

5
1. Eignung
Zulassung
Der BABY-SAFE SLEEPER ist für zwei
unterschiedliche Anwendungsarten
zugelassen:
... als Babywanne eingebaut im
Fahrzeug:
*ECE = Europäische Norm für Sicherheitsausrüstung
• Die Babywanne ist ausgelegt, geprüft und
zugelassen entsprechend den Anforderungen
der europäischen Norm für Kindersicherheits-
Einrichtungen (ECE R 44/04).
Das Prüfzeichen E (in einem Kreis) und die
Zulassungsnummer befinden sich auf dem
Zulassungsetikett (Aufkleber an der
Babywanne).
Britax /
RÖMER
Babywanne
Prüfung und Zulassung
nach ECE* R 44/04
empfohlener
Altersbereich
Gruppe Körpergewicht
BABY-SAFE
SLEEPER
0bis10kg
Geburt bis
ca. 6 Monate

6
1. Suitability
Certification
The BABY-SAFESLEEPERis approved for two
different methods of installation:
... as a carrycot
installed in a vehicle:
*ECE = European Standard for Safety Equipment
• The carrycot has been designed, tested and
certified according to the requirements of the
European Standard for Child Safety Equipment
(ECE R 44/04).
The seal of approval E (in a circle) and the
approval number are located on the approval
label (sticker on the carrycot).
Britax/
RÖMER
Carrycot
Tested and certified
according to
ECE* R 44/04 Recommended
age range
Group Body weight
BABY-SAFE
SLEEPER 0 up to 10 kg From birth to
around 6 months
1. Habilitation
Homologation
La coque BABY-SAFE SLEEPER est
homologuée pour deux types d'application
différents :
... en tant que nacelle pour bébé monté
dans la voiture :
*ECE = norme européenne pour les équipements de sécurité
• La nacelle pour bébé est conçue, contrôlée et
homologuée conformément aux exigences de la
norme européenne pour les équipements de
sécurité pour enfants (ECE R 44/04).
Le signe de contrôle E (dans un cercle) et le
numéro d’homologation se trouvent sur
l’étiquette d’homologation (autocollant sur la
nacelle pour bébé).
Britax /
RÖMER
Nacelle pour
bébé
Examen et homologation
selon ECE* R 44/04 tranche d'âge
recommandée
Groupe Poids
BABY-SAFE
SLEEPER
0 jusqu'à 10 kg delanaissance
à env. 6 mois

7
• Die Zulassung erlischt sobald Sie an der
Babywanne etwas verändern. Änderungen darf
ausschließlich der Hersteller vornehmen.
... als Kinderwagen-Aufsatz auf einem
Britax Fahrgestell:
Die Babywanne eignet sich als Kinderwagen-
Aufsatz von Geburt bis sich Ihr Kind selbstständig
aufsetzen kann (mit ca. 6 Monaten).
Die Babywanne kann als Kinderwagen-
Aufsatz auf allen Britax Fahrgestellen
verwendet werden die mit dem Symbol
Kinderwagen-Aufsatz „Typ A“
gekennzeichnet sind und für einen
Kinderwagen-Aufsatz freigegeben sind.
Dieser Kinderwagen-Aufsatz ist entwickelt und
hergestellt entsprechend der Normen
EN1888:2005-11 und EN1466:2004.
A

8
• This approval shall be invalidated if you make
any modifications to the carrycot. Only the
manufacturer is permitted to make modifications.
... as a pram attachment on a Britax
frame:
The carrycot is suitable for use as a pram
attachment from birth until your baby is old enough
to sit up unaided (around 6 months).
The carrycot can be used as a pram
attachment on all Britax frames which
are marked with the "type A" carrycot
icon and which have been approved for
use with a pram attachment.
This pram attachment has been designed and
manufactured in accordance with European
standards EN1888:2005-11 and EN1466:2004.
A
• La nacelle pour bébé perd son homologation dès
que vous réalisez des modifications. Toute
modification doit exclusivement être réalisée par
le fabricant.
.. en tant que nacelle de poussette sur
un châssis de poussette Britax :
La nacelle pour bébé convient en tant que nacelle
pour poussette de la naissance jusqu'à ce que
votre enfant puisse s'assoir seul (à env. 6 mois).
La nacelle pour bébé peut être utilisée
en tant que nacelle de poussette sur
tous les châssis de poussette Britax
équipés du symbole nacelle pour
poussette « type A » et dont l'utilisation
avec des nacelles pour bébé est
autorisée.
Cette nacelle de poussette est conçue et fabriquée
conformément à la norme EN1888:2005-11 et
EN1466:2004.
A

9
2. Gebrauch Ihrer Babywanne
Zum Schutz Ihres Babys
• Schnallen Sie Ihr Baby in der Babywanne immer
an.
• Die Babywanne ist nicht geeignet als Ersatz für
Bett oder Wiege. Er darf nur für den Transport
genutzt werden.
• Lassen Sie Ihr Baby in der Babywanne niemals
aus den Augen, wenn Sie es auf erhöhten
Flächen abstellen.
(z.B. Wickelkomode, Tisch...)
• Klemmen Sie das Gurtende 8 (siehe 3.3)
niemals in bewegliche Teile ein (z.B.
automatische Türen, Rolltreppen...).
•Vorsicht! Die Kunstoffteile der Babywanne
heizen sich in der Sonne auf. Ihr Baby kann sich
daran verbrennen. Schützen Sie Ihr Baby und
die Babywanne vor intensiver
Sonneneinstrahlung (z.B. ein leichtes Tuch über
die Schale legen).

10
2. Using the carrycot
For the protection of your baby
• Always secure your baby in the carrycot using
the harness.
• The carrycot is not suitable as a substitute for a
cot or a cradle. It must only be used for transport.
• Never leave your baby unattended in the
carrycot when placing it on elevated surfaces
(e.g. a table, nappy changing unit, etc.).
• Never allow the strap end 8 (see 3.3) to become
caught in moving parts (e.g. automatic doors,
escalators, etc.).
•Caution! The plastic parts of the carrycot heat
up in the sun, so that your baby may get burnt.
Protect your baby and the carrycot against
intense sunlight (e.g. by putting a light cloth over
the carrycot).
2. Utilisation de votre nacelle pour
bébé
Pour protéger votre bébé
• Attachez toujours votre bébé dans la nacelle
pour bébé.
• La nacelle pour bébé n'est pas adaptée pour
remplacer le lit ou le berceau. Elle ne doit être
que pour le transport.
• Ne perdez jamais de vue votre bébé lorsque
vous déposez la nacelle sur des surfaces
surélevées
(table à langer, table à manger, etc.)
• Ne coincez jamais l'extrémité de la sangle 8 (voir
paragraphe 3.3) dans des pièces mobiles (par
ex. portes automatiques, escalier roulant...).
•Attention ! Les parties en matière plastique de
la nacelle pour bébé se réchauffent en plein
soleil. Votre bébé risque de se brûler. Protégez
votre bébé et la nacelle pour bébé contre le
rayonnement intensif du soleil (recouvrez-la par
ex. de linge).

11
2.1 Verstellen des Tragebügel
Sie können den Tragebügel in drei Stellungen
einrasten:
ÞDrücken Sie gleichzeitig die beiden Tasten 4am
Tragebügel 5.
ÞSchwenken Sie nun den Tragebügel 5mit
gedrückten Tasten 4vor oder zurück, bis er in
der gewünschten Stellung einrastet.
•A: Zum Tragen und zum Transport im Auto
Vorsicht! Vergewissern Sie sich ob der
Tragelbügel 5sicher eingerastet ist, bevor Sie
die Babywanne anheben.
•B: Zum Hineinlegen Ihres Babys in die
Babywanne.
A
B
5
4

12
2.1 Adjusting the handle
You can engage the handle in three positions:
ÞSimultaneously press both buttons 4on the
handle 5.
ÞThen whilst holding the buttons pressed 4turn
the handle 5backwards or forwards until it
engages in the desired position.
•A: For carrying and for transport in the car
Caution! Ensure that the handle 5is securely
engaged before you pick up the carrycot.
•B: For putting your baby into the carrycot
2.1 Ajustage de l’anse
Vous pouvez enclencher l’anse en trois
positions :
ÞAppuyez simultanément sur les deux touches 4
de l’anse 5.
ÞPivotez à présent l’anse 5en avant ou en arrière
jusqu'à ce qu'elle s'enclenche dans la position
souhaitée, les touches 4étant enfoncées.
•A: pour porter la nacelle et pour la transporter
dans la voiture
Attention ! Assurez-vous que l'anse 5est
correctement enclenchée avant de soulever la
nacelle pour bébé.
•B: Pour coucher votre bébé dans la nacelle.

13
•C: Zum Hineinlegen Ihres Babys und beim
Gebrauch als Kinderwagen-Aufsatz
2.2 Klappen des Sonnenverdeckes
So klapppen Sie das Sonnenverdeck 9 auf:
ÞSchwenken Sie den Verdeckbügel 10 nach oben
bis er einhakt.
So klapppen Sie das Sonnenverdeck 9 zu:
ÞHeben Sie den Verdeckbügel 10 etwas an um
ihn auszuhaken. Schwenken Sie den
Verdeckbügel 10 zurück auf den Schalenrand.
2.3 Anbringen des Windschutzes
ÞHängen Sie die beiden Gummischlaufen 11 in
die Haken unter dem Tragebügel-Gelenk ein.
ÞZiehen Sie den elastische Saumkante über den
Schalenrand.
ÞStecken Sie den D-Ring 12 durch den Schlitz im
Windschutz 30.
9
10
C

14
•C: For putting your baby in and when used as a
pram attachment
2.2 Folding the sunshade
This is how to unfold the sunshade 9:
ÞSwivel the handle 10 of the sunshade upwards
until it engages.
This is how to fold the sunshade 9back:
ÞLift the sunshade handle 10 slightly to disengage
it. Swivel the sunshade handle 10 back to the
edge of the shell.
2.3 Fitting the apron
ÞHook the two elastic loops 11 around the hooks
under the handle mounting.
ÞPull the elastic seam over the edge of the shell.
ÞPush the D ring 12 through the slot in the
apron 30.
•C: Pour coucher votre bébé ou à utiliser en tant
que nacelle pour poussette
2.2 Repliage du pare-soleil
Pour déplier le pare-soleil 9, procédez comme
suit :
ÞBasculez l'anse du pare-soleil 10 vers le haut
jusqu'à ce qu'elle s'enclenche.
Pour rabattre le pare-soleil 9, procédez comme
suit :
ÞSoulevez légèrement l'anse du pare-soleil 10
jusqu'à ce qu'elle se décroche. Basculez l'anse
du pare-soleil 10 vers l'arrière jusqu'au bord de
la coque.
2.3 Fixation du coupe-vent
ÞAccrochez les deux passants en caoutchouc 11
dans les crochets sous l'articulation de l'anse.
ÞTirez le bord élastique de la couture au-dessus
du bord de la coque.
ÞPassez l'anneau D 12 dans la fente du coupe-
vent 30.

15
2.4 Einstellen der Rückenlehne
Zum Schutz Ihres Babys
• Verwenden Sie die Babywanne im Auto
nur mit ganz flacher (waagerechter)
Rückenlehne 6!
So können Sie die Neigung der
Rückenlehne 6verstellen:
ÞLockern Sie die Schultergurte 3. (siehe
3.1)
ÞGreifen Sie am Fußende 19 von unten an den
Boden der Babywanne.
ÞDrehen Sie das graue Verstellrad 13...
...im Uhrzeigersinn: die Rückenlehne 6 wird
flacher.
...gegen den Uhrzeigersinn: die Rückenlehne 6
wird steiler.
Vorsicht! Die Rückenlehne 6lässt sich nur
verstellen wenn die Schultergurte 3ganz
gelockert sind.
ÞStraffen Sie die Schultergurte 3bis sie eng am
Körper Ihres Babys anliegen.
(siehe 3.3)
19
13
6

16
2.4 Adjusting the backrest
For the protection of your baby
•In a vehicle, only use the carrycot with
the backrest 6completely flat (horizontal)!
This is how to adjust the angle of the
backrest 6:
ÞLoosen the shoulder straps. (see 3.1)
ÞReach under the carrycot at the foot end 19.
ÞTurn the grey adjustment wheel 13...
...clockwise: the backrest 6becomes more flat
...anti-clockwise: the backrest 6becomes
steeper.
Caution! The backrest 6can only be adjusted if
the shoulder straps 3are completely loosened.
ÞTighten the straps until they are in contact with
your baby's body.
(see 3.3)
2.4 Réglage du dossier
Pour protéger votre bébé
• N'utilisez la nacelle pour bébé dans la
voiture que lorsque le dossier est complètement
abaissé (horizontal) et plat 6!
Pour régler l'inclinaison du dossier 6,
procédez comme suit :
ÞDesserrez les bretelles 3. (voir 3.1)
ÞPassez votre main de l'extrémité pied 19 depuis
le bas sur le fond de la nacelle pour bébé.
ÞTournez la molette de réglage grise 13...
...dans le sens horaire : le dossier 6
s'abaisse.
...dans le sens anti-horaire : le dossier 6
se redresse.
Attention ! Le dossier 6ne peut être réglé que
lorsque les bretelles 3sont entièrement
relâchées.
ÞTendez les bretelles 3jusqu’à ce qu’elles
reposent sur le corps de votre bébé.
(voir 3.3)

17
3. Sichern Ihres Babys
Zum Schutz Ihres Babys
• Schnallen Sie Ihr Baby in der Babywanne immer
an.
• Die Spannung der Schultergurte 3verändert sich
wenn Sie die Neigung der Rückenlehne 6
verstellen.
Vorsicht! Vergewissern Sie sich, dass die
Schultergurte 3immer körpernah anliegen, ohne
das Baby einzuengen.
3.1 Lockern der Schultergurte
ÞDrücken Sie auf die Verstelltaste 7und ziehen
Sie gleichzeitig die beiden Schultergurte 3nach
vorne.
7
3

18
3. Securing your baby
For the protection of your baby
• Always secure your baby in the carrycot using
the harness.
• The tension of the shoulder straps 3changes
when you change the angle of the backrest 6.
Caution! Always ensure that the shoulder straps
3are comfortable but FIRM fit around your child,
3.1 Loosening the shoulder straps
ÞPress the adjustment button 7and at the same
time pull both shoulder straps 3forward.
3. Protection de votre bébé
Pour protéger votre bébé
• Attachez toujours votre bébé dans la nacelle
pour bébé.
• La tension des bretelles 3changent lorsque vous
changez l'inclinaison de votre dossier 6.
Attention ! Assurez-vous que les bretelles 3
épousent bien le corps sans pour autant
comprimer le bébé.
3.1 Desserrage des bretelles
ÞAppuyez sur la touche de réglage 7et tirez les
deux bretelles 3en même temps vers l’avant.

19
3.2 Anschnallen des Babys
ÞLockern Sie die Schultergurte 3. (siehe 3.1)
ÞÖffnen Sie das Gurtschloss 1(auf die rote Taste
drücken).
ÞLegen Sie Ihr Baby in die Babywanne.
ÞFühren Sie die Schultergurte 3über die
Schultern Ihres Babys.
Vorsicht! Schultergurte nicht verdrehen oder
vertauschen.
ÞFühren Sie die beiden Schlosszungen 2
zusammen...
Þ...und rasten Sie sie im Gurtschloss 1hörbar ein.
KLICK!
ÞStraffen Sie die Schultergurte 3bis sie eng am
Körper Ihres Babys anliegen.
(siehe 3.3)
1
2
3
1
2
3
Other manuals for BABY-SAFE
3
Table of contents
Other Britax Baby Carrier manuals

Britax
Britax BABY SAFETY CAPSULE User manual

Britax
Britax BABY SAFETY CAPSULE User manual

Britax
Britax GO NEXT User manual

Britax
Britax ECLIPSE none User manual

Britax
Britax SERENITY User manual

Britax
Britax BRITAX GO User manual

Britax
Britax Baby Carrier User manual

Britax
Britax UNITY User manual

Britax
Britax Go Prambody User manual

Britax
Britax Strider Compact User manual