manuals.online logo
Brands
  1. Home
  2. •
  3. Brands
  4. •
  5. Brizo
  6. •
  7. Plumbing Product
  8. •
  9. Brizo SENSORI T66632 Series User manual

Brizo SENSORI T66632 Series User manual

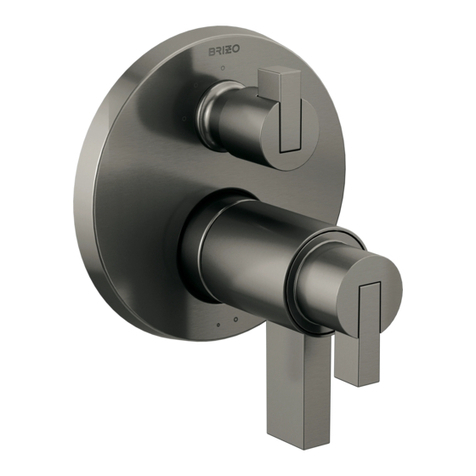
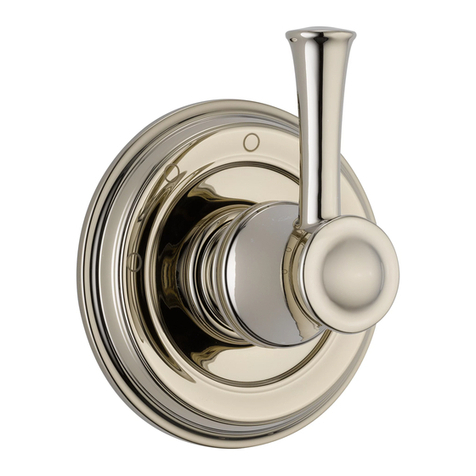
SENSORI®VOLUME CONTROL TRIM
ACCESORIO DEL CONTROL DE VOLÚMEN SENSORI®
FINITION DE LA COMMANDE DE DÉBIT SENSORI®
1
You May Need / Usted puede necesitar / Articles dont vous pouvez avoir besoin:
08/08/2016 Rev. B
Models/Modelos/Modéles
T66605s, T66630s, T66632s,
T66633s, T66634s, T66636s,
T66638s, T66640s, T66650s,
T66660s, T66661s, T66675s,
T66685s, T66690s& T66695s
Series/Series/Seria
90412
Write purchased model number here.
Escriba aquí el número del modelo comprado.
Articles dont vous pouvez avoir besoin:
T66695s
RSVP®Cross
Cruz RSVP®
Cruciforme RSVP®
T66690s
RSVP®Lever
Palanca RSVP®
Levier RSVP®
T66675s
Odin™ Lever
Palanca Odin™
Levier OdinMC
T66660s
Rook™ Lever
Palanca Rook™
Levier RookMC
T66661s
Rook™ Cross
Cruz Rook™
Cruciforme RookMC
T66650s
Sotria™ Lever
Palanca Sotria™
Levier SotriaMC
T66638s
Traditional Cross
Cruz Tradicional
Cruciforme Traditional
T66636s
Traditional Lever
Palanca Tradicional
Levier Traditional
T66640s
Vesi®Lever
Palanca Vesi®
Levier Vesi®
T66605s
Baliza®Lever
Palanca Baliza®
Levier Baliza®
▲Specify Finish / Especifíque el Acabado / Précisez le Fini
T66685s
Charlotte®Lever
Palanca Charlotte®
Levier Charlotte®
T66630s
Virage®Lever
Palanca Virage®
Levier Virage®
T66632s
Litze™ Lever
Palanca Litze™
Levier LitzeMC
T66633s
Litze™ T-Lever
T-Palanca Litze™
Levier en T LitzeMC
T66634s
Litze™ Industrial
Industrial Litze™
Industriel LitzeMC
For easy installation of your Brizo®faucet you will need:
• To READ ALL the instructions completely before beginning.
• To READ ALL warnings,care, and maintenance information.
Note:The Sensori®Volume Control rough (R35600) must be
installed before installing the trim.
Para instalación fácil de su llave Brizo®usted necesitará:
• LEER TODAS las instrucciones completamente antes de
empezar.
• LEER TODOS los avisos, cuidados, e información de
mantenimiento.
Nota: La plomería preliminar del control de volumen Sensori®
(R35600) debe instalarse antes de instalar el accesorio.
Pour installer votre robinet Brizo®facilement, vous devez:
• LIRE TOUTES les instructions avant de débuter.
• LIRE TOUS les avertissements ainsi que toutes les instructions de
nettoyage et d’entretien.
Note : La plomberie brute pour la commande de débit Sensori®
(R35600) doit être installée avant la finition.
www.brizo.com
C.
6
3
Finished Wall
Pared Acabada
Surface nie du mur
1 1/2" (38 mm)
Finished Wall
Pared Acabada
Surface nie du mur
2
90412 Rev. B
A. B.
2
3
1
Mark the cartridge stem (6) 1 1/2" (38 mm) from the finished wall (3).
Carefully cut cartridge stem (6) at mark previously made.
C.
Verify finished wall is located between indicator lines on plaster
guard. Remove plaster guard (1) from valve assembly.
A.
Mark the extension sleeve (2) at 7/8" (22 mm) from the finished wall
(3). Remove extension sleeve and carefully cut at the mark previ-
ously made.
Reinstall sleeve, tightening securely.
B.
7/8" (22 mm)
R35600
Marque el cartucho de la espiga (6) 1 1/2”(38 mm) de la pared
acabada (3). Corte con cuidado la espiga del cartucho (6) en la
marca hecha previamente.
C.
Verifique que la pared acabada se encuentre entre las líneas
indicadoras en el protector de yeso/enlucido. Retire el protector de
yeso (1) del ensamble de la válvula.
A.
Marque el manguito de extensión (2) a 1/4” (6,5 mm) de la pared
acabada (3). Quite el casquillo de extensión y cuidadosamente corte
en la marca hecha previamente.
Vuelva a instalar el casquillo, apretando firmemente.
B.
Faites une marque sur la tige de la cartouche (6) à 1 1/2 po (38 mm)
du mur fini (3). Sectionnez soigneusement la tige de la cartouche (6)
à l’endroit où vous avez fait la marque.
C.
Enlevez le manchon de protection (1) du robinet. Assurez-vous que
le mur fini se trouve entre les lignes indicatrices sur le manchon de
protection.
A.
Faites une marque sur le manchon de rallonge (2) à 1/4 po (6,5 mm)
du mur fini (3). Enlevez le manchon de rallonge et sectionnez-le soi-
gneusement à l’endroit où vous avez fait la marque.
Reposez le manchon et serrez-le solidement.
B.
390412 Rev. B
D. F.
E.
9
8
7
6
OFF
ON
8
2
10
6
Turn cartridge stem (6) clockwise to off position. Install gasket (7)
into groove of handle base (8). Place the handle over the cartridge
stem (6). Hold the handle blade (9) stationary and thread the handle
base (8) onto the extension sleeve (2). Tighten securely, but do not
overtighten.
D.
Check the handle rotation to see if the off and on positions are in the
desired locations. If handles do not align to your satisfaction, unscrew
the handle until handle disengages from stem. Rotate handle one
spline clockwise or counter-clockwise to the desired position and
retighten onto handle base (8).
E.
If precise handle alignment is not achieved, fine adjustments can
be made: Remove handle base (8) and extension sleeve (2).
Loosen cartridge nut (10) two full turns should be sufficient. Now
the cartridge can be rotated until the cartridge stem (6) is in the
final adjusted position. The cartridge can only be unscrewed
from seated position 25 max. Now tighten cartridge nut (10) to
final torque range of 15ft-lb - 18ft-lb (20Nm - 25Nm). Verify entire
installation function, alignment and leakage.
F.
o
2
Gire la espiga del cartucho (6) hacia la derecha a la posición cerrada.
Instale el empaque (7) en la ranura de la base de la manija (8).
Coloque la manija sobre la espiga del cartucho (6).
Sostenga el mango de la manija (9) fija sin moverla y enrosque la
base de la manija (8) sobre el casquillo de extensión (2). Apriete
firmemente, pero no demasiado.
D.
Fíjese en la rotación de la manija para ver si las posiciones abiertas
y cerradas están en las ubicaciones deseadas. Si las manijas no
se alinean a su satisfacción, desenrosque el asa/la manija hasta
desenganchar la manija de la espiga. Gire el mango de la manija,
una muesca hacia la derecha o hacia la izquierda a la posición
deseada y vuelva a apretar en la base de la manija (8).
E.
Si no se logra la alineación precisa de la manija, puede hacer
ajustes pequeños: Retire la base de la manija (8) y el casquillo de
extensión (2). Afloje la tuerca del cartucho (10) con dos vueltas
completas deben ser suficientes. Ahora el cartucho se puede girar
hasta que la espiga del cartucho (6) esté en la posición ajustada
final. El cartucho solamente se puede desenroscar desde la
posición reclinada - 25 como máximo. Ahora apriete la tuerca del
cartucho (10) al par final de 15 pies-lb - 18 pies-lb (20 Nm - 25 Nm).
Compruebe toda la función de la instalación, la alineación y la fuga/
filtración.
F.
o
Tournez la tige de la cartouche (6) dans le sens des aiguilles d’une
montre jusqu’à la position de fermeture. Installez le joint (7) dans la
rainure de la base de manette (8). Placez la manette sur la tige de la
cartouche (6). Maintenez la manette (9) immobile et vissez la base
de manette (8) sur l’écrou-chapeau. Serrez fermement, mais prenez
garde de trop serrer.
D.
Vérifier la rotation de la manette pour vous assurer que les positions
de fermeture complète et d’ouverture complète se trouvent aux bons
endroits. Si l’orientation de la manette n’est pas correcte, dévissez
la manette jusqu’à ce qu’elle se libère de la tige. Tournez la manette
dans le sens des aiguilles d’une montre ou dans le sens inverse d’un
cran à la fois jusqu’à ce qu’elle soit dans la position souhaitée, puis
resserrez-la sur la base de manette (8).
E.
Si vous n’arrivez pas à régler la position de la manette précisément,
vous pouvez faire un réglage fin. Enlevez la base de manette (8) et
le manchon de rallonge (2). Desserrez l’écrou de la cartouche (10).
Un tour complet devrait suffire. Tournez ensuite la cartouche (6)
jusqu’à ce que la tige de la cartouche (6) se trouve dans la position
finale souhaitée. Par rapport à sa position d’origine, la cartouche
(6) peut être tournée d’au plus 25 . Serrez l’écrou de la cartouche
(10). Le couple de serrage est de 15 pi-lb à 18 pi-lb (20 N.m - 25
N.m). Vérifiez l’installation au complet, son fonctionnement, la
position de la manette et l’étanchéité.
F.
o
© 2016 Masco Corporation of Indiana
Parts and Finish
All parts (other than electronic parts and batteries) and finishes of this Brizo®faucet are warranted to
the original consumer purchaser to be free from defects in material and workmanship for as long as the
original consumer purchaser owns the home in which the faucet was first installed or, for commercial
users, for 5 years from the date of purchase.
Electronic Parts and Batteries (if applicable)
Electronic parts (other than batteries), if any, of this Brizo®faucet are warranted to the original consumer
purchaser to be free from defects in material and workmanship for 5 years from the date of purchase or, for
commercial users, for one year from the date of purchase. No warranty is provided on batteries.
Brizo Kitchen & Bath Company will replace, FREE OF CHARGE, during the applicable warranty period,
any part or finish that proves defective in material and/or workmanship under normal installation, use and
service. If repair or replacement is not practical, Brizo Kitchen & Bath Company may elect to refund the
purchase price in exchange for the return of the product. These are your exclusive remedies.
Brizo Kitchen & Bath Company recommends using a professional plumber for all installation and repair. We
also recommend that you use only genuine Brizo®replacement parts.
Brizo Kitchen & Bath Company shall not be liable for any damage to the faucet resulting from misuse,
abuse, neglect or improper or incorrectly performed installation, maintenance or repair, including failure to
follow the applicable care and cleaning instructions.
Replacement parts may be obtained by calling the applicable number below or by writing to:
Limited Warranty on Brizo®Faucets
In the United States and Mexico: In Canada:
Brizo Kitchen & Bath Company Masco Canada Limited, Plumbing Group
Product Service Technical Service Centre
55 E. 111th Street 350 South Edgeware Road
Indianapolis, IN 46280 St. Thomas, Ontario, Canada N5P 4L1
1-877-345-BRIZO (2749) 1-877-345-BRIZO (2749)
brizosupport@brizo.com [email protected]
Proof of purchase (original sales receipt) from the original purchaser must be made available to Brizo
Kitchen & Bath Company for all warranty claims unless the purchaser has registered the product with Brizo
Kitchen & Bath Company. This warranty applies only to Brizo®faucets manufactured after January 1, 1995
and installed in the United States of America, Canada and Mexico.
BRIZO KITCHEN & BATH COMPANY SHALL NOT BE LIABLE FOR ANY SPECIAL, INCIDENTAL OR
CONSEQUENTIAL DAMAGES (INCLUDING LABOR CHARGES) FOR BREACH OF ANY EXPRESS OR
IMPLIED WARRANTY ON THE FAUCET. Some states/provinces do not allow the exclusion or limitation
of special, incidental or consequential damages, so these limitations and exclusions may not apply to you.
This warranty gives you special legal rights. You may also have other rights which vary from state/province
to state/province.
This is Brizo Kitchen & Bath Company’s exclusive written warranty and the warranty is not transferable.
If you have any questions or concerns regarding our warranty, please view our Warranty FAQs at
www.Brizo.com, email us at [email protected] or call us at the applicable number above.
© 2016 Masco Corporación de Indiana
Piezas y acabado
Todas las piezas (excepto las piezas electrónicas y las pilas) y los acabados de esta llave de agua Brizo®
están garantizados al consumidor comprador original de estar libres de defectos en material y fabricación
durante el tiempo que el comprador original posea la vivienda en la que la llave de agua fue originalmente
instalada o, para los consumidores comerciales, durante 5 años a partir de la fecha de compra.
Componentes electrónicos y pilas (si aplicable)
Todas las piezas (salvo las pilas), si hay, de esta llave de agua Brizo®están garantizadas al consumidor
comprador original de estar libres de defectos en materiales y fabricación durante 5 años a partir de
la fecha de compra o, para los usuarios comerciales, por un año a partir de la fecha de compra. No se
garantizan las pilas.
Brizo Kitchen & Bath Company reemplazará, SIN CARGO, durante el período de garantía aplicable,
cualquier pieza o acabado que pruebe tener defectos de material y/o fabricación bajo la instalación, uso
y servicio normal. Si la reparación o su reemplazo no es práctico, Brizo Kitchen & Bath Company tiene
la opción de reembolsarle su dinero por la cantidad del precio de compra a cambio de la devolución del
producto. Estos son sus únicos recursos.
Brizo Kitchen & Bath Company recomienda que use los servicios de un plomero profesional para todas las
instalaciones y reparaciones. También le recomendamos que utilice sólo las piezas de repuesto originales
de Brizo®.
Brizo Kitchen & Bath Company no será responsable por cualquier daño a la llave de agua que resulte del
mal uso, abuso, negligencia o mala instalación o mantenimiento o reparación incorrecta, incluyendo el no
seguir los cuidados aplicables y las instrucciones de limpieza.
Las piezas de repuesto se pueden obtener llamando al número correspondiente más abajo, o escribiendo
a:
Garantía Limitada de las Llaves de Agua (grifos) Brizo®
En los Estados Unidos y México: En Canadá:
Brizo Kitchen & Bath Company Masco Canada Limited, Plumbing Group
Product Service Technical Service Centre
55 E. 111th Street 350 South Edgeware Road
Indianapolis, IN 46280 St. Thomas, Ontario, Canada N5P 4L1
1-877-345-BRIZO (2749) 1-877-345-BRIZO (2749)
brizosupport@brizo.com [email protected]
La prueba de compra (recibo original) del comprador original debe ser disponible a Brizo Kitchen & Bath
Company para todos los reclamos a menos que el comprador haya registrado el producto con Brizo
Kitchen & Bath Company. Esta garantía le aplica sólo a las llaves de agua de Brizo®fabricadas después
del 1 de enero 1995 e instaladas en los Estados Unidos de América, Canadá y México.
BRIZO KITCHEN & BATH COMPANY NO SE HACE RESPONSABLE POR CUALQUIER DAÑO
ESPECIAL, INCIDENTAL O CONSECUENTE (INCLUYENDO LOS GASTOS DE MANO DE OBRA) POR
EL INCUMPLIMIENTO DE CUALQUIER GARANTÍA EXPRESA O IMPLÍCITA DE LA LLAVE DE AGUA.
Algunos estados/provincias no permiten la exclusión o limitación de daños especiales, incidentales o
consecuentes, por lo que estas limitaciones y exclusiones pueden no aplicarle a usted. Esta garantía le
otorga derechos legales. Usted también puede tener otros derechos que varían de estado/provincia a
estado/provincia.
Esta es la garantía exclusiva por escrito de Brizo Kitchen & Bath Company y la garantía no es transferible.
Si usted tiene alguna pregunta o inquietud acerca de nuestra garantía, por favor, vea nuestra sección
de preguntas frecuentes FAQ sobre la garantía en www.Brizo.com, también puede enviarnos un correo
electrónico a brizosupport@brizo.com o llámenos al número que le corresponda anteriormente incluido.
© 2016 Division de Masco Indiana
Pièces et finis
Toutes les pièces (à l’exception des composants électroniques et des piles) et tous les finis de ce robinet
Brizo®sont protégés contre les défectuosités du matériau et les vices de fabrication par une garantie
qui est consentie au premier acheteur et qui demeure valide tant que celui-ci demeure propriétaire de la
maison dans laquelle le robinet a été installé. Dans le cas d’une utilisation commerciale, la garantie est de
5 ans à compter de la date d’achat.
Composants électroniques et piles (le cas échéant)
Si ce robinet Brizo® comporte des composants électroniques, ces composants (à l’exception des piles)
sont protégés contre les défectuosités du matériau et les vices de fabrication par une garantie consentie au
premier acheteur qui est d’une durée de 5 ans à compter de la date d’achat. Dans le cas d’une utilisation
commerciale, la garantie est d’un an à compter de la date d’achat. Aucune garantie ne couvre les piles.
Brizo Kitchen & Bath Company remplacera, GRATUITEMENT, pendant la période de garantie applicable,
toute pièce ou tout fini qui présentera une défectuosité du matériau et/ou un vice de fabrication pour
autant que le robinet ait été installé, utilisé et entretenu normalement. S’il est impossible de réparer ou
de remplacer le robinet, Brizo Kitchen & Bath Company pourra décider de rembourser le prix d’achat du
produit pour autant que celui-ci lui soit retourné. Il s’agit de vos seuls recours.
Brizo Kitchen & Bath Company recommande de confier l’installation et la réparation à un plombier
professionnel. Nous vous recommandons également d’utiliser uniquement des pièces de rechange
authentiques Brizo®.
Brizo Kitchen & Bath Company se dégage de toute responsabilité à l’égard des dommages causés au
robinet en raison d’un mauvais usage, d’un usage abusif, de la négligence ou de l’utilisation d’une méthode
d’installation, de maintenance ou de réparation incorrecte ou inadéquate, y compris les dommages
résultant du non-respect des instructions de nettoyage et d’entretien applicables.
Pour obtenir des pièces de rechange, veuillez appeler au numéro applicable ci-dessous ou écrire à
l’adresse applicable ci-dessous.
Garantie limitée des robinets Brizo®
Aux États-Unis et au Mexique: Au Canada:
Brizo Kitchen & Bath Company Masco Canada Limited, Plumbing Group
Product Service Technical Service Centre
55 E. 111th Street 350 South Edgeware Road
Indianapolis, IN 46280 St. Thomas, Ontario, Canada N5P 4L1
1-877-345-BRIZO (2749) 1-877-345-BRIZO (2749)
brizosupport@brizo.com [email protected]
La preuve d’achat (reçu original) du premier acheteur doit être présentée à Brizo Kitchen & Bath Company
pour toutes les demandes en vertu de la garantie, sauf si le produit a été enregistré auprès de Brizo Kitchen
& Bath Company. La présente garantie s’applique uniquement aux robinets Brizo®fabriqués après le 1er
janvier 1995 et installés aux États-Unis d’Amérique, au Canada et au Mexique.
BRIZO KITCHEN & BATH COMPANY SE DÉGAGE DE TOUTE RESPONSABILITÉ À L’ÉGARD DES
DOMMAGES PARTICULIERS, CONSÉCUTIFS OU INDIRECTS (Y COMPRIS LES FRAIS DE MAIN-
D’OEUVRE) QUI POURRAIENT RÉSULTER DE LA VIOLATION D’UNE GARANTIE IMPLICITE OU
EXPLICITE QUELCONQUE SUR LE ROBINET. Dans les États ou les provinces où il est interdit de limiter
ou d’exclure la responsabilité à l’égard des dommages particuliers, consécutifs ou indirects, les limites et
les exclusions susmentionnées ne s’appliquent pas. La présente garantie vous donne des droits précis qui
peuvent varier selon l’État ou la province où vous résidez.
La présente garantie écrite est la garantie exclusive offerte par Brizo Kitchen & Bath Company et elle n’est
pas transférable.
Si vous avez des questions ou des préoccupations en ce qui concerne notre garantie, veuillez consulter la
page Warranty FAQs à www.Brizo.com, faire parvenir un courriel à brizosupport@brizo.com ou nous appeler
au numéro applicable.
490412 Rev. B
CLEANING AND CARE
Care should be given to the cleaning of this product. Although its finish is extremely durable, it can be damaged by harsh abrasives or polish. To clean, simply wipe gently with a damp cloth and blot dry
with a soft towel.
LIMPIEZA Y CUIDADO DE SU LLAVE
Tenga cuidado al ir a limpiar este producto. Aunque su acabado es sumamente durable, puede ser afectado por agentes de limpieza o para pulir abrasivos. Para limpiar su llave, simplemente frótela con
un trapo húmedo y luego séquela con una toalla suave.
INSTRUCTIONS DE NETTOYAGE
Il faut le nettoyer avec soin. Même si son ni est extrêmement durable, il peut être abîmé par des produits fortement abrasifs ou des produits de polissage. Il faut simplement le frotter doucement avec
un chiffon humide et le sécher à l’aide d’un chiffon doux.
www.brizo.com

This manual suits for next models

14

Other Brizo Plumbing Product manuals

Brizo RP90472 User manual

Brizo

Brizo RP90472 User manual

Brizo Odin Series User manual

Brizo

Brizo Odin Series User manual

Brizo Tresa 65836LF User manual

Brizo

Brizo Tresa 65836LF User manual

Brizo 68414 Series User manual

Brizo

Brizo 68414 Series User manual

Brizo Vettis 65388LF Series User manual

Brizo

Brizo Vettis 65388LF Series User manual

Brizo ARTESSO 62525LF-SS User manual

Brizo

Brizo ARTESSO 62525LF-SS User manual

Brizo VETTIS T60 Series User manual

Brizo

Brizo VETTIS T60 Series User manual

Brizo LEVOIR T65898LF LHP Series User manual

Brizo

Brizo LEVOIR T65898LF LHP Series User manual

Brizo RP72411 User manual

Brizo

Brizo RP72411 User manual

Brizo Trevi Cross 6516017 User manual

Brizo

Brizo Trevi Cross 6516017 User manual

Brizo 65336 Series User manual

Brizo

Brizo 65336 Series User manual

Brizo Loki Series User manual

Brizo

Brizo Loki Series User manual

Brizo BALIZA 63005LF User manual

Brizo

Brizo BALIZA 63005LF User manual

Brizo Kintsu 696306 Series User manual

Brizo

Brizo Kintsu 696306 Series User manual

Brizo RP72414 User manual

Brizo

Brizo RP72414 User manual

Brizo 65175LF-PC User manual

Brizo

Brizo 65175LF-PC User manual

Brizo ARTESSO 64225LF User manual

Brizo

Brizo ARTESSO 64225LF User manual

Brizo RP92056 User manual

Brizo

Brizo RP92056 User manual

Brizo Trevi 6516828 Series User manual

Brizo

Brizo Trevi 6516828 Series User manual

Brizo ATAVIS 88742 User manual

Brizo

Brizo ATAVIS 88742 User manual

Brizo Brizo 63074LF User manual

Brizo

Brizo Brizo 63074LF User manual

Brizo 62720LF User manual

Brizo

Brizo 62720LF User manual

Brizo SOLNA 64020LF User manual

Brizo

Brizo SOLNA 64020LF User manual

Brizo RP6949570 User manual

Brizo

Brizo RP6949570 User manual

Popular Plumbing Product manuals by other brands

Hans Grohe Rainfinity Digital 500 1jet 25033000 Instructions for use/assembly instructions

Hans Grohe

Hans Grohe Rainfinity Digital 500 1jet 25033000 Instructions for use/assembly instructions

ENER-J BW1001 manual

ENER-J

ENER-J BW1001 manual

Mira Vision Dual Owner's installation guide

Mira

Mira Vision Dual Owner's installation guide

Franke RONDO RNDH450-O Installation and operating instructions

Franke

Franke RONDO RNDH450-O Installation and operating instructions

Symmons Duro 363DTB-18 Operation & maintenance manual

Symmons

Symmons Duro 363DTB-18 Operation & maintenance manual

Graff BALI 2100-LM20 installation instructions

Graff

Graff BALI 2100-LM20 installation instructions

Sterling ADA Adaptable Bath and Wall Surrounds 7114... Installation and care guide

Sterling

Sterling ADA Adaptable Bath and Wall Surrounds 7114... Installation and care guide

American Standard 8340.235.002 installation instructions

American Standard

American Standard 8340.235.002 installation instructions

Kraus FVS-1007 manual

Kraus

Kraus FVS-1007 manual

Schon 65710N-B8401 Installation and care guide

Schon

Schon 65710N-B8401 Installation and care guide

Kohler STATEMENT K-26325T-CP installation instructions

Kohler

Kohler STATEMENT K-26325T-CP installation instructions

KOLO NEXT HKPF 80 installation manual

KOLO

KOLO NEXT HKPF 80 installation manual

Glacier bay HD873X-0701 Installation and care guide

Glacier bay

Glacier bay HD873X-0701 Installation and care guide

Danze 063-8025-4 manual

Danze

Danze 063-8025-4 manual

TLV J3X instruction manual

TLV

TLV J3X instruction manual

Tylo 2900 2665 manual

Tylo

Tylo 2900 2665 manual

Delta 54613 Series Specification sheet

Delta

Delta 54613 Series Specification sheet

Alveus MONARCH Series Care Instructions

Alveus

Alveus MONARCH Series Care Instructions

manuals.online logo
manuals.online logoBrands
  • About & Mission
  • Contact us
  • Privacy Policy
  • Terms and Conditions

Copyright 2025 Manuals.Online. All Rights Reserved.