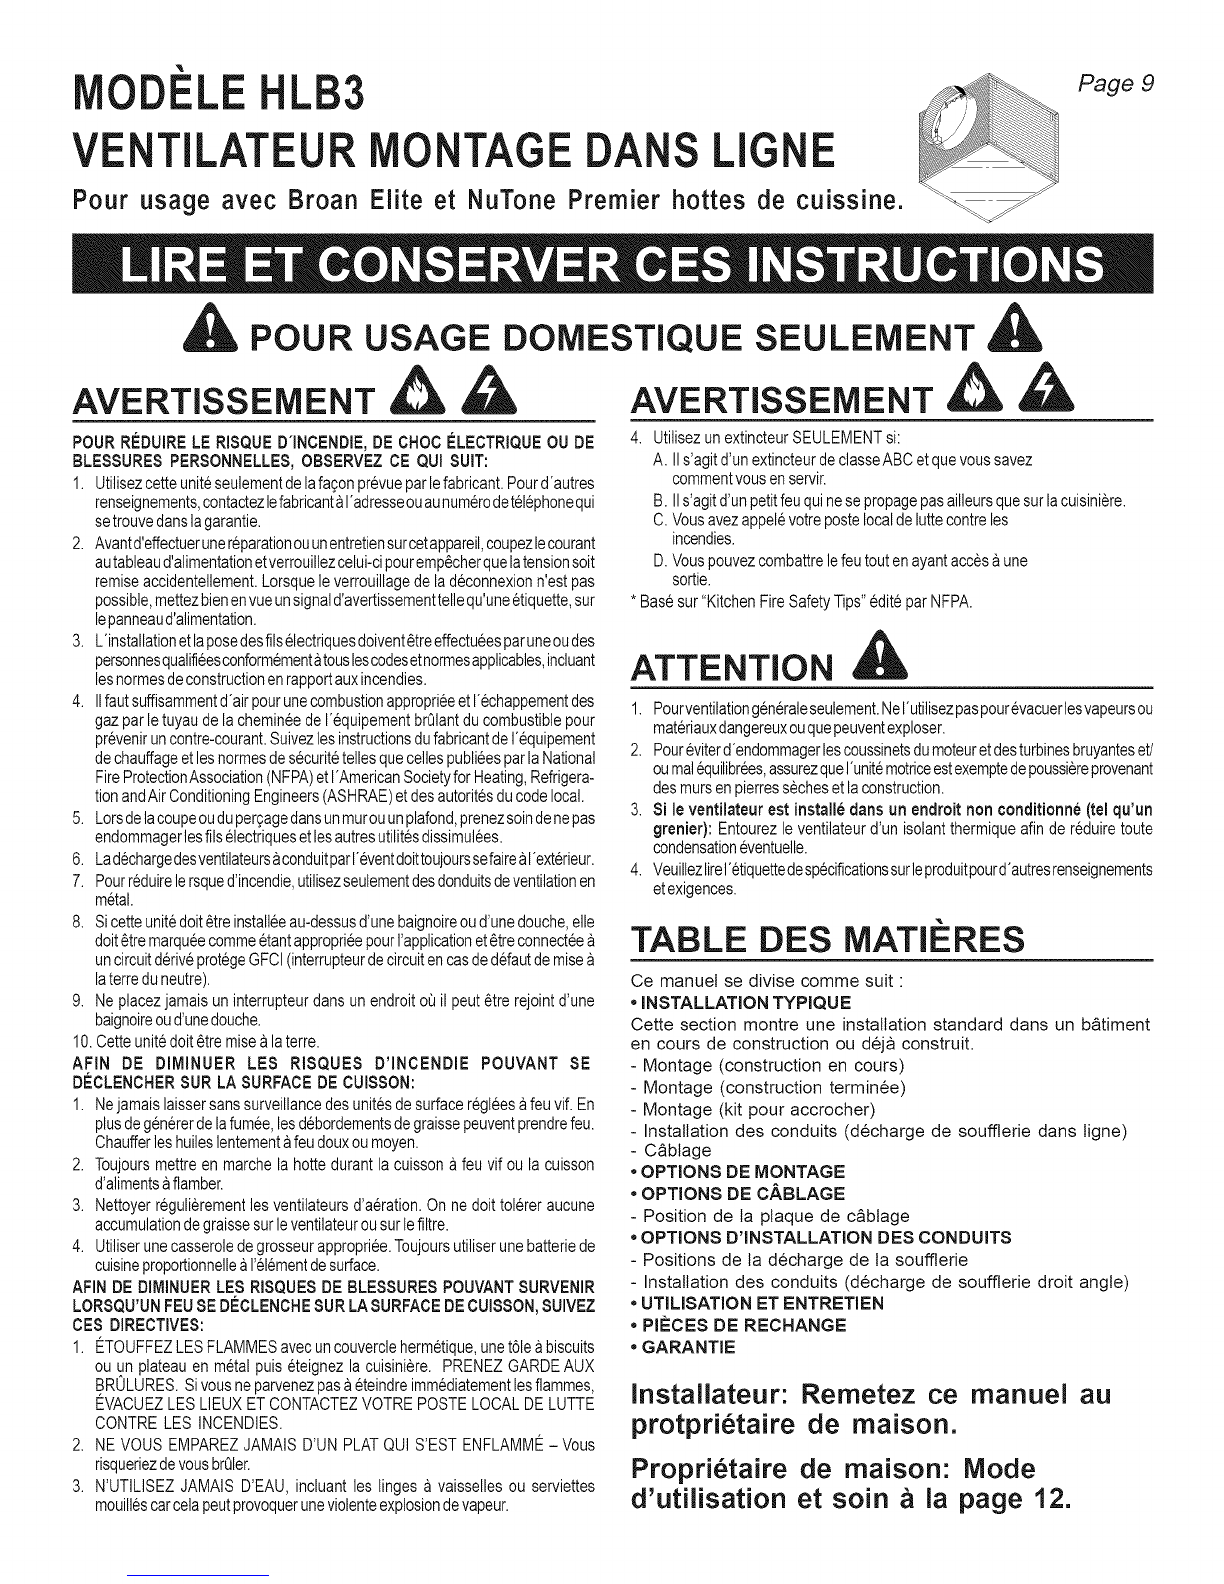
Broan HLB3 User manual

L
E
For use with
L
LOWER
Broan Elite and NuTone Premier Hoods.
Page 1
FOR DOMESTIC
wAR,I.G
TO REDUCE THE RISK OF FIRE, ELECTRIC SHOCK, OR IN=
JURY TO PERSONS, OBSERVE THE FOLLOWING:
1. Use this unit only in the manner intended by the manufacturer.
If you have questions, contact the manufacturer at the address
or telephone number listed in the warranty.
2. Before servicing or cleaning unit, switch power off at service
panel and lock the service disconnecting means to prevent
power from being switched on accidentally. When the service
disconnecting means cannot be locked, securely fasten a promi-
nent warning device, such as a tag, to the service panel.
3. Installation work and electrical wiring must be done by a quali-
fied person(s) in accordance with all applicable codes and stan-
dards, including fire-rated construction codes and standards.
4. Sufficient air is needed for proper combustion and exhausting
of gases through the flue (chimney) of fuel burning equipment
to prevent backdrafting. Follow the heating equipment
manufacturer's guideline and safety standards such as those
published by the National Fire Protection Association (NFPA),
and the American Society for Heating, Refrigeration and Air
Conditioning Engineers (ASHRAE), and the local code authori-
ties.
5. When cutting or drilling into wall or ceiling, do not damage
electrical wiring and other hidden utilities.
6. Ducted fans must always be vented to the outdoors.
7. To reduce the risk of fire, use only metal ductwork.
8. If this unit is to be installed over a tub or shower, it must be
marked as appropriate for the application and be connected to
a GFCI (Ground Fault Interrupter) - protected branch circuit.
9. Never place a switch where it can be reached from a tub or
shower.
10. This unit must be grounded.
TO REDUCE THE RISK OF A RANGE TOP GREASE FIRE:
A. Never leave surface units unattended at high settings. Boitovers
cause smoking and greasy spitlovers that may ignite. Heat oils
slowly on tow or medium settings.
B. Always turn hood ON when cooking at high heat or when
flambeing food (i.e. Crepes Suzette, Cherries Jubilee, Pepper-
corn Beef Flambe').
C. Clean ventilating fans frequently. Grease should not be allowed
to accumulate on fan or filter.
D. Use proper pan size. Always use cookware appropriate for the
size of the surface element.
TO REDUCE THE RISK OF INJURY TO PERSONS IN THE EVENT
OF A RANGE TOP GREASE FIRE, OBSERVE THE FOLLOW-
ING:*
1. SMOTHER FLAMES with a close-fitting lid, cookie sheet, or
metal tray, then turn offthe burner. BE CAREFUL TO PREVENT
BURNS. If the flames do not go out immediately, EVACUATE
AND CALL THE FIRE DEPARTMENT.
2. NEVER PICK UP A FLAMING PAN - You may be burned.
3. DO NOT USE WATER, including wet dishcloths or towels -
violent steam explosion will result.
COOKING ONLY
WAR,I.G
4. Use an extinguisher ONLY if:
A. You know you have a Class ABC extinguisher and you already
know how to operate it.
B. The fire is small and contained in the area where it started.
C. The fire department is being called.
D. You can fight the fire with your back to an exit.
* Based on "Kitchen Fire Safety Tips" published by NFPA.
CAUTION
1. For general ventilating use only. Do not use to exhaust hazard-
ous or explosive materials and vapors.
2. To avoid motor bearing damage and noisy and/or unbalanced
impellers, keep drywall spray, construction dust, etc. off power
unit.
3. If ventilator is installed in an unconditioned space (such as
an attic): Surround the ventilator with thermal insulation - to
minimize possible condensation.
4. Please read specification label on product for further informa-
tion and requirements.
TABLE OF CONTENTS
This manual is divided into sections as follows:
* "TYPICAL INSTALLATION"
This section shows a common installation.
- Mounting (New Frame Construction)
- Mounting (Existing Frame Construction)
- Mounting Using Hanger Kit (included)
- Ducting (straight-through blower discharge)
- Wiring
* "MOUNTING OPTIONS"
" "WIRING OPTIONS"
- Wiring Plate Position
" "DUCTING OPTIONS"
- Blower Discharge Positions
- Ducting (vertical blower discharge)
*"USE AND CARE"
*"SERVICE PARTS"
" "WARRANTY"
installer: Leave this manual with
the homeowner.
Homeowner: Use and Care
information on page 4.

TYPICAL iNSTALLATiON
MOUNTING (New Frame Construction)
10" ROUND DUCT
[8" TO 10" ROUND
TRANSITION
1½" FRAMING 10" ROUND
DUCT
/
Blower
factory-
shipped
in straight
through
discharge
position.
CEILING JOIST
(16" centers
shown)
Mounting brackets factory-
shipped in position for
½" ceiling material. MOUNTING SCREW
Factory-shipped unit installed in new construction.
MOU NTING (Existing Frame Construction)
8" TO 10" ROUND
TRANSITION
10" ROUND DUCT
(OUTLET)
CEILING JOIST
(16" centers
shown)
MOUNTING
BRACKETS
(Attached to
opposite sides
of housing &
upside-down)
10" ROUND
DUCT
(INTAKE)
2 X 4 FRAMING
(wide side down)
Blower Jbctory-shipped in straight-through
discharge position.
iMPORTANT: Remove shipping tape from damper
Remove the shipping tape from the damper flap and make sure
that damper flap opens and closes freely inside the ductwork. Use
duct tape to make ductwork connections secure and air-tight.
Remove shipping ring from blower inlet
Remove the shipping ring from the blower inlet before operating
the ventilator.
Page 2
TYPICAL INSTALLATION
MOUNTING USING HANGER KIT (included)
HANGER
KIT BOLT
& WASHER
EXTENSION
SPRING
HANGER 10" ROUND
"_ _ DUCT (INTAKE)
KIT CHAIN _ _i
HANGER KIT
EYE-BOLT
8"TO 10"
ROUND
TRANSITION HANGER
KIT NUT &
WASHER
BRACKET
", _ GRILLE NUT
_ (Install into
_ square holes in
10"(OUTLET)DUCTROUND <, ,,_ housing)
/"4... _ ACCESS
ACCESS PANEL _ i-'-- PANEL SCREW
Blower factolT-shipped in straight-through
discharge position.
DUCTING (Horizontal blower discharge)
ROUND DUCT
/
ROUND
ELBOW
WALL
CAP
Two ways to connect ductwork to a Jbctory-shipped unit.

WIRING
BLACK
TO
BLACK TOP /BACK
OF HOUSING
GROUND TO
WIRING PLATE
WHITE
TO
WHITE
WIRING
PLATE
120 VAC
"_ LINE IN
(from
range
hood)
Ventilator can be wired jmm outside qj housing.
Use UL approved connectors to wire per local codes.
Page 3
WIRING OPTIONS
WiRiNG PLATE POSiTiON
HORIZONTALPOWER
CABLE CONNECTION
VERTICAL
POWER
CABLE
I I CONNECTION
Wiring plate mounts to side or top c_/ housing.
MOUNTING OPTIONS
¼-20 hex nuts secure mounting brackets to housing. Loosen and
re-tighten or remove and replace nuts as necessary for desired
mounting bracket position.
1½"
11j_,, _ t_,,MAX.
Mounting brackets in Mounting brackets .flipped
Jbctory-shipped position, over and mounted to
(Outlet parallel to joists.) outlet sides of housing.
(New construction) (Outlet parallel to joists.)
(_ construction)
0 0
I_=== 12¼" ===._
Mounting brackets
mounted to outlet sides c_f
housing.
(Outlet perpendicular to joists.)
(New construction)
Mortaring brackets .flipped
over to give approx. 1"
more clearance.
(Outlet parallel to joists.)
(New construction)
" _V_ 113/4'I
0 0 . o o _-I
[ k.------12¼"---------,4 1 I.,,---12_"---,_ I
Mounting brackets Mounting brackets .flipped
mounted to top _f sides c_f over and mounted to top
housing, c_ sides c_ housing.
(Outlet parallel to joists.) (Outlet parallel to joists.)
(New or existing construction) (New or existing construction)
DUCTING OPTIONS
BLOWER DISCHARGE POSiTiONS
DUCT DUCT
CONNECTOR CONNECTOR
Blower and duct connec-
tor in straight through
discharge position.
(Factory shipped)
Blower and duct connec-
tor in right angle dis-
char eg.d_position.
DUCTING (Right angle blower discharge)
ROOF CAP
ROUND
DUCT
!
I
1I
Typical ductwork connection to aventilato," converted
to right angle discharge.

USE AND CARE
Follow wiring instructions packed with range hood, and adhere to
all local and state codes, and the National Electrical Code.
_ARNING: To reduce the risk of electric shock,
disconnect from power supply before servicing.
Page 4
To clean blower assembly: Remove access panel, unplug blower
from housing, remove blower mounting nuts, and carefully re-
move blower from housing. Use appropriate vacuum attachment
or a soft cloth and mild soap or detergent to clean blower dis-
charge area and wheel. DO NOT ALLOW WATER TO ENTER
MOTOR. Make sure blower assembly is completely dry before
reinstalling.
Motor is permanently lubricated. Do not oil or disassemble motor.
SERVICE PARTS
KEY NO. PART NO.
1 97014735
97014736
2 97014728
3 97014761
4 99390099
5 99150415
6 98005513
7 99400035
8 98005512
9 99150471
10 97014775
11 98009399
12 99020273
13 99080485
14 99260558
15 99250959
16 99100491
+ 97016792
17 99260477
18 97006039
19 98009417
20 99420470
21 99150472
22 99150591
23 97016791
24 $414
DESCRIPTION
Housing Assembly
Housing Assembly
Mounting Bracket (2 req.)
Damper Assembly (8" dia.)
Duct Connector (8" dia.)
Screw, 8-18 x 1¼(12 req.)*
Wire Box Cover
Strain Relief Bushing
Wiring Plate
Ground Screw, 10-32 x ½ (2 req.)
Scroll Assembly
Inlet Ring
Blower Wheel
Motor
Lock Nut, 8-32 (4 req.)*
Washer (4 req.)*
Grommet (4 req.)
Blower Assembly, Complete
(Includes Key Nos. 5 & 10-17)
Nut, 1¼-20(6 req.)*
Wire Harness
Access Panel
Cover Nut (2 req.)
Cover Mounting Screw (2 req.)
Screw, 10-16 x 7/8 (4 req.)*
Hanger Kit
Transition 8-10" Round
Order replacement parts by PART NO. - not by KEY NO.
* Standard hardware - may be purchased locally.
+ Not shown assembled.
WARRANTY
24
3
\
22
4
23
%1
>
/
22
/
/
/
f
I10.
I
I
I
I
16
1//
/
/
I BLOWER
j ASSEMBLY
! ..---21
BROAN-NUTONE ONE YEAR LIMITED WARRANTY
Broan-NuTone warrants to the original consumer purchaser of its products that such products will be free from defects in materials or workmanship for a period of one year
from the date of original purchase. THERE ARE NO OTHER WARRANTIES, EXPRESS OR IMPLIED, INCLUDING, BUT NOT LIMITED TO, IMPLIED WARRANTIES OF
MERCHANTABILITY OR FITNESS FOR A PARTICULAR PURPOSE.
During this one-year period, Broan-NuTone will, at its option, repair or replace, without charge, any product or part which is found to be defective under normal use and
service.
THIS WARRANTY DOES NOT EXTEND TO FLUORESCENT LAMP STARTERS AND TUBES. This warranty does not cover (a) normal maintenance and service or (b) any
products or parts which have been subject to misuse, negligence, accident, improper maintenance or repair (other than by Broan-NuTone), faulty installation or installation
contrary to recommended installation instructions.
The duration of an implied warranty is limited to the one-year period as specified for the express warranty. Some states do not allow limitation on how long an implied
warranty lasts, so the above limitation may not apply to you.
BROAN-NUTONE'S OBLIGATION TO REPAIR OR REPLACE, AT BROAN-NUTONE'S OPTION, SHALL BE THE PURCHASER'S SOLE AND EXCLUSIVE REMEDY UNDER
THIS WARRANTY. BROAN-NUTONE SHALL NOT BE LIABLE FOR INCIDENTAL, CONSEQUENTIAL OR SPECIAL DAMAGES ARISING OUT OF OR IN CONNECTION WITH
PRODUCT USE OR PERFORMANCE. Some states do not allow the exclusion or limitation of incidental or consequential damages, so the above limitation may not apply
to you.
This warranty gives you specific legal rights, and you may also have other rights, which vary from state to state. This warranty supersedes all prior warranties.
To qualify for warranty service, you must (a) notify Broan-NuTone at the address or phone number stated below (b) give the model number and part identification and (c)
describe the nature of any defect in the product or part. At the time of requesting warranty service, you must present evidence of the original purchase date.
In the U.S., contact: Broan-NuTone, 926 West State Street, Hartford, WI U.S.A. 53027 (1-800-637-1453)
In Canada, contact: Broan-NuTone Canada, 1140 Tfistar Drive Mississauga, Ontario L5T 1H9 (1-888-882-7626)
99043698B

VE LO
TILA LB3
PARA NTAJE E f
LI A
Peruse con campanasde BroanElitey NuTonePremier.
Pagina 5
PARA COClNAR EN CASA SOLAMENTE
ADVERTENCIA ADVERTENCIA
PARAREDUClRELRIESGODEINCENDIO,GOLPEEL[:CTRICO,0LESION
A PERSONAS,OBSERVELO SIGUIENTE:
1. Useesta unidadsolamentede la maneraindicadaperelfabricante.Si tiene
preguntas,p6ngaseencontactoconelfabricantealadirecci6notelefonoque
aparecenenlagarantia.
2. Antesdelimpiarodeponerenserviciolaunidad,apagueelinterrupterenelpanel
de servicio,y asegureel panelde servicio para evitar que se encienda
accidentalmente.Cuandoeldispositivoparadesconectarelservicioelectricono
puedesercerradoconalg0ntipodetraba,sujetefuertementealpaneldeservicio,
unaetiquetadeadvertenciaprominente.
3. Eltrabajodeinstalaci6ny cableadoelectricodebenestarhechosperpersonal
capacitadodeacuerdocontodosloscOdigosyestandaresaplicables,incluyendo
cOdigosyestandaresdeconstrucciOnapruebadeincendios.
4. Se necesitasuficienteairepara lacombusti6ny extracciOnde gasesperla
chimeneadelequipoquequemacombustibleparaevitarlaretrogresiOndelas
llamas.Sigalasdirectricesdelfabricantey estandaresdeseguridadcomelos
publicadosperlaAsociaciOnNacionaldeProtecciOnContraIncendios(opersus
siglaseninglesNFPA),ylaSociedadAmericanadeIngenierosdeCalefacciOn,
Refrigeraci6n,yAireAcondicionado(opersussigleseninglesASHRAE),y los
cOdigosdelasautoridadeslocales.
5. Cuandocorteotaladreenunaparedo cieloraso,nodafiecableadoelectricoo
instalacionesnovisibles.
6. Ventiladoresconconductossiempredebenextraerhaciaelexterior.
7. Parareducirelriesgodeincendio,uses61oductosdemetal.
8. Siestaunidadvaainstalarsesobreunabar,eraoducha,debemarc&rselacome
correctaparadichaaplicaci6nydebeconectarseaunprotegidoGFCI(Cortacicuito
AccidentalaTierra).
9. NuncainstaleuninterrupterdondesepuedaalcanzardesdeunabaSeraoducha.
10.Estaunidadsedebeconectaratierra.
PARAREDUCIRELRIESGODEINCENDIODEBIDOAGRASAACUMULADA
EN LASHORNILLAS:
1. Nuncadejesinatenderlasunidadesdesuperficiecuandotenganajustesaltos.
Losrebosespuedenprovocarhumoyderramesgrasososquesepuedenincendiar.
Calientelentamenteel aceiteenunajustebajoo medio.
2. SiempreENClENDAlacampanacuandococineconaltatemperaturaocuando
cocinealimentosquesepuedanincendiar.
3. Limpieconfrecuencialosventiladores.Nodebepermitirquelagrasaseacumule
enelventiladornienelfiltro.
4. Utiliceunsartendetamafioadecuado.Siempreutiliceelutensilioadecuadoal
tamafiodelelementodesuperficie.
PARAREDUCIREL RIESGODE LESIONAPERSONASRESULTADODE
UNINCENDIODEBIDOA GRASAACUMULADAENLASHORNILLAS,PRO-
CURELO SIGUIENTE:*
1. AHOGUELASLLAMASconunatapaajustadaocharolade metal,despues
apaguela hornilla.TENGACUIDADOAFINDE EVlTARQUEMADURAS.Si
lasllamasnoseapagandeinmediato,EVACUEYAVISEALOSBOMBEROS.
2. NO LEVANTENUNCAUNASARTENQUE ESTEEN LLAMAS- Ustedse
podraquemar.
3. NOUTILICEAGUA,incluyendotoallasdecocinamojadas-puederesultaruna
explosiondevaporviolenta.
4. UtiliceunextinguidorSOLAMENTEsi:
A. UstedsabequetieneunextinguidordeclasABCyIosabeutilizar.
B. Elincendioespequer_oycontenidodentrodelareaderideseinici6.
C. Losbomberoshansideavisados.
D. Ustedpuedecombatirelincendioconunasalidaasuespalda.
*Basadoenlasrecomendacionespara"SeguridadenlaCocina"publicadasperla
NFPAdelos EEUU.
CUIDADO
1. Parausedeventilaci6ngeneralsolamente.NoIouseparaextraermaterialeso
vaporespeligrososoexplosives.
2. ParaevitardaSoaloscojinetesdelmotoryholicesruidosasy/odesequilibradas,
mantengalaunidaddepotencialejosderociosdeyeso,polvodeconstrucciOn,
etc.
3. Si elventilador se instalaen un area sin acondicionamiento (come per
ejemploenun atico): Rodeeelventiladorconmaterialdeaislamientotermico
paraminimizarlaposiblecondensaciOn.
4. Paramasinformaci6ny requisitesfavorleerlaetiquetadeespecificacionesdel
producto.
CONTENDIO
Estemanualconsisteenlassiguientessecciones:
•"INSTALACIONTiPICA"
Estasecci6nmuestraunainstalaci6ncom0nenunaestructuranuevayen una
existente.
-Montaje(estructuranueva)
-Montaje(estructuraexistente)
-Montajeel usarkitdesuspender
-Conexioneselectricas
-ColocaciOndeconductos(descargaderechoperdel
ventilador)
•"OPCIONESDEMONTAJE"
• "OPCIONESPARALACONEXIONELI':CTRICA"
-Colocaci6ndelaplacadeconexiones
•"OPCIONESPARALACOLOCACIONBE CONDUCTOS"
-Posicionesdeladescargadelventilador
-ColocaciOndeconductos(descargaangulorectodel
ventilador)
•"USO Y CUIDABO"
•"PIEZAS DE SERVIClO"
•"GARANTiA"
Instalador: Deje este manual con el
dueho de casa.
Dueho de casa: Informacion del use y
mantenimiento en la pagina 8.

INSTALACI6N TiPICA
MONTAJE (Estructura nueva)
CONDUCTOREDONDODE25,4 CM (10 PO)
/TRANSICION REDONDODE
20,32A25,4CM(8A10PO)
ESTRUCTURA ADICIONAL
DE1½' (3,8cm) CONDUCTO
REDONDODE 25,4
CM (10 PO)
/
Ventilador,enviado _,
defabricaen
posici6nde VIGUETADEL TECHO
descargaderecho & _emuestrancentrosde
delventilador / 16"(40,6cm)
por
TORNILLODE MONTAJE
Abrazaderasdemontaje,enviadasdefabricaenposici6n
paramontarseenunaviguetade ½" (1,27cm)deltecho.
Unidad enviada de J_brica instalada en una eslructura mteva.
MONTAJE (Estructura existente)_
TRANSICION REDONDO DE
20,32A25,4CM(8A 10PO)
CONDUCTO REDONDO DE
25,4CM(10 PO)(SALIDA)
VIGUETADELTECHO
(semuestrancentrosde
16"(40,6cm)
ABRAZADERAS
DE MONTAJE
(conectadasaloslados
opuestosdel alojamientoy
haciaabajoparaque el
alojamientoquedea nivel
delcielo rasoterminado)
CONDUCTO
REDONDO DE
25,4CM(19 PO)
(ADMISION)
ESTRUCTURADE2 X 4 (5,08x 10,2cm)
(con el ladodel cableadohaciaabajo)
Ventilador, enviado de j_brica en posici6n de descarga
derecho pot del ventilador.
IMPORTANTE: Quite la cinta del envio de
apagador
Aseg_rese de quitar la cinta que fija ta pestafia det regulador
durante ta transportaci6n, y de que esta pestafia abra y cierre
libremente dentro det conducto. Utitice cinta de conductos para
asegurar y hermetizar tas conexiones de los conductos.
Quite el anillo de! envio de entrada del soplador
Quite et anitlo det envio de la entrada det soplador antes de fun-
cionar et ventitador.
Pagina 6
INSTALACION TiPICA
MONTAJE EL USAR KiT DE SUSPENDER
(incluido)
TORNILLOY
ARANDELA
DEKITDE
SUSPENDER
RESORTE
EXTENCION
CADENADEKIT
DE SUSPENDER._.
TORNILLO DE
OJO DEKITDE
SUSPENDER
TRANSICION
REDONDO
20,32A 25,4CM
(8A 10PO)
CONDUCTO
REDONDO DE
25,4CM (19PO)
(ADMISION)
TUERCAY
ARANDELA
DEKIT DE
SUSPENDER
ABRAZADERA
DE MONTAJE
_-. UERCADE PANEL
DEACCESO(Instale
CONDUCTO ._ _ enlosagujeros
REDONDO DE J ! _ pequefiosen la
25,4CM(10 PO) <_ I _ oubierta)
(SALIDA) /_ _ TORNILLO DE
PANEL DE ACCESO V _ PANEL DE ACCESO
Ventilador, enviado de ,#_brica en posici6n de descarga
derecho pot del ventilador.
COLOCACION DE CONDUCTOS (descarga
derecho por de! ventilador)
_ VENTILACIONENELALERO
\
•/............. /! ......... _ .... /),,(-_.............. I-i-'><_l-:l I IAPA_"/1"_ _ DEL
CODO REDONDO _ TECHO
Dos Jbrmas de conectar los conductos a una unidad
enviada de J3brica.

Pagina 7
CABLEADO
NEGRO
A
NEGRO
PARTESUPERIOR/
POSTERIOR DEL
ALOJAMIENTO
TIERRAALAPLACADE
CONEXIONES
PLACADE
CONEXlONES
BLANCO
A
BLANCO
LiNEADE
ENTRADA DE
120VCA
E1 ventilador se puede conectar desde el exterior del
alojamiento. Use conectores aprobados pot UL en la
conexi6n en cumplimiento con los c6digos locales.
OPCIONES DE MONTAJE
LaB tuercas hexagonales de ¼ x 20 aseguran taBabrazaderas de
montaje en et alojamiento. Afloje y vuetva a apretar o quite y
reemplace taB tuercas segQn sea necesario para cotocar laB
abrazaderas de montaje en la posici6n deseada.
Abmzadems de montaje en la Abrazaderas de montaje
posiciJn ajustada en ,[k_brica. volteadas v montadas a los
(La salida queda paraleta a lados de la salida del aloja-
laB viguetas) (Estructura miento. (La satida queda
nueva.) perpendicular a laB viguetas)
(Estructura existente)
0 0
J_..-31,1 cm=..-_
Abmzadems de montaje
montadas en los lados de la
salida del alojamiento.
(La salida queda
perpendicular a laB viguetas)
(Estructura nueva_)
Abz'azadems de montaje
volteadas paz'a permitiz" un
e,spacio adicional de aprox.
1" (2.54 cm). (La salida queda
paralela a taB viguetas)
(Estructura nueva)
____I 00 0 _--
Abl'azadel'a,s" de montaje
montadas en la paz'te supez'ioz"
de los lados del alojamiento.
(La salida queda paraleta a
laB viguetas) (Estructura nueva
o existente.)
o o _,LI],4'---31,1 cm-----_
Abz'uzadems de montaje
volteadas v montadas en la
parte supez'ioz" de los lados del
alojamiento. (La salida queda
paraleta a taB viguetas)
(Estructura nueva o existente)
OPCIONES PARA LA
CONEXION ELECTRICA
I
_ L_J//" I CONEXION
,V o I VERTICAL DEL
I I " /CABLE DE
ALIMENTACl0N
CONEXION _
HORIZONTAL
DELCABLE DE
ALIMENTACION
La plata de conexiones se monta alos [ados o en[a
parte superior del alojamiento.
COLOCACION DE LA
PLACA DE CONEXIONES
OPCIONES PARA LA
COLOCACION DE CONDUCTOS
POSIClONES DE LA DESCARGA DEL VENTILADOR
CONECTOR
DEL ]
CONDUCTO_
VENTILA_
Cambie la posicidn del
conector del ventilador y
del conducto pard una
descar_a derecho pot del
ventilador.
CONECTOR
DEL
CONDUCTO
Cambie la
posici6n
del conector
del ventilador
y delconducto
para una l I
VENTILAD_ _
Conector del ventilador y
del conducto en posicR'm
de descarga bngulo recto
(ajuste de J2_brica)
COLOCAClON DE DUCTOS (Descarga [_ngulorecto del
ventilador)
TAPA DEL TECHO
CONDUCTO
REDONDO
/
I
I I
Conexic'm tipica de los conductos dl ventilador
cambiado adescarga c_ngulo recto.

USO Y CUIDADO
Siga las instrucciones para tas conexiones etectricas que vienen
empacadas con et control, y observe todos los c6digos locales y
estatales y et C6digo Etectrico Nacional.
_ADVERTENCIA: Para reducJr el rJesgo de sufrJr una
descarga electrJca, antes de dar servJcio al ventilador
desconectelo del suministro electrico.
Pagina 8
Para IJmpJarel conjunto del ventJlador: Quite el panel de acceso,
desconecte et ventilador del alojamiento, quite las tuercas de
montaje del ventitador y cuidadosamente saque et ventilador det
alojamiento. Use el aditamento apropiado de la aspiradora o un
patio suave y jab6n o detergente suave para limpiar et area de
descarga y ta rueda del ventilador. NO PERMITA QUE ENTRE
AGUA AL MOTOR. AsegOrese de que et conjunto del ventitador
este completamente seco antes de volverlo a instalar.
El motor esta permanentemente lubricado. No lubrique ni
desmonte et motor.
PIEZAS DE SERVlCIO
CLAVE NQ. DESCRIPCI6N
1
2
3
4
5
6
7
8
9
10
11
12
13
14
15
16
+
17
18
19
20
21
22
23
24
PIEZA N°.
97014735
97014736
97014728
97014761
99390099
99150415
98005513
99400035
98005512
99150471
97014775
98009399
99020273
99080485
99260558
99250959
99100491
97016792
99260477
97006039
98009417
99420470
99150472
99150591
97016791
$414
Conjunto del alojamJento
Abrazaderas de montaje (2 req.)
Conjunto del reguiador 8" de dia. (20.3 cm)
Conector del conducto 8" de dia. (20.3 cm)
Tornillos de 8-18 x 1/_(se req. 12)*
CubJerta de la caja de conexiones
Buje de alivJo de tensJ6n
Placa de conexJones
TornJllos de conexi6n a tierra, 10-32 x ½
(se req. 2)
Conjunto del caracol
Anillo de entrada
Rueda del ventilador
Motor
Tuercas de 8-32 (se req. 4)*
Arandelas (se req. 4)*
Aros interiores (se req. 4)
Conjunto del ventilador, completo
(Incluye art. clave N°. 5 y 10-17)
Tuercas, IA-20 (se req. 6)*
Arnes de alambre
Panel de acceso
Tuercas de panel de acceso (2 req.)
Tuercas de montaje de panel de acceso (2 req.)
Tomillos, 10-16 x 7/8 (4 req.)*
Kit de Suspender
Transici6n, Rodondo de 20,32-24,5 cm
(8-10 po)
Pida las piezas de repuesto por N°. DE PIEZA, no por N°. DE CLAVE
* Herraje estandar, se puede comprar Iocalmente.
+ No demostrado montado.
24
3
\
4
23
/
22
/
/
f
I10.
I
I
I
I
16
GARANTIA i.121
GARANTIA LIMITADA DE BROAN-NUTONE DE UN AI_IO
Brean-NuTone le garantiza al consumider comprador original de sus productos que tales productos estar&n libres de defectos en materiates o mano de obra por un periodo de un afie a par@ de la fecha de compra
original. NO HAY OTRAS GARANTtAS EXPUCtTAS O tMPLICtTAS, tNCLUYENDO, PERO NO LIMITADAS A GARANTtAS tMPLICITAS DE COMERCIALIZACION O APTtTUD PARA UN PROPOSITO
PARTICULAR
Durante este periedo de un aSe, Brean-NuTene reparara e cambiar&, a su epci6n y sin cobro, cualquier preducte e pieza que se encuentre defectuosa baje use y servicie normal.
ESTA GARANTtA NO SE EXTtENDE A ARRANCADORES DE LAMPARAS FLUORESCENTES Y TUBOS. Esta garantia no cubre (a) mantenimiente y servicie normales o (b) cualquier preducto e pieza
que hayan side sometidos a use equtvocado, negligencia, accidente, mantenimiento o reparacion indebida (excepto per Broan-NuTone), instatact6n defectuosa o instataci6n contraria a tas tnstrucciones de
instalaci6n.
La duraci6n de cuatquier garantia impticita se timita a un periodo de un afio segun se especifica en ta garantia explicita. Algunos estados no permiten limitaci6n a ta duraci6n de una garantia impticita, pot Io
que esta limitaci6n tal vez no se aplica at caso suyo.
LA OBUGACtON DE BROAN-NUTONE DE REPARAR O CAMBIAR, A OPCION DE BROAN-NUTONE, SERA EL UNtCO Y EXCLUStVO REMEDIO AL COMPRADOR BAJO ESTA GARANTtA. BROAN-
NUTONE NO SERA RESPONSABLE POR DAi_OS tNCtDENTALES, CONSECUENTES, O ESPECtALES QUE SURJAN DE O EN RELACION A EL USO O DESEMPEI_O DEL PRODUCTO. Algunos
estados no permiten la exlusi6n o limitaci6n de daSos tncidentales o consecuentes, por to que esta limitact6n o exciusi6n tat vez no se aplica en su caso.
Esta garantia te da derechos legates especificos, y usted puede tenet otros derechos que varian de estado a estado. Esta garantia reemptaza todas tas garanttas antertores.
Para calificar para servicto bajo esta garantia, usted debe (a) notificar a Broan-NuTone en la direcci6n o aI tetefono que aparece abajo (b) dar el numero de modeto y la identificacion de pieza y (c) describir
el defecto en el producto o pieza. AI solicitar servicio bajo lagarantia, usted debe presentar evtdencia de ta fecha de compra original
En los Estados Unidos, Itame: Elroan-NuTone LLC, 926 West State Street, Hartford, W153027 (1-800-637-1453)
En Canada, frame: Broan-NuTone Canada, 1140 Tristar Drive Mississauga, Ontario L5T 1H9 (1-888-882-7626)
99043698B

'!
ODELE L
VE TILATEUR
Pour usage avec Broan Elite
NTAGEDA
et NuTone Premier SLI
hottes
E
de cuissine.
Page 9
POUR USAGE DOMESTIQUE SEULEMENT
AVERTISSEMENT AVERTISSEMENT
POURRCDUIRELE RISQUED'INCENDIE,DE CHOCI_LECTRIQUEOU DE
BLESSURESPERSONNELLES,OBSERVEZCE QUI SUIT:
1. Utilisezcetteuniteseulementdelafa_onprevueparlefabricant.Pourd'autres
renseignements,contactezlefabricantal'adresseouaunumerodetel6phonequi
setrouvedanslagarantie.
2. Avantd'effectuerunereparationouunentretiensurcetappareil,coupezlecourant
autableaud'alimentationetverrouillezcelui-cipouremp_cherquelatensionsoit
remiseaccidentellement.Lorsqueleverrouillagede ladeconnexionn'estpas
possible,mettezbienenvueunsignald'avertissementtellequ'uneetiquette,sur
lepanneaud'alimentation.
3. L'installationetlaposedesfils61ectriquesdoivent_treeffectu6esparuneoudes
personnesqualifieesconformementatouslescodesetnormesapplicables,inchant
lesnormesdeconstructionenrapportauxincendies.
4. IIfautsuffisammentd'airpourunecombustionapproprieeetI'echappementdes
gazparle tuyaudelachemineedeI'equipementbrQlantducombustiblepour
preveniruncontre-courant.SuivezlesinstructionsdufabricantdeI'equipement
dechauffageetlesnormesdesecurit6tellesquecellespublieesparlaNational
FireProtectionAssociation(NFPA)etI'AmericanSocietyforHeating,Refrigera-
tionandAirConditioningEngineers(ASHRAE)etdesautoritesducodelocal.
5. Lotsdelacoupeoudupergagedansunmurouunplafond,prenezsoindenepas
endommagerlesillselectriquesetlesautresutilitesdissimulees.
6. Ladechargedesventilateursaconduitpar1'6ventdoittoujourssefaireaI'ext6rieur.
7. Pourreduirelersqued'incendie,utilisezseulementdesdonduitsdeventilationen
metal.
8. Sicetteunit6dolt_treinstall6eau-dessusd'unebaignoireoud'unedouche,elle
dolt6tremarqueecommeetantapproprieepourI'applicationet_treconnectee
uncircuitderiv6protegeGFCl(interrupteurdecircuitencasdedefautdemise
laterreduneutre).
9. Ne placezjamaisuninterrupteurdansun endroitoQil peut_tre rejointd'une
baignoireoud'unedouche.
10.Cetteunitedolt_tremisealaterre.
AFIN DE DIMINUER LE8 RISQUES D'INCENDIE POUVANT SE
DECLENCHER$UR LASURFACEDE CUISSON:
1. Nejamaislaissersanssurveillancedesunitesdesurfaceregl6esafeuvif. En
plusdegen6rerdelafumee,lesdebordementsdegraissepeuventprendrefeu.
Chaufferleshuileslentementafeudouxoumoyen.
2. Toujoursmettreen marchela hottedurantla cuissona feu vif ou la cuisson
d'alimentsaflamber.
3. Nettoyerregulierementlesventilateursd'aeration.Onnedolttolereraucune
accumulationdegraissesurleventilateurousurlefiltre.
4. Utiliserunecasseroledegrosseurappropriee.Toujoursutiliserunebatteriede
cuisineproportionnellea I'el6mentdesurface.
AFIN DE DIMINUERLESRISQUE$DEBLESSURESPOUVANTSURVENIR
LORSQU'UNFEUSEDECLENCHESURLASURFACEDECUISSON,$UIVEZ
CES DIRECTIVES:
1. t_TOUFFEZLESFLAMMESavecuncouverclehermetique,unet61eabiscuits
ou un plateauen metalpuiseteignezla cuisiniere. PRENEZGARDEAUX
BROLURES.Sivousneparvenezpasa eteindreimmediatementlesflammes,
t_VAOUEZLESLIEUXETCONTACTEZVOTREPOSTELOCALDELUTTE
CONTRELES INCENDIES.
2. NE VOUSEMPAREZJAMAISD'UNPLATQUI S'EST ENFLAMME- Vous
risqueriezdevousbrQler.
3. N'UTILISEZJAMAISD'EAU, incluantles lingesa vaissellesou serviettes
mouillescarcelapeutprovoqueruneviolenteexplosiondevapeur.
4. UtilisezunextincteurSEULEMENTsi:
A. IIs'agitd'unextincteurdeclasseABCetquevoussavez
commentvousenservir.
B. IIs'agitd'unpetitfeuquinesepropagepasailleursquesurlacuisiniere.
C.Vousavezappelevotrepostelocaldeluttecontreles
incendies.
D.Vouspouvezcombattrelefeutoutenayantacces&une
sortie.
* Basesur"KitchenFireSafetyTips"editeparNFPA.
ATTENTION
1. Pourventilationgeneraleseulement.NeI'utilisezpaspourevacuerlesvapeursou
materiauxdangereuxouquepeuventexploser.
2. Poureviterd'endommagerlescoussinetsdumoteuretdesturbinesbruyanteset/
oumalequilibrees,assurezqueI'unitemotriceestexemptedepoussiereprovenant
desmursenpierressechesetlaconstruction.
3. Si leventilateur est installedarts unendroitnon conditionne(tel qu'un
grenier):Entourezle ventilateurd'un isolantthermiqueafindereduiretoute
condensationeventuelle.
4. VeuillezlireI'etiquettedespecificationssurleproduitpourd'autresrenseignements
etexigences.
TABLE DES MATIERES
Ce manuel se divise comme suit :
INSTALLATION TYPIQUE
Cette section montre une installation standard dans un b_timent
en cours de construction ou deja construit.
- Montage (construction en cours)
- Montage (construction terminee)
- Montage (kit pour accrocher)
- Installation des conduits (decharge de soufflerie dans ligne)
- C_btage
OPTIONS DE MONTAGE
OPTIONS DE CABLAGE
- Position de la plaque de c_blage
, OPTIONS D'INSTALLATION DES CONDUITS
- Positions de la decharge de ta soufflerie
- Installation des conduits (decharge de soufflerie droit angle)
,UTILISATION ET ENTRETIEN
,PIC:CES DE RECHANGE
, GARANTIE
Installateur: Remetez ce manuel au
protprietaire de maison.
Proprietaire de maison: Mode
d'utilisation et soin a la page 12.

INSTALLATION TYPIQUE
MONTAGE (Construction en cours)
CONDUIT CIRCULAIRE
DE 10 po (25,4 cm)
TRANSITION CIRCULAIRE DE 8
10 po (20,32 a 25,4 cm)
CHARPENTE
SUPPLE_MENTAIRE DE
1½ po (3,81 cm)
CONDUIT
CIRCULAIRE
DE 10 po
(25,4 cm)
Soufflerie
preassembl6e en
position de decharge
dans ligne
Supports preassembl6s
pour plafonds de ½ po
(1,27 cm) d'epaisseur.
\ SOLIVE DE
VIS DE PLAFOND
FiXATiON (16 po /40,6 cm
centre)
Appardl installd darts un b_timent en cours de consfl"uction.
MONTAGE (Construction termin6e)
CONDUIT
CIRCULAIRE DE
10 po (25,4 cm)
(SORTIE)
SOLIVE DE
PLAFOND
(16 po/40,6 cm
centre)
SUPPORTS
(fixes aux autres
c6tes du boftier et
I'envers pour que le
boTtier soit au ras du
plafond fini)
CONDUIT
CIRCULAIRE DE
10 po (25,4 cm)
(ADMISSION)
CHARPENTE 2 x 4 (c6te
large en has)
5bz!fflerie prdassemblde en position de ddchapge darts ligne.
IMPORTANT: Retirez la bande d'exp6dition de
I'amortisseur.
Veitler a retirer le ruban adhesif d'expedition du volet du registre
et s'assurer que ce demier s'ouvre et se ferme librement a l'interieur
du conduit. Utitiser du ruban adhesif pour assurer et etancher les
raccords des conduits.
Retirez ia boucle d'exp6dition de la prise de
ventilateur.
Retirez la boucle d'expedition de la prise de ventitateur avant
d'actionner le ventitateur.
Page 10
INSTALLATION TYPIQUE
MONTAGE EN UTILISANT LE KIT DE CINTRE
(inclus)
VIS ET
RONDELLE
DE LE KiT
POUR
ACCROCHER
RESSORT DE
PROLONGATION
CHA/NE
DELEKIT
POUR _
ACCROCHER
BOULON D'OEIL
DE LE KiT POUR
CONDUIT
CIRCULAIRE DE
10 po (25,4 cm)
(ADMISSION)
TRANSITION VIS ET
CIRCULAIRE RONDELLE
DE 8 a 10 po DE LE KiT
(20,32 a 25,4 -- POUR
cm) ACCROCHER
SUPPORTS
ECROU DE
. _ PANNEAU
_ D'ACCESS
_ (installez sur les
CONDUIT _ "1_ trous carres dans
CIRCULAIRE DE
10po(25,4cm) __ o(SORTIE) /"-,< .2"_ le Iogement)
PANNEAU D'ACCESS V _/ D'ACCESS
5bz!fflerie prdassemblde en position de ddchapge darts ligne.
INSTALLATION DES CONDUITS (d6charge de
souffierie clans ligne)
CHAPEAU DE TOIT
CONDUIT
CIRCULAIRE
/
CHAPEAU
COUDE DEMUR
CIRCULAIRE
Deux maniOres de raccorder les conduits _un appareil
prdmontd.

Page 11
CABLAGE
NOIR AU
NOIR DESSUS /
ARRIC:RE DU
BO/TIER
FIL DE TERRE/_
PLAQUE DE C,_,BLAGE
PLAQUE
/^DE
CABLAGE
"_ ENTREE
BLANC 120 VCA
AU (du le
BLANC hotte)
Le ventilateur 19eut Otre branchd de19uis l'extdrieur du bo#ier.
Utiliser des connecteurs homologuds UL pour les
branchement, s; con/brm_ment aux codes locaux en vigueur.
OPTIONS DE MONTAGE
Des ecrous a six pans ¼-20 fixent les supports au boRier. Desserrer
et resserrer ou retirer et replacer tes ecrous si necessaire, selon la
)osition desir6e pour le support.
_ 0 0 __x =
_1--- 31,1 cm---_ _ _- 31,1 cm--M
Su1919orts en 19osition
19rdassemblde
(Sortie parallele aux solives)
(B_timent en cours de con-
struction)
0 0
l_.= 31,1 cm =..._
Supports fixes de part et
d'autre de la sortie du
bo#ier
(Sortie perpendiculaire aux
solives) (B&timenten cours de
construction)
3,8
a
6,4
cm
Supports retournds et fixds
de part et d'autre de la
sortie du baffler
(Sortie perpendiculaire aux
solives) (B&timent
construit)
Jo I
° .... ],_-----31,1 cm--_
Supports retournds pour
donner environl 19o de
ddgagement su19191dmentaire
(Sortie perpendiculaire aux
solives) (B_timent en cours de
construction_)
_--A 27,3 aI
.... I,_---- 31,1 cm---_ _J 29n9 I
Supports retournds et fixds
sur le dessus, de part et
d'autre du bo#ier
(Sortie parall+le aux solives)
(B_timent en cours de con-
struction ou deja construit)
Su1919o;_tsfixds sur le
dessus, de part et d'autre
du boOier
(Sortie parall%leaux solives)
(B_timent en cours de con-
struction ou deja construit)
OPTIONS DE CABLAGE
POSITION DE LA
PLAQUE DE CABLAGE
BRANCHEMENT
DU CABLE
D'ALIMENTATION
I _,LAVERTICALE
BRANCHEMENT DU
CABLE D'ALIMENTATION
ik L'HORIZONTALE
La plaque de cdblage se jixe sur le cdtd ou sur le
dessus du boitier.
OPTIONS D'INSTALLATION
DES CONDUITS
POSITIONSDE LA DISCHARGEDE LA SOUFFLERIE
RACCORD
DE
CONDUIT l
I
J
SOUFFLE
Raccord de soz_flerie et
de conduit en 19osition de
ddcharge clans ligne
(19rdassemb lde)
RACCORD
DE
CONDUIT
Raccord de soz_flerie et
de conduit en 19osition de
ddchar_e droit angle_
INSTALLATIONDESCONDUITS(deehargede soufflerie
dreit angle)
CHAPEAU DE TOIT
CONDUIT
CIRCULAIRE
!
Raccordement de conduit ty19ique _ un ventilateu, '_
converti en ddcha_e droit angle.

Page 12
UTILISATION ET ENTRETIEN
Suivre les instructions de c_blage fournies avec le regulateur et respecter
tousles codes Iocaux et provinciaux en vigueur, de m6me que le Code
national de I'electricit6.
_ AVERTISSEMENT : Pour diminuer les risques de decharge
_lectrique, debrancher la source d'alimentation avant
toute operation d'entretien.
PII CES DE RECHANGE
LteGENDE DESCRIPTION
1
2
3
4
5
6
7
8
9
10
11
12
13
14
15
16
+
17
18
19
20
21
22
23
24
N° DE RER
97014735
97014736
97014728
97014761
99390099
99150415
98005513
99400035
98005512
99150471
97014775
98009399
99020273
99080485
99260558
99250959
99100491
97016792
99260477
97006039
98009417
99420470
99150472
99150591
97016791
$414
BoftJer
BoTtler
Support (2 oblig.)
RegJstre (diam. 8 po)
Raccord de conduit (diam. 8 po)
VJs, 8-18 x 'A (12 oblig.)*
Couvercle de la bofte de c_blage
Reducteur de tension
Plaque de c_blage
Vis de terre, 10-32 x ½ (2 oblig.)
Volute
Bague d'arrivee
Roue de soufflerie
Moteur
Ecrou, 8-32 ( 4 oblig.)*
Rondelle (4 oblJg.)*
Bague d'etoupe (4 oblig.)*
Soufflerie, ensemble
(inclut nolegende 5 et 10 a 17)
Ecrou, _A-20 (6 oblig.)*
Harnais a ills
Panneau d'access
Ecrou de panneau d'access (2 oblJg.)
VJs de panneau d'access (2 oblig.)
VJs, 10-16 x 7/8 (4 oblig.)*
Kit pour accrocher
Transition, Rond de 20,32-24,5 cm (8-10 po)
Commander les pieces de rechange par numero de ref6rence et non
I'aide du numero de legende.
* Visserie standard - peut 6tre achetee Iocalement.
+ Non montre reuni.
GARANTIE
Pour nettoyer la soufflerie : Retirer la panneau de access, debrancher
la soufflerie du bottler, retirer les ecrous de fixation de la soufflerie et
retirer delicatement la soufflerie du bottler. Utiliser un accessoire
d'aspirateur approprie ou retirer la grille et nettoyer a I'aide d'un chiffon
doux et de savon ou de detergent doux pour nettoyer la zone de
decharge de la soufflerie et la roue. NE PAS LAISSER D'EAU
S'INFILTRER DANS LE MOTEUR. S'assurer que la soufflerie est
completement seche avant de la reinstaller.
Le moteur est lubrifie en permanence. Ne pas lubrifier ou demonter le
moteur.
24
3
\
4
23
/
22
16
i.121
GARANTIE LIMITEE D'UNAN DE BROAN=NUTONE
Broan-NuTone garantit _ I'acheteur consommateur original, de ses produits qu'ils sont exempts de defauts dans les mati_res premieres ou ta main-d'oeuvre pour une periode
d'un an a compter de ladate d'achatoriginal. IL N'YA PAS D'AUTRES GARANTIES, EXPRIMEES OU IMPLIClTES, INCLUANTMAIS NON PAS LIMITEAUX GARANTIES IMPLICITES
POUR FIN DE COMMERClALISATION ET DE CONVENANCE DANS UN BUT PARTICULIER.
Pendant cette periode d'un an, Broan-NuTone; _ son choix, reparera ou remplacera, gratuitement, tout produit ou piece qui s'avere d&fectueux sous utilisation et service normaux.
CETTE GARANTIE NE COUVRE PAS LES DEMARREU RS DE LAMPES FLUORESCENTES ET LES TUBES. Cette garantie ne couvre pas (a)I'entretien et le service normal ou
(b) tout produit ou piece endommage par suite de mauvais usage, negligence, accident, entretien inapproprie ou reparation (autre que par Broan-NuTone), mauvais installation
ou installation contraire au mode d'installation recommande.
La duree de toute garantie implicite est timitee a une periode d'un an tel que specifi6 pour la garantie exprimee.
L'ENGAGEMENT DE BROAN-NUTONE DE REPARER OU DE REMPLACER, AU CHOIX DEBROAN-NUTON .E,SERALA SEULE OBL.IGATION EXCLUSIVE SOUS CE.TTEGARANTI E.
BROAN-NUTONE NESETIENDRA PAS RESPONSABLE DES DOMMAGES DIRECTS, INDIRECTS OU SPEClAUXSURVENANTACAUSE DEOU EN RAPPORT A L'UTILISATION
OU LA PERFORMANCE DE SES PRODUITS.
Cette garantie vous donne des droits legaux specifiques et il se peut que vous ayez d'autres droits. Cette garantie annule toutes les garanties pr&cedentes.
Pour le service sous garantie, vous devez (a) aviser Broan-NuTone a I'adresse ou numero de telephone mentionnee ci-dessous, (b)donner le numero du modele et I'identification
de la piece et (c) decrire la nature de tout defaut dans le produit ou la pi6ce. Au temps de demander le service sous garantie, vous devez presenter une preuve de la date d'achat
original.
Aux E.U., comuniquez avec: Broan-NuTone LLC, 926 West State Street, Hartford, W153027 (1-800-637-1453)
Au Canada, comuniquez avec: Broan=NuTone Canada, 1140 Tristar Drive Mississauga, Ontario L5T 1H9 (1-888-882-7626)
99043698B
Other manuals for HLB3
1
Table of contents
Languages:
Other Broan Blower manuals

Broan
Broan P12D User manual

Broan
Broan RM325H User manual

Broan
Broan NuTone 336 User manual

Broan
Broan Best ILB11 User manual

Broan
Broan NuTone 336 User manual

Broan
Broan NuTone 332H User manual

Broan
Broan Best EB15 User manual

Broan
Broan Exterior Blower 335 User manual

Broan
Broan HLB3 User manual

Broan
Broan HLB9 User manual