BRP PYRA User manual

PYRA HELMET
USER GUIDE

1
USER GUIDE
PYRA
ENGLISH _

2
PYRA Helmet
CONGRATULATIONS!
You now have in your possession our newly designed Pyra helmet. This
MX style helmet has been engineered to not only keep you safe but also
look great on the mountain, trails, or cross track. The lightweight
technology, coupled with our new Energy Reduction Technology makes
this one of our safest and most versatile helmets ever.
When you wear your Pyra you can feel secure knowing that this helmet
has gone through rigorous testing and passed even the most advanced
DOT and ECE certification. Provided with high airflow, the Pyra helmet is
equipped with a removable wind deflector, making it an excellent 4 season
helmet.
You can feel secure in the knowledge that you now own a quality helmet
that is designed to provide you safety and high standards of performance
in particular on long journeys – and that will give you a great deal of
pleasure at the same time.
Please take the time to read through this manual carefully so that your
helmet protects you properly when riding your snowmobile or motorcycle.
To ensure that you do not overlook any aspect of the manual that is
relevant to your safety, we recommend that you read it in the order in
which it appears.
WARNING
This helmet complies with U.S. Federal Motor Vehicle Safety Standard
218 (DOT FMVSS 218) and/or the United Nations Economic Commission
for Europe Regulation 22 (ECE R22.06). This helmet was not designed to
be used by a child under 13.
We wish you a safe ride.

3
CONTENTS
A. GENERAL ...................................................................4
1. SAFETY INFORMATION 4
B. THE HELMET..............................................................5
1. ANATOMY OF THE HELMET 5
2. HELMET SIZING 5
3. WIND DEFLECTOR 5
REMOVING / INSTALLING THE WIND DEFLECTOR 5
4. CHINSTRAP ATTACHEMENT 6
ADJUSTING THE CHINSTRAP 6
5. INNER LINER 6
REMOVING / INSTALLING THE CHEEK PADS 7
REMOVING / INSTALLING THE HEAD LINER 7
REMOVING / INSTALLING THE PEAK PIVOT 8
C. FIT & USAGE ..............................................................9
1. HOW TO PUT THE HELMET ON 9
2. PROPER FIT 9
1. MEASURE HEAD CIRCUMFERENCE 9
2. TRY ON THE HELMET 9
3. CHECK FOR A PROPER FIT 9
4. CHECK YOUR FIELD OF VISION 10
5. TEST THE HELMET FIT 10
6. FASTEN THE CHINSTRAP 10
7. TEST THE CHINSTRAP FIT 10
3. PUT THE HELMET OFF 10
4. PROPER USAGE 11
5. PROPER HELMET HANDLING 11
D. BEFORE EVERY RIDE............................................. 12
1. CHECKING THE HELMET 12
E. OTHER IMPORTANT INFORMATION...................... 13
1. MODIFICATIONS / ACCESSORIES 13
2. FROSTBITE 13
F. CARE AND MAINTENANCE .................................... 14
1. SHELL CLEANING 14
2. INTERIOR CLEANING 14
3. HELMET INSPECTION 14
4. HELMET STORAGE 14
G. TROUBLESHOOTING GUIDE ................................. 15
H. ACCESSORIES AND REPLACEMENT PARTS ...... 15
1. REPLACEMENT PARTS 15
I. BRP SERVICE............................................................ 16
1. REPAIR SERVICE 16
2. WARRANTY 16
J. HOW TO CONTACT US............................................ 16

4
A. GENERAL
1. SAFETY INFORMATION
This helmet is backed by the BRP warranty and a network of authorized
dealers and distributors ready to provide the parts, service or accessories
that you may require. Genuine BRP parts should be used for replacement
to maintain the warranty, consult an authorized BRP dealer.
Use this User Guide to acquaint yourself with your new helmet and its
various functions. Make sure you read and understand the contents of this
guide and keep it for future reference. The information and components
descriptions contained in this guide are accurate at time of publication.
The illustrations in this document may not show the typical construction of
the different assemblies or may not reproduce the full detail or exact
shape of the parts shown, however, they represent parts which have the
same or a similar function.
This guide uses the following safety alert symbol in conjunction with
signal words to indicate a potential personal injury hazard.
WARNING
Indicates a hazardous situation which, if not avoided, could result in death
or serious injury.
NOTICE
Address practices not related to personal injury.
Simply reading this guide will not eliminate hazards. The user must
understand and follow the instructions. Because of its ongoing
commitment to product quality and innovation, BRP reserves the right at
any time to discontinue or change specifications, designs, features or
equipment without incurring obligation. If anyone seeks to translate any
portion of this guide into any language, this person must ensure that the
translation is accurate.
WARNING
Riding a motorized vehicle can be extremely dangerous. This helmet
provides limited protection to the head. It complies with U.S. Federal
Motor Vehicle Safety Standard 218 (DOT FMVSS 218) and/or the United
Nations Economic Commission for Europe Regulation 22 (ECE R22.06).
However, it will not protect the wearer against all possible impacts. Some
i
mpacts may exceed this helmet’s capability to provide protection and
result in serious head, brain, spinal, or other injury including paralysis or
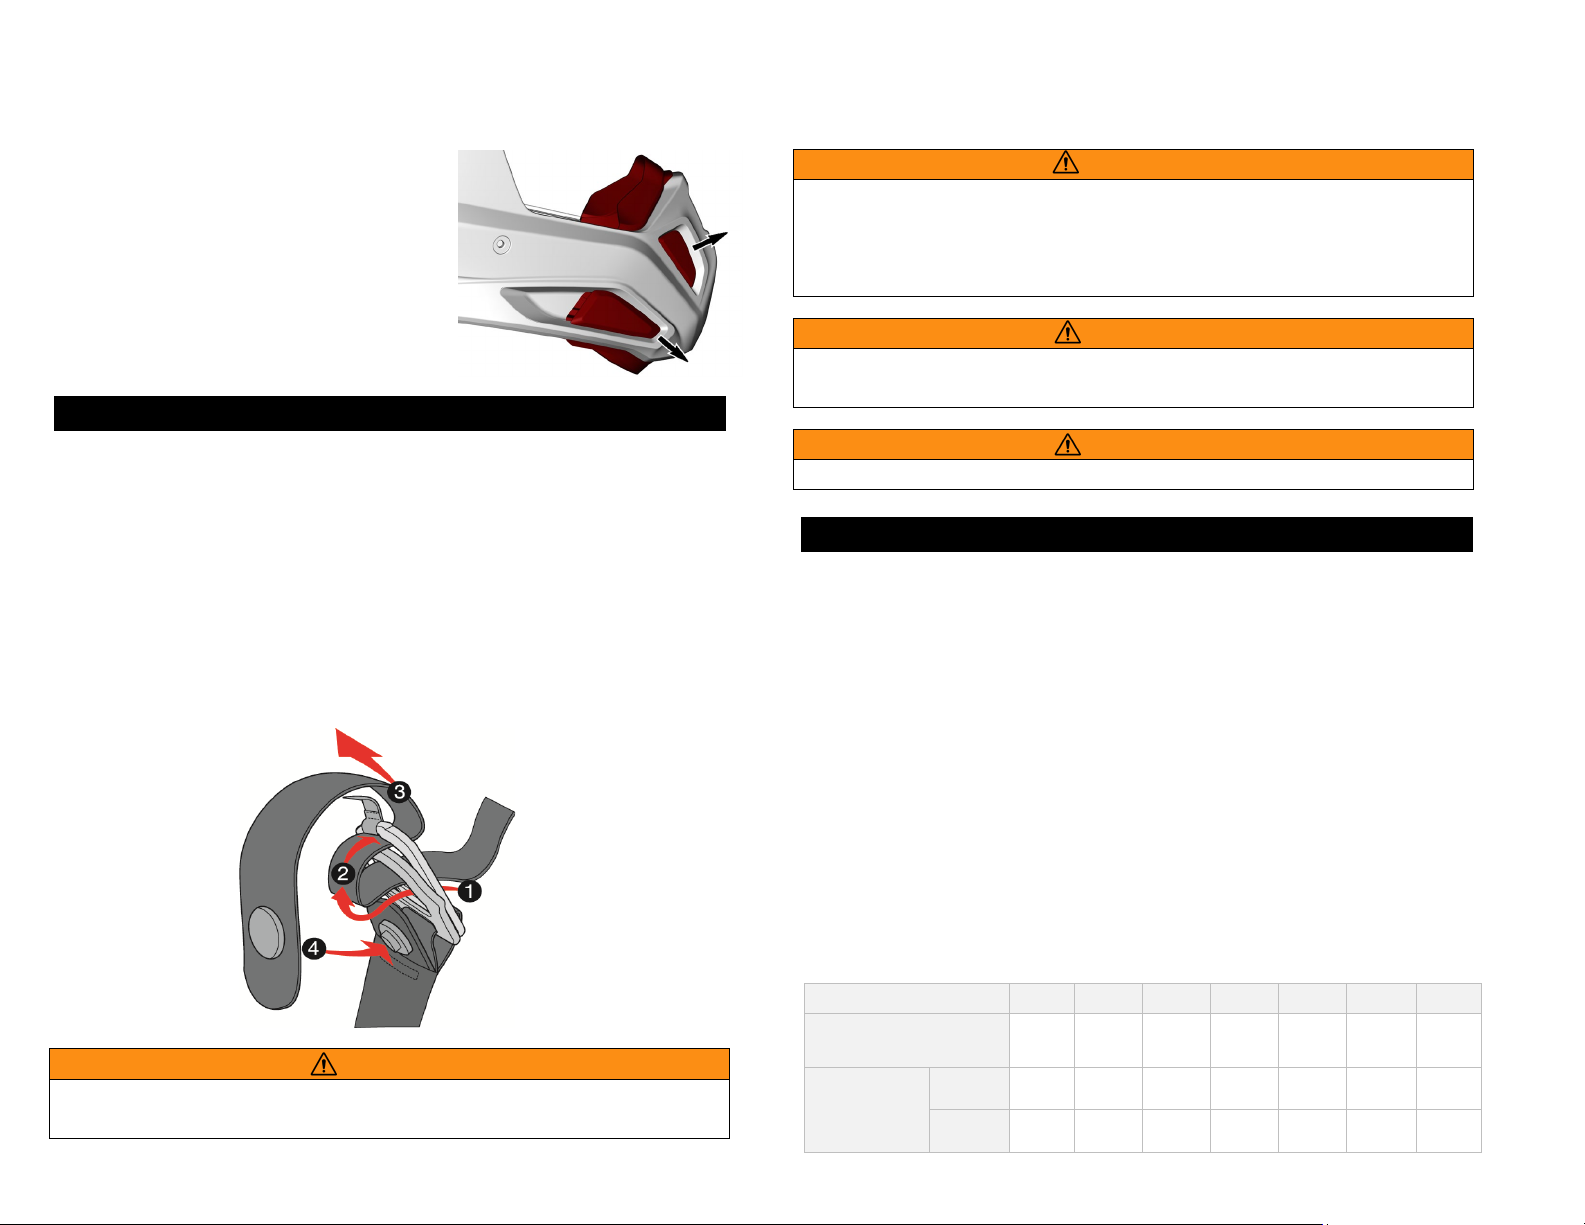
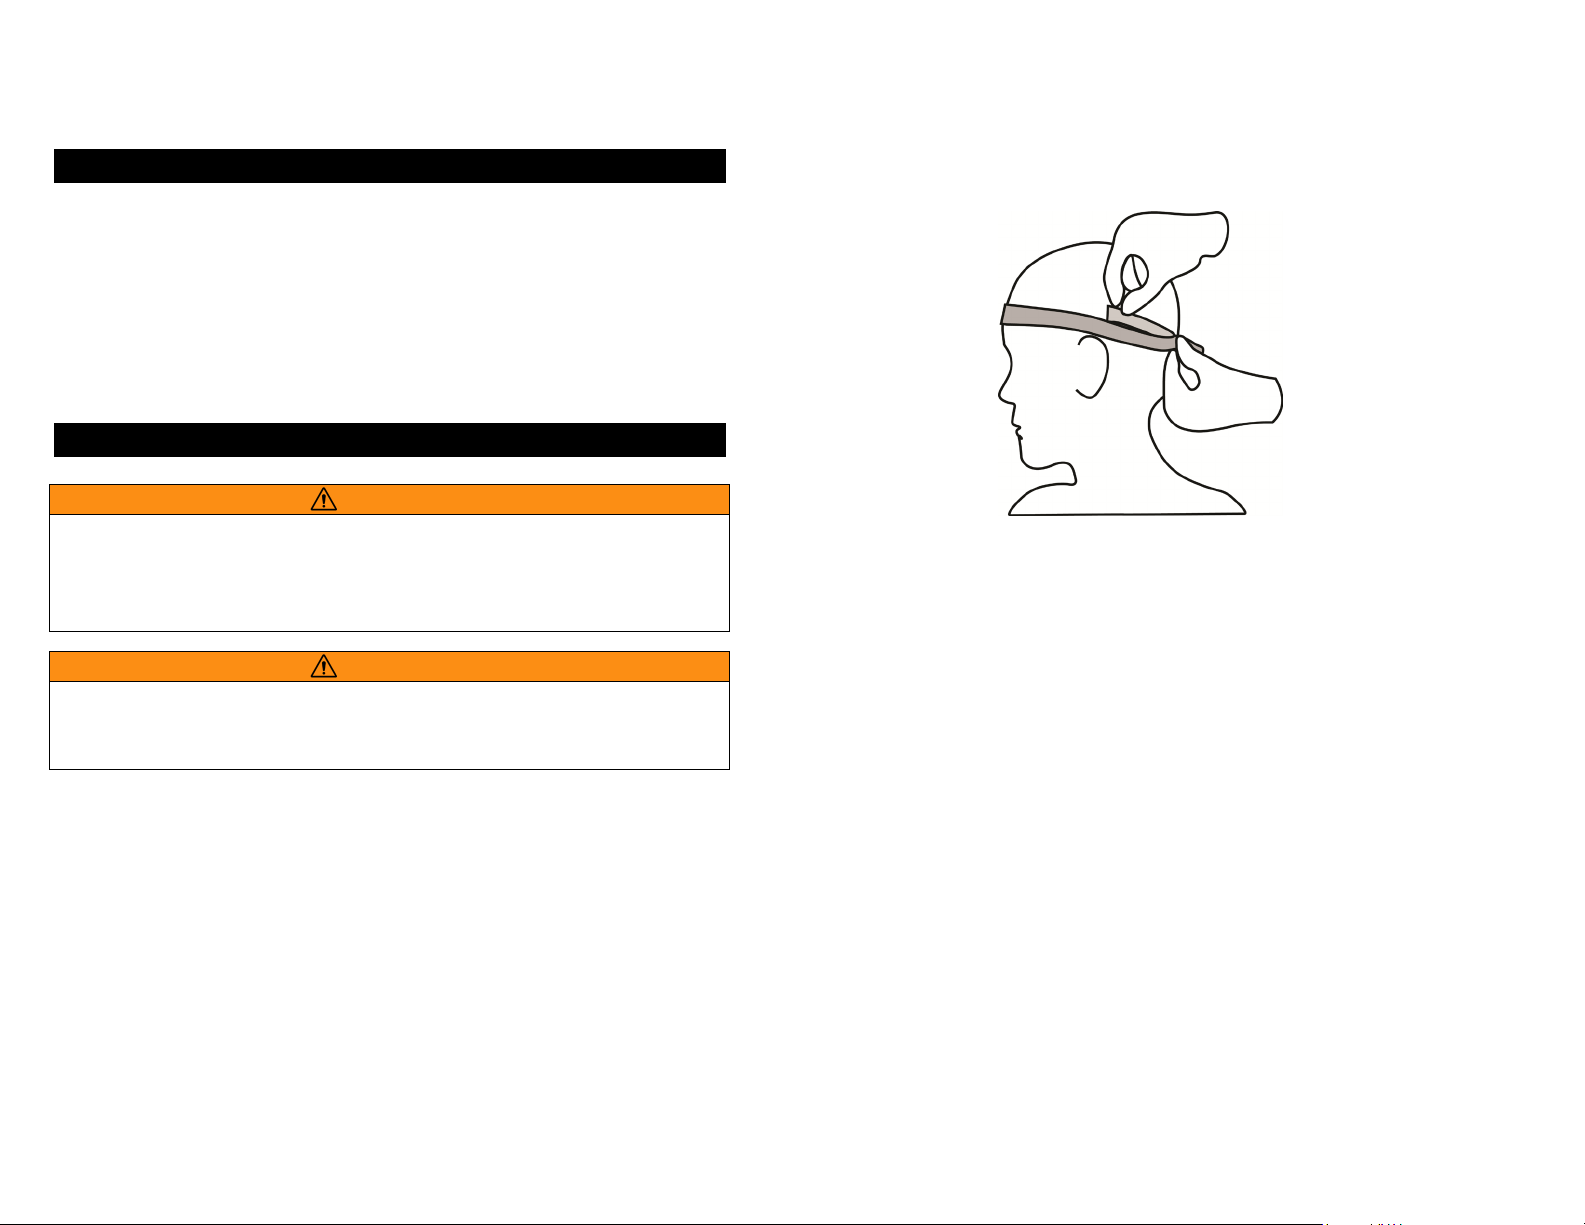
death. For maximum protection, the helmet must fit firmly on the head
with the chinstrap securely fastened.
If your helmet is equipped with a main visor, it must be fully closed. If your
helmet is equipped with other component, such as wind deflector, breath
deflector, breathing mask, mandible, etc., make sure to install them in
proper position to direct exhaled breath away from the main visor.
Always wear appropriate protection against frostbite, which may include a
balaclava, neck tube, facemask or combination of these items.
Inspect the helmet before each use following the inspection procedure in
the instructions. Replace any part showing wear or damage. Do not alter
the helmet or attach any items not recommended by the manufacturer.
The helmet is designed to absorb shock by partial destruction of the shell
and it should not be visible. Destroy and replace helmet if subjected liner,
which may not be visible. Destroy and replace helmet if subjected to a
severe blow even if it appears undamaged.
The helmet shell, liner
and other components may be damaged and
rendered ineffective by petroleum products, cleaning
agents, paint,
adhesives, etc., without the damage being visible. Use only warm mild
soapy water to clean the helmet.
Follow all warnings and instructions provid
ed with this helmet. For
replacement instructions, contact BRP. Failure to follow all warnings and
instructions can result in serious personal injury or death.

5
B. THE HELMET
1. ANATOMY OF THE HELMET
2. HELMET SIZING
Helmet size XS S M L XL 2XL 3XL
Shell size SL
Head
size
mm 53 - 54 55 - 56 57 - 58 59 - 60 61 - 62 63 - 64 65 - 66
Inches 20 7/8 -
21 1/4
21 5/8 -
22
22 3/8 -
22 3/4
23 1/8 -
23 5/8
24 -
24 3/8
24 3/4 -
25 1/8
25 1/2 -
25 7/8
3. WIND DEFLECTOR
The wind deflector reduces air intrusion and unpleasant effect of the wind
created when you ride by flowing into the helmet. This feature allows to
also reduce the riding noises (such as wind, motor, track...). In
addition, the wind deflector prevents the infiltration of several
contaminants (such as rocks, snow, sand, ice, etc.)
For optimal performance of the helmet, it should be used with the BRP
PYRA balaclava.
REMOVING THE WIND DEFLECTOR
1. Press the side of the wind deflector
as shown to remove the bottom part.
2. Press on wind deflector as shown to
remove the top section.
Note: Avoid pulling on the wind
deflector to prevent damage.

6
B. THE HELMET
INSTALLING THE WIND DEFLECTOR
1. Insert the 4 protrusions of the wind
deflector in the chin of the helmet in
their specific housing as shown.
4. CHINSTRAP ATTACHMENT
The retention system of the PYRA helmet comes with double D-ring.
This locking system is easy to use and enables you to adjust the chinstrap
perfectly to your head every time you put the helmet on.
ADJUSTING THE CHINSTRAP
Lead chinstrap through eyelets of both rings (1).
Curl back and thread through taller ring with nylon pull-tab (2).
Securely tighten the strap until comfortable and safe (3).
Press and snap buttons together to manage excess strap (4).
WARNING
When adjusting the strap, make sure that the helmet cannot be pulled off
in a forward direction with the chinstrap closed.
WARNING
Never ride without making sure that the chinstrap is correctly fastened
and adjusted and properly positioned. If the chinstrap
is not correctly
adjusted or fastened, the helmet could be displaced in the event of an
accident.
WARNING
Closing the comfort pad of the chinstrap alone will not provide adequate
protection. The chinstrap must always be fully fastened.
WARNING
Never open the chinstrap while riding.
5. INNER LINER
The replaceable inner lining of the PYRA helmet is washable and ensures
both an excellent fit and improved ventilation of the helmet.
The dual-density cheek pads have a specific 3D shape to ensure that the
helmet fits comfortably around the cheeks, and the headliner provides an
optimal fit all around the head.
All interior fittings are made entirely of skin-friendly material. The material
used for the cheek pads and head liner has been constructed with sweat-
wicking material.
When removing the lining, the cheek pads must first be detached before
taking out the headband pad. When fitting the lining, remember to insert
the headband pad before the cheek pads.
PAD SIZES
Helmet size
XS
S
M
L
XL
2XL
3XL
Cheek pad
thickness
40
mm
35
mm
35
mm
30
mm
35
mm
30
mm
20
mm
Head liner
thickness
Top
8
mm
8
mm
8
mm
8
mm
8
mm
8
mm
8
mm
Crown
10
mm
8
mm
14
mm
12
mm
14
mm
12
mm
10
mm

7
B. THE HELMET
REMOVING THE CHEEK PADS
1. Unfasten the 3 snaps to remove the
first part of the pad.
2. Slide out the chinstrap to remove
cheek pad completely.
3. Repeat these steps for the other
side.
INSTALLING THE CHEEK PADS
1. Before installing the cheek pads,
identify the right and the left sides.
2. Fasten the 3 snaps in position. Make
sure the strap is in position inside the
cheek pad notch.
3. Repeat these steps for the other
side.
REMOVING THE HEAD LINER
1. The head liner is attached to the
inner shell with 2 snaps (on rear section
of the helmet).
2. The frontal portion, with 2 snaps.
They can be removed by pulling them
out carefully.
For the frontal portion, start to pull from
one side of the plastic strip.
3. Next, pull the upper part of the head
liner, to detach the VelcroTM.

8
B. THE HELMET
INSTALLING THE HEAD LINER
1. Fasten the 2 snaps of head liner and
attach the VelcroTM upper part in
position.
2. Next, position the head liner inside
the helmet.
3. Then, fasten the 2 snaps on the neck
portion.
WARNING
Never ride when parts of the inner
lining have been removed.
To avoid damage to the inner lining and inner shell, do not hang the
helmet over the mirrors or handlebar grips.
REMOVING THE PEAK PIVOT
1. Pull perpendicularly on the side of
the peak as shown.
2. To remove the peak pivot, insert a
screwdriver into the larger of the two
holes and gently pry out.
3. Repeat these steps for the other
side.
INSTALLING THE PEAK PIVOT
1. Insert peak pivot in the helmet in
their specific housing as shown.
2. Install peak by pushing it in peak
pivot as shown.
Note: Make sure that the front pin of
peak is aligned with the opening in the
peak pivot.
3. Repeat these steps for the other
side.
4. Check that the peak mechanism is
working correctly.
NOTICE
Be careful not to damage the surface
finish of the helmet.

9
C. FIT & USAGE
1. HOW TO PUT THE HELMET ON
1. Open the chinstrap and chinstrap comfort pad.
2. Pull apart the lower ends of the chinstrap.
3. It will now be easy to put the helmet on.
4. Close and fasten the chinstrap.
5. Make sure the chinstrap passes under the chin and fits snugly.
2. PROPER FIT
WARNING
Never buy a used helmet or borrow someone else’s helmet. Over time
the protective foam in helmets will adjust to the contours of a user’s head.
A used or borrowed helmet may not offer as much protection as a new
helmet.
WARNING
Wearing the wrong helmet size can increase the risk of serious injury or
death in an accident. A helmet that is too large for your head may be
dislodged or knocked off in an accident.
To select the right helmet size for your head, follow the steps:
1. MEASURE HEAD CIRCUMFERENCE
Have someone help you measure your head circumference and choose a
helmet size close to that value. Refer to the helmet sizing table above.
Position the tape around your head, from the center of the forehead,
above the ears and over the natural bump at the back of the head.
Note: Tape must be snug but not tight. If measurements fall between two
sizes, order the larger size.
2. TRY ON THE HELMET
Grasp both chinstraps to pull the helmet completely onto your head,
ensuring that the top of your head is in contact with the top of the helmet
interior. Try the helmet with all the protection you plan to use (balaclava,
neck tube, face mask, etc.)
3. CHECK FOR A PROPER FIT
To make sure that your helmet is the right size, check that:
• The helmet inner lining fits snugly around your head.
• The top pad presses firmly on your head.
• The cheek pads contact your cheeks.
• There is no space around your brow under the inner lining. Test this by
trying to insert your fingers. If the helmet does not fit snugly, try on a
smaller size.
This step might take several trials before finding the perfect adjustment.

10
C. FIT & USAGE
4. CHECK YOUR FIELD OF VISION
Some helmets may obstruct or block your vision when looking left, right,
up, or down.
WARNING
Always make sure you can see well enough to safely operate your
vehicle.
5. TEST THE HELMET FIT
Place your hands on each side of the helmet. While holding your head as
motionless as possible, try rotating your helmet from left to right then up
and down. You should feel the helmet move the skin on your head and
face as you try to move the helmet.
If it is not the case or if you can feel the helmet padding sliding on your
head, it is too big. If the helmet is constricting or painful, it is too small.
6. FASTEN THE CHINSTRAP
Tighten it under your jaw until there remains no slack in the strap, and the
strap must be tight up against your jaw.
7. TEST THE CHINSTRAP FIT
• Put your hands on the back of the helmet and try to push the helmet off
by rotating it forward.
• Put your hands on the front of the helmet above your forehead (or on the
chin guard) and try to push.
• If helmet comes off, try another size or model.
Repeat steps 1 through 6 until you find a helmet that fits your head snugly
and securely.
3. HOW TO TAKE THE HELMET OFF
1. Open the chinstrap.
2. Hold the lower ends of the chinstrap and pull them apart to ease
removal.
3. The helmet can now be removed easily from the head.
To avoid scratching any objects you might place the helmet on, we
recommend closing the chinstrap after you have taken the helmet off.

11
C. FIT & USAGE
4. PROPER USAGE
WARNING
To reduce the risk of serious injury or death and to help prevent damage
to your helmet:
Never ride with a visor that does not allow you to see clearly
– Scratch, deterioration, fogging can impair your vision. Some tinted
visors might not be safe in night riding.
Never adjust your helmet accessories while riding –
Only make
helmet adjustments when stopped.
Always wear eye protection – If you are not using a helmet with a visor,
always wear eye protection when riding. Always lock your visor in place
when you are riding. Internal sun visor is not considered as a face shield.
Never wear a dark or tinted main visor in dark or
poor visibility
riding conditions. This is not only unsafe, but also illegal in most states.
Never wear a sun visor that has become scratched, or ride with a main
visor that is fogged by condensation.
Always be alert for sounds – Your helmet may impair
your hearing.
However, your helmet is not a form of hearing protection.
Always wear appropriate protection against frostbite – Frostbite can
happen when using your helmet in cold weather. Protection may include
a balaclava, neck tube, facemask, or combination of these items.
5. PROPER HELMET HANDLING
WARNING
To reduce the risk of serious injury or death and to help prevent damage
to your helmet:
Never place your helmet where it could easily roll
off or fall and
impact the ground causing damage to the helmet – It is best to place
your helmet on the ground so it cannot fall in any direction.
Never drop your helmet – Dropping your helmet may crack the shell or
damage the protective foam.
The damage may not be visible. Your
helmet is only designed for ONE impact.
Never use insect repellent on or around your helmet – Insect
repellant may damage your helmet’s visor, shell, protective foam, or other
components.
Never expose helmet to gasoline or gasoline fumes – Gasoline may
damage your helmet’s visor, shell, protective foam, or other components.
Other substances may damage your helmet, see proper
care section.
Always store your helmet in a helmet bag – When not in use to help
reduce accidental surface damage.

12
D. BEFORE EVERY RIDE
1. CHECKING THE HELMET
Regularly inspect your helmet for damage. Small superficial scratches will
not impair the protective function of your helmet.
WARNING
In the case of more serious damage (cracks, dents, flaking and cracking
paint, etc.), the helmet should no longer be used.
WARNING
Never ride with the chinstrap unfastened or incorrectly adjusted. The
chinstrap should fit correctly and should not become loose when pulled.
The fastener is not correctly closed if the chinstrap becomes loose when
pulled.

13
E. OTHER IMPORTANT INFORMATION
1. MODIFICATIONS / ACCESSORIES
WARNING
Original components (in particular on the outer shell, inner shell and
restraint system) should not be altered or removed.
Remember that installing unapproved accessories or doing any helmet
modification can reduce the protective effect, renders the certification, all
warranty and insurance claims invalid.
Use only original parts, replacement parts and accessories that BRP has
expressly approved for your helmet!
Modifying your helmet may reduce its ability to protect you and increase
your risk of serious injury or death in an accident.
Modifications include the following:
• Drilling holes
• Cutting shell, strap or shock absorbing liner
• Pressing shock absorbing liner
• Modifying the retention system, including adding a chin cup
• Removing parts
• Painting
• Using adhesives
• Installing unapproved accessories
2. FROSTBITE
WARNING
What is frostbite?
Frostbite can be defined as the freezing of the skin a
nd/or the bodily
tissues under the skin. It is thermal injury that can result from prolonged
exposure to moderate cold or brief exposure to extreme cold.
What causes frostbite to occur?
Different factors can contribute to the occurrence of frostbite such as:
• Length of time a person is exposed to the cold;
• Temperature outside;
• Force of the wind (wind-chill factor);
• Humidity in the air;
• Wetness of clothing;
• Previous frostbite or cold injury.
How to prevent frostbite
• Do not go outdoors for prolonged periods in severely cold weather.
• Always wear additional headwear such as a balaclava, neck tube, face
mask, or a combination of those items.
• Change any wet clothes immediately.
• Watch for signs of frostbites frequently: Red or pale skin, prickling and
numbness.
• Avoid caffeine, tobacco and alcohol when going out in the cold, as these
leave the skin more prone to thermal injury;
Sources:
• National Institutes of Health's Website:
https://medlineplus.gov/frostbite.html
https://medlineplus.gov/ency/patientinstructions/000866.htm

14
F. CARE AND MAINTENANCE
WARNING
Never use petroleum-based chemicals, solvents, gasoline, cleaning
agents or adhesives to clean the shell, liners, or visors of your helmet.
Your helmet shell, liner and visors may be seriously damaged by the use
of such products and the full safety function of the helmet can then no
longer be guaranteed.
1. SHELL CLEANING
To clean the helmet shell, only use warm mild soapy water or
commercially available mild soaps made for that purpose.
Using water and soap is usually sufficient. Make sure when using any
other cleaning materials that these do not risk damaging the cleaned
surfaces.
2. INTERIOR CLEANING
The inner lining of the PYRA helmet can be removed completely.
The head and cheek pads can be washed by hand using a mild soap
solution (e.g. with highly diluted standard mild detergent) at a maximum
temperature of 30 °C.
Hand washing is recommended, but machine washing is also permitted.
Use the "delicate" cycle to prevent the agitator from damaging the sweat-
wicking material covering the liner parts. Allow the lining to dry at room
temperature and with good ventilation.
WARNING
Do not place lining parts in the dryer: Excess heat may damage the foam
and coverings.
3. HELMET INSPECTION
Check for helmet damages. If your helmet is damaged or cracked, stop
using it immediately and replace it.
Check for worn or damaged parts. Plastic components may wear out over
time. If you find worn or damaged parts, replace them, or purchase a new
helmet. See "Replacement parts" for information on parts replacement.
WARNING
To reduce the risk of serious injury or death, always inspect your helmet
before each ride.
The helmet should be replaced 3 to 5 years after the date of purchase,
depending on use and care. Although the outer shell is in principle
capable of a longer service life, the occurrence of material fatigue and
wear to other components, as well as the overall action of the helmet and
the unknown conditions in which the helmet has been used, make it
advisable for your own safety to replace the helmet after this period of use.
Excessive heat (e.g. exhaust heat) can cause damage to the helmet
esthetics, the inner shell of the helmet and the interior lining.
4. HELMET STORAGE
• Store helmet in a cool and dry place;
• Keep helmet away from pets and other animals;
• Keep helmet away from heat more than 50ºC
(122ºF) and do not set on or near hot surfaces;
•Store helmet in a helmet bag.
WARNING
Improperly stored helmet can become damaged.

15
G. TROUBLESHOOTING GUIDE
PROBLEM ACTION
PEAK
1. Peak doesn’t maintain its position:
- Verify if the peak inserts are broken.
Replace if necessary.
H. ACCESSORIES AND REPLACEMENT PARTS
Remember that installing unapproved accessories or doing any helmet
modification is forbidden on a certified helmet for safety purposes.
You will find a summary of all available accessories and spare parts on
internet at www.brp.com
WARNING
For safety reasons, all accessories should be approved by BRP for that
specific helmet.
WARNING
Use of replacement parts other than the ones offered by BRP may
increase your risk of serious injury or death and will void the certification.
Only use parts that are specifically designed to work with this helmet.
BRP recommends that all replacement parts shall be installed by a BRP
dealer.
WARNING
Never modify your helmet – It may reduce your helmet’s ability to protect
you and increase your risk of serious injury or death in an accident.
1. REPLACEMENT PARTS
Original BRP parts are available at your authorized BRP dealer. To find
BRP dealers in your area, use the dealer search on the BRP website:
www.brp.com
•Peak for PYRA helmet #929041
•PYRA headliner
•PYRA cheek pads
•PYRA wind deflector
•Can-Am PYRA peak
•Can-Am PYRA Dune peak
•PYRA peak pivots
Note:For more information on available replacement parts, please visit
our website at the following address: http://store.ski-doo.com/

16
I. BRP SERVICE
1. REPAIR SERVICE
The PYRA helmet is a BRP quality product that has been designed and
manufactured using the latest development and production methods. If a
repair to your helmet is necessary, please consult your authorized BRP
dealer or distributor.
Upon receipt of a claim, BRP may examine the item and/or delay
completion of the claim until the analysis is completed.
Even where a clear description of the original fault has been provided, if
BRP discover further defaults during the repair, BRP may rectify these
without a specific order if this is necessary to restore the correct
functioning of the helmet.
2. LIMITED WARRANTY
Buying your helmet at an authorized BRP dealer provides a limited
warranty for purchased equipment on manufacturing defects.
The limited warranty period is 4 years from the purchasing date. Should
you have a reason to complain, please contact authorized BRP dealer.
BRP ask that you provide a precise description of the claim as well as a
copy of your receipt.
For your nearest authorized BRP dealer or distributor or for more information on BRP products, please visit
our web site: www.brp.com
® ™ and the BRP logo are trademarks of Bombardier Recreational Products inc. or its affiliates.
© 2022. Bombardier Recreational Products Inc.
BRP_20220115_R00EN
J. HOW TO CONTACT US
North America
565 de la Montagne Street
Valcourt (Québec) J0E 2L0
Canada
Sturtevant, Wisconsin, U.S.A.
10101 Science Drive
Sturtevant, Wisconsin
53177
U.S.A.
Sa De Cv, Av. Ferrocarril 202
Parque Ind. Querétaro, Lote2-B
76220
Santa Rosa Jáuregui, Qro.
Mexico
Oceania
6 Lord Street
Lakes Business Park
Botany, NSW 2019
Australia
South America
Rua James Clerck Maxwell, 230
TechnoPark Campinas
SP 13069-380
Brazil
Asia
15/F Parale Mitsui Building,8
Higashida-Cho, Kawasaki-ku
Kawasaki 210-0005
Japan
Room Dubai, level 12, Platinum
Tower
233 Tai Cang Road
Xintiandi, Lu Wan District
Shanghai 200
Europe
Skaldenstraat 125
B-9042 Gent
Belgium
Itterpark 11
D-40724 Hilden
Germany
ARTEPARC Bâtiment B
Route de la côte d'Azur, Le
Canet
13590 Meyreuil
France
Ingvald Ystgaardsvei 15
N-7484 Trondeim
Norway
Isoaavantie 7
PL 8040
96101 Rovaniemi
Formvägen 16
S-906 21 Umeå
Sweden
Avenue d’Ouchy 4-6
1006 Lausanne
Switzerland
Table of contents
Other BRP Motorcycle Accessories manuals
Popular Motorcycle Accessories manuals by other brands

KTM
KTM 60312935044 Information

Cardo Systems
Cardo Systems PACKTALK SLIM manual

Memphis Shades
Memphis Shades 2321-0036 Mounting instructions

Saddlemen
Saddlemen Road Sofa H18-07-18X all User's guide & installation instructions

Memphis Shades
Memphis Shades 3508-0017 quick start guide

Memphis Shades
Memphis Shades 2321-0047 Mounting instructions