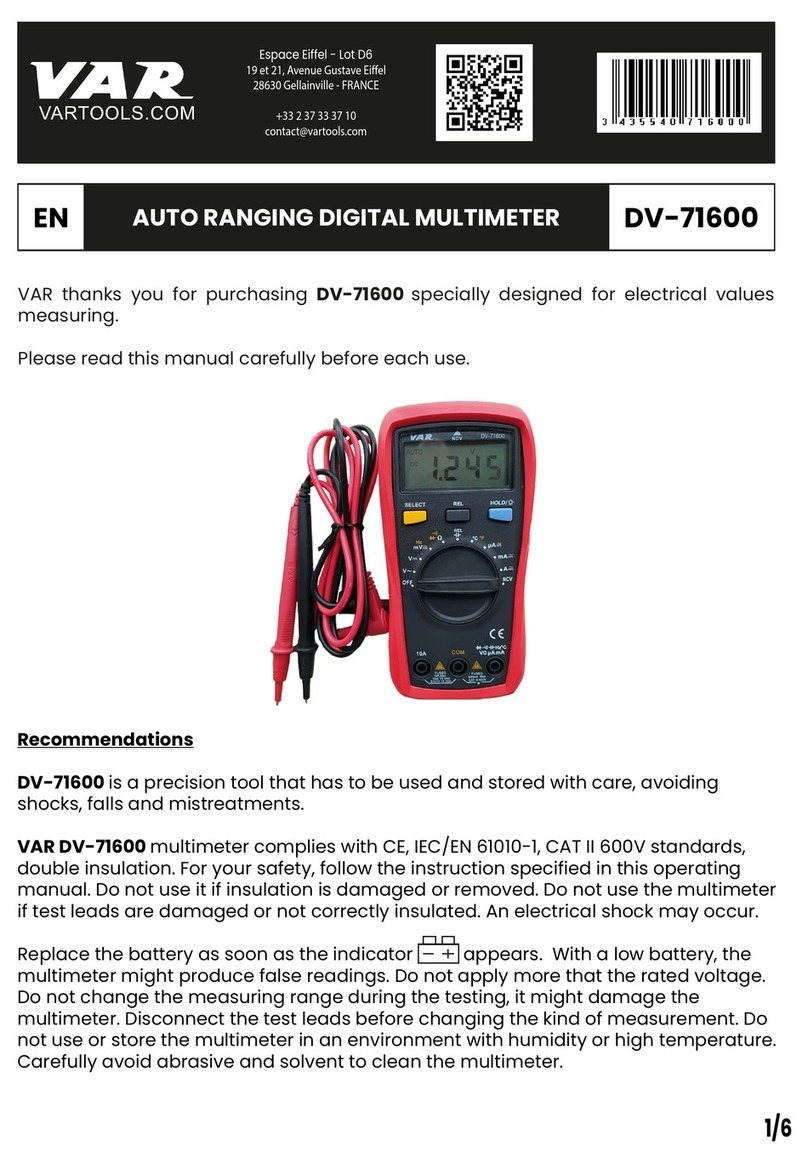
Brymen BM2807CSE Series User manual

USER'S
MANUAL
BM2807CSE
BM2805CSE
BM2803CSE
Enhanced
Practical
Multimeter
Series

1
0) BRIEF INTRODUCTION
This 2800 CSE meter series is a safety Category and EMI Shielding Enhanced (CSE)
version of our popular 800 practical meter series. Apart from the added up-to-date
features and improvements in safety ratings, it is also equipped with EMI shielding on
both sides of the circuitry module to improve measurement stability under harsh
electromagnetic interferences, especially in the electrical and automotive industries.
1) SAFETY
This manual contains information and warnings that must be followed for operating the
meter safely and maintaining the meter in a safe operating condition. If the meter is
used in a manner not specified by the manufacturer, the protection provided by the
meter may be impaired.
Observe proper safety precautions when working with voltages above 30 Vrms, 42.4
Vpeak, or 60 VDC. These voltage levels pose a potential shock hazard to the user.
Disconnect the test leads from the test points before changing functions. Do not
expose this product to rain or moisture. The meter is intended only for indoor use.
Keep your hands/fingers behind the hand/finger barriers (of the meter and the test
probe assembly, where applicable) that indicate the limits of safe access of the hand-
held parts during measurements. Inspect lead wires, connectors, and probes for
damaged insulation or exposed metal periodically. If any defects are found, replace
them immediately. Only use the test probe assembly provided with the meter or a UL
Listed test probe assembly to the same meter ratings or better. Optional offer premium
test probe assembly using silicone lead wire insulation, at agent’s discretion, is
equipped with white inner insulation layers as wear indicators. Replace them
immediately if any of the white layers has become visible.
The meter meets IEC/EN/BSEN/CSA_C22.2_No./UL standards of 61010-1 Ed. 3.1 and
61010-2-033 Ed. 2.0 to Measurement Categories CAT III 1000V and CAT IV 600V. The
accompanied test probe assembly meets IEC/EN/BSEN/CSA_C22.2_No./UL
standards of 61010-031 Ed. 2.0 to the same meter ratings or better. The 61010-031
requires exposed conductive test probe tips to be ≤ 4mm for CAT III & CAT IV (≤
19mm for CAT II) ratings. The accompanied add-on caps (or permanent insulated tips
option) have to be used for applications under CAT III & CAT IV. Refer to the category
markings on your probe assemblies as well as on the add-on accessories (like
detachable Caps or Alligator Clips), if any, for applicable rating changes.
2
INTERNATIONAL SYMBOLS
Marking of Electrical and Electronic Equipment (EEE). Do not dispose of this
product as unsorted municipal waste. Contact a qualified recycler
Refer to the explanation in this Manual
Possibility of electric shock
Earth (Ground)
Meter protected throughout by Double Insulation or Reinforced insulation
Fuse
Direct Current (DC)
Alternating Current (AC)
3 Three-phase Alternating Current
Application of current sensor to and removal from Hazardous Live
Uninsulated Conductors is permitted
BRIEF INFORMATION ON MEASUREMENT CATEGORIES
Measurement Category IV is applicable to test and measuring circuits connected at
the source of the building’s low-voltage MAINS installation. Examples are
measurements on devices installed before the main fuse or circuit breaker in the
building installation.
Measurement Category III is applicable to test and measuring circuits connected to
the distribution part of the building’s low-voltage MAINS installation. Examples are
measurements on distribution boards (including secondary electricity meters),
photovoltaic panels, wiring and stationary motors in the fixed installation, and
equipment for industrial use.
Measurement Category II is applicable to test and measuring circuits connected
directly to utilization points (socket outlets and similar points) of the low-voltage MAINS
installation. Examples are measurements on MAINS CIRCUITS of household
appliances, portable TOOLS and similar equipment, and on the consumer side only of
socket-outlets in the fixed installation.
2) EUROPEAN DIRECTIVES AND UK STATUTORY REQUIREMENTS
The instruments conform to EUROPEAN (CE) Low-Voltage Directive 2014/35/EU,
Electromagnetic Compatibility Directive 2014/30/EU, and RoHS 2 Directive 2011/65/EU
plus amendment Directive (EU) 2015/863. The instruments also conform to the UK
(UKCA) Electrical Equipment (Safety) Regulations 2016, Electromagnetic Compatibility
Regulations 2016, and The Restriction of the Use of Certain Hazardous Substances in
Electrical and Electronic Equipment Regulations 2012.

3
3) PRODUCT DESCRIPTION
This user's manual uses only representative model(s) for illustrations. Please refer to
detailed specifications for function availability to a particular model.
1) 3-5/6 digits 6000 counts
display LCD
2) Push-buttons for special
functions & features
3) Selector to turn the Power
On or Off and select a function
4) Input Jack (+) for 10A (20A
for 30sec) current function
5) Input Jack (+) for all functions
EXCEPT current (
A, mA, A)
functions
6) Common (Ground reference)
Input Jack (-) for all functions
7) Input Jack (+) for milli-amp
and micro-amp functions
4) OPERATION
Note: Before and after hazardous voltage measurements, test the voltage function on
a known source such as line voltage to determine proper meter functioning

4
ACV; Line-level Hz (Models 2807 & 2805 only)
Inputs are made via the terminals COM/V. Startup defaults to ACV Function. Press the
SELECT button momentarily to select the Line-level Hz function.
Note: Input sensitivity varies automatically with the function range selected while
activating the Hz function. 6V function range has the highest and the 1000V range has
the lowest. When activated, the trigger voltage range will be displayed right before the
Hz readings start. Press momentarily the RANGE button can manually select another
trigger voltage range. It is recommended to first measure the signal voltage level and
activate the Hz function in that range to get the most appropriate trigger level. If the Hz
reading becomes unstable, select lower sensitivity to avoid electrical noise. If the
reading shows zero, select higher sensitivity.
EF-Detection of Electric Field (Model 2807 only)
Startup defaults to ACV Function. Press the SELECT button momentarily twice to
select the EF-Detection function. The meter displays “EF-H”, the High sensitivity, when
it is ready. If it is too sensitive for your applications, press the (LEVEL) button
momentarily to toggle to EF-L, the Low sensitivity. The detected Electric Field is
indicated as a series of display bar-segments, backlight flashing, and beep sounds in
proportion to the field strength.

5
●Non-Contact EF-Detection (NCV): An antenna is located near the top end center of
the meter, which detects the ac electric field surrounding energized conductors. It is
ideal for tracing live wiring connections, locating wiring breakages, and distinguishing
between live and earth connections.
●Probe-Contact EF-Detection (Single-pole): For more precise indications of live

6
wires, such as distinguishing between Live and Ground connections, use one single
test probe to test via terminal COM for direct metal contact-probing to achieve the most
distinctive indications.
DCV; VFD-ACV & Line-level VFD-Hz (Models 2807 & 2805 only)
Inputs are made via the terminals COM/V. Startup defaults to DCV Function. Press the
SELECT button momentarily to select the subject functions in sequence.
Note: VFD-ACV and VFD-Hz are equipped with a digital low-pass filter (DSP) and are
capable of handling VFD (Variable Frequency Drives) signals for fundamental V & Hz
readings. It also improves ACV and Hz reading stability when being used in most
electrically noisy environments.
Note: Input sensitivity varies automatically with the function range selected while
activating the VFD-Hz function. 600V function range has the highest and the 1000V
range has the lowest. When activated, the trigger voltage range will be displayed right
before the Hz readings start. Press momentarily the RANGE button can manually
select another trigger voltage range. It is recommended to first measure the signal
voltage level and activate the Hz function in that range to get the most appropriate
trigger level. If the Hz reading becomes unstable, select lower sensitivity to avoid
electrical noise. If the reading shows zero, select higher sensitivity.

7
DCmV; ACmV; Logic-level Hz (Models 2807 & 2805 only); °C/°F (Model 2807 only)
Inputs are made via the terminals COM/V. Startup defaults to DCmV Function. Press
the SELECT button momentarily to select the subject functions in sequence.
Note:
1) In ACmV function:

8
1-1) ACmV startup defaults to the AC 600.0mV range. Auto-ranging is not available.
Press the RANGE button momentarily to toggle to the AC 60.00mV range for extended
resolution.
1-2) Using the ACmV function in a composite signal beyond the peak levels specified in
the specifications will saturate the respective ranges and produce false results. Instead,
the meter shows OL with both DC & AC icons when the peak value is exceeded in this
regard. Suspected signal levels can be verified with the DCV and ACV functions.
1-3) To measure ACmV signals coupled merely in AC nature when required, it is
recommended to add in series an appropriate DC blocking capacitor in the
measurement loop.
2) In temperature function:
2-1) Be sure to insert the banana-plug type-K temperature bead-probe with correct
polarities. Banana-pins to type-K socket adapter Bkb32 (Optional purchase) can
be used to accept other type-K probes using standard miniature plugs.
2-2) Temperature accuracies assume the meter interior has the same temperature
(isothermal stage) as the ambient, particularly at the plug of the probe being used, for a
correct junction voltage compensation. Allow the meter interior temperature to catch up
with that of the plug after a sudden change in the measuring environment and hence
the ambient temperature. This can take up to an hour, for changes > 5°C, within a low
ventilated sturdy meter housing. The uncompensated temperature differences, if any,
will be reflected as offsets on the meter readings.
2-3) °F selection can be left out as factory calibration default for countries that only
accept metric units.

9
Resistance; BeepLitTM Continuity; & BeepLitTM Diode
Inputs are made via the test lead terminals COM/. Startup defaults to Resistance.
Press the SELECT button momentarily to select the subject functions in sequence.
◎ BeepLitTM Continuity
This function is having improved convenience for checking wiring connections and
operation of switches. The resistance threshold is being used. A continuous beep
sound together with display backlight flashing indicates a complete wire. Such audible
and visible indications improve continuity readabilities in noisy working environments.
◎ BeepLitTM Diode
●Reading indication: Forward voltage drop (forward-biased) for a good silicon diode
is between 0.400V to 0.900V. A higher reading indicates a leaky diode (defective). A
zero reading indicates a shorted diode (defective). An over-range display indicates an
open diode (defective). Reverse the test leads connections (reverse biased) across the
diode. The digital display shows an over-range if the diode is good. Any other readings
indicate the diode is resistive or shorted (defective).
●BeepPassTM indication (Short-beep):
When the display reading drops across 0.850V, the BeepPassTM indication gives a
short beep sound to signal a Good forward voltage drop of common diodes.
●BeepLitTM indication (Continuity):

10
If the reading further drops below 0.100V, the BeepLitTM indication gives a continuous
beep sound together with the display backlight flashing to indicate a shorted diode or a
complete wire. It is similar to that of the resistive BeepLitTM Continuity function but this
BeepLitTM indication, instead, is based on the voltage threshold to indicate continuity.
Note: Using Resistance, BeepLitTM Continuity, or BeepLitTM Diode function in a live
circuit will produce false results and may damage the meter. In many cases, the
component(s) under test must be disconnected from the circuit to obtain an accurate
measurement reading.
DCA; ACA; ACA-Hz (Models 2805 & 2807 only)
Inputs are made via the test lead terminals COM/A mA. Startup defaults to DCA.
Press the SELECT button momentarily to select the subject functions in sequence.
DCmA; ACmA; ACmA-Hz (Models 2805 & 2807 only)
Inputs are made via the test lead terminals COM/A mA. Startup defaults to DCmA.
Press the SELECT button momentarily to select the subject functions in sequence.

11
DCA; ACA; ACA-Hz (Models 2805 & 2807 only)
Inputs are made via the test lead terminals COM/A. Startup defaults to DCA. Press the
SELECT button momentarily to select the subject functions in sequence.

12
(nF & F) Capacitance (Models 2805 & 2807 only)
Inputs are made via the test lead terminals COM/ . Turn the rotary switch to select
measurements in nF or in F. There are 3 auto-ranges (20.00, 200.0, and 2000) in
each unit position making it 6 ranges altogether in the capacitance function.
Note: Discharge capacitor(s) before making capacitance measurements. Large-value
capacitors should be discharged through an appropriate resistance load. Using the
Capacitance function in a live circuit will produce false results and may damage the
meter. In many cases, the suspected component(s) must be disconnected from the
circuit to obtain accurate measurement readings.

13
Manual-ranging Override (Voltage, Current, and Ω functions only)
Press the RANGE button momentarily to select manual-ranging. The meter will remain
in the range it was in; the LCD turns off. Press the button momentarily again to
select the next range in sequence. Press and hold the button for 1 second or more to
resume auto-ranging.
HOLD (with Hold-alertTM Warning)
HOLD feature freezes the display reading and stops further measurements for later
views. LCD “ ” turns on flashing, and the frozen reading also flashes; it is the Hold-
alertTM feature to warn the user of a displaying reading that is inactive. Press the HOLD
button momentarily to toggle the HOLD feature.
MAX HOLD
Press the “MAX ” button for one second or more to activate MAX HOLD feature.
LCD MAX & turn on; Auto-Power-Off is disabled automatically; the meter beeps
when a new MAX (maximum) reading is updated. When activated, the measuring
speed (reading update rate) will be boosted to 40 times per second to capture RMS
reading surges in the Voltage & Current functions; the speed remains unchanged in all
other functions. Press the button for 1 second or more to exit.
Relative mode
Relative mode allows the user to offset the meter consecutive measurements with
the main-display displaying reading as the reference value. LCD “ ” turns on. Press
the button momentarily to toggle Relative mode.
LCD Backlight and Auto-Backlight-Off (ABO)
Press the SELECT button for 1 second or more to toggle the LCD backlight. The ABO
mode turns the LCD backlight off automatically after around 32 minutes of backlight
activation to extend battery life. See Power-on Options section for disabling ABO.
Intelligent Auto-Power-Off (iAPO)
The iAPO mode turns the meter off automatically to extend battery life after idling
around 32 minutes of no specified activities, where applicable, below:
1) Rotary switch or push button operation
2) Significant measuring reading of above 8.5% of its range
3) Non-over-range reading for Resistance, Continuity, or Diode function
4) Non-zero reading for Hz function
5) Significant bar-segment indication in EF-Detection function

14
In other words, the meter will intelligently reset the iAPO mode when it is under normal
measurements. To wake the meter up from iAPO, press the SELECT or HOLD button
momentarily, or turn the rotary switch OFF and then back on. Always turn the rotary
switch to the OFF position when the meter is not in use.
Power-on Options
◎ Disabling both iAPO and ABO
Press and hold the SELECT button while powering on the meter to disable both iAPO
and ABO features temporarily during the power-on session. The LCD will display
“dAPO” to confirm selection before the SELECT button is released.
◎ Shortening APO idling time for inspection
Press and hold the HOLD button while powering on the meter can shorten the iAPO
idling time to about 8 seconds temporarily during the power-on session. This mode is
designed mainly for production verification use.
◎ Showing all LCD segments for inspection
Press and hold the RANGE or Relative button while powering on the meter can hold
and show all LCD segments before the button is released. This mode is designed
mainly for production verification use.

15
5) MAINTENANCE
Note: To avoid electrical shock, disconnect the meter from any circuit, remove the test
leads from the input jacks, and turn OFF the meter before opening the case. Do not
operate with open case.
Trouble Shooting
If the instrument fails to operate, check batteries and test leads etc., and replace as
necessary. Double-check the operating procedure as described in this user’s manual.
Refer to the LIMITED WARRANTY section for obtaining calibration, repairing, or
warranty service.
Accuracy and Calibration
Accuracy is specified for a period of one year after calibration. Periodic calibration at
intervals of one year is recommended to maintain meter accuracy.
Cleaning and Storage
Periodically wipe the meter and the test probe assembly with a damp cloth and mild
detergent. Do not use abrasives or solvents. Allow drying completely before operating.
If the meter is not to be used for periods of longer than 60 days, remove the batteries
and store them separately.
Battery and Fuse replacement
Battery use:
Standard 1.5V AAA Size (IEC R03) battery X 2
Fuses use:
Fuse (F1) for A-mA current input:
0.63A/1000V ac & dc, IR 10kA, F fuse; or better. Dimensions: 6 x 32 mm
Fuse (F2) for A current input:
11A/1000V ac & dc, IR 20kA, F fuse; or better. Dimensions: 10 x 38 mm
Battery replacement for models with battery access door:
Loosen the 2 screws from the battery access door of the case bottom. Lift the battery
access door and thus the battery compartment up. Replace the batteries. Put back the
battery access door and re-fasten the 2 screws.
Fuse replacement (and also Battery replacement for the splash-proof version without
battery access door):
Remove the battery access door as described above (not applicable for the splash-

16
proof version).
Loosen the 4 screws from the case bottom. Lift the end of the case bottom nearest the
input jacks until it unsnaps from the case top. Replace the blown fuse(s) and/or the
batteries of the splash-proof version. Put back the case bottom; ensure that all the
gaskets are properly seated and the two snaps on the case top (near the LCD side) are
engaged. Re-fasten the 4 screws.
Put back the battery access door and re-fasten the 2 screws (not applicable for the
splash-proof version).

17
GENERAL SPECIFICATIONS
Display: 3-5/6 digits 6,000 counts
Update Rate: 5 per second nominal
Operating Temperature: -10°C to 50°C
Relative Humidity: Maximum relative humidity 80% for temperature up to 31°C
decreasing linearly to 50% relative humidity at 50°C
Altitude: Operating below 2000m
Storage Temperature: -20°C ~ 60°C, < 80% R.H. (with battery removed)
Temperature Coefficient: Nominal 0.15 x (specified accuracy)/ °C @ (-10°C ~ 18°C
or 28°C ~ 50°C), or otherwise specified
Sensing: True RMS sensing
Pollution Degree: 2
Safety: Certified per IEC/UL/EN61010-1 Ed. 3.1, IEC/UL/EN61010-2-033 Ed. 2.0,
IEC/UL/EN61010-031 Ed. 2.0 and the corresponding CAN/CSA-C22.2 regulations to
Measurement Categories: CAT III 1000V and CAT IV 600V
Transient Protection: 8.0kV (1.2/50s surge)
E.M.C.: Meets EN61326-1:2013
mV, Diode, Ohm, & Temperature; in an RF field of 1V/m:
Total Accuracy = Specified Accuracy + 100 digits
Other functions; in an RF field of 3V/m:
Total Accuracy = Specified Accuracy + 100 digits
Overload Protection:
A & mA: 0.63A/1000V DC/AC rms, IR 10kA, F fuse; or better
A: 11A/1000V DC/AC rms, IR 20kA, F fuse; or better
V: 1100V DC/AC rms
mV, Ohm, & others: 1000V DC/AC rms
Low Battery: Below approx. 2.5V
Power Supply: 1.5V AAA Size battery X 2
Power Consumption (typical): 3.2mA
iAPO Consumption (typical): 10A
iAPO Timing: Idle for approx. 32 minutes
Accessories: Test lead set, User's manual, Banana-plug type-K thermocouple (Model
2807 only)
Optional purchase accessories: BKB32 banana-plug to type-K socket plug adaptor
(Model 2807 only)
Special Features: VFD-ACV & VFD-Hz; Hi/Lo EF-Detection (NCV & Single pole);
Display Hold w/Hold-alertTM warning; MAX Hold; BeepLitTM Diode w/BeepPassTM
indication; BeepLitTM Continuity; Relative-Zero mode; Backlighted LCD display;

18
BeepJackTM audible & visible input warning
Electrical Specification
Accuracy is given as ± (% of reading digits + number of digits) or otherwise specified
@ 23°C ± 5°C
AC Voltage & Current accuracies are specified from 1 % to 100 % of range or
otherwise specified. Maximum Crest Factor <2:1 at full scale & <4:1 at half scale, and
with signal component frequencies limited to the specified bandwidth of the AC
functions for non-sinusoidal waveforms
AC Voltage
RANGE
Accuracy
50Hz ~ 60Hz
60.00mV
1)
,
600.0mV
2)
1.0
%
+
3
d
6
.000V
, 60.00V, 600.0V, 1000
V
0
.7
%
+
3
d
45Hz ~ 500Hz
6
0.00mV
1)
, 600.0mV
2)
2.0
%
+
3
d
6.000V
, 60.
0
0
V
, 6
00.0V, 1000V
2.0
%
+
3
d
500Hz
~
1
k
Hz
6
0.00mV
1)
, 600.0mV
2)
2.0
%
+
3
d
6.000V
, 60.
0
0
V
, 6
00.0V, 1000V
Unspecified
Input Impedance: 10M, 20pF nominal
1)Signal peak absolute values, including DC bias, less than 130mVpeak
2)Signal peak absolute values, including DC bias, less than 1300mVpeak
VFD-ACV (with Low Pass Filter )
RANGE
Acc
uracy
1)
1
0 ~ 10
0Hz
600.0
V
,
1000
V
1.0
%
+
3
d
100
~
400
Hz
6
00.0
V
,
1000
V
10
.0
%
+
3
d
2)
1)Not specified for fundamental frequency > 400Hz
2)Accuracy linearly decreases from 1% + 3d @100Hz to 10% + 3d @400Hz

19
DC Voltage
RANG
E
Accura
cy
60.0
0
mV, 600.0mV
,
6.000V
0
.
3
%
+
2
d
60.00V
0
.
4
%
+
2
d
600.0V
0
.
2
%
+
2
d
1000V
0
.
4
%
+
2
d
Input Impedance: 10M, 20pF nominal
Ohm
RA
N
G
E
1)
Accuracy
600.0
, 6.000k
0.3% + 3d
60.00
k
,
6
00.0
k
0.5% + 3d
6
.00
0
M
2)
, 6
0
.
00M
3)
0.9% + 2d 4)
1)Open Circuit Voltage: 1.6VDC typical
2)Constant Test Current: 0.2A Typical
3)Constant Test Current: 0.02A Typical
4)5%+20d @ >30M
BeepLit™ Continuity Tester
Continuity Threshold: Between 30 and 480
Continuity ON Response Time: <15ms
Audible Indication: Beep sound
Visible Indication: LCD Backlight
Capacitance (Models 2805 & 2807 only)
RANGE
Accuracy
20
.00nF, 200.0nF
1.5% + 8d
2
0
0
0nF
1.5% + 3d
20
.
00
F,
20
0
.0
F
, 2000
F
Accuracies with film capacitor or better
This manual suits for next models
2
Table of contents
Other Brymen Multimeter manuals

Brymen
Brymen TopTronic TBM315 User manual

Brymen
Brymen BM161 User manual

Brymen
Brymen BM805s User manual

Brymen
Brymen BM878 User manual

Brymen
Brymen BM821s User manual

Brymen
Brymen TBM195 User manual

Brymen
Brymen BM230 Series User manual

Brymen
Brymen BM252 User manual

Brymen
Brymen BM170D Series User manual

Brymen
Brymen TOP TRONIC TBM251 User manual

Brymen
Brymen BM837RS User manual

Brymen
Brymen BM039F User manual

Brymen
Brymen BM161s User manual

Brymen
Brymen BM195 User manual

Brymen
Brymen TBM161 User manual

Brymen
Brymen BM830 Series User manual

Brymen
Brymen BM195 User manual

Brymen
Brymen BM089 User manual

Brymen
Brymen TBM157 User manual

Brymen
Brymen BM079 User manual