BSG Wind power BLACK 300-12V User manual

Black Series Generator
The High-Tech Wind Turbine!
Owners Manual
BLACK SERIES WIND GENERATORS

NOTICES:
• This information is believed to be reliable; however, The Black Series Wind power is no
responsibility for inaccuracies or omissions. The user of this information and
product assumes full responsibility and risk.
•All specifications are subject to change without notice.
• Wind generators, like other sources of electrical power, must be installed
following the guidelines established by state and local regulations. Consult a local
electrical contractor or the local planning and zoning office for details and regulations.
• For your convenience and protection write the serial number of your wind turbine
on the front of this manual. Store your purchase invoice with this manual as well. You will
need this information in the event of a warranty claim. It also helps the customer service
department at Black Series Generator when you have questions about your specific turbine.
Thank you.

CONGRATULATIONS!
You have just purchased the most high wind energy utilization coefficient wind turbine in the
world!
We believe you will find it easy to install your turbine; however, it is important that you
read this manual entire thoroughly prior to installation to assure proper performance and
safety.
What makes the BLACK SERIES unique in comparison to other turbines is the used of
more reasonable design for magnets arrangement reduces the start-up torque
of our generator. Black Series Wind Generators can generate electricity at a low
wind speed.
If you have any questions after thoroughly reading the manual, please
contact your authorized distributor/dealer or preVent GmbH.
Hope You Enjoy.

Unique Features of the BLACK SERIES GENERATOR(BSG)
The 300W is the latest evolution of the black series of wind turbines from
The improvements are almost all inside the turbine.
The Features:
• New Generator:
Permanent magnetic ring double-generating system;
The new rotor and stator design. The design will improve the Wind Energy
utilization coefficient.
Means that only need small wind power generation can begin!
At the same time also guarantee the reliability of the performance.
•Simple Installation & maintenance:
BSG used for the first time users will immediately install.
But also the design does not affect the effectiveness and ability of catch the wind.
•New Blades: The rotor blades use a highly efficient, true airfoil. They are
manufactured using a precision injection molding process that produces blades
of exceptional consistency. The result is quieter performance and minimal
vibration.
•New Yaw Shaft: The yaw shaft is the part of the turbine that mounts to the tower
and allows the turbine to rotate into the wind. The BSG features a new yaw shaft
that allows for stronger clamping forces to the tower, and more agility in the turbine.
The BLACK SERIES also retains these features
Braking: The regulation control circuitry incorporates excessive brake function.
•This will lock the turbine in a silent regulation mode once the batteries are fully charged.
The turbine begins producing power again when the battery voltage drops slightly
below fully charged.
•New Body, New Hub: The body is made from a precision casting process that not
only enhances fit and finish, but also leads to a stiffer, more durable body. Every metal
accessory is used of stainless steel, even a screw of the turbine all in stainless steel.

Table of Contents
1. Safet
y
………………………………………………………………………. 6
1.1 Mechanical Hazards 6
1.2 Electrical Hazards 6
1.3 Installation 7
1.4 Operation 7
2. Package Contents………………………………………………………… 8
3. Wirin
g
and Installation Procedures……………………………………. 9
3.1 Wiring………………………………………………………………….. 9
3.1.1 Electrical Connections 9
3.1.2 Wire Size 10
3.1.3 Grounding 10
3.1.4 Fusing10
3.1.5 Controller 10
3.2 Mounting to Tower………………………………………………… 13
3
.
3
Link
e
r
a
n
d
R
oto
r A
sse
m
b
l
y
………………………………………… 14
3.3.1 Mountin
g
Blades 14
3.3.2Mounting the blades and adjust balance process 14
3.4 Step-By-Step Instructions…………………………………………. 15
4. Testing………………………………………………………………………. 17
4.1 General Discussion of Operation…………………………………. 17
4.2 Testing ……… ………………………………………………………… 18
5. Trouble Shooting………………………………………………………….. 18
5.1 Assembly……………………………………………………………… 18
5.2 Electrical System………………………………….…………………. 18
5
.
3
El
e
v
at
i
o
n………………………………….………………...…………. 19
6. Warranty Policy……………………………………………………………. 20
7. Technical Specifications………………………………………………… 21
8.Maintenanc
e
………………………………………………………….…….… 22
9. Sitin
g
……… ………………………………………………………….……. ..24
10. Towers……………………………………………………………………… 25

6/25
1. SAFETY PRECAUTIONS
The BSG has been designed with your safety in mind. However, there are inherent dangers
involved with any electrical and/or mechanical equipment.
The BSG is designed with your personal safety as the first priority. However, there are
still some inherent dangers involved in the electrical/mechanical equipment. Safety
must be the priority concern during installation of the system. if you are not sure, if
there is any problem with the wind turbine, don’t use it and let the wind turbine work
after a professional specialist have check your system.
Safety must be the primary concern as you plan the location, installation and
operation of the turbine. At all times be aware of electrical, mechanical and rotor blade
hazards.
If you hear, that extreme wind is coming, please also fix one rotor blade to the pole
with a robe. Then you will have a long lifetime with your wind turbine without any
complications.
The rotor can get a wind power of 3000 N up to the black 500, so the pole or tower
must be able to hold this. Please ask static experts, if you pole is strong enough fixed.
·Choose a calm day to erect the tower.
·Undersized wires or bad connections should be avoided as they will often result in
overheating and potentially cause electrical fire.
·Never approach an operating turbine during strong winds or during thunderstorms.
1.1 Mechanical Hazard
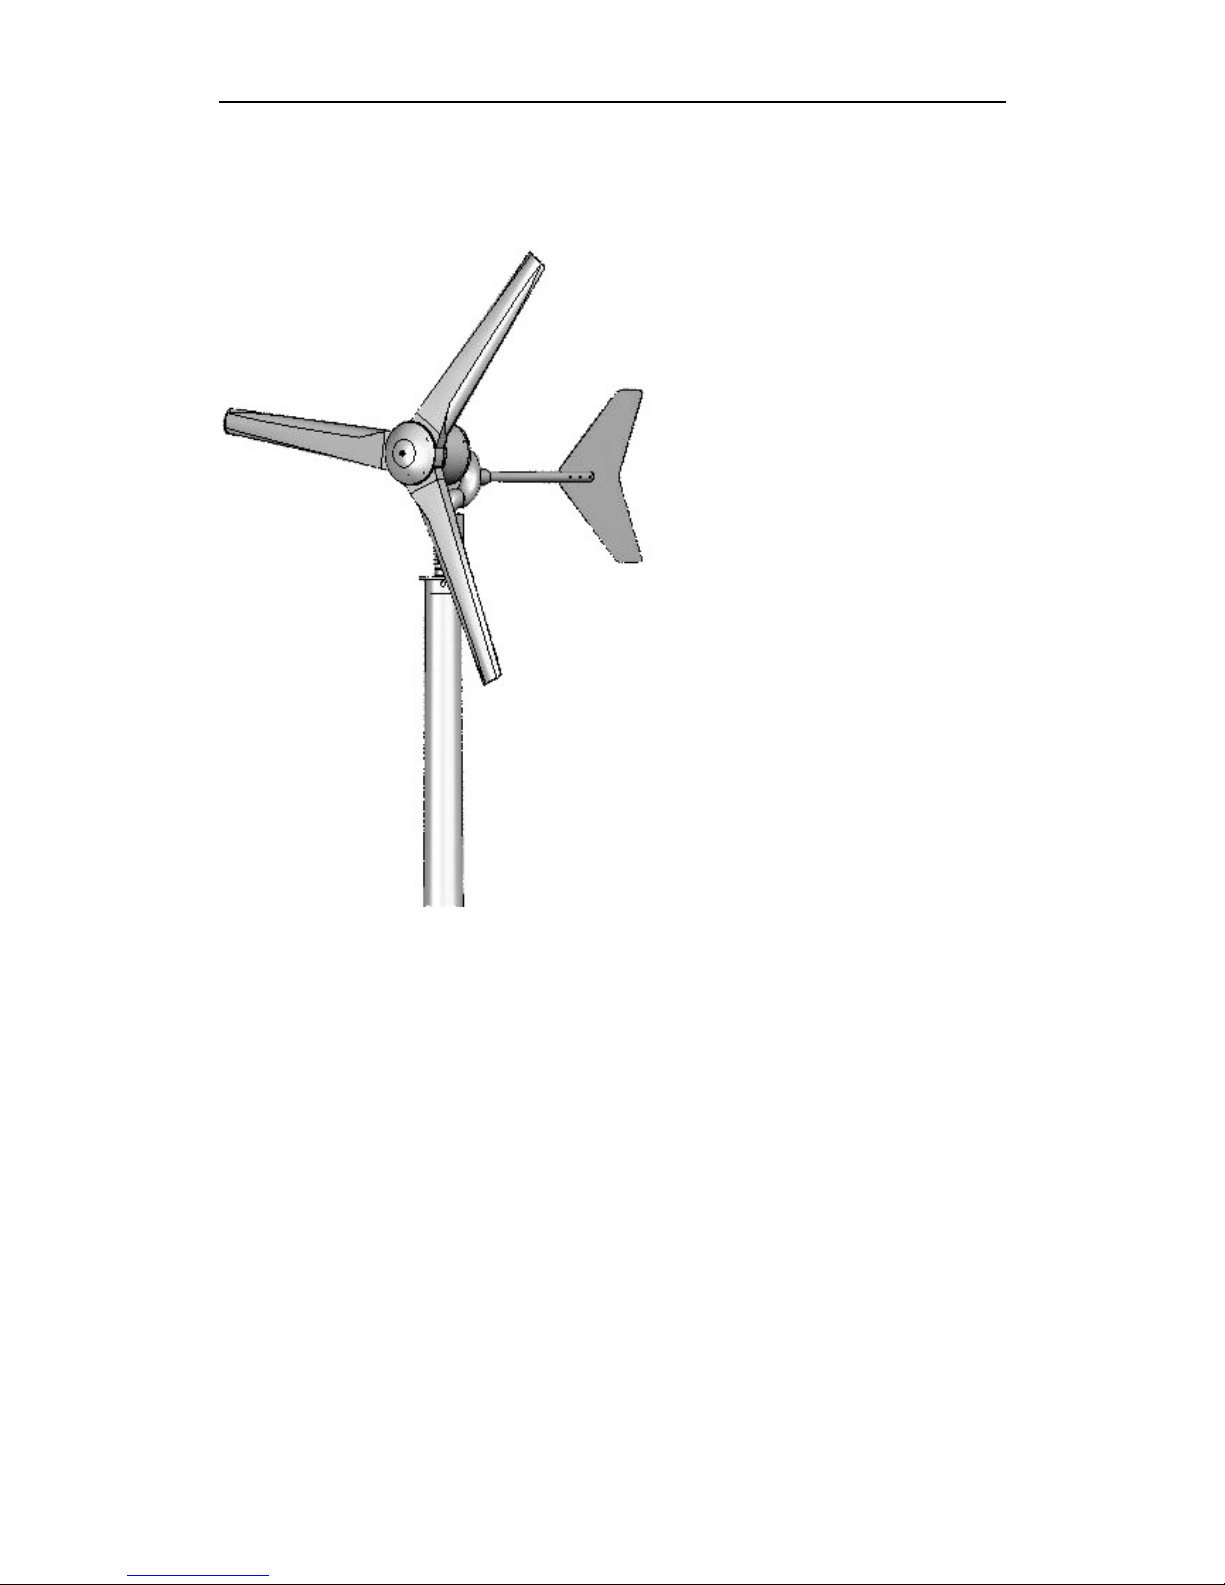
Rotating blades present the most serious mechanical hazard. The BSG rotor blades are
made of very strong fiberglass. At the tip, the blades may be moving at velocities over
275 miles per hour (440 km/hr). At this speed, the tip of a blade is nearly invisible and
can cause serious injury. Under no circumstances should you install the turbine
where a person could come in contact with moving rotor blades.
CAUTION: DO NOT INSTALL THE TURBINE WHERE ANYONE CAN APPROACH
THE PATH OF THE BLADES.
1.2 Electrical Hazards
The BSG is equipped with sophisticated electronics designed to provide protection from
over current electrical dangers. The internal electronics of the BSG prevent open circuit
voltages from rising above 20 volts for 12-volt systems or above 40 volts for 24-volt systems.
Please note that the inherent personal dangers from electrical current still exist,
therefore caution should always be used when connecting this and other electrical devices.

7/25
Heat in wiring systems is often a result of too much current flowing through an
undersized wire or through a bad connection. It is important to follow the wire-sizing
chart in Section 3.1.2 on page 10 to insure a safe electrical system.
CAUTION: FOLLOW THE WIRE SIZING CHART IN SECTION 3.1.2 ON PAGE 10 TO
HELP AVOID THE RISK OF AN ELECTRICAL FIRE.
Batteries can deliver a dangerous amount of current. If a short occurs in the wiring from
the batteries, a fire can result. In order to avoid this threat, a properly sized fuse or circuit
breaker is required in the lines connecting to the battery.
CAUTION: FUSE ALL CONNECTIONS. FOLLOW THE FUSE SIZING GUIDELINES IN
SECTION 3.1.5 ON PAGE 12 TO MINIMIZE THE RISK OF FIRE AND/OR AN
ELECTRICAL FAILURE.
1.3 Installation
CAUTION: INSTALLATION PROCEDURES SHOULD BE PERFORMED AT
GROUND LEVEL.
CAUTION: MAKE SURE THAT ALL BATTERIES ARE
DISCONNECTED THROUGHOUT THE INSTALLATION PROCESS.
CAUTION: NEVER INSTALL THE BSG UPSIDE
DOWN. Please follow these precautions during the installation
process:
•Choose a calm day.
•THINK SAFETY! Have someone available to help during the installation process.
•Disconnect batteries from turbine wiring.
• Prior to attaching the wires to the battery, tie the wind turbine output lead wires
(positive = red; negative = black) together near the battery to be sure that the rotor will
not spin-up during installation.
NOTE: Do not install the blade assembly until the turbine is mounted on the tower.
1.4 Operation
Check support structures, blades, and electrical systems on a regular basis.
• The rotor blades are very strong; however, if they come in contact with a solid object,
they can break. Use common sense about safety when locating the turbine.
• When performing periodic inspections, or at anytime when you must approach the path of the
blades, disconnect the power leads from the battery and tie the wind turbine output leads
together to stop (slow down) the blades from rotating. The turbine can also be shut
down through the use of a stop switch. Please refer to Figure 3 on page 12 on how to install a
stop switch in your system.
CAUTION: NEVER APPROACH THE TURBINE DURING OPERATION.

8/25
2. PACKAGE CONTENTS
Compare the parts shown in Figure 1 to ensure that the contents of the box
contain all necessary parts.
CAUTION: THE EDGES OF THE ROTOR BLADES ARE
SHARP. PLEASE HANDLE WITH CARE.
NOTE: need add screw washers when assembly 6blades and 1nose cone.
Figure 1
First please compare the parts listed below with the contents in the box which your
receive to make sure that you have everything needed for assembly.
Content Quantity
Manual 1
Generator assembled 1
Blades 3
Nose Cone 1
Blade Linker 1
Tail Fin 1
Solar &wind hybrid controller. 1
Cone screw M8x35 1
Blades screw M8x45 6
Tail Screw M6x30 2
Hardware
Screw washers 7 Spring washers

9/25
6 washers
3. WIRING AND INSTALLATION PROCEDURES
Your BSG is shipped partially disassembled. Refer to page 18 for assembly instructions.
Please completely read all procedures before beginning installation.
NOTE: Do not install the blade/hub assembly until the turbine is mounted on the tower
Required Tools:
•6.0mm hex key wrench
•8.0mm hex key wrench
•14.0 hex key wrench
•Torque wrench with 250*30mm hex drives
•Soldering iron or propane torch
•Rosin core solder
•Wire strippers
•Wire crimpers
3.1 Wiring
3.1.1 Electrical Connections
NOTE: Refer ToAll Local and National Codes before Installation.
CAUTION: MAKE SURE THE TURBINE IS DISCONNECTED FROM THE
BATTERIES DURING INSTALLATION.
CAUTION: CONNECTIONS SHOULD BE INSPECTED PERIODICALLY FOR
SIGNS OF CORROSION AND CLEANED WHEN NECESSARY.
NOTE: All electrical power cables should be physically protected. Run the wires inside
the tower or conduit for maximum protection.

10/25
Figure 2
3.1.2 Wire Size
To select the appropriate size wire, measure the distance from the batteries to your
BSG , then refer to the following wire sizing chart as minimum sizes. If cost is not an
issue, a larger sized wire will improve the performance of your BSG .
We recommend these as the minimal wire sizes; for optimal performance you should use the
largest wires that are practical and affordable. Local, state, and national electrical codes
can substitute these recommendations, and should be followed to insure the safety of
your system..
12volt:
Distance of generator
to batteries(m)
10.6 10.7-17.6 17.7-28.2 28.3-44.1 44.2-68.1 68.1-110
Wire sqmm 6 10 16 25 35 50
24volt:
Distance of generator
to batteries(m)
10.6 10.7-17.6 17.7-28.2 28.3-42.4 42.3-70.6 70.7-112.9
Wire sqmm 2.5 4 6 10 16 25
48volt:
Distance of generator
to batteries(m)
10.6 10.7-17.6 17.7-28.2 28.3-44.1 44.2-68.1 70.7-112.9
Wire sqmm 1.25 2 3 5 8 12.5
Wiring Resistance and Regulation
Depending on your exact system configuration including other charging sources in your
system, wiring resistance may affect the regulation set point of the turbine. Higher
wiring resistance (smaller wires) will tend to lower the voltage at which the turbine enters
regulation and stops charging. The recommended wiring sizes should provide little effect
on the regulation set point, but all installations should be observed over time to ensure
that the batteries are charged to the proper voltage.
3.1.3 Grounding/Lightning Protection
Properly grounding the turbine is very important in protecting the electronics for
long-term operation. Grounding procedures must be followed along with any local electrical
codes.
IMPORTANT: SEVERE TURBINE DAMAGE CAN RESULT FROM IMPROPER
GROUNDING! FAILURE TO PROPERLY GROUND WILL VOIDYOUR WARRANTY.
It is very important to ground your battery bank and ground your tower for lightning and static
protection. Proper grounding also enhances the safety of your turbine system. The
green lead wire provides grounding for the body of the turbine. This wire must be
connected to the system earth ground. This is usually done by connecting a wire from a
ground rod near the base of the tower to the green turbine lead wire. For additional
lightning and static protection, another wire should connect this ground rod to the tower pipe.

11/25
3.1.4 Fusing
The BSG is capable of producing high amperages. As with all electrical
installations, you must protect each of your turbines with a properly sized
fuse or circuit breaker. The BSG should be wired with an appropriately sized
“slow-blow” type fuse between itself and the batteries. If a controller is used,
the fuse should be placed between the switch and the batteries.
3.1.5 Charge Controller
In the package, you will also find a solar &wind hybrid controller which is shown in the
following picture, please note, this charger only use for Max.400W wind generator:
Please read this Manual carefully before using this equipment.
3.1.5.1 Security
In the design of this product has been fully taken into account the personal and
property safety, but the un-correct using way may lead to the occurrence of
failures, even lead to burn this charging controller , in order to guarantee the
safety of you, please follow with the following rules when you are using this
equipment:
·Need the guidance of the professional or contact with the dealer for the installing way when Installing the
charger controller.
·Do not spill any liquid into the charger controller, please don’t use the wet cloth to brush the shell of it.
·Do not let children or the lack of independent people to use this product
·This product should not be placed in the electric heater and other sources of heat use, and try to avoid
direct sunlight
·Please check carefully before connecting to the solar panels, batteries and the load, their rated voltage
should be the same, it should be 12V or (24V).
·Please pay high attention and make sure to connect to the right way of the "+","-" poles of the solar
panels, batteries and load.
·The diameter of the electrical wire should burden to the current..
·The current of the solar panels and load must be less than the rated current of the charger controller.
·The connections must be firmly and ensure good contact.
·Prohibit short circuit for the connected "+,-"poles of the batteries.
3.1.5.2 Characteristics
B L A C K 2008 charge controller is battery power, constant voltage control mode,
the 12 V, 24V batteries Universal. According to the battery voltage level, adjusting
the charge current size, decide whether to load electricity or not, and has the
following properties:
.12V, 24V battery control system automatically switches
.Brake show for the wind generator
.12V, 24V switch Show
·Keep a full battery
·Prevent excessive battery charge
·Showing excessive battery discharge
·prevent the battery charging solar panels reversely at night

12/25
·Reverse connection for the battery protection
·Reverse connection for the solar panels protection.
·When the charge controller start up, it can set automatically the stop charging voltage, load
downtime voltage, load restoration voltage according to the battery voltage, these parameters are
the Windows default at the ambient temperature at 25 ℃.
·The controller will automatically charge voltage temperature compensation According to the
changes of the environmental temperature.
·Users can stop filling according to their own needs.
·To prevent excessive battery discharge, the charge controller control minimum load downtime
voltage automatically, it should be not less than 10 V (for 12 V batteries) or 20 V (for 24 V batteries).
3.1.5.3 System wire connection
As shown as the following picture
figure 3
·Please connect the “+”、“-”pole of batteries firmly to the end of output “+”、“-”poles of the
charge controller.
·Connect the "+","-"poles of the solar panel to the solar "+","-"poles of charge
controller.
·Connect the three phrases of the wind generator to the wind generator as shown in the
above picture.
Attention please!
·Please make sure in connection of the “+”、“-”poles of the solar panels, batteries and
load.
·According to the current, please select suitable diameter for electric wire, and must not
be too small, recommended diameter ≥6 sq mm
3.1.5.4 Technic parameter
Style no:B L A C K 2008

13/25
input voltage:12V or 24V DC
stop voltage:14.4V or 28.8V
current of solar module:10A
Max. current:40A
Max. diameter of rotor blades:1.80M
BSG in a system with solar panels(Hybrid System)
Figure 4-5
NOTE: In this drawing the BSG internal regular is used. The other type external regulator can
also be used. The version type regulator could be used in any of the systems.
3.2 Mounting Tower
Size of tower normally is 80mm diameter outside. There is a soft coupling inside the yaw
shaft mount that is designed to provide a secure fit the tower. The pole must be mounted
with hardware specifically designed for small wind turbines.
Attaching to Pole
While attaching the turbine to the tower, be careful not to pinch the yaw wires. Slide the yaw all
the way down over the end of pole.
Make sure that your tower allows for proper clearance of the blades.

14/25
Figure 6
3.3 Rotor linker and Rotor Assembly
Before assembling the hub and rotor refer to Figure 7 below, and the following
detailed instructions.
Assembly with the screws and spring washers
NOTE: To avoid damage to the blades during installation, do not put the blade/hub
assembly on the turbine until the turbine is mounted on the tower.
Blades linker direction:copper washer to blades
Figure 7
3.3.1 Mounting the Blades
CAUTION: THE EDGES OF THE ROTOR BLADES ARE SHARP.
PLEASE HANDLE WITH CARE.
Notice that the screw holes in the blades are counter-bored for the socket head cap
screws. Place one of the blades with the counter bore facing up, and align the screw
holes. Insert one of the socket head cap screws with washers through the blades and
hub.
Repeat this procedure on all three blades. Do not over-torque.
Please note that over-torque of blades may cause damage to the blade and
compromise the safety of the product.
A: Assembling the rotor blades and the blades protection plate.

15/25
B: Blades are in front of the wind turbine with a Blades protection plate. please make sure the
concave surface of the blades is outside(or face to you).
C: Fix the blades according to the screw holes on it and the screw holes on the steel plate on
wind turbine. Then tighten the Bolt M8x40 through the Blades protection plate and blades. The
screw should be turn into the steel plate of the wind generator only 6mm. please pay high
attention to this operation, otherwise, the wire coil will be destroyed by the bolts.
How bring the blades in Balance, so that the screws are only fixed with a small
torque.
If the system is including the spinner is in balance, please fix all screws with a torque of 22 Nm.
D: Assembling the spinner
Place the spinner on the blades protection plate, thread the Spinner screw M8x45 into the
screw hole on the blades protection plate and tighten by hex key.
NOTE: so that you still can move the blades, then bring the blades in to the right position.
Please make sure adjusted the 3 blades in balance position.
When you got the balance, the blades can stay in at any position.
THIS IS VERY IMPORTANT!
Please add that the balance test, must be done without any wind.
3.3.2 Mounting the blades and adjust balance process:
1: assembly blades with screws and washers. Screws keep slightly.
2: assembly nose cone, and mark the location.
3: unloaded nose cone when adjusted to balance.
4: tight all screws include the screws of blades finally.
NOTE: the relative Position of nose cone and blades is very important, so keep
the consistent relative position after and before the adjust balance.
Figure 8
Please inform in point 2, that is should be dangerous to install the blades in the wind,
because after assembling, the rotor begin to turn and you can’t stop it, so please be sure,
that the rotor is anywhere fixed before the wind turbine is not ready installed.
When the wires to the charger are fixed at the generator, the please bring at the other

16/25
wind of the wire a shortcut between all three phases.
CAUTION: THE BLADES ARE SHARP. USE CAUTION WHILE HANDLING THE BLADES.
3.4 Step-By-Step Instructions
The following Step-By-Step-Installation-Procedures provide you with an
outline of the BSG installation process. This consolidated reference should
only be used as an outline during installation. Refer to the appropriate sections
for further details.
1) Run the wires from the battery (do not connect to the battery), through the pole to
the top of the tower. Be sure not to connect the wires to the battery until
everything else has been completed.
2) Strip the insulation back from each set of wires.
3) Connect the wires from the BSG to the wires running to the battery.
4) Insulate the connections using either heat shrink tubing or a quality electrical tape.
CAUTION: IF THE WIRES ARE HOOKED-UP BACKWARDS YOU WILL DAMAGE THE
BSG ELECTRONICS. (IF YOU ARE UNCERTAIN OF THE POLARITY OF THE WIRES,
SPIN THE ROTOR SHAFT AND MEASURE THE VOLTAGE DIRECTION WITH A VOLT
METER).
5) Once the wires are attached to the BSG, Do not use plastic pipe.
6) Remove the nut on the rotor shaft, and carefully attach the assembled hub and blades to
the rotor shaft without pushing the rotor shaft into the turbine.
7) Run all wires from the turbine to the battery. Be sure to crimp and solder the connections
using the appropriate sized connectors. If you plan to connect an amp meter into your
system.
IMPORTANT: SEVERE UNIT DAMAGE MAY RESULT FROM IMPROPER
GROUNDING. FAILURE TO PROPERLY GROUND THE TURBINE WILL VOID YOUR
WARRANTY.
8) Before attaching the wiring to the battery, make sure that all circuit breakers are in the
off position.
9) Attach wires to the battery.
10) Turn on the circuit breakers. When the BSG is first connected to the battery bank, the

17/25
microprocessor will blink the LED twice to indicate that the control circuit is running
correctly. Once the blades reach 1600 RPM, the turbine will begin charging and the LED
will turn on. The LED can be difficult to see during the day.
11) You have now completed the installation process.
4. TESTING
4.1 General Discussion of Operation
NOTE: The BSG Built-in magnetic field with dual power system and scientific wind sweeping
leaves area.
NOTE: Bad connections, undersized wires, and inline diodes will cause the internal
regulator to not work properly. It is very important that the BSG can “sense” the
proper battery voltage.
4.1.1 Over-speed Protection
All wind turbines must have some form of over-speed protection in order to survive
high winds. Most small wind turbines rely on a mechanical method of bending or
tilting out of the wind. The BSG was unique in using brake circuit for over-speed
protection.
But also keep the no noise when it brake.
If the BSG senses the RPM above 1600,it will shut down until the wind speeds
reduce.
The controller of BSG will blink the LED.
a) Open Circuit
When the turbine is disconnected from the batteries, it will “free-spin”. In this mode the
generator can spin “unloaded” with the wind. The internal regulator has a high-speed
regulation to protect the circuit from high voltage conditions. However, when a high
voltage condition is sensed, the turbine is stopped which causes the voltage to drop
and the high voltage condition to end. The result is an oscillating mode which is not
recommended.

18/25
Operating the turbine in open circuit for a brief period of time will not damage the turbine.
However, operating the turbine in open circuit for a long period of time can cause
excessive wear to the turbine and is NOT recommended. We recommend that during
long periods of operation the turbine should be connected to a battery or the turbine
wires should be shorted. Shorting the turbine will minimize wear to the bearings and
prolong turbine life and is quieter than running open circuit.
b) Normal Operation (Charge)
When the generator is connected to a battery bank in need of a charge, the turbine
blades will spin “normally” with the wind. The turbine will charge the battery bank as
necessary until the battery voltage matches the regulation set point.
NOTE: When switched from open circuit to charge, you may notice a reduction in RPM
as the generator is now “under load”. If the batteries are fully charged the turbine blades
will slow to a silent spin.
When charging, the BSG Controller will turn on the LED.
c) Stall Mode
It will depend on the exact wind speed. When the wind speeds reach 50 mph, RPM
reach 1600 RPM. The turbine will shut off completely and the RPM will slow to almost zero.
4.2 Testing
Three quick bench tests can verify if your BSG is working correctly.
Test 1
1. Remove blade assembly from turbine and place in a safe location. (Do not stand the
blade assembly against a wall.)
2. Spin rotor shaft with your fingers while at the same time connecting and
disconnecting the two yaw wires.
3. With the yaw wires connected, the rotor shaft should become more difficult to
rotate and feel “lumpy”. With the yaw wires disconnected it should spin freely. If
these conditions do not exist, you should contact your turbine dealer or BSG Wind
power.
Test 2
1. Remove blade assembly from turbine and place in a safe location.
2. Each time the BSG is connected to a battery, the LED will blink to
indicate that the controller is running properly.
The test is in order to let any internal voltage drain. If the LED does not blink when the
BSG is connected to a battery, you should contact your turbine dealer or BSG Wind
power.

19/25
5. TROUBLE SHOOTING
If the turbine does not work properly after following the installation instructions, then read this
chapter and carefully compare your installation with each section.
5.1 Assembly
Make sure the blade assembly is on tight. You can check by placing the 14.0 hex key in
the shaft, holding it and attempting to turn the blade assembly. If you can turn
the blade, retighten the blade assembly.
5.2 Electrical System
Measure the voltage at the battery terminals to which the BSG is connected. For the factory
regulation set point, if the voltage for a 12v system reads 14.4V or higher (24v 28.2), then the
turbine will sense the battery is charged and stop producing power.
While you are conducting output tests, make sure no other devices such as alternators
or photovoltaic panels are charging the batteries at the same time. The total voltage
from other charging sources could increase the battery voltage causing the BSG'S
regulator to think the batteries are charged and prematurely stop charging.
Also, check the condition of each individual battery. One bad battery can create high
voltages (16-18 volts) and stop the turbine from charging. Consult the battery
manufacturer for testing individual batteries or cells.
5.3 Elevation
The higher a wind generator is from sea level, the lower the air density. Air density is directly
proportional to the output of your turbine. Here are some general numbers to keep in
mind when determining the maximum output that can be expected from a wind turbine.
1-500 ft (0 – 150 m) 100%
500-1000 f
t
(
150
–
300 m
)
97%
1000 - 2000 f
t
(
300
–
600 m
)
94%
2000 - 3000 f
t
(
600
–
900 m
)
91%
3000 - 4000 f
t
(
900
–
1200 m
)
88%

20/25
6. WARRANTY POLICY
What Is Covered and For How Long
For turbines that are one year old or less from date of original purchase or one year and three
months from date of build, any defective part will be replaced at no charge. Either a
BSG wind power technician or an Authorized Service Center determines a defective
part.
What Is Not Covered
•Damage due to lightning
•Damage due to extreme winds (110 MPH+; 60 m/s)
•Damage due to improper installation (including to but not limited to poor tower
design & inverted hanging)
•Damage due to improperly wiring to batteries
•Blade damage resulting from contact with flying debris
Limitations and Exclusions
1) No one has the authority to add to or vary this limited warranty, or to create any other
obligation in connection to BSG Wind power and its products.
2) ANY IMPLIED WARRANTY APPLICABLE TO BSG WIND POWER’S PRODUCTS IS
LIMITED IN DURATION TO THE SAME PERIOD OF TIME AS THIS WRITTEN
WARRANTY.
3) BSG WIND POWER SHALL NOT BE LIABLE FOR INCIDENTAL,
CONSEQUENTIAL, SPECIAL, OR CONTINGENT DAMAGES THAT ANY PERSON
OR PROPERTY MIGHT SUFFER AS A RESULT OF ITS BREACH TO THIS WRITTEN AND
OR IMPLIED WARRANTY.
4) This warranty applies to the original purchaser and may be transferred.
The Customer’s Responsibilities
All of BSG Wind power’s products must be installed and operated in accordance to the
Table of contents