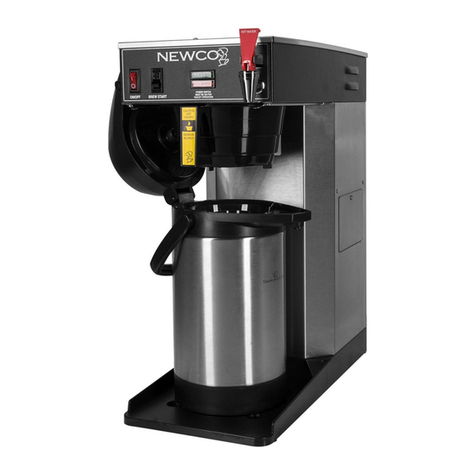
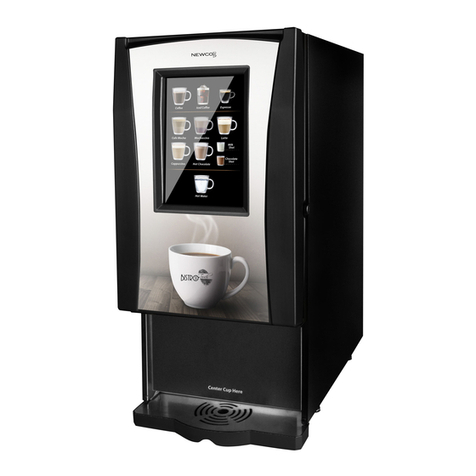
Newco LITTLE JOE COMPONENT ACCESS User manual

ACCESS INSTRUCTIONS PN 153264 20230519 MMF
Technical Service 1-800-556-3926
LITTLE JOE
COMPONENT ACCESS
All servicing and repairs are to be
done by an authorized Service Technician.

2 Technical Service 1-800-556-3926
TABLE OF CONTENTS
MAIN COMPONENT ACCESS
DISASSEMBLY ------------------------------------ 3
REASSEMBLY ------------------------------------- 7
BREW MECH COMPONENT ACCESS
DISASSEMBLY ----------------------------------- 12
REASSEMBLY ------------------------------------ 17
COMPLETE DISASSEMBLY AND REASSEMBLY
INSTRUCTIONS
DISASSEMBLY ----------------------------------- 20
REASSEMBLY ------------------------------------ 28
WARNING:
Unplug machine power and read through all
instructions carefully before servicing your machine. Failure to
follow instructions may void your machine warranty.
Ensure machine is powered off, has no water in it, and has
cooled completely.
LITTLE JOE ACCESS INSTRUCTIONS PN 153264 20230519
39
If power cord was removed
from back panel, thread it
back through the opening
shown above.
Align hooks on the sides and
bottom of the back panel to
slots on the sides and
bottom of the back of the
machine. Slide back panel
up about 1/4” to engage
the hooks into the slots.
Insert and tighten 3 screws. Replace Waste Bin and Drip
Tray.

38 Technical Service 1-800-556-3926
Front panel hook detail. Left
and right front panels have
mirrored hooks.
On the right front panel,
push wire connection into
display board, ensure the
locking tab is on the right
and the connector is secure.
Place each front panel flush
against the machine, with
the top of each front panel
about 1/4” above the top of
the machine cover.
Align front panel hooks
about 1/4” above machine
tabs. Slide panels down into
place.
LITTLE JOE ACCESS INSTRUCTIONS PN 153264 20230519
3
MAIN COMPONENT ACCESS
DISASSEMBLY
Remove drip tray, then
remove waste bin.
Remove 3 screws (circled)
then slide the back panel
down about 1/4” to
disengage the locking tabs,
then pull away from the
machine.
Open the brew mechanism,
leave open for front panel
removal.
Remove 1 screw (circled)

4 Technical Service 1-800-556-3926
Lift the right front panel up
about 1/4”, then pull away
from the machine,
disengaging locking tabs. Be
careful with display wiring.
Press on the locking tab on
the harness connector and
pull to release it from the
display board.
Remove 3 screws (circled).
Slide the right side panel
towards the back of the
machine about 1/4” to
disengage locking tabs,
then pull away.
LITTLE JOE ACCESS INSTRUCTIONS PN 153264 20230519
37
Align upper and lower side
panel hooks. Slide right side
panel forward about 1/4” to
the front of the machine to
lock in place.
Insert and tighten 3 screws.
Open brew mechanism for
reassembly of front panels.
Detail of slots on machine
and right side panel. Left
and right side panels have
mirrored slots.

36 Technical Service 1-800-556-3926
Note the end of the trim
plate will need to slide into
trim plate retaining notches,
pointed to with arrows in the
next image.
Reattach trim plate and
handle cover by inserting
and tightening 4 screws.
Detail of side panel hooks
and machine slots.
Right side panel hooks
inserted into machine slots.
LITTLE JOE ACCESS INSTRUCTIONS PN 153264 20230519
5
Side view

6 Technical Service 1-800-556-3926
Back view
LITTLE JOE ACCESS INSTRUCTIONS PN 153264 20230519
35
Align the screws into the
widest part of the keyhole
slots and press the brew
mech cover onto the brew
mechanism.
Slide brew mech cover
down and back into the
machine to fully seat the
screws into the narrow part
of the keyhole slots.
Insert and tighten two
circled screws. If screws do
not tighten, ensure the brew
mech cover screws are fully
seated into the brew
mechanism keyholes.
Tighten 4 keyhole screws.

34 Technical Service 1-800-556-3926
Note You may need to slide
the silver hood back and
forth to catch the keyholes
with the screws.
Note you will need to align
the screws on the brew
mech cover with the
keyholes on the brew
mechanism.
Raise the brew mechanism
to meet the brew mech
cover, aligning the handle
into the front slot in the brew
mech cover.
Fully open the brew
mechanism and brew mech
cover together to view the
screws and keyhole slots.
LITTLE JOE ACCESS INSTRUCTIONS PN 153264 20230519
7
REASSEMBLY
Detail of side panel hooks
and machine slots.
Right side panel hooks
inserted into machine slots.
Align upper and lower side
panel hooks. Slide right side
panel forward about 1/4”
to the front of the machine
to lock in place.
Insert and tighten 3 screws.

8 Technical Service 1-800-556-3926
Open brew mechanism for
reassembly of front right
panel.
Detail of slots on machine
and right side panel.
Front panel hook detail. Push wire connection into
display board, ensure the
locking tab is on the right
and the connector is
secure.
LITTLE JOE ACCESS INSTRUCTIONS PN 153264 20230519
33
Install reservoir into its
location on the left side
panel. Ensure reservoir is fully
seated, then close the lid.
With the brew mechanism
closed, lift the bushing guide
panel.
With the bushing guide
panel lifted, align the
bushings into the bushing
guide.
Tilt the brew mech cover
front up and slide it into the
bushing guide panel.

32 Technical Service 1-800-556-3926
Set the reservoir detection
switch fully to the right to set
it into the left side panel
opening. Then tighten the 2
screws on its bracket.
Insert and tighten one screw
on the left side panel near
the front of the machine,
gently pressing down on the
top cover to ensure correct
alignment.
Place keyhole over screw
then slide L bracket to the
left. Do not tighten screw
yet. Hold the L bracket in
place to align with the
screw hole in the next step.
Insert and tighten one screw
on the left side panel near
the back of the machine,
gently pressing down on the
top cover to ensure correct
alignment. Tighten the
screw on the L bracket from
the previous step.
LITTLE JOE ACCESS INSTRUCTIONS PN 153264 20230519
9
Place front panel flush
against the machine, with
the top of the front panel
about 1/4” above the top
of the machine cover.
Slide front panel down into
place, engaging panel
hooks with slots on the
machine and on the side
panel. Tighten screw.
If power cord was
removed from back panel,
thread it back through the
opening shown above.
Align hooks on the sides
and bottom of the back
panel to slots on the sides
and bottom of the back of
the machine. Slide back
panel up about 1/4” to
engage the hooks into the
slots.

10 Technical Service 1-800-556-3926
Insert and tighten 3 screws.
Replace Waste Bin and
Drip Tray.
LITTLE JOE ACCESS INSTRUCTIONS PN 153264 20230519
31
With bushing guide panel
lifted, align the top cover
cutout around the bushing
guide panel.
Lower and slide the top
cover forward to align
locking tabs.
Ensure screw hole tabs are
over the stainless steel plates
on the front and back of the
left side of the machine.
Screw holes will be aligned
in a later step.
Gently press down to snap
top cover into place,
engaging the locking tabs.

30 Technical Service 1-800-556-3926
REASSEMBLY
Insert vent tube into the left
side panel, making sure it is
fully seated.
Align tabs on left side panel
with slots on the machine,
with the panel tabs about
1/4” above and to the left
of the machine slots.
After aligning the left side
panel tabs, slide down and
forward onto the machine.
Note reservoir inlet must be
centered in left side panel
opening.
LITTLE JOE ACCESS INSTRUCTIONS PN 153264 20230519
11

12 Technical Service 1-800-556-3926
BREW MECH COMPONENT ACCESS
This is a separate disassembly process from the Main
Component Access process. Follow these instructions if you
need to access any of the parts associated with the brew
mechanism. For further details on these parts, see the Parts
List on our website.
DISASSEMBLY
Open the brew mechanism. Remove 6 screws (circled)
then remove the handle
cover by pulling it away
from the brew mech cover.
LITTLE JOE ACCESS INSTRUCTIONS PN 153264 20230519
29

28 Technical Service 1-800-556-3926
LITTLE JOE ACCESS INSTRUCTIONS PN 153264 20230519
13
Insert a screwdriver under
the brew mech handle to
gently pry the trim plate
away from the brew mech.
Loosen 4 screws (circled),
then slide silver brew mech
cover upwards to clear the
screws from the keyholes.
Keyhole detail

14 Technical Service 1-800-556-3926
To be able to disengage the
handle and properly remove
the brew mech cover, close the
brew mech halfway, then tilt
the back of the brew mech
cover upwards and the front of
the brew mech cover
downwards.
You may need to shift the cover
up and down to disengage the
screws from the keyhole slots.
Then, while holding the
brew mech cover in
place, close the brew
mechanism to clear the
handle. Latch the brew
mechanism in place
before the next step.
LITTLE JOE ACCESS INSTRUCTIONS PN 153264 20230519
27

26 Technical Service 1-800-556-3926
Gently pull up about 1/4” on
the top cover to release
panel tabs.
Lift bushing guide panel
then slide top cover about
2” towards the back of the
machine. Lift top cover up
to remove.
Remove 3 screws (circled),
then slide left side panel
about 1/4” towards the
back of the machine to
disengage the locking tabs,
then lift panel up and away
from the machine.
Remove the vent tube from
the left side panel to
complete the disassembly
process.
LITTLE JOE ACCESS INSTRUCTIONS PN 153264 20230519
15
Tilt the brew mech cover
front up and slide it out of
the bushing guide.
If bushings come
unattached from the brew
mech cover, press them
back on once the brew
mech cover is free from the
machine.

16 Technical Service 1-800-556-3926
LITTLE JOE ACCESS INSTRUCTIONS PN 153264 20230519
25
Remove 1 screw (circled)
from the left side panel near
the back of the machine.
Remove 1 screw (circled)
from the left side panel near
the front of the machine.
Loosen 2 screws (circled).
Slide the reservoir detection
switch harness to the left, so
that it is removed from its
opening in the left side
panel.
Loosen 1 screw (circled),
then slide L bracket to the
right to remove the screw
from the keyhole.

24 Technical Service 1-800-556-3926
Tilt the brew mech cover
front up and slide it out of
the bushing guide.
If bushings come
unattached from the brew
mech cover, simply press
them back on once the
brew mech cover is free
from the machine.
Open reservoir lid, then lift
up, using the handle, to
remove side reservoir.
Side reservoir handle
location.
LITTLE JOE ACCESS INSTRUCTIONS PN 153264 20230519
17
REASSEMBLY
With the brew mechanism
closed, lift the panel
containing the bushing
guide.
With the bushing guide
panel lifted, align the
bushings into the bushing
guide.
Tilt the brew mech cover
front up and slide it into the
bushing guide.
Note you will need to align
the screws on the brew
mech cover with the
keyholes on the brew
mechanism.

18 Technical Service 1-800-556-3926
Raise the brew mechanism
to meet the brew mech
cover, aligning the handle
into the front slot in the brew
mech cover.
Fully open the brew
mechanism and brew mech
cover together to view the
screws and keyhole slots.
Align the screws into the
widest part of the keyhole
slots and press the brew
mech cover onto the brew
mechanism.
Slide brew mech cover
down and back into the
machine to fully seat the
screws into the narrow part
of the keyhole slots.
LITTLE JOE ACCESS INSTRUCTIONS PN 153264 20230519
23
To be able to disengage the
handle and properly remove
the brew mech cover, close
the brew mech halfway, then
tilt the back of the brew mech
cover upwards and the front
of the brew mech cover
downwards.
You may need to shift the
cover up and down to
disengage the screws from
the keyhole slots.
Then, while holding the
brew mech cover in
place, close the brew
mechanism to clear the
handle. Latch the brew
mechanism in place
before the next step.

22 Technical Service 1-800-556-3926
Insert a screwdriver under
the brew mech handle to
gently pry the trim plate
away from the brew mech.
Loosen 4 screws (circled),
then slide and lift silver hood
upwards to clear the screws
from the keyholes.
Keyhole detail
LITTLE JOE ACCESS INSTRUCTIONS PN 153264 20230519
19
Insert and tighten two
circled screws. If screws do
not tighten, ensure the brew
mech cover screws are fully
seated into the brew
mechanism keyholes.
Tighten 4 keyhole screws.
Note the trim plate will
need to set into trim plate
retaining notches, pointed
to with arrows in the next
image.
Reattach trim plate and
handle cover by inserting
and tightening 4 screws.

20 Technical Service 1-800-556-3926
COMPLETE DISASSEMBLY AND REASSEMBLY
Before beginning the complete disassembly process, check
the Parts List on our website to locate components.
DISASSEMBLY
Remove drip tray, then
remove waste bin.
Remove 3 screws (circled)
then slide the back panel
down about 1/4” to
disengage the locking tabs,
then pull away from the
machine.
Open the brew mechanism,
leave open for front panel
removal.
Remove 2 screws (circled)
LITTLE JOE ACCESS INSTRUCTIONS PN 153264 20230519
21
Lift the front panels up
about 1/4”, pull away from
the machine, disengaging
the locking tabs. Be careful
with display wiring.
Press on the locking tab on
the harness connector and
pull to release it from the
display board.
Remove 3 screws (circled).
Slide the right side panel
towards the back of the
machine about 1/4” to
disengage locking tabs,
then pull away.
Remove 6 screws (circled)
then remove the handle
cover by pulling it away
from the brew mech cover.
This manual suits for next models
1
Table of contents
Other Newco Brewing System manuals

Newco
Newco LCD-TCH Instruction Manual

Newco
Newco KB-APF Setup guide

Newco
Newco KB1 Setup guide

Newco
Newco AKH-TC-A User manual

Newco
Newco KB Series Setup guide

Newco
Newco 767377 Guide

Newco
Newco DB2A Installation instructions

Newco
Newco CX-TOUCH User manual

Newco
Newco 805044 User manual

Newco
Newco CX-TOUCH User manual
Popular Brewing System manuals by other brands
NUTRICHEF
NUTRICHEF PKBRKTL150 user manual

BREWFERM
BREWFERM 12195 user guide

Curtis
Curtis G4CB user guide

Brooklyn Brew Shop
Brooklyn Brew Shop Hard Cider manual

Blichmann Engineering
Blichmann Engineering Fermenator F3-7 NPT Operation, Assembly & maintenance manual

Fetco
Fetco CBS-1221 Plus Users guide and operator instructions