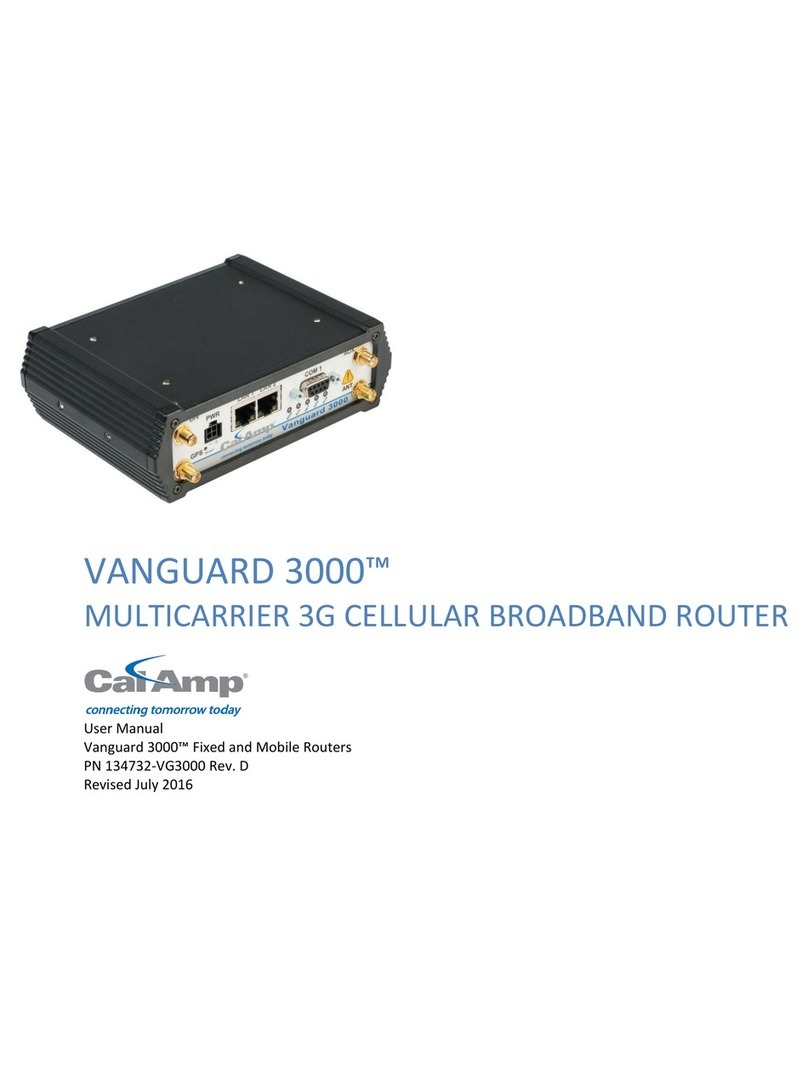
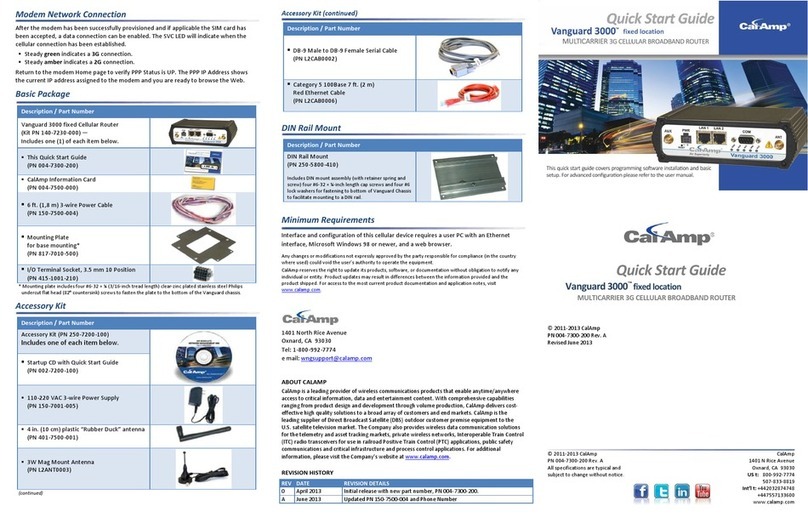
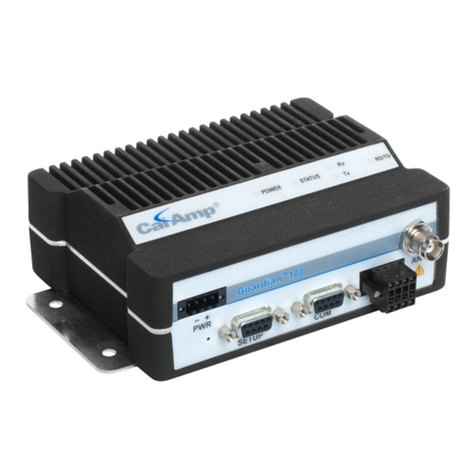
CalAmp vanguard User manual

Vanguard Cellular Data Modem & IP Router Series
User Manual
001-7200-100
Revision 0; June 2011
USAT
USATCORP.COM
Contact USATCORP.COM for more
information or quantity pricing
1-888-550-8728

Vanguard Cellular Data Modem & IP Router Series
User Manual
001-7200-100
Revision 0; June 2011

Copyright Notice
©2011 CalAmp. All Rights Reserved.
CalAmp reserves the right to modify the equipment, its specification or this manual without prior notice, in the interest of
improving performance, reliability, or servicing. At the time of publication all data is correct for the operation of the
equipment at the voltage and/or temperature referred to. Performance data indicates typical values related to the
particular product.
No part of this documentation or information supplied may be divulged to any third party without the express written
consent of CalAmp. Products offered may contain software which is proprietary to CalAmp. The offer or supply of these
products and services does not include or infer any transfer of ownership.
Modem Use
The Vanguard Series modems are designed and intended for use in fixed and mobile applications. “Fixed” assumes the
device is physically secured at one location and not easily moved to another location. Please keep the cellular antenna at a
safe distance from your head and body while the modem is in use.
Important
Maintain a distance of at least 20 cm (8 inches) between the transmitter’s antenna and any person while in use. This
modem is designed for use in applications that observe the 20 cm separation distance.
Interference Issues
Avoid possible radio frequency (RF) interference by following these guidelines:
The use of cellular telephones or devices in aircraft is illegal. Use in aircraft may endanger operation and disrupt
the cellular network. Failure to observe this restriction may result in suspension or denial of cellular services to the
offender, legal action or both.
Do not operate in the vicinity of gasoline or diesel-fuel pumps unless use has been approved and authorized.
Do not operate in locations where medical equipment that the device could interfere with may be in use.
Do not operate in fuel depots, chemical plants, or blasting areas unless use has been approved and authorized.
Use care if operating in the vicinity of protected personal medical devices, i.e., hearing aids and pacemakers.
Operation in the presence of other electronic equipment may cause interference if equipment is incorrectly
protected. Follow recommendations for installation from equipment manufacturers.
Mobile Application Safety
Do not change parameters or perform other maintenance of the 882 GSM Series modem while driving.
Road safety is crucial. Observe National Regulations for cellular telephones and devices in vehicles.
Avoid potential interference with vehicle electronics by correctly installing the 882 GSM Series modem. CalAmp
recommends installation by a professional.

3
Revision History
2011 June Initial Release

4
Table of Contents
1Product Overview ................................................................................................................................................................6
1.1 Module Identification.................................................................................................................................................6
1.2 Features and Benefits.................................................................................................................................................6
1.3 General Specifications................................................................................................................................................7
1.4 Mechanical Specifications ..........................................................................................................................................8
1.5 Order Informaiton ......................................................................................................................................................8
1.6 External Connectors .................................................................................................................................................10
1.7 Antenna....................................................................................................................................................................11
1.8 RS-232 Serial Port Integration Parameters ..............................................................................................................12
1.8.1 ODP (Open Developers Platform) over RS-232....................................................................................................12
2Getting Started ..................................................................................................................................................................13
2.1 Package Contents .....................................................................................................................................................13
2.2 Device Connections ..................................................................................................................................................13
2.3 LAN Configuration ....................................................................................................................................................13
2.4 Cellular connections .................................................................................................................................................14
2.4.1 GSM Users............................................................................................................................................................14
2.4.2 CDMA Users .........................................................................................................................................................14
3Vanguard Web Interface....................................................................................................................................................15
3.1 Unit Status................................................................................................................................................................15
3.1.1 Status ...................................................................................................................................................................15
3.1.2 Basic Settings .......................................................................................................................................................20
3.2 SIM Settings (GSM MODELS ONLY) ..........................................................................................................................21
3.2.1 Enabling PIN Security ...........................................................................................................................................21
3.2.2 PIN security options .............................................................................................................................................22
3.3 Provisioning (CDMA MODELS ONLY)........................................................................................................................24
3.3.1 Verizon Wireless provisioning Information (OTASP) ...........................................................................................24
3.3.2 Sprint provisioning information (OMA-DM) ........................................................................................................24
3.3.3 Advanced Settings................................................................................................................................................27
3.4 Cell Connection ........................................................................................................................................................29
3.4.1 Dial Settings .........................................................................................................................................................29
3.4.2 System Monitor ...................................................................................................................................................31
3.4.3 Dynamic DNS........................................................................................................................................................34
3.5 LAN Settings .............................................................................................................................................................35
3.5.1 MAC Filtering .......................................................................................................................................................39
3.6 Router.......................................................................................................................................................................40
3.6.1 Port Forwarding ...................................................................................................................................................40
3.6.2 Static Routes ........................................................................................................................................................42
3.7 VPN...........................................................................................................................................................................43
3.7.1 PPTP .....................................................................................................................................................................44
3.7.2 IPSec.....................................................................................................................................................................45
3.7.3 GRE.......................................................................................................................................................................48
3.8 Serial.........................................................................................................................................................................49
3.8.1 External Serial ......................................................................................................................................................49
3.8.2 Internal Serial.......................................................................................................................................................54
3.9 Diagnostics ...............................................................................................................................................................55
3.9.1 SNMP ...................................................................................................................................................................55
3.9.2 Logging .................................................................................................................................................................57
3.10 I/O Settings...............................................................................................................................................................58
5
3.10.1 Status...............................................................................................................................................................58

3.10.2 Settings ............................................................................................................................................................60
3.10.3 Labels...............................................................................................................................................................61
3.11 Firmware Update .....................................................................................................................................................62
4Service and Support...........................................................................................................................................................65
Appendix A –Abbreviations ......................................................................................................................................................66
Appendix B –Warranty Statement ............................................................................................................................................67

6
1PRODUCT OVERVIEW
The Vanguard Series from CalAmp is the ideal solution for a wide range of cellular data network serial and Ethernet
connectivity requirements.
CDMA models feature EV-DO Rev A speeds with data rates up to 3.1 Mbps downlink and 1.8 Mbps uplink and are backward
compatible to EV-DO Rev 0 and 1xRTT dependant on carrier service availability. This occurs automatically to the level of
service available. Dual Band Digital CDMA 800 MHz and CDMA PCS 1900 MHz models supports packet-switched services.
GSM models feature Tri-Band UMTS/HSUPA (850/1900/2100) and Quad-Band GSM/GPRS network support with data rates
up to 7.2 Mbps downlink and 2.0 Mbps uplink for HSPA and are backwared compatible to HSUPA, HSDPA, EDGE and GPRS
dependent on carrier service availability.
1.1 MODULE IDENTIFICATION
The module identification label can be found on the bottom of your Vanguard device. This label contains the product part
number, the serial number, FCC and IC IDs as well as carrier specific information that will be required when activating your
data account.
CDMA module identification labels contain the device ESN numbers. This number is required by your cellular carrier when
activating your data contract. The ESN number is provided in both decimal and Hex formats. The format required for
activation is carrier dependent.
GSM module identification lables contain an International Mobile Equipment Identity (IMEI) number shown in decimal
format. This number is used by the GSM network only to identify and validate the device. It has no permanent or semi-
permanent relation to the subscriber.
Figure 1 CDMA Module Idenficiation Label
Figure 2 GSM Module Idenficiation Label
1.2 FEATURES AND BENEFITS
Supports Dynamic or Static IP
Inbound and Outbound Ethernet Routing
DHCP Server and Inbound port mapping/translation (Port Forwarding)
Firewall configuration for increased network security
Diversity antenna port/auxiliary port for increased receive sensitivity
Local or remote configuration using HTML web server

7
TCP/IP Packet assembler and dis-assembler for serial connected devices
Inbound IP termination with Static IP
Modem Domain Names with Dynamic DNS
Embedded Linux on ARM 9 processor
Internet access and web browsing via Ethernet connector
VPN support
On-board 1.8/3V SIM socket (Active only for GSM Models)
1.3 GENERAL SPECIFICATIONS
Product specifications are subject to change without notice.
Interface Connectors
RS-232 DE-9S Connector (DCE female)
10/100 Base-T Full Duplex (Dual)
10 Pin I/O Port
USB Client port
Power Connector
Molex 43045-4000 MicroFit 3.0, 4 pin header
LED Indicators
RSSI, SVC, NET, GPS, AUX
Antenna Interface
Primary Antenna 50-ohm SMA Female
Diversity Antenna 50-ohm SMA Female
GPS Antenna 50-ohm, 3.3V SMA Female
WiFi Antenna 50-ohm RP-SMA Plug
Size
4.5 (L) x 6.0 (W) x 1.9(H) inches (11.4 x 15.2 x 4.8 cm)
Weight
1.94lb (0.88 kg)
Power Input
9-28 VDC
Maximum TX Power
CDMA 25 dBm
GSM/EDGE 33 dBm
UMTS 24 dBm
Rx Sensitivity
CDMA >-107 dBm
GSM/EDGE >-105 dBm
UMTS >-109 dBm
Frequencies
Cellular: TX: 824-849 MHz; Rx: 869-894 MHz
PCS: TX: 1850-1910 MHz; Rx: 1930-1990 MHz
Temperature
Operating: -30°C to +70°C 100% duty cycle. Note: Cellular TX power may be reduced outside
this range; Storage: -40° to +85°C (-40° to +185°F)
Emissions
FCC Part 15b
Transport Protocols
UDP/TCP
Command Protocol
Web Interface

8
1.4 MECHANICAL SPECIFICATIONS
The following section describes in detail the exterior dimensions of the 882 GSM Series modems and how to utilize the
mounting flanges to secure the modem to any surface, which can be drilled for such a purpose. The drawings may be used
as layout reference, but it is advised that a physical comparison be made to the modem before proceeding with the
mounting process.
Figure 3 Vanguard Mechanical Drawing
1.5 ORDER INFORMAITON
Table 1 shows the available order options and the part numbers required for ordering Vanguard modems.
Table 1 - Vanguard Order Information
Carrier Options
STANDARD MODELS
ADD GPS
ADD GPS + WI-FI
EVDO
VERIZON
140-7221-000
140-7221-010
140-7221-110
EVDO
SPRINT
140-7223-000
140-7223-010
140-7223-110
EVDO
BELL MOBILITY
140-7225-000
140-7225-010
140-7225-110
HSPA
AT&T
140-7202-000
140-7202-010
140-7202-110
HSPA
TELSTRA
140-7207-000
140-7207-010
140-7207-110
HSPA
GSM CARRIERS
140-7206-000
140-7206-010
140-7206-110

9
Table 2 - Vanguard Accessories
Vanguard Accessories
ACC-ANTN-RBD
4” Rubber Duck Antenna
ACC-ANTN-MAG
3” Mag Mount Antenna
ACC-PWSP-ML2
110 VAC Input Power
ACC-PWDC-MLX
DC Power Cable
ACC-CABL-SER
DB-9 Serial Cable
ACC-CABL-ETH
7’ Ethernet cable

10
1.6 EXTERNAL CONNECTORS
This section describes the external connectors for the Vanguard modem.
Figure 4 shows the front panel connections for Standard (Fixed) models.
Figure 5 shows the front panel connections for Mobile models with GPS and WiFi.
Figure 6 shows the rear panel for all models.

11
Table 3 describes these connections.
Figure 4 Front Panel Standard Models
Figure 5 Front Panel Mobile Models with GPS and WiFi
Figure 6 Rear Panel Connections

12
Table 3 –External Connectors
Panel Indicator
Connection
Description
COM
RS-232
Serial to IP conversion use
ANT
SMA
Primary RF Antenna
AUX (Figure 4)
SMA
Cellular Diversity or Cellular/GPS combination antenna
AUX (Figure 5)
RP-SMA
Wi-Fi antenna
GPS
SMA
GPS Antenna
DIV
SMA
Cellular Diversity Antenna
LAN 1, LAN 2
RJ-45
Interface for Ethernet connection to devices
SIM/SVC
USB Mini
Available for CalAmp Support Use Only
RESET
Hold for one second to reset unit. If held for at least 4 sec,
unit will reconfigure to factory default settings.
PWR Jack
Molex 43025-0400; Power –bottom
pins; I/O –top pins
Interface for power plug (9-28VDC)
Interface for Input and Output control lines; ODP use only.
SIM/SVC
SIM Card socket
Interface for SIM card. Your wireless service provider will
supply the SIM card with your wireless service contract.
Table 4 –Status LEDs
Function
Off
Green
Flash Green
Red
Flash Red
Amber
Flash Amber
RSSI
Strong
Weak/None
Medium
SVC
3G
3G/NC
NC
2G
2G/NC
NET
No
Connectivity
RX Data
TX Data
RX/TX
GPS
Disabled
Fix
Search
No Fix
Aux
Disabled
Good
Failed
If SVC is solid, then modem is connected to internet. If flashing, the modem is trying to connect to the network.
Net indicates direction of data.
Aux refers to WiFi in mobile models.
The LEDs act different than the table at boot. The boot sequence is: All Red, All Amber, All Green, All Flash Green 3
times. Boot sequence is complete.
1.7 ANTENNA
Primary antenna connections are SMA female connectors and must be used with antenna with SMA male connectors.
When using a direct mount or rubber duck antenna, choose the antenna specific to your band requirements. Mounting
options and cable lengths are user’s choice and application specific.
The AUX antenna connector is installed on all standard models and can be used for Diversity or True GPS. The diversity port
supports three bands, Cellular (850 MHZ), PCS(1900 MHZ), and GPS(1575 MHZ). Connect a dual band cellular antenna to
this port to implement RX diversity on the unit and increase receive sensitivity on the cellular network. Connect a GPS

13
antenna, with an average gain >-5dBi, if using the GPS functionality. If both RX diversity and GPS are required, install a
Cellular/GPS combo antenna.
This device is configured with default settings and is ready to be configured via HTML. Some configurations may be set
using AT commands. Refer to Section XX for AT Commands using the Serial Port.
1.8 RS-232 SERIAL PORT INTEGRATION PARAMETERS
Table 5 provides the serial cable design information to integrate the Vanguard modem into your system. Table 6 gives the
default RS-232 communication parameters.
Table 5 –Standard RS-232 DE-9 Pin out
Pin
Name
Direction
Description
1
CD
←
Carrier Detect
2
RX
←
Receive Daa
3
TX
→
Transmit Data
4
DTR
→
Data Terminal Ready
5
GND
System Ground
6
DSR
←
Data Set Ready
7
RTS
→
Request to Send
8
CTS
←
Clear to Send
9
RI
←
Ring Indicator
Note: Direction is DTE relative DCE
Table 6 –Default RS-232 Communication Parameters
Bits Per Second
115,200
Data Bits
8
Parity
None
Stop Bits
1
Flow Control
None
Figure 7 DE-9 Connectors
1.8.1 ODP (OPEN DEVELOPERS PLATFORM) OVER RS-232
This device includes the Open Developers Platform (ODP), which permits customers to develop their own Linux based
applications which run on the modem’s ARM9 (AT91RM9200) processor. The customer’s application can utilize the external
RS-232 port, and or an internal 3 pin (GND, RXD, TXD) RS-232 port and is able to transfer data over the cellular WAN using
the linux socket libraries. The Vanguard firmware also supports an API that allows the customer’s application to access
diagnostic data from the cell module such as connection status and RSSI. More information and support is provided by
CalAmp’s Applications Engineering organization.

14
2GETTING STARTED
2.1 PACKAGE CONTENTS
Vanguard Modem
Power Cable
Information Card
2.2 DEVICE CONNECTIONS
1. (GSM Users) Insert the SIM card into the SIM/SVC slot as shown.
2. Connect an antenna to the ANT connector on the front panel of the Vanguard modem.
3. Connect an Ethernet cable into the LAN 1 port and plug the other end into the network port of your PC.
4. Connect the Power Adapter to the modem PWR port and plug into a proper AC power socket.
2.3 LAN CONFIGURATION
This device is configured via the Internet which automatically allows your computer to obtain the proper IP address. For
Windows XP users, select Start » Control Panel » Network Connections. Right click Local Area Connection and select
Properties to open the configuration dialog box for Local Area Connection. Select Internet Protocol (TCP/IP) and click
Properties to open the TCP/IP configuration window. On the General tab, select Obtain an IP address automatically and
Obtain DNS server address automatically. Click OK to complete TCP/IP configuration.

15
Figure 8 LAN Configuration Screens
2.4 CELLULAR CONNECTIONS
Before you begin, you will need an active Cellular account with the carrier of your choice.
2.4.1 GSM USERS
Insert the SIM card with the gold side up into the SIM/SVC slot in the rear of the device. Push the card completely into the
slot until it clicks in place. If you have already powered your device, you will need to cycle power to register the SIM for
proper operation.
2.4.2 CDMA USERS
Refer to Section 3.3 to provision your modem for proper operation.

16
3VANGUARD WEB INTERFACE
Start your web browser and enter 192.168.1.50 in the address bar. A login screen should appear.
Enter the User Name: admin and the Password: password and click OK to log into the modem’s Home Page. Vanguard Web
interface is divided into two sections. On the left is the main navigation panel (shown in Figures 9-10). On the right is the
content area for the desired page (shown in Figures 11-12).
Figure 9 LAN CDMA Main Navigation Panel
Figure 10 GSM Main Navigation Panel
3.1 UNIT STATUS
3.1.1 STATUS

17
Figure 11: Vanguard CDMA Unit Status Window

18
Figure 12: Vanguard GSM Unit Status

19
LAN
IP
Displays LAN side static IP information for this device (the modem). Note: Once this IP address has been changed
and saved, the browser connection to the device will be lost. To continue configuration, please connect to the
(new) IP address / the address that has been entered and saved.
Subnet Mask
Displays the LAN side subnet mask for the modem
MAC Address
Media Access Control Address. Every Ethernet device (i.e. LAN cards) has a unique hardware serial number or MAC
address to identify each Network Device from all others.
System Information
Date
Displays the current date and time (UTC) as received from the cellular carrier. The date and time information is
updated at the start of each PPP connection, and then maintained internally until the modem is rebooted. If no
PPP connection has been made this boot cycle, the time display will not be accurate. This is not a user settable
function –it is controlled only by the carrier supplied date and time. Not all carriers support this function.
System Up time
Displays the system uptime in seconds:
―1 minute = 60 seconds
―1 hour = 3600 seconds
―1 day = 86400 seconds
―1 year = 31,536,000 seconds
Current Firmware Version
Displays the current modem firmware version loaded. Please visit www.calamp.com for the latest updates.
Kernel Date
Displays the date of the operating system kernel the unit is running
Phone Module Version
This will vary depending on the vendor of the radio module inside the modem.
Temperature
Displays the current internal temperature of the modem, as measured by the cellular radio module
PPP
PPP Status
Indicates the status of the PPP interface, usually UP when connected properly
This manual suits for next models
1
Table of contents
Other CalAmp Network Router manuals

CalAmp
CalAmp Vanguard 3000 VG3000-PXS-F User manual

CalAmp
CalAmp Fusion User manual

CalAmp
CalAmp Guardian-100 User manual

CalAmp
CalAmp Vanguard 5530 User manual

CalAmp
CalAmp LMU-5541 User manual

CalAmp
CalAmp Vanguard 3000 User manual

CalAmp
CalAmp Fusion User manual

CalAmp
CalAmp Vanguard 3000 User manual

CalAmp
CalAmp Viper 100 User manual

CalAmp
CalAmp VIPER SC+ 100 series User manual