0126 0127
Warning
LYRA 75W
Warranty
LYRA 75W
1. The installation should be performed by qualified electricians or technicians.
2. Before conducting any installation, maintenance, or removal, the luminaires should
be powered off and cooled down.
3. Do not touch the fixture while it is turned on.
4. If there are any issues with the fixture, do not power off and attempt to repair
it unless you are a qualified technician, electrician, or customer service member.
GROWBAR product is covered by a 5 year limited warranty. GROWBAR
grow light warrants to the original purchaser that this product is free from
defects in materials and workmanship for the period of 5 years from date of
purchase. To obtain warranty service please contact your local distributor or sales
rep for further instruction.
CALIVE LLC reserves the right to update all product
data sheets at any time. Consult CALIVE marketing
Copyright©2021–2022 CALIVE LLC,
All Rights Reserved.
1460 Park Avenue.
Emeryville, CA 94608 USA
www.calivellc.com
CALIVE
GROW LIGHT
LYRA
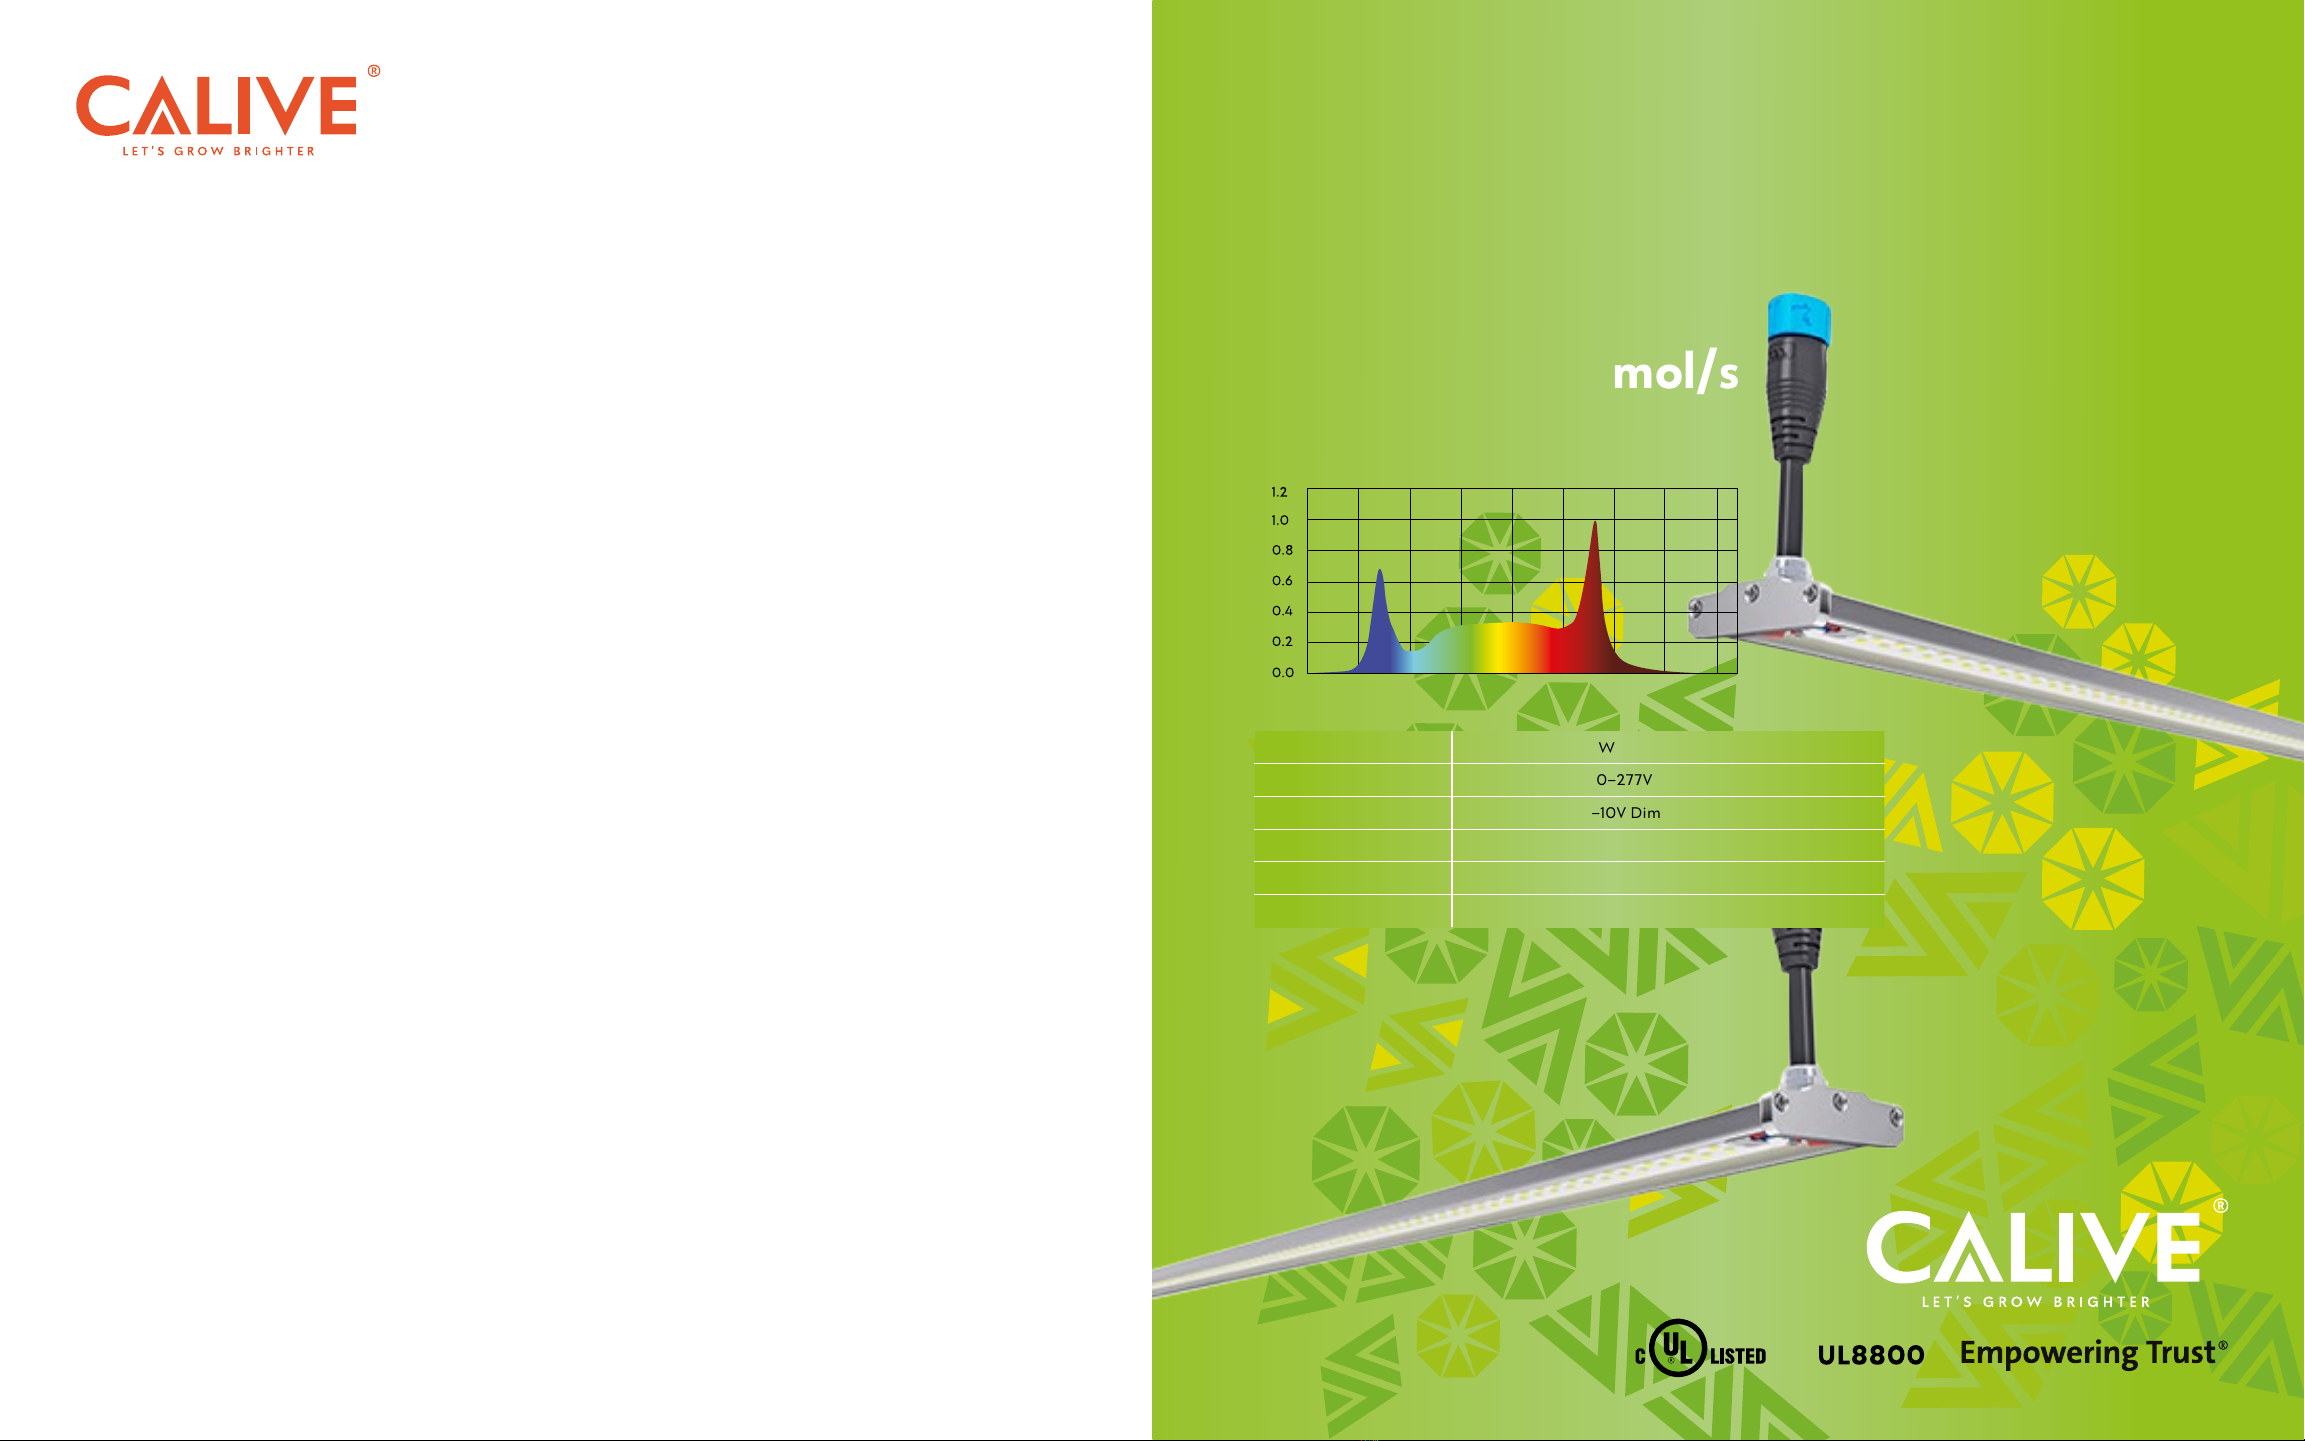
75W
Total PPF: 210 μmol/s
POWER 75W
INPUT VOLTAGE 100–277V
DIMMING 0–10V Dim
FIXTURE DIMENSIONS 44.0" L x 2.1" W x 0.4" H
LED CHIPS Lumleds + Prolight (660nm)
LED EFFICACY 2.8μmol/J Total PPF: 210μmol/s
380 430 480 530 580 630 680 730 780


