Cambo CS-CHRONOS User manual

CS-CHRONOS
HDSLR/DV SUPPORT SYSTEMS
INSTRUCTION MANUAL
EN
Please read this manual carefully before using the Cambo CS rig!
CAMBO | WHERE TRADITION MEETS VISION | MADE IN THE NETHERLANDS

UPDATED: 02-07-2010
Instruction Manual CS-
Chronos
2
Thank you for purchasing a Cambo product
The Cambo CS system complies with the “Arriflex
®
15mm Light Weight” standard.
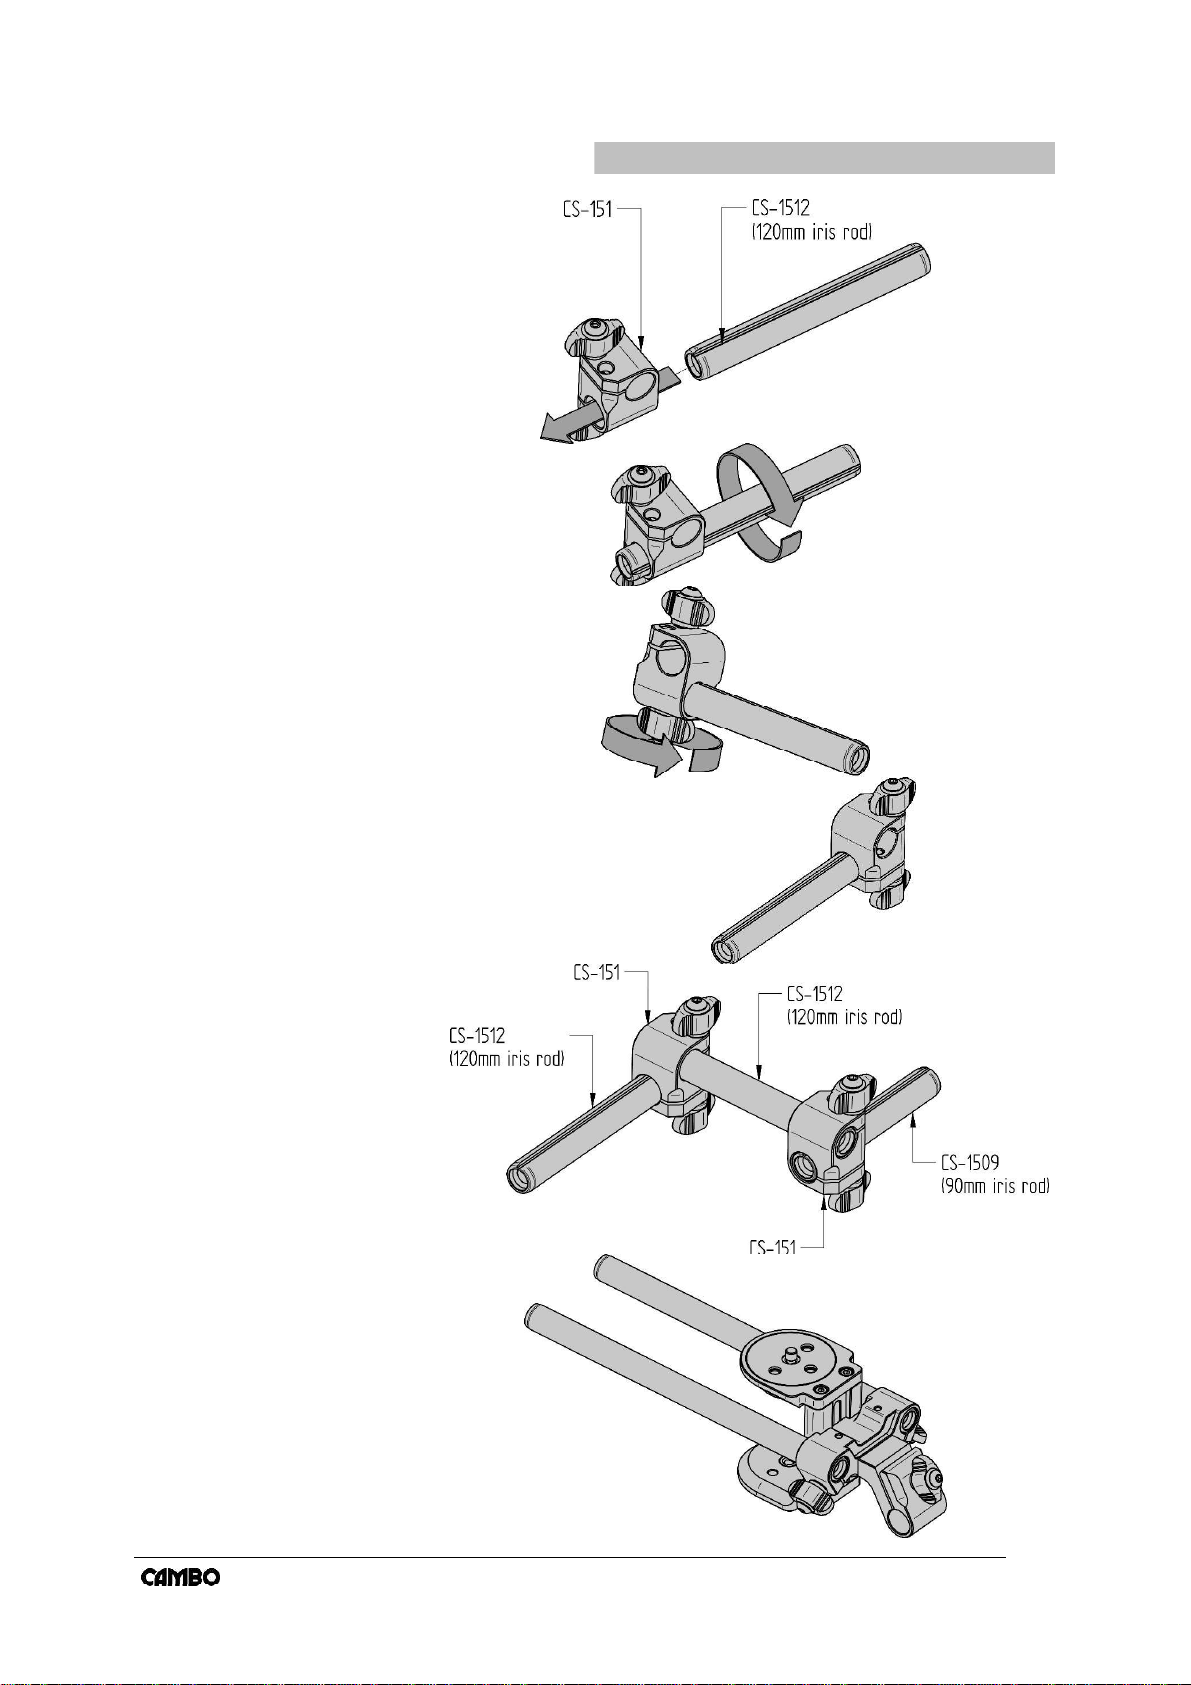
This means the CS system is compatible with parts of other brands using the 15mm
light weight standard. The 15mm light weight standard characteristics are: 15mm iris
rods that are positioned 60mm apart and 85mm below the optical axis.
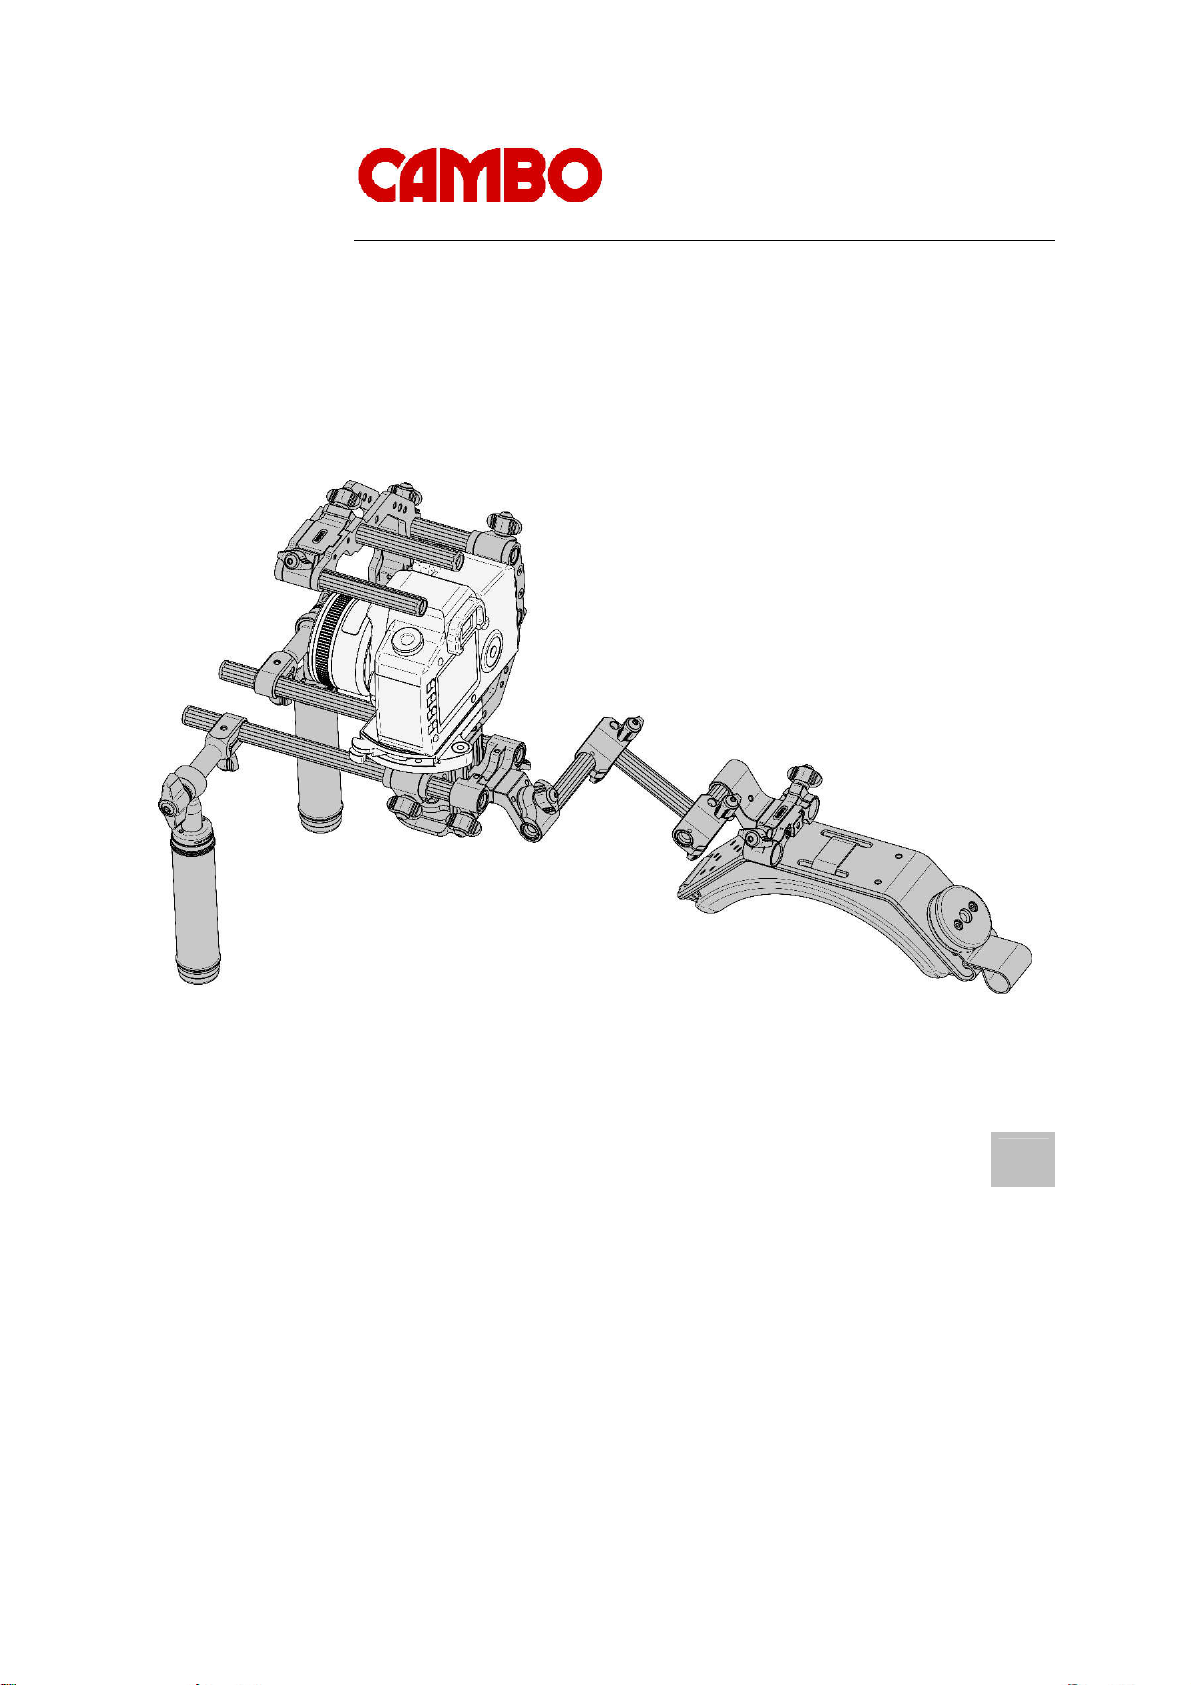
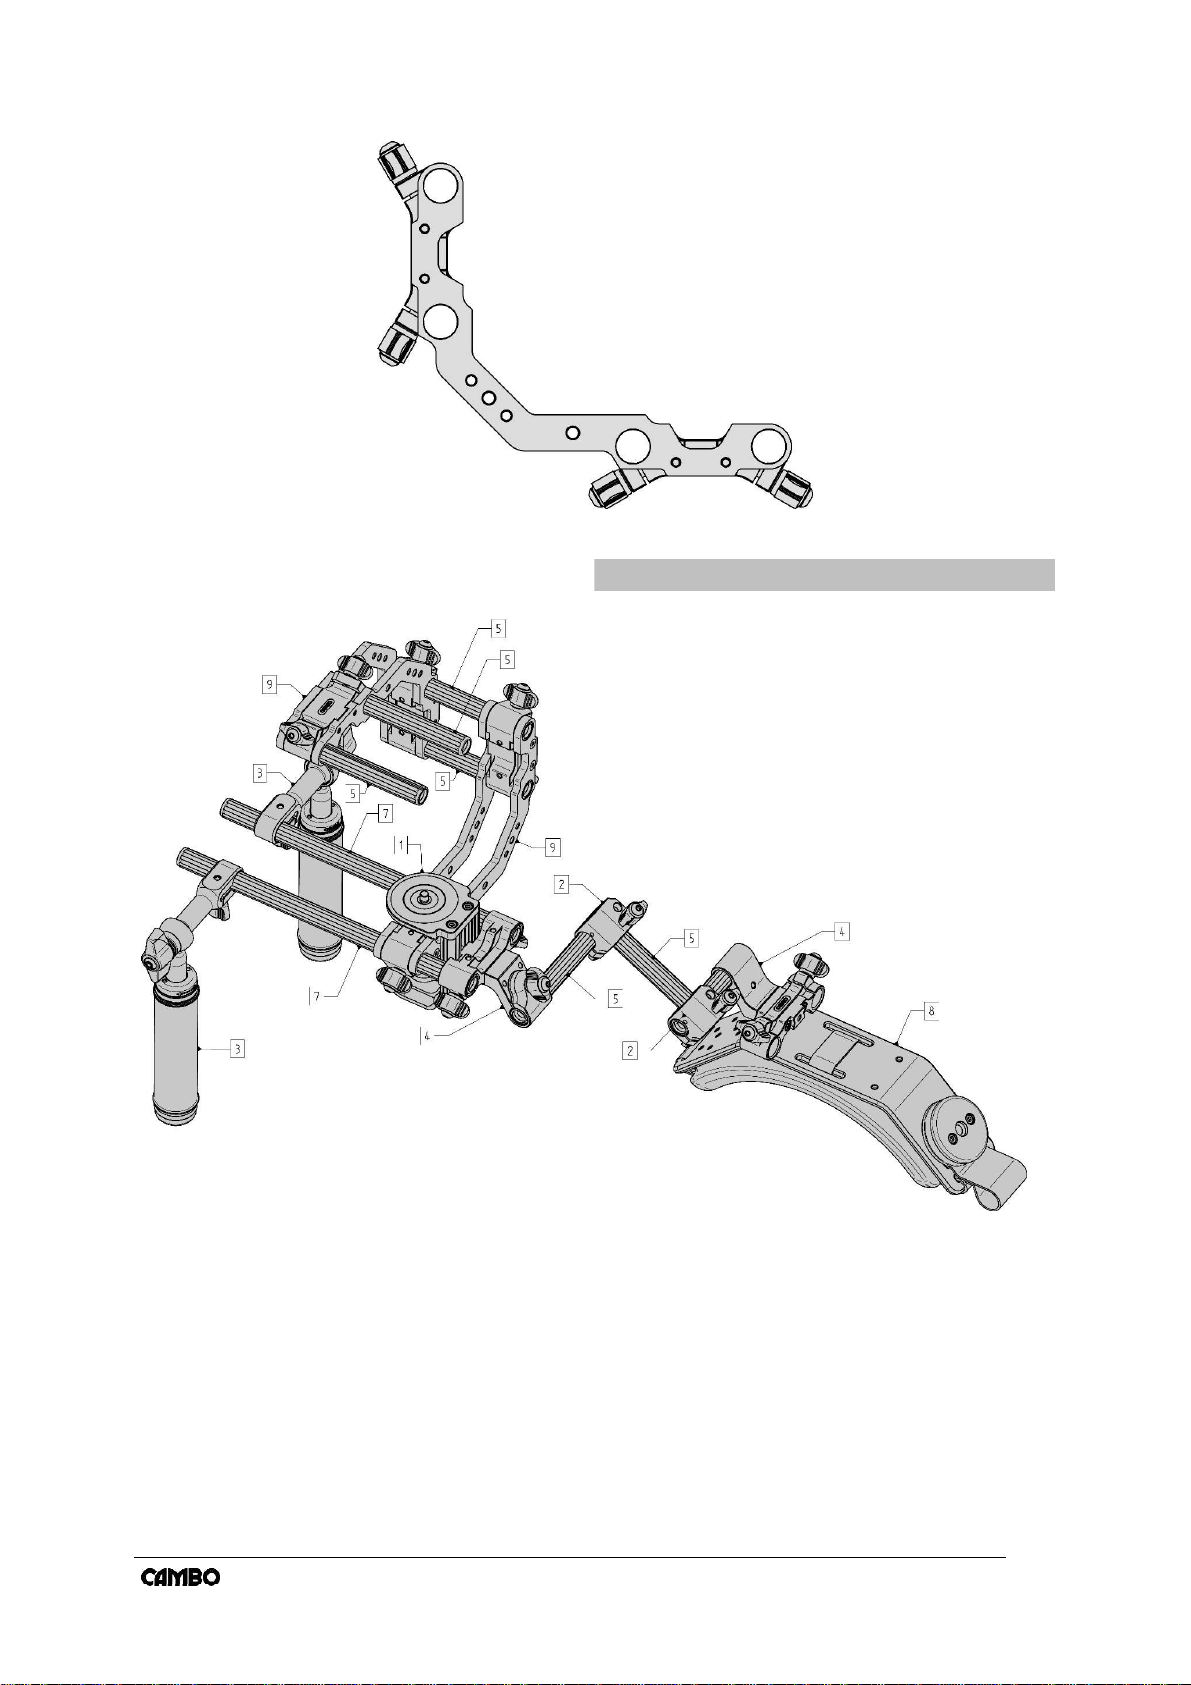
The Cambo CS Chronos camera support is a fully adjustable. The offset of the
HDSLR is adjustable in the x, y and z axis. This provides an optimal viewing position,
whether you use a loupe or a direct view on the HDSLR monitor.
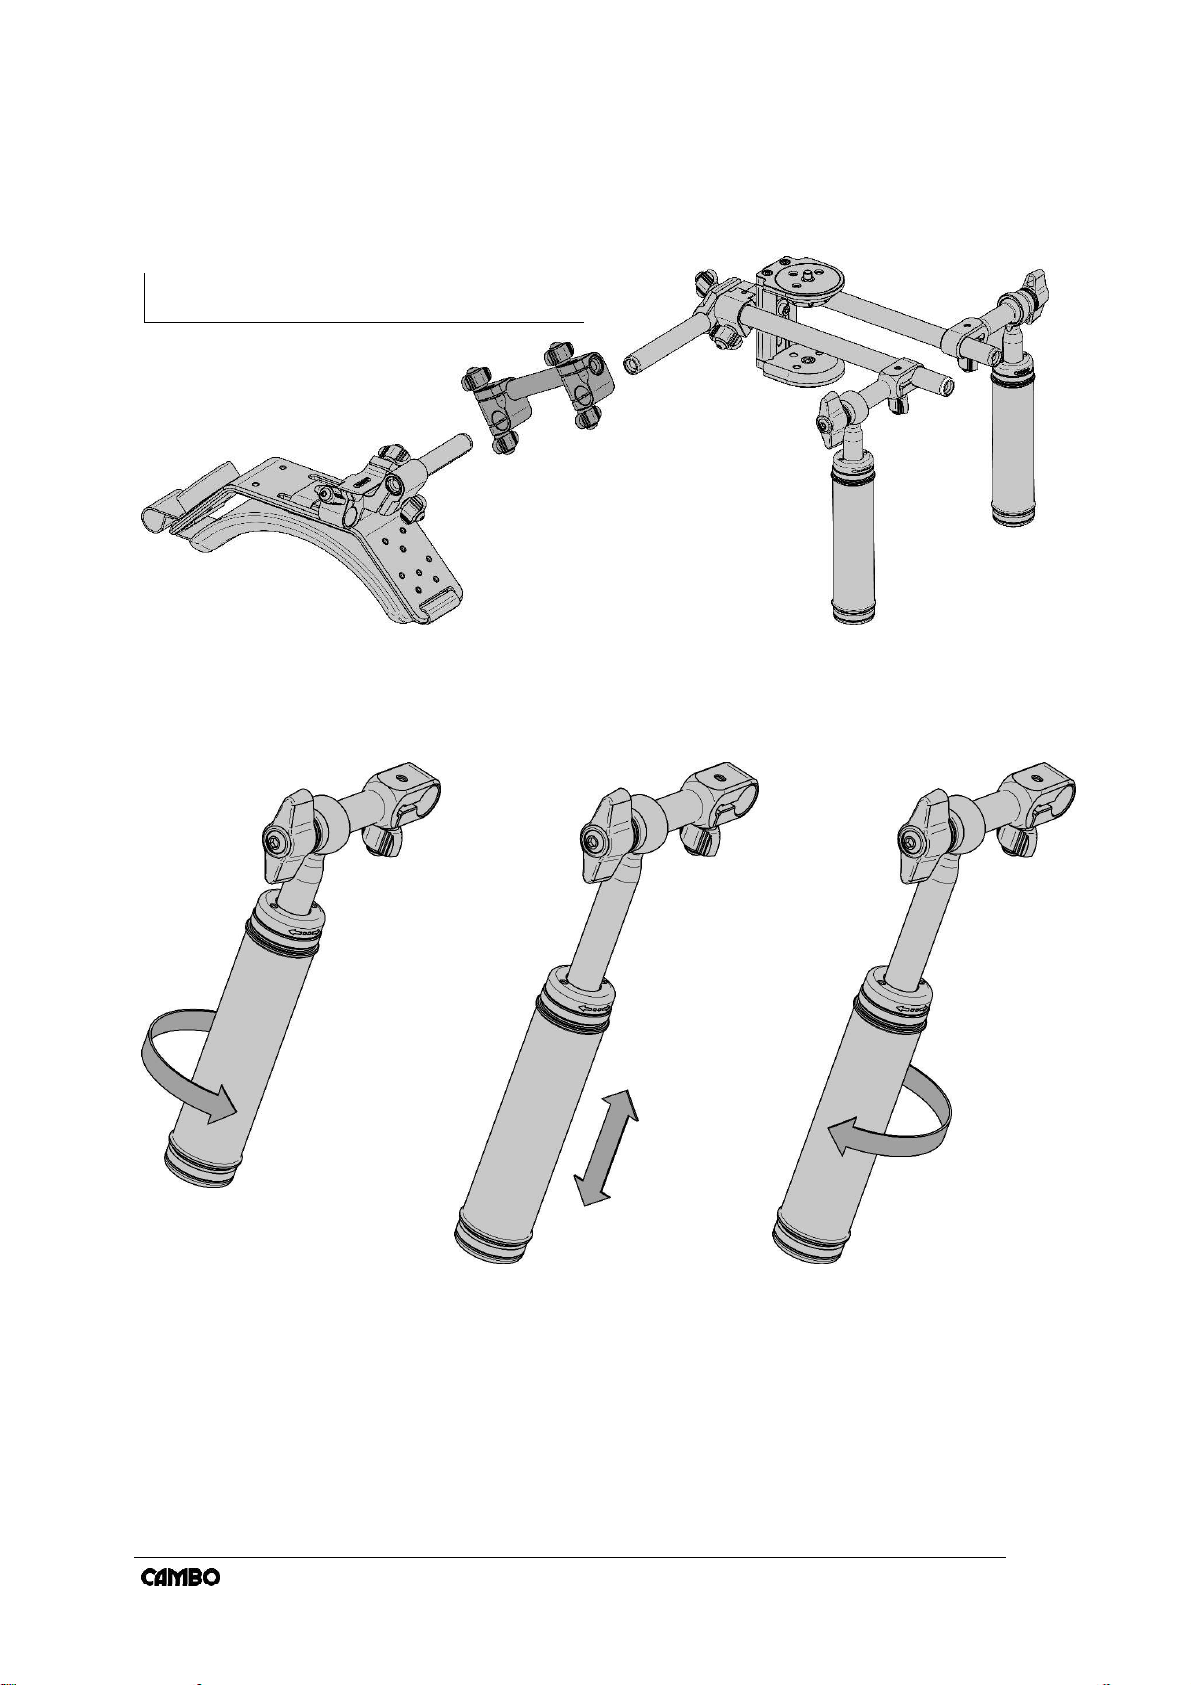
The Chronos features the telescopic CS-H2 handle grips, giving the user full control
over the positioning of the grips.
Due to the modular character of the Cambo rig system, the user is fully in charge of
customizing the rig to his or her personal preferences.
The Chronos-Rig can be used with any follow-focus and/or matte box, this rig
configuration centers the weight of the rig on the handle axis.
Warnings
Before loosening a clamp knob, ensure that the loosened part of the rig is
supported.
Do not tighten the clamp without a rod inserted. This can deform and damage
the clamp.
Always check, after (re)assembly of the rig, if the clamps connecting the rods
are well tightened.
Do not lift the rig while holding only one handle. This could lead to excessive
force momentum on the handle joint, causing it to shift.

UPDATED: 02-07-2010
Instruction Manual CS-
Chronos
3
Item check list
Before starting, please check if all items are included in your package. If anything is missing,
contact your dealer.
CS-H2 grip handle telescopic (2x)
CS-1522 iris rods 220mm (2x), CS-M1 camera/tripod mount (1x), CS-153 triple clamp (1x)
CS-P1 ergonomic pad (1x), CS-153 triple clamp (1x)
CS-1512 iris rod 120mm (6x), CS-1509 iris rod 90mm (1x), CS-151 perpendicular clamp (2x)
6x
2x

UPDATED: 02-07-2010
Instruction Manual CS-
Chronos
4
CS-154 quad parallel 15mm rod clamp (2x)
Overview CS-Chronos rig
1 CS-M1 Camera/tripod mount
2 CS-151 Perpendicular 15mm rod clamp
3 CS-H2 Telescopic handle
4 CS-153 Triple 15mm rod clamp
5 CS-1512 Iris rod 120mm
6 CS-1509 Iris rod 90mm
7 CS-1522 Iris rod 220mm
8 CS-P1 Ergonomic shoulder pad
9 CS-154 Quad parallel 15mm rod clamp
2x

UPDATED: 02-07-2010
Instruction Manual CS-
Chronos
5
Assembly of the CS-Chronos rig
Insert the CS-1512 rod into
the CS-151 clamp.
Twist the rod until you feel it
snap into the preset position.
Tighten the related clamp
knob to fix the position of the
iris rod.
Position the rod/clamp
assembly as shown in the
picture.
Insert the other CS-1512 in to
the CS-151 clamp, rotate the
rod until the snap, then
tighten the related clamp
knob. The other CS-151
clamp and CS-1590 are
assembled in the same order.
This picture show’s the
assembly of the middle part
of the rig.
Its advisable to use a tripod
for the assembly of the CS-
Chronos rig.
Its also advisable to use
quick-release plates for the
connection between the rig
and camera and between rig
and tripod. This ensures a
fast decoupling of both rig
and camera.

UPDATED: 02-07-2010
Instruction Manual CS-
Chronos
6
The “15mm Arriflex LW”
standard, indicates a distance
of 85mm between the optical
axis and the axis of the rods.
Due to the variation in
camera bodies and quick-
release plates the distance
between the camera and rods
is adjustable.
Use a hex-key 4mm to loosen
the socket bolt, by turning it
counter clockwise. Set the
distance between camera
and rods to the appropriate
value, fasten the CS-M1
mount by turning the hex-key
clockwise (do not over tighten
the bolt).
Please assemble the front, middle and back part of the rig according the picture above.

UPDATED: 02-07-2010
Instruction Manual CS-
Chronos
7
Please assemble the two CS-154 brackets by placing the CS-1512 rods. First place the rods into the
CS-154 brackets, when all the rods are placed and when the two CS-154 brackets are parallel, please
tighten the screws of the CS-154 brackets.
Please assemble the two CS-H2 handles.
The assembly of the CS Chronos rig is now complete.

UPDATED: 02-07-2010
Instruction Manual CS-
Chronos
8
CS-Chronos rig adjustments
The position of the front assembly (camera) in relation to the back assembly (shoulder pad) can be
adjusted in the x, y and z direction and axis.
The CS Chronos also features a memory setting to ensure a reproduction of the ideal user settings.
Before adjusting the middle assembly (indicated dark grey in the picture above), please ensure that the
rods are set into the snapped position of the CS-151 clamps (explained at page 4).
Loosen knob A (counter clockwise) and adjust the desired angle of the front assembly in relation to the
middle and back assembly, when the desired angle is set fasten knob A (clockwise).
Loosen knob B (counter clockwise) and adjust the desired angle of the back assembly in relation to the
middle and front assembly, when the desired angle is set fasten knob B (clockwise).
Note: for clarity the CS-154 brackets are not
shown in the following images.

UPDATED: 02-07-2010
Instruction Manual CS-
Chronos
9
When you want to split up the rig for transport, you leave knob A and B fixed and you loosen knob D and
slide of the back assembly, after this you loosen knob C and slide of the middle assembly.
The rods still connected to the front and back assembly now feature the custom angle setting. To
reassemble the rig use the snapping of the CS-151 clamp to reproduce the custom angle setting.
The CS-H2 handles can be adjusted in length. The handle is either locked clockwise or counter
clockwise. In the example picture below its locked counter clockwise, twist the handle clockwise until you
feel that the handle is unlocked, then slide the handle to desired length and twist the handle counter
clockwise to lock (of course its also possible to twist the handle clockwise to lock it again).
Note: for clarity the CS-154 brackets are not
shown in the following images.

UPDATED: 02-07-2010
Instruction Manual CS-
Chronos
10
The image above shows the different mounting options of the CS-P1 shoulder pad. The CS-152/153
and the CS-158 can be mounted directly to the CS-P1 shoulder pad.
Cambo CS system accessories
The CS-15XX iris rods and the CS-H2 handle feature a 3/8” socket which can be used for mounting
attachments.

UPDATED: 02-07-2010
Instruction Manual CS-
Chronos
11
Name Function
CS-155 iris rod connector
CS-156 3/8” adapter
CS-156 1/4” adapter
To couple two CS-15XX iris rods
To attach a 3/8” accessory
To attach a 1/4” accessory
monitor, microphone, light, etc.
The CS-181 unit can be used to adjust the weight distribution of the CS-rig.
The CS-M8 is a separate monitor/microphone/light stand which couples to the 15mm iris rod. The CS-
H1 handle can be extended using a CS-155 connector and a CS-15XX iris rod.

UPDATED: 02-07-2010
Instruction Manual CS-
Chronos
12
Cambo CS system
15mm CS rig assemblies
CS-Cilix HDSLR Support Two Grip Handheld
CS-Styx HDSLR/DV Shoulder Mount
CS-Cirus HDSLR OFFSET RIG
CS-Eris HDSLR Support Fully Adjustable
CS-Chronos HDSLR Cinema Rig Professional
15mm iris rod clamp units
CS-151 Rod Clamp 15mm Perpendicular
CS-152 Rod Clamp 15mm Dual Parallel
CS-153 Rod Clamp 15mm Triple Dual/Perpendicular
CS-154 Rod Clamp 15mm Bracket Quad Parallel
CS-158 Rod Clamp 15mm Single (Connects to the CS-152 and CS-P1)
Camera/tripod mount units
CS-M0 Compact Camera/Accessory Mount
CS-M1 Compact Camera/Tripod Mount
CS-M2 DV Camera/Tripod Mount One Column Base
CS-M4 DV Camera/Tripod Mount Two Column Base
CS-M8 Monitor/Microphone Support
CS-394 Quick Release Mount Manfrotto 394 RC4 Low Profile
Handle units
CS-H1 Grip Handle Compact (Includes the CS-151)
CS-H2 Grip Handle Telescopic
Shoulder support units
CS-P1 Shoulder Pad Ergonomic Adjustable
Weight/battery units
CS-180 0.8Kg/1,8Lbs Weight with 3/8” mount connections
CS-181 Weight Holder Including 1x 0.8Kg/1,8Lbs weights
CS-182 Weight Holder Including 2x 0.8Kg/1,8Lbs weights
CS-189 Battery/Camera Mount Plate (Connects to the CS-152 and CS-153)
15mm Rod Connector and Adapters
CS-155 Cambo Iris Rod Connector
CS-156 Cambo Iris Rod to 3/8" Adapter
CS-157 Cambo Iris Rod to 1/4" Adapter
HDRB Heavy Duty Stainless Steel Reducer Bushing 3/8” to 1/4”
15mm iris rods
CS-1509 Iris Rod 90mm / 3.5"
CS-1512 Iris Rod 120mm / 5"
CS-1522 Iris Rod 220mm / 9"
CS-1530 Iris Rod 300mm / 12"
CS-1536 Iris Rod 380mm / 15"
CS-1546 Iris Rod 460mm / 18"
Matte-box units
CSM-100 Matte-box Flexible Hood
CSM-210 Matte-box Kit, two filter holder, one rotating
Follow-focus units
CSMFC-1 Follow Focus Kit Universal
Viewer-loupe units
CS-30 3” Monitor Viewing Loupe 3.0x Magnification
Cambo Photographic Industry B.V. / Cambo Video and Broadcast Products B.V. Cambo R&D 01 November 2010
This instruction manual is prepared with care, although no responsibility, financial or otherwise, is accepted for any consequences related the
information stated in this instruction manual. All specifications in this instruction manual are subject to change without notice.
For more information please visit the Cambo web site: www.cambo.com
Table of contents
Other Cambo Professional Video Accessories manuals