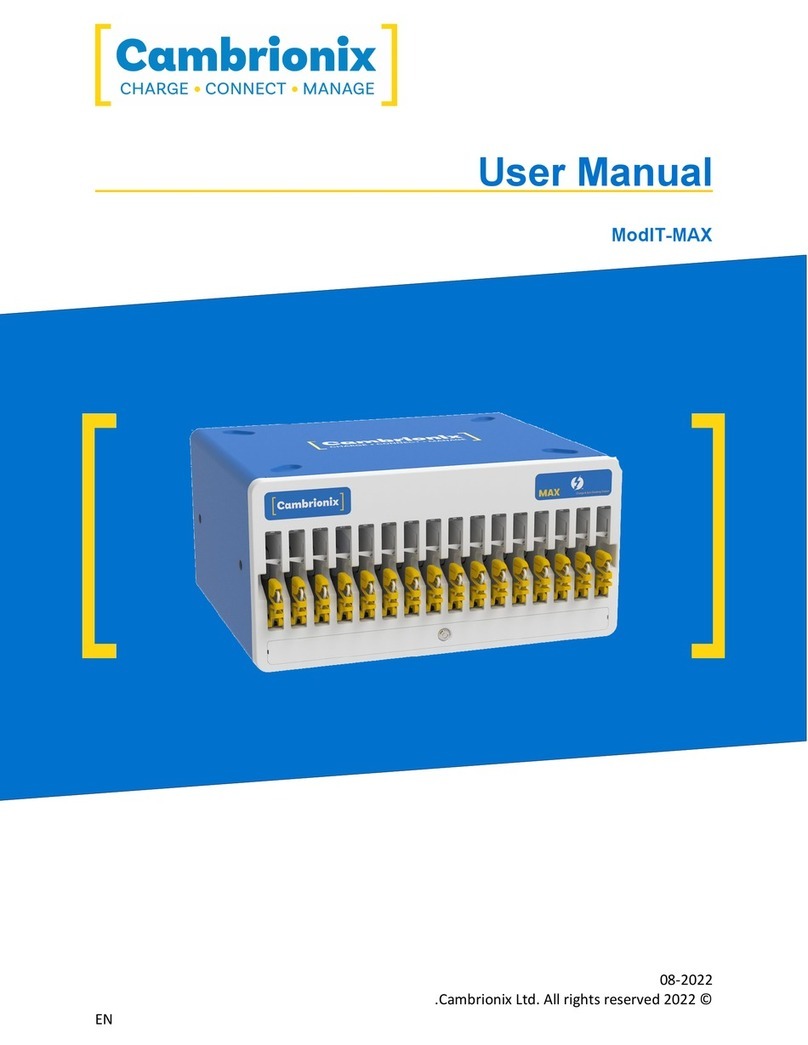
CAMBRIONIX ModIT-MAX User manual

Manual del usuario
ModIT-MAX
2022-08
© 2022 Cambrionix Ltd. All rights reserved.
EN

ModIT-MAX Página 1 de 43
1. Índice
1. Índice 1
2. Su ModIT-MAX de un vistazo 3
2.1. Principales características 3
3. Seguridad 4
3.1. Panel de palabras de señalización 4
3.2. Símbolo de alerta de seguridad 5
3.3. Pictogramas 5
3.4. Modificación del producto 5
3.5. Alimentación 6
3.6. Almacenamiento e instalación 7
4. Primeros pasos 8
4.1. Opening your product 8
4.2. Qué se incluye 8
4.3. Conexión a la red eléctrica 9
4.4. Conexión al host 9
4.5. Cargando 9
4.6. Cables 10
4.7. Llaves 10
4.8. Registro 10
4.9. Ayuda y soporte 10
5. Uso de su ModIT-MAX 11
5.0.1 Configuración de ledes 11
5.1. Using without connecting to host 11
5.2. Using when connected to host 12
5.2.1 Conexión del hub a un equipo host 12
5.2.2 Authorising Thunderbolt™ hubs on Linux® 12
5.2.3 Cargando 13
5.2.4 Transferencia de datos 14
5.2.5 Communication Interface and Protocol 14
5.3. Escalabilidad 15
5.4. Administrar los puertos y su ModIT-MAX 17
5.4.1 Modos de los puertos 17
5.4.2 Perfiles de carga 17
5.4.3 Firmware 17
5.5. Software 20

ModIT-MAX Página 2 de 43
5.5.1 Installing Software 20
5.5.2 LiveViewer 21
5.5.3 API de Cambrionix 22
5.5.4 Actualización del software 22
5.5.5 Removing Software 23
5.5.6 Instrucciones de línea de comandos (CLI) 24
5.6. Ajustes de usuario 26
5.6.1 Cambio de los cables 26
5.6.2 Ajuste-del-tope-trasero 26
5.7. Limpieza de su ModIT-MAX 27
6. Especificaciones del producto 29
6.1. Requisitos de la alimentación entrante 29
6.2. Potencia de salida 29
6.3. Error flag rail values 29
6.4. Especificaciones físicas 29
6.5. Packaged information 30
6.6. Consumables and Placing Orders 30
7. Troubleshooting 33
7.1. Initial troubleshooting tips 33
7.2. Logging through LiveViewer 33
7.3. Hardware Failure 34
7.4. Device connection. 34
7.5. Hub connection issues 35
7.6. No GUI 36
7.7. Software troubleshooting 37
8. Eliminación 38
9. Devoluciones y productos dañados 39
9.1. ¿Qué debo hacer si mi pedido llega y el producto está defectuoso o
dañado físicamente? 39
9.2. ¿Qué sucede después de haber solicitado una devolución? 39
10. Cumplimiento normativo y normas 41

ModIT-MAX Página 3 de 43
2. Su ModIT-MAX de un vistazo
The ModIT-MAX has been designed to provide high-speed data transfer to USB compliant
devices without being constrained by endpoint limits.
El ModIT-MAX permite cargar dispositivos USB conectados sin usar un equipo local. El ModIT-
MAX permite cargar prácticamente cualquier dispositivo a su velocidad óptima (hasta 2,4 A).
The firmware can be updated to ensure the ModIT-MAX can charge the latest devices. It is
ready to charge out-of-the-box and sync devices when attached to a host computer.
When a local (host) computer is attached, the host can control the operation of each port using
software provided by Cambrionix. La carga y la sincronización del dispositivo se pueden
monitorizar a través de la aplicación LiveViewer de Cambrionix,
monitored through Cambrionix’s LiveViewer Application, the Application Programming
Interface (API) or Command Line Interface (CLI). El software gratuito de monitorización y
control de Cambrionix se puede descargar desde www.cambrionix.com/products/api
With your ModIT-MAX there is a Thunderbolt™ connection to the host which, is capable of up
to , meaning your upstream speeds to the host will be capable of this data transfer rate. The
upstream data transfer rate will be shared amongst the downstream 16 x USB 3.2 tipo A
connections.
2.1. Principales características
Hasta
40Gbps
por puerto
Hasta
2,4 A
por puerto
Hasta
96
Dispositivos
Transfiera datos de forma inte-
grada Potencia Escalabilidad
Each high-speed port can
transferir datos a velocidades
de hasta 40Gbps
Cada puerto puede cargar dis-
positivos hasta 2,4 A (12W)
Es posible conectar hasta 96
dispositivos a la vez utilizando
múltiples hubs

ModIT-MAX Página 4 de 43
3. Seguridad
This user manual is for informational purposes only, it contains information for the start-up and
operation of this product. Nota: El contenido y el producto descrito podrían cambiar sin previo
aviso. To avoid injuries and damage, observe the safety instructions in the user manual.
This manual has been arranged to follow IEC/ICEE 82079-1 standard. Se hace así para facilitar la
comprensión y localización de la información relacionada con el ModIT-MAX. Any errors or
omissions can be reported using our support ticket system (seeAyuda y soporte). This way, any
issues can be collected and fixed.
Es esencial comprender y observar las instrucciones de este manual del usuario para un uso sin
riesgos y
la seguridad durante el manejo. This user manual cannot cover all possible applications. Si
desea información adicional o si surgen problemas que no se abordan suficientemente en este
manual,
sufficiently addressed in this manual, please ask your distributor or contact us directly using the
means preferred, which are located on the back cover of this manual.
PRECAUCIÓN
Lesiones y daños al producto
lRespete las instrucciones de seguridad de este manual del usuario
3.1. Panel de palabras de señalización
Dependiendo de la probabilidad de consecuencias graves, los peligros potenciales se identifican
con una palabra de advertencia, el color de seguridad correspondiente y, si corresponde, el
símbolo de alerta de seguridad.
PRECAUCIÓN
Indicates a potentially hazardous situation that, if not avoided, may result in moderate or
minor (reversible) injury.

ModIT-MAX Página 5 de 43
PRECAUCIÓN
Indicates a potentially hazardous situation which, if not avoided, may result in damage to the
product and its functions, or to property in its proximity.
3.2. Símbolo de alerta de seguridad
El uso del símbolo de alerta de seguridad indica un riesgo de lesiones.
Observe todas las medidas marcadas con el símbolo de alerta de seguridad para
evitar lesiones
3.3. Pictogramas
Señales de advertencia
Peligro eléctrico Peligro de incendio
Señales de acción obligatoria
Leer las instrucciones de funcionamiento Norma obligatoria
3.4. Modificación del producto
Los productos Cambrionix se diseñan y fabrican para cumplir los requisitos de las normas de
seguridad británicas e
internacionales. Modifications to the product could affect safety and render the product non-
compliant with relevant safety standards, resulting in injury or damage to the product.

ModIT-MAX Página 6 de 43
PRECAUCIÓN
An electric shock or personal injury may occur
lDo not modify the product in any way.
lDo not dismantle the product.
PRECAUCIÓN
Fire, or personal injury may occur
lDo not obstruct air vents on the product.
lDo not cover the product in combustible material.
PRECAUCIÓN
Riesgo de daños en su producto
lDo not bend or compress any part of the product.
3.5. Alimentación
This section describes the safety precautions you must follow when using the power supply.
PRECAUCIÓN
An electric shock or personal injury may occur
lDo not use a damaged power cord or plug, or a loose power socket.
lDo not touch the power plug with wet hands.
lDo not allow liquids to come into contact with the unit or power supply.
PRECAUCIÓN
Riesgo de daños en su producto

ModIT-MAX Página 7 de 43
PRECAUCIÓN
lDo not short circuit the Power Supply Unit (PSU) supplied with your
product.
lDo not disconnect the power cord while the product is being used.
lDo not bend or pull the power cord with excessive force.
3.6. Almacenamiento e instalación
Esta sección describe las precauciones de seguridad que debe seguir al instalar y almacenar su
ModIT-MAX.
PRECAUCIÓN
An electric shock or personal injury may occur
lDo not place the power cord near heat sources.
lConnect the plug to an earthed socket.
PRECAUCIÓN
Su producto Cambrionix podría sufrir daños
lUtilice el producto solo en un entorno donde la temperatura ambiente esté
dentro
temperature is inside the operating temperature range.
lOperate the product only in an environment where the relative humidity is
inside the operating range.
lBe careful not to leave the power cord underneath a heavy object.
PRECAUCIÓN
Las tomas de corriente sobrecalentadas pueden causar un incendio
lDo not overload the power socket that your hub is connected to.
lInsert the power plug all the way into the socket so that it is not loose.

ModIT-MAX Página 8 de 43
4. Primeros pasos
This manual provides a reference for end-users installing for the first time and using their hub
after that. As well as a guide for product safety-related information.
The ModIT-MAX is intended to be used in an indoor static environment in which the
environment falls within the tested specifications to provide charge, sync and management
functionality. Please see the physical specifications section of this manual for information on
the environment specifications.
4.1. Opening your product
When you have received your product, please check the packing slip to ensure all contents and
quantities are correct before opening. This is to avoid retesting and repackaging any items that
are not required.
When opening the packaging, use a suitable method to open the box i.e, do not use a knife.
This is to ensure the product is not damaged.
PRECAUCIÓN
Lesiones y daños al producto
lThere will be a sticker on the hub advising you to read the User manual before use. This
will need to be removed before use as it may be covering host ports, vents etc.
4.2. Qué se incluye
lThunderbolt™™ 3 Cable (to provide communication between the host system and hub)
lHub ModIT-MAX
l2m Mains power cable (Country specified on order including fuse for the UKplugs)
lKey for Locking mechanism
Part description Part number
Thunderbolt™™ 3 updater cable 200369
Key for locking mechanism 200403
Yellow cable arms with Apple cables 200122
Yellow cable arms with Cambrionix cables 200123

ModIT-MAX Página 9 de 43
UK Power cable 200144
US Power cable 200327
EU Power cable 200329
AUSPower cable 200337
IND Power cable 200341
4.3. Conexión a la red eléctrica
Make sure you adhere to local safety regulations, connect the power cable to the socket and
switch the power supply on. The hub is now ready to charge the attached devices.
Periodic inspections should be made to power supply cables and any USB cables for any signs of
damage. If any damage is found, replace the damaged cord before further use.
4.4. Conexión al host
Once the power is connected, connect the ModIT-MAX to your host system using a
Thunderbolt™™ 3 cable. El uso de un cable de host incorrecto puede dar lugar a que el hub y
todos los puertos posteriores no sean reconocidos por su host.
Cambrionix recomienda usar el cable Thunderbolt™ que se entrega con nuestro ModIT-MAX. If
you are looking at purchasing your own cable, to achieve 40Gbps a suitable cable would be
either:
lHasta 0,8m pasivo
lHasta 2m activo.
Cambrionix recomienda usar cables certificados por Intel®. Todos los cables que presentan el
logotipo Thunderbolt™ deben tener certificación.
Tenga en cuenta que las especificaciones USB exigen un suministro de corriente de carga
mínima de 100mA durante la transferencia de datos. Como se indicaba anteriormente, si el
dispositivo conectado tiene un puerto CDP compatible con BC1.2, el dispositivo puede consumir
hasta 2,4 A mientras se transfieren datos.
4.5. Cargando
Your ModIT-MAX will allow your device to charge at the maximum rate possible up to 2,4 A.
The way that charging takes place is the ModIT-MAX will provide the device with a capability to

ModIT-MAX Página 10 de 43
charge and the devices USB charging controller will determine the maximum amount of charge
it wants to draw down.
4.6. Cables
Some USB cables are data transfer only, and some are power delivery only. There are also
options that can handle both tasks. Be sure to verify a cable’s abilities before purchasing it and
select a cable which can handle the speeds and power transfer that you require. We would
advice using the cable that was provided with the device to connect to our hubs.
4.7. Llaves
Su ModIT-MAX se entrega con un conjunto de llaves que se pueden usar para cerrar y abrir
manualmente los mecanismos de bloqueo de todas las ranuras a la vez. Con ello, se anula
cualquier otra función del hub para poder guardar los dispositivos en un lugar seguro o poder
desconectarlos.
Estas llaves se entregan con su ModIT-MAX, pero puede contactar con Cambrionix para que le
enviemos repuestos si los necesitara.
4.8. Registro
Puede registrar su producto en www.cambrionix.com/product-registration
4.9. Ayuda y soporte
Las preguntas frecuentes y la ayuda se pueden encontrar en la página de ayuda situada aquí
lwww.cambrionix.com/help_pages/help.
Puede generar un ticket de soporte para obtener un soporte más detallado desde aquí
lhttps://cambrionix.atlassian.net/servicedesk/customer/portals
También puede descargar cualquiera de nuestros manuales y mantenerse al día con este enlace
lwww.cambrionix.com/product-user-manuals
When contacting support, please supply the product information for the hub in question. This
can be found on the Device Information Plate which is either on the underside or back of the
unit.
Providing serial and Purchaseorder numbers, can help identify the product in question faster,
and speed up the process.

ModIT-MAX Página 11 de 43
5. Uso de su ModIT-MAX
In this section, you can find information using your hub in charge or sync application. You can
also find information on managing your hub, changing port modes, connecting multiple hubs to
one host and using Cambrionix Software.
5.0.1 Configuración de ledes
Su ModIT-MAX presenta ledes incorporados que se utilizan para indicar el estado de los puertos
o dispositivos. These LEDs can be configured to support your use case; this can be controlled
either by using the APIto send commands directly or through separate software.
El comportamiento predeterminado de los ledes del hub es el siguiente.
Color Comportamiento
Rojo intermitente El puerto está en modo de carga y está perfilando el dis-
positivo
Rojo El puerto está en modo de carga y está cargando
Verde El puerto está en modo de carga y el dispositivo ha
alcanzado el umbral de carga
Azul El puerto está en modo de sincronización y tiene una
conexión de host
5.1. Using without connecting to host
Al encender el hub, si no está conectado a ningún equipo host local, se configura
automáticamente para cargar dispositivos utilizando su algoritmo de carga inteligente. Connect
the devices to be charged to any of the available ports (not the Host Port) using
utilizando cables compatibles con USB.
Una vez que los dispositivos estén conectados, el algoritmo detectará la tasa de carga más alta
permitida para cada dispositivo conectado. La carga a la velocidad óptima (hasta 2,4 A)
especificada por el fabricante comenzará una vez que se complete el perfilado. Dependiendo
del estado de carga del dispositivo conectado, puede tardar decenas de segundos.

ModIT-MAX Página 12 de 43
5.2. Using when connected to host
5.2.1 Conexión del hub a un equipo host
You can use either Thunderbolt™ host port on the rear of the hub to connect to your host
system; there are two ports on the rear, so you can use one port to connect the host and the
other port to daisy chain multiple hubs.
5.2.2 Authorising Thunderbolt™ hubs on Linux®
With Linux® systems, it is necessary to authorise/enrol the ModIT-MAX before it connects.
To do this, you will need to use "boltctl," which is used to control the Thunderbolt™ device
manager. "boltctl" is the command-line interface to interact with boltd, the system daemon
that manages Thunderbolt™ 3™ devices. Using "boltctl", input the following commands to
authorise and enrol your ModIT-MAX.
power [-t | --timeout seconds]
Power up the Thunderbolt™ controller. If the Thunderbolt™ controller is not in "native
enumeration mode", it can be completely powered down by the host firmware/BIOS. Los
sistemas compatibles cuentan con una interfaz para "forzar" la alimentación
supported systems, there is an interface to "force" power the Thunderbolt™ controller. Si se
admite, este comando solicitará al daemon que
supported, this command will request the daemon to do so. El daemon realizará un
seguimiento de todas las solicitudes del cliente y liberará la
anulación de la alimentación cuando
se libere la última solicitud.
authorize DISPOSITIVO
Autorizar un dispositivo actualmente no autorizado identificado a través de su ID única (uuid)
de dispositivo. Si se dispone de una clave almacenada en la base de datos, se utilizará,
key is stored in the database, it will be used, given the security level of the domain
conexión segura del dispositivo. Utilice la lista de boltctl para averiguar el uuid de un
dispositivo.

ModIT-MAX Página 13 de 43
enrol [--policy default] DEVICE
Autorizar y registrar el dispositivo con la ID exclusiva de dispositivo de la base de datos. Si el
dominio admite la conexión segura, se generará una nueva clave que se almacenará
supports a secure connection a new key will be generated and stored in the database
alongside the device and vendor name. Si se crea, la clave se utilizará en el futuro para
autorizar el
to authorize the device securely.
5.2.3 Cargando
When the Host Port is connected to a local computer, the hub defaults to Sync mode and
charge currents are determined according to USB Implementers Forum (USBIF) Super-Speed
USB3 specifications. Si el dispositivo conectado cumple la especificación de carga de batería
USB-IF BC1.2 y admite el puerto posterior de carga (CDP),
el hub puede proporcionar carga de alta velocidad a hasta
high-speed charging at 2,4 A. If the connected device does not comply with BC1.2, the charge
current will be limited to 900 mA in compliance with USB specifications.
If you wish to limit the charging to your devices whilst connected to your host system then you
can disable CDPon all ports by inputting the following commands.
The CLI commands for turning off the sync charge options, with a 1 or 0 per port.
settings_unlock
settings_reset
settings_set sync_chrg 0 0 0 0 0 0 0 0 0 0 0 0 0 0 0 0
settings_set alt_sync_chrg 0 0 0 0 0 0 0 0 0 0 0 0 0 0 0 0
reboot
This can also be done via the API if this is easier. Just supply that string (joined with \n) like:
cbrxapi.cbrx_connection_set(handle, "Settings", "settings_unlo-
ck\nsettings_reset\nsettings_set sync_chrg 0 0 0 0 0 0 0 0 0 0 0
0 0 0 0 0\nsettings_set alt_sync_chrg 0 0 0 0 0 0 0 0 0 0 0 0 0
0 0 0\nreboot")
Note that settings_reset clears any previous settings, so if you need to retain something else, it
would be better to issue settings_display first, which gives you the entire settings which you
can then modify and re-issue in entirity.

ModIT-MAX Página 14 de 43
5.2.4 Transferencia de datos
Si desea transferir datos, cambiar aplicaciones, restaurar o actualizar su dispositivo móvil, se
requiere una
conexión de datos a un equipo host local. The hub is compatible with macOS®, Windows™ and
Linux® operating systems and can transfer data between these operating systems and many
mobile operating systems such as iOS™ and Android™.
In order to transfer data, connect the host port to your local (host) computer using a
Thunderbolt™™ 3 compliant cable. Los dispositivos conectados al hub aparecerán ahora como
si estuvieran conectados al puerto USB del equipo host.
Para transferir datos, conecte el puerto Thunderbolt™ de su equipo local (host) a uno de los
puertos Thunderbolt™ de la parte posterior del hub utilizando un cable compatible con
Thunderbolt™ 3. También se puede utilizar un cable Thunderbolt™ 2 con un adaptador
Thunderbolt™ 2-3 con velocidades de datos reducidas. Los dispositivos conectados al hub
aparecerán ahora como si estuvieran conectados al puerto USB del equipo host. El hub es
totalmente compatible con SuperSpeed USB3.2 y puede proporcionar velocidades de
transferencia de datos de hasta 5Gbps por puerto. Al sincronizar, se enciende un LED amarillo
sobre cada puerto. Puede utilizar el programa de su elección para transferir datos desde y hacia
su dispositivo. Si el dispositivo conectado tiene un puerto CDP compatible con BC1.2, el
dispositivo puede consumir hasta 1,5A mientras se transfieren datos.
5.2.5 Communication Interface and Protocol
The ModIT-MAX appears as a virtual serial port (also called a UART or VCP). On Microsoft
Windows™, the system will appear as a COM port, the COMport number can be found in
device manager. On macOS®, a device file is created in the / directory. S is an alpha-numeric
serial string unique to each device
/dev/tty.usbserial S
Los dispositivos incorporan un circuito convertidor USB a UART FT230X de FTDI International.
En Windows 7 o posterior, se podría instalar automáticamente un controlador (si Windows está
configurado para descargar controladores de Internet automáticamente). If this is not the case,
or if a Mac® or Linux® platform is used, the driver may be downloaded from www.ftdichip.com.
Los controladores VCP son obligatorios. For Linux® or Mac computers, the default OS drivers
should be used.

ModIT-MAX Página 15 de 43
The default communications settings should be set to 115200 baud, 8 data bits, no parity, and
one stop bit. This is sometimes referred to as "115200,8,N,1". No se utiliza control de flujo.
ANSI terminal emulation should be selected
5.3. Escalabilidad
USB controllers generally have an endpoint limit, limiting the number of devices that can be
enumerated when connected to the USB3 port of a local computer. Los controladores de host
xHCI de puerto USB3 de la mayoría de los equipos limitan la cantidad de puntos de conexión
controllers in most computers limit the number of endpoints enumerated between 64 and 128.
Los dispositivos móviles se enumeran como más de un punto de conexión, y los dispositivos
complejos con paneles táctiles se enumeran a menudo como 5 o 6 puntos de conexión. Por
consiguiente, el número de dispositivos que se pueden enumerar correctamente se limita
típicamente a menos de veinte.
Con la conectividad Thunderbolt™ y al incorporar controladores de host dentro del hub, cada
puerto puede manejar hasta 16 puntos de conexión. If you wish to synchronise more devices,
multiple hubs can be daisy-chained to allow up to 96 devices to be managed simultaneously
from a single host computer.
To daisy-chain multiple hubs, each hub needs to be connected to mains powerindividually, then
the first hub in the chain should be connected to the local computer through one of the
Thunderbolt™ ports. The next hub in the daisy-chain is connected using one of its
Thunderbolt™ ports to the remaining Thunderbolt™ port of the first hub. Es posible añadir un
tercer, cuarto y quinto hubs de la misma manera, conectando el puerto Thunderbolt™
disponible delhub anterior a uno de los puertos Thunderbolt™ del siguiente dispositivo de la
conexión en cadena. Using this approach, a maximum of six hubs can be linked together,
allowing 96 devices to be synced from a single host computer.

ModIT-MAX Página 16 de 43

ModIT-MAX Página 17 de 43
5.4. Administrar los puertos y su ModIT-MAX
Each port on your ModIT-MAX can be managed either individually, or all together. You can turn
the ports off and on, change the port mode, or change the charging profiles. This can be done
either through LiveViewer, or by connecting to the hub via the API.
5.4.1 Modos de los puertos
Sincronización Cambiar puertos específicos o todo el hub al modo de sincronización.
Biased Detect the presence of a device but it will not sync or charge it
Apagado Turn specific ports on or off or switch the whole hub on or off (no
power and no data channels open)
5.4.2 Perfiles de carga
Para garantizar que los dispositivos conectados se carguen a su ritmo óptimo, nuestros hubs
USB inteligentes vienen con los siguientes perfiles de carga inteligentes integrados:
0 Algoritmo de carga inteligente que seleccionará un perfil 1-6
1 2,1A (Apple)
2BC1.2 Standard (this covers the majority of Android™ phones and
other devices)
3 Samsung
4 2,1A (Perfil 1, pero con un tiempo límite más largo)
5 1,0A (empleado típicamente por Apple)
6 2,4A (empleado típicamente por Apple)
5.4.3 Firmware
El firmware se puede mantener actualizado utilizando nuestro software LiveViewer. As part of
delivering an easy user experience, our LiveViewer application is now a set-and-forget solution.
The LiveViewer application will discover your USB hub’s firmware and present an update for
you.
To update the firmware, first, go to the firmware updater section of LiveViewer. Here you can
see the available Firmware versions to download and install to the hub.

ModIT-MAX Página 18 de 43
The current firmware version on the hub is displayed in the firmware updater section alongside
the hub's name. Se muestra en rojo si existe una versión más reciente o en verde si ya es la más
actualizada.
To install the firmware onto the hub click the hub/ hubs connected that you want to update,
then select the firmware version you want to upgrade to. Una vez seleccionada, pulse el botón
de actualización de la parte superior para que comience la actualización.
Firmware versions and hardware
We advise not to change the firmware version on any new products you receive as this may
cause compatibility issues and stop your ModIT-MAX from functioning.
PRECAUCIÓN
Your ModIT-MAX may not function correctly
lDo not install old firmware onto a new product
PRECAUCIÓN
Su firmware de Cambrionix podría estar dañado

ModIT-MAX Página 19 de 43
PRECAUCIÓN
lDo not interrupt the Firmware update process.
lDo not disconnect the power during the update process.
Other manuals for ModIT-MAX
6
Table of contents
Other CAMBRIONIX Control Unit manuals