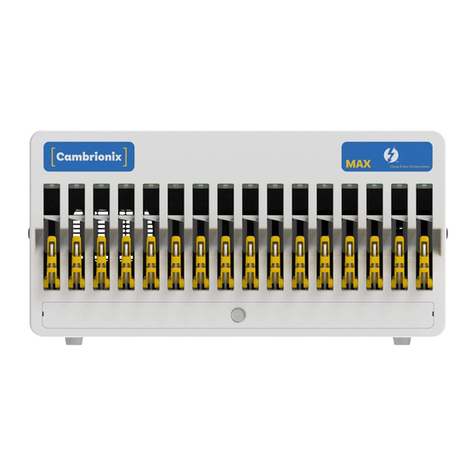
CAMBRIONIX ModIT-MAX User manual

ModIT-Max
User Manual
© 2023-02 Cambrionix Ltd. All rights reserved. EN

ModIT-Max Page 1 of 42
1. Table of Contents
1. Table of Contents 1
2. Your ModIT-Max at a glance 3
2.1. Key Features 3
3. Safety 4
3.1. Signal word panel 4
3.2. Safety alert symbol 5
3.3. Pictograms 5
3.4. Product modification 5
3.5. Power supply 6
3.6. Storage and Installation 6
4. Getting Started 8
4.1. Unpacking your product 8
4.2. What's Included 8
4.3. Connecting to the mains 9
4.4. Connecting to a Host 9
4.5. Charging 9
4.6. Cables 10
4.7. Keys 10
4.8. Registration 10
4.9. Help and Support 10
5. Using your ModIT-Max 11
5.0.1 LED States 11
5.0.2 Fan Behaviour 11
5.1. Using without connecting to a host 12
5.2. Using when connected to a host 12
5.2.1 Connecting the Hub to a host computer 12
5.2.2 Authorising Thunderbolt™ hubs on Linux® 12
5.2.3 Charging 13
5.2.4 Data Transfer 13
5.2.5 Communication Interface and Protocol 14
5.3. Scalability 14
5.4. Managing Ports & Your ModIT-Max 16
5.4.1 Port Modes 16
5.4.2 Switching port modes 16
5.4.3 Charging Profiles 16
5.4.4 Firmware 17
5.5. Software 19
5.5.1 Installing Software 19
5.5.2 LiveViewer 20

ModIT-Max Page 2 of 42
5.5.3 Cambrionix API 22
5.5.4 Updating Software 22
5.5.5 Removing Software 23
5.5.6 Command Line Instructions (CLI) 24
5.6. User adjustments 25
5.6.1 Changing the cables 25
5.6.2 Adjusting-the-backstop 25
5.7. Cleaning your ModIT-Max 26
6. Product Specifications 27
6.1. Input Power Requirements 27
6.2. Output Power 27
6.3. Rail value limits 27
6.4. Physical specifications 27
6.5. Packaged information 28
6.6. Consumables and Placing Orders 28
6.7. Hub Architecture 30
7. Troubleshooting 32
7.1. Common troubleshooting tips 32
7.2. Logging through LiveViewer 32
7.3. Hardware Failure 32
7.4. Device connection 33
7.5. Hub connection issues 34
7.6. Using with a headless system 35
7.7. Software troubleshooting 35
8. Disposal 36
9. Returns and Damaged Products 37
9.1. What if my order arrives with an issue? 37
9.2. What happens after I have requested a Return? 37
10. Compliance and Standards 38
11. Terms and Conditions 39

ModIT-Max Page 3 of 42
2. Your ModIT-Max at a glance
The ModIT-Max has been designed to provide high-speed data transfer to USB compliant devices and
expand the endpoint limits.
The ModIT-Max can charge attached USB devices without using a local computer. The ModIT-Max
allows any USB compliant device to be charged at its optimum rate (up to 2.4A). The firmware can be
updated to ensure the ModIT-Max can manage the latest devices. It is ready to charge out-of-the-box
and sync devices when attached to a host computer.
When a local (host) computer is attached, the host can control the operation of each port using
software provided by Cambrionix. Device charging and synchronisation can be
monitored through Cambrionix’s LiveViewer Application, the Application Programming Interface (API)
or Command Line Interface (CLI). Cambrionix’s monitoring and control software can be downloaded
from https://www.cambrionix.com/software
With your ModIT-Max there is a Thunderbolt™ 3 connection to the host capable of up to 5 (Gbps). The
upstream data transfer rate will be shared amongst the downstream connections.
2.1. Key Features
Up To
5(Gbps)
per Port
Up To
2.4A
per Port
Up To
96
Devices
Transfer Data
Seamlessly Power Scalability
Each high-speed port can
transfer data up to 5
(Gbps)
Each port can charge
devices up to 2.4A
(12W)
Up to 96 devices can be
connected at once using
multiple hubs

ModIT-Max Page 4 of 42
3. Safety
This user manual is for informational purposes only, it contains information for the start-up and
operation of this product. Note: the contents and the product described are subject to change
without notice. To avoid injuries and damage, observe the safety instructions in the user manual.
This manual has been arranged to follow the IEC/ICEE 82079-1 standard. This is to facilitate the easier
understanding and location of information relating to the ModIT-Max. Any errors or omissions can be
reported using our support ticket system (seeHelp and Support). This way, any issues that are
discovered can be acted on quickly and we can update the documentation to reflect this.
Understanding and observing the instructions in this user manual are prerequisites for hazard-free
use and safety during operation. This user manual cannot cover all possible applications. If you would
like additional information or if problems arise that are not sufficiently addressed in this manual,
please ask your distributor or contact us directly using the means preferred, which are located on the
back cover of this manual.
CAUTION
Personal Injury and Damage to the product
Always observe the safety instructions in this user manual
3.1. Signal word panel
Depending on the probability of serious consequences, potential dangers are identified with a signal
word, the corresponding safety colour, and if appropriate, the safety alert symbol.
CAUTION
Indicates a potentially hazardous situation that, if not avoided, may result in moderate or
minor (reversible) injury.
CAUTION
Indicates a potentially hazardous situation which, if not avoided, may result in damage to the
product and its functions, or to property in its proximity.

ModIT-Max Page 5 of 42
3.2. Safety alert symbol
Use of the safety alert symbol indicates a risk of injury.
Observe all measures that are marked with the safety alert symbol in order to avoid injury
3.3. Pictograms
These symbols will be used throughout this documentation to alert to any potential dangers or any
actions that must be taken.
Warning Signs
Electrical hazard Fire Hazard
Mandatory action signs
Read operating instructions Mandatory regulation
3.4. Product modification
Cambrionix products are designed and manufactured to meet the requirements of UK and
international safety regulations. Modifications to the product could affect safety and render the
product non-compliant with relevant safety standards, resulting in injury or damage to the product.
CAUTION
An electric shock or personal injury may occur
Do not modify the product in any way.
Do not dismantle the product.

ModIT-Max Page 6 of 42
CAUTION
Fire, or personal injury may occur
Do not obstruct air vents on the product.
Do not cover the product in or place near combustible material.
CAUTION
Damage to your product may occur
Do not bend or compress any part of the product.
3.5. Power supply
This section describes the safety precautions you must follow when using the external power supply.
CAUTION
An electric shock or personal injury may occur
Do not use a damaged power cord or plug, or a loose power socket.
Do not touch the power plug with wet hands.
Do not allow liquids to come into contact with the unit or power supply.
CAUTION
Damage to your product may occur
Do not short circuit the Power Supply Unit (PSU) supplied with your product.
Do not disconnect the power cord while the product is being used.
Do not bend or pull the power cord with excessive force.
Do not use a power supply that exceeds the power supply specifications
within this manual
3.6. Storage and Installation
This section describes safety precautions you must follow when installing and storing your ModIT-
Max.

ModIT-Max Page 7 of 42
CAUTION
An electric shock or personal injury may occur
Do not place the power cord near heat sources.
Connect the plug only to an earthed socket.
CAUTION
Damage to your Cambrionix product may occur
Operate the product only in an environment where the ambient
temperature is inside the operating temperature range.
Operate the product only in an environment where the relative humidity is
inside the operating range.
Be careful not to leave the power cord underneath a heavy object.
CAUTION
Overheated power sockets may cause a fire
Do not overload the power socket that your hub is connected to.
Insert the power plug all the way into the socket so that it is not loose.
CAUTION
Overloading the brackets may cause failure
The rack brackets for all our products are not designed to be used in a mobile
application, bracket failure could occur if the units are not supported fully e.g
Shock during road transport.

ModIT-Max Page 8 of 42
4. Getting Started
This manual provides a reference for end-users installing for the first time and using their hub
afterwards. As well as a guide for product safety-related information.
The ModIT-Max is intended to be used in an indoor static environment in which the environment falls
within the tested specifications to provide charge, sync and management functionality. Please see
the physical specifications section of this manual for information on the environment specifications.
4.1. Unpacking your product
When you have received your product, please check the packing slip inside the box to ensure all
contents and quantities are correct before opening. This is to avoid retesting and repackaging any
items that are not required.
When opening the packaging, use a suitable method to open the box i.e, do not use a knife. This is to
ensure the product is not damaged.
CAUTION
Personal Injury and Damage to the product
There will be a label on the hub advising you to read the User manual before
use. This will need to be removed before use as it may be covering host ports,
vents etc.
4.2. What's Included
lThunderbolt™ 3 Cable (to provide communication between the host system and hub)
lModIT-Max Hub
l2m Mains power cable (Country specified on order including fuse for the UKplugs)
lKey for Locking mechanism
Part description Part number
Thunderbolt™ 3 updater cable 200369
Key for locking mechanism 200403
Yellow cable arms with Apple cables 200122
Yellow cable arms with Cambrionix cables 200123
UK Power cable 200144

ModIT-Max Page 9 of 42
Part description Part number
US Power cable 200327
EU Power cable 200329
AUSPower cable 200337
IND Power cable 200341
4.3. Connecting to the mains
Make sure you adhere to local safety regulations, connect the power cable to the socket and switch
the power supply on. The hub is now ready to charge the attached devices.
Periodic inspections should be made to power supply cables and any USB cables for any signs of
damage. If any damage is found, replace the damaged cord before further use.
4.4. Connecting to a Host
Once the power is connected, connect the ModIT-Max to your host system using a Thunderbolt™ 3
cable. Using an incorrect host cable may result in the hub and all subsequent ports not being
recognised by your host.
Cambrionix recommend using the Thunderbolt™ cable that is provided with our ModIT-Max. If you are
looking at purchasing your own cable, to achieve 40Gbps a suitable cable would be either:
lup to 0.8m passive
lup to 2m active.
Cambrionix recommend using cables certified by Intel®, all cables marked with the Thunderbolt™ logo
should have certification.
Only one host can be connected to a hub at one time.
Please note that USB specifications require a minimum 100 mA charge current to be available during
data transfer. As indicated in above, if the attached device has a BC1.2 compliant CDP port, the
device can draw up to 2.4A whilst transferring data.
4.5. Charging
Your ModIT-Max will allow your device to charge at the maximum rate possible up to 2.4A. The way
that charging takes place is the ModIT-Max will provide the device with a capability to charge and the
devices USB charging controller will determine the maximum amount of charge it wants to draw
down.
Although a maximum charge rate of 2.4A is possible, the device itself determines the exact rate and
as such you may not see the maximum amount of charging on every device type that is connected.

ModIT-Max Page 10 of 42
4.6. Cables
Some USB cables are data transfer only, and some are power delivery only. There are also options
that can handle both tasks. Be sure to verify a cable’s abilities before purchasing it and select a cable
which can handle the speeds and power transfer that you require. We would advise using the cable
that was provided with the device to connect to our hubs.
4.7. Keys
Your ModIT-Max comes with a set of keys which can be used to manually close and open the locking
mechanisms on all of the slots at once. This will override any other functions on the hub so that you
can secure devices away or make them available to remove.
These keys are provided with your ModIT-Max but if you need any replacement's or spares you can
contact Cambrionix to organise a new set to be sent out.
4.8. Registration
You may register your product at www.cambrionix.com/product-registration
4.9. Help and Support
FAQs and help can be found on the Help page here
lwww.cambrionix.com/help_pages/help.
You can raise a support ticket for more in depth support here
lhttps://cambrionix.atlassian.net/servicedesk/customer/portals
You can also download any of our manuals and keep up to date at the link here
lwww.cambrionix.com/product-user-manuals
When contacting support, please supply the product information for the hub in question. This can be
found on the Device Information Plate which is either on the underside or back of the unit.
Providing serial and Purchaseorder numbers, can help identify your specific product and speed up
the process.

ModIT-Max Page 11 of 42
5. Using your ModIT-Max
In this section, you can find information using your hub in charge or sync application. You can also
find information on managing your hub, changing port modes, connecting multiple hubs to one host
and using Cambrionix Software.
5.0.1 LED States
Your ModIT-Max has inbuilt LEDs used to show the state of the ports, devices and the power state.
These LEDs can be configured to support your use case; this can be controlled either by using the
APIto send commands directly or through separate software. When the hub is powered on all the
available LED's will flash once and then revert to the default behaviour mentioned below.
Colour Behaviour
Flashing Red Port is in charge mode and is profiling the device
Red Port is in charge mode and is charging
Green Port is in charge mode and the device has reached the charged threshold
Blue Port is in Sync mode and has a host connection
LEDOff No Device is detected
5.0.2 Fan Behaviour
Your ModIT-Max has an inbuilt fan used to cool the product when internal temperatures rise above a
set threshold. On power up the fan will spin for approximately a second before turning off. The
temperature at which the fan should begin to cool the device is °C, the fan will be at max speed when
the internal temperature reaches . Once the ModIT-Max is below internal temperature of the fan will
switch off.
With the ModIT-Max there is also an internal power supply which has its own fan which will
continuously be active with a very low sound level (less than 47db at full load)

ModIT-Max Page 12 of 42
5.1. Using without connecting to a host
When the Hub is switched on and is not connected to a local host computer it is automatically
configured to charge devices using its intelligent charging algorithm. Connect the devices to be
charged to any of the available ports (not the Host Port) using USB - compliant cables.
Once the devices are connected, the algorithm will detect the highest charge rate allowable for each
attached device. Charging at the optimum rate (up to 2.4)A specified by the manufacturer will
commence once profiling is complete. Depending on the state of charge of the device attached, this
may take tens of seconds.
5.2. Using when connected to a host
5.2.1 Connecting the Hub to a host computer
You can use either Thunderbolt™ host port on the rear of the hub to connect to your host system;
there are two ports on the rear, so you can use one port to connect the host and the other port to
daisy chain multiple hubs.
5.2.2 Authorising Thunderbolt™ hubs on Linux®
With Linux® systems, it is necessary to authorise/enrol the ModIT-Max before it connects.
To do this, you will need to use "boltctl," which is used to control the Thunderbolt™ device manager.
"boltctl" is the command-line interface to interact with boltd, the system daemon that manages
Thunderbolt™ 3™ devices. Using "boltctl", input the following commands to authorise and enrol your
ModIT-Max.
Some useful information on this can be found at the following link.
https://manpages.ubuntu.com/manpages/focal/en/man1/boltctl.1.html
power [-t | --timeout seconds]
Power up the Thunderbolt™ controller. If the Thunderbolt™ controller is not in "native enumeration
mode", it can be completely powered down by the host firmware/BIOS. On supported systems, there
is an interface to "force" power the Thunderbolt™ controller. If supported, this command will request
the daemon to do so. The daemon will keep track of all client requests and will release the force
power override when the last request is released.
authorize DEVICE
Authorize a currently unauthorized device identified via its unique id (uuid) DEVICE. If a
key is stored in the database, it will be used, given the security level of the domain
supports secure device connection. Use boltctl list to find out the uuid of a device.

ModIT-Max Page 13 of 42
enrol [--policy default] DEVICE
Authorize and record the device with the unique id DEVICE in the database. If the domain
supports a secure connection a new key will be generated and stored in the database
alongside the device and vendor name. The key, if created, will be used in the future
to authorize the device securely.
5.2.3 Charging
When the Host Port is connected to a local computer, the hub defaults to Sync mode and charge
currents are determined according to USB Implementers Forum (USBIF) Super-Speed USB3
specifications. If the attached device complies with USB-IF Battery Charging specification BC1.2 and
supports Charging Downstream Port (CDP), the hub can provide high-speed charging at 2.4A. If the
connected device does not comply with BC1.2, the charge current will be limited to 900 mA in
compliance with USB specifications.
If you wish to limit the charging to your devices whilst connected to your host system then you can
disable CDP. You can disable CDP through NVRAM settings either by going through the advanced
settings and turning "Sync charge" off or through the API and disabling it via code. For example, the
instructions would be below using the command line.
The CLI commands for turning off the sync charge options, with a 1 or 0 per port.
settings_unlock
settings_reset
settings_set sync_chrg 0 0 0 0 0 0 0 0 0 0 0 0 0 0 0 0
settings_set alt_sync_chrg 0 0 0 0 0 0 0 0 0 0 0 0 0 0 0 0
reboot
This can also be done via the API if this is easier. Just supply that string (joined with \n) like:
cbrxapi.cbrx_connection_set(handle, "settings", "settings_unlock\nsettings_reset\n-
settings_set sync_chrg 0 0 0 0 0 0 0 0 0 0 0 0 0 0 0 0\nsettings_set alt_sync_chrg 0
0 0 0 0 0 0 0 0 0 0 0 0 0 0 0\nreboot")
Note that settings_reset clears any previous settings, so if you need to retain something else, it would
be better to issue settings_display first, which gives you the entire settings which you can then
modify and re-issue in entirity.
5.2.4 Data Transfer
If you wish to transfer data, change applications, restore or update your mobile device, a data
connection to a local host computer is required. The hub is compatible with macOS®, Windows™ and
Linux® operating systems and can transfer data between these operating systems and many mobile
operating systems such as iOS™ and Android™.

ModIT-Max Page 14 of 42
In order to transfer data, connect the host port to your local (host) computer using a Thunderbolt™ 3
compliant cable. Any devices connected to the hub will now appear as if they were connected to the
host computer’s USB port.
In order to transfer data, connect the Thunderbolt™ port of your local (host) computer to one of the
Thunderbolt™ ports on the back of the hub using a Thunderbolt™ 3 compliant cable. A Thunderbolt™
2 cable with a Thunderbolt™ 2-3 adaptor can also be used with consequently reduced data speeds.
Any devices connected to the hub will now appear as if they were connected to the host computer’s
USB port. The hub is fully compliant with SuperSpeed USB3.2 and can provide up to 5Gbps data
transfer speeds per port. A yellow LED above each port will illuminate when Syncing. You can use the
program of your choice to transfer data to and from your device. If the attached device has a BC1.2
compliant CDP port, the device can draw up to 1.5A while transferring data.
5.2.5 Communication Interface and Protocol
The ModIT-Max appears as a virtual COMport (VCP). On Microsoft Windows™, the system will appear
as a COM port, the COMport number can be found in device manager. On macOS®, a device file is
created in the / directory. S is an alpha-numeric serial string unique to each device
/dev/tty.usbserial S
Devices incorporate a USB to UART converter IC from FTDI International. On Windows 7 or later, a
driver may automatically be installed (if Windows is configured to download drivers from the internet
automatically). If this is not the case, or if a Mac® or Linux® platform is used, the driver may be
downloaded from www.ftdichip.com. The VCP drivers are required. For Linux® or Mac computers, the
default OS drivers should be used.
The default communications settings are as below, ANSI terminal emulation should be selected.
Communication setting Value
Number of bits per second (baud) 115200
Number of data bits 8
Parity None
Number of stop bits 1
Flow control None
5.3. Scalability
USB controllers generally have an endpoint limit, limiting the number of devices that can be
enumerated when connected to the USB3 port of a local computer. USB3 port xHCI host
controllers in most computers limit the number of endpoints enumerated between 64 and 128.
Mobile devices enumerate as more than one endpoint, and complex devices with touch panels often
enumerate as 5 or 6 endpoints. Consequently, the number of devices that can be successfully
enumerated is typically limited to less than twenty.

ModIT-Max Page 15 of 42
By using Thunderbolt™ connectivity and incorporating host controllers inside the hub each port can
handle up to 16 endpoints. If you wish to synchronise more devices, multiple hubs can be daisy-
chained to allow up to 96 devices to be managed simultaneously from a single host computer.
To daisy-chain multiple hubs, each hub needs to be connected to mains power individually, then the
first hub in the chain should be connected to the local computer through one of the Thunderbolt™
ports. The next hub in the daisy-chain is connected using one of its Thunderbolt™ ports to the
remaining Thunderbolt™ port of the first hub. A third, fourth and fifth hub can be added in the same
way, connecting the available Thunderbolt™ port of the previous hub to one of the Thunderbolt™
ports of the next device in the daisy-chain. Using this approach, a maximum of six hubs can be linked
together, allowing 96 devices to be synced from a single host computer.

ModIT-Max Page 16 of 42
5.4. Managing Ports & Your ModIT-Max
Each port on your ModIT-Max can be managed either individually, or all together. You can turn the
ports off and on, change the port mode, or change various other settings applicable to the ModIT-
Max more information can be found in the LiveViewer section under NVRAMsettings. This can be
done through LiveViewer, the CLI or by connecting to the hub via the API.
5.4.1 Port Modes
Sync Turn specific ports or the whole hub to sync mode
Biased Detect the presence of a device but it will not sync or charge it
Off Turn specific ports on or off or switch the whole hub on or off (no power and no
data channels open, mimics unplugging the device)
5.4.2 Switching port modes
You can switch between port modes by using LiveViewer, the CLI or by connecting to the hub via the
API. If you switch a port off then this will stop any connection taking place to the USBdevice and
would mimic unplugging the USB device completely from the host system.
If you are in Sync mode and then switch to Charge mode the USB device will disconnect briefly whilst
the profiling process takes place. Once the profiling has taken place, and a charging profile is
selected, the device will then draw a charge rate, which will be defined by the charging controller
within the USBdevice. The charging profile will limit the maximum amount that the device is able to
draw.
If you are in Off or Charge mode and switch to Sync mode the USB device will disconnect briefly
whilst a data connection is opened, the USBdevice will then become available to the host as if the
USB device is connected directly to the host, and will be able to sync data at a maximum rate of 5
(Gbps). The ModIT-Max will also charge the device whilst connected. It is impossible to have a data
connection to a USBdevice without any power negotiating, you can reduce the charging rates
available by disabling CDP (Charging downstream port).
You can disable CDPthrough NVRAMsettings either by going through the hub settings and turning
"Sync charge" off or through the APIand disabling it via code. For example, using the command line,
the instructions would be as below.
settings_unlock
settings_set sync_chrg 0000000000000000
5.4.3 Charging Profiles
To ensure attached devices charge at their optimum rate, our smart USB hubs come with the below
intelligent charging profiles built in:

ModIT-Max Page 17 of 42
0 Intelligent charging algorithm which will select a profile 1-6
1 2.1A (Apple)
2 BC1.2 Standard (this covers the majority of Android™ phones and other devices)
3 Samsung
4 2.1A (Profile 1 but with a longer timeout)
5 1.0A (Typically used by Apple)
6 2.4A (Typically used by Apple)
5.4.4 Firmware
The firmware can be kept up to date using our LiveViewer software. As part of delivering an easy user
experience, our LiveViewer application is now a set-and-forget solution. The LiveViewer application
will discover your USB hub’s firmware and present an update for you.
To update the firmware, first, go to the firmware section of LiveViewer. Here you can see the available
Firmware versions to install to the hub.
The current firmware version on the hub is displayed in the firmware section alongside the hub's
name. This will appear red if a newer version is available or green if it is the most up to date.

ModIT-Max Page 18 of 42
To install the firmware onto the hub click the hub(s) connected that you want to update, the latest
firmware will be automatically selected, if you wish to change the firmware version you are updating
to then this can also be done. Once selected press the update button at the top and the update will
commence.
CAUTION
Your ModIT-Max may not function correctly
Do not downgrade firmware onto a new product
CAUTION
Your Cambrionix Firmware may get corrupted
Do not interrupt the Firmware update process.
Do not disconnect the power during the update process.
CAUTION
Your Cambrionix Hub may not be visible or become unresponsive
If you have older hardware with Firmware version number lower than 1.83 then the
hub may not be compatible with the Cambrionix API and will need to be updated to
the latest version of Firmware using the Command Line Updater which can be
downloaded and installed from the following link.
https://www.cambrionix.com/firmware
CAUTION
A new version may be available
Ensure you have the latest version of Firmware installed on your hub. These updates will often
contain new features, fixes for bugs and performance improvements

ModIT-Max Page 19 of 42
5.5. Software
Cambrionix provides interfaces by which the Hub can be monitored and managed:
lLiveViewer
lCambrionix Connect
lCambrionix API
lCommand Line Instructions
LiveViewer or Cambrionix Connect can use the API to interact with the devices through a user-friendly
application, or the API can be used to provide other protocols that send translated string commands.
The ModIT-Max uses string commands to communicate with the host system. These can be sent via
the virtual serial port of the ModIT-Max directly,
There are different channels for both our LiveViewer application and the API. The channels are Beta
and Release. We would recommend using the release version of both the APIand LiveViewer.
We will push bug fixes and updates through Beta before it is merged into the Release version. If you
have found a bug that we have a fix for, the Beta releases may already have addressed these and
implemented fixes.
5.5.1 Installing Software
Cambrionix has two pieces of software that can be used to manage the devices and your hub using
different host systems. This section has instructions and information on using our software on three
of the most popular host systems.
Our software is available to download from www.cambrionix.com/software, you will find software
available for Windows™, Mac® and Linux® Systems.
Linux® OS systems tested with our software are Ubuntu 18.04 LTS or Debian 9; some other OS
versions based on the two mentioned will work. Some different Linux® OS versions may work, but we
dont test against other distributions.
To install on Mac® and Windows™ systems, download the install files from the above link, once
downloaded run the install process and dialogue boxes will help you through installation and initial
set-up.
For Linux® systems, download the install files from the website at the above link. Once downloaded,
you can either install it from the desktop GUI or the command line via:
sudo apt install ./
after this command you will need to enter the file name that has just been downloaded from our
website.
Other manuals for ModIT-MAX
6
Table of contents
Other CAMBRIONIX Control Unit manuals
Popular Control Unit manuals by other brands

BENDIX
BENDIX TABS-6 TRAILER ABS MODULE Service data

CALEFFI
CALEFFI 523160A Installation, commissioning and service instructions

Ambu
Ambu PEEP 10 Instructions for use

Jackson Systems
Jackson Systems ESP-400 Installation & operation instructions

Brizo
Brizo MultiChoice T75P588 Installation instructions & owner's manual

Marley
Marley 12003 operating instructions