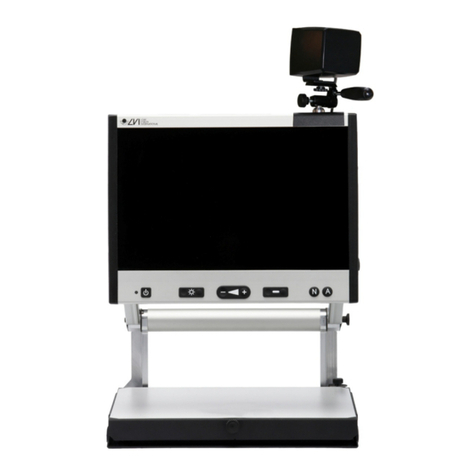
C&P i-loview 13 User manual


Introduction

Introduction

Precautions
Please read this manual carefully to ensure safe and proper use of the product.
! Important !
Negligent use or misuse of the product may cause a fire, personal injury or serious damage.
ㆍDo not use damaged power plug or unsuitable outlet to prevent electronic
shock or fire.
ㆍDo not touch power plug with wet hands to prevent electronic shock.
! Important !
Misuse of the product may result in personal injury or damage to the unit.
ㆍUse only the adapter supplied with the product. Other adapters may damage
the unit.
ㆍDo not use this unit in moist environments like a bathroom or shower room.
ㆍDo not place heavy objects on the unit.
ㆍDo not attempt to disassemble, remodel, or repair the unit. It may damage
the unit and will void the warranty.

Precautions
Please read this manual carefully to ensure safe and proper use of the product.
!Important !
After six(6) months usage, the lifespan of the battery may be shortened.
!Important !
Keep the product out of direct sunlight and extreme temperatures.
ㆍThe display may not work properly.
ㆍThe recommended operating temperature is between 0 ~35 ℃(32 ~95 ℉)

Contents
1. Package ·········································
2. Instructions before use ·····························
3. Configuration · ····································
4. Hot keys & Features ·······························
5. Technical specifications ·····························
6. Warranty ·········································

1. Package
Thank you very much for choosing the i-loview 13 Full HD (i-1388)
Please check for the following items in the i-loview 13 Full HD (i-1388)
Package :
1) Portable magnifier
2) Power adapter
3) Carrying pouch
4) User’s manual
5) Microfiber cloth for cleaning the display

2. Instructions before use
ㆍThe battery must be fully charged for prior to the initial use.
Please connect the supplied power adapter to the DC input jack to charge the battery.
ㆍRemove the LCD protection film before using the unit.
ㆍBe careful not to allow foreign material to adhere to the camera lens.
If any foreign material is on the lens, wipe it off with the provided microfiber cloth.

Opening the i-loview 13 FHD
①Place the folded i-loview 13 on stable such as table.
②Press on the base plate with one hand, while other hand grabs on top of the body frame.
③Lift the arm until it locks in place.
④Put both hands on the left and right sides of the LCD monitor.
⑤Pull the LCD monitor toward you.
⑥Push the LCD monitor up using both hands and adjust it in a suitable position.

Closing the i-loview 13 FHD
①Put both hands on the left and right sides of the LCD monitor.
②To close the i-loview 13, push down the LCD monitor using both hands.
③Push the LCD monitor toward the main body frame.
④Place both hands on top of the body frame.
⑤Lower the top of the body frame until it is closed.

Camera positions
You can use various modes by adjusting the Camera location adjuster.
①Self-view mode(mirror mode)
②Reading mode
③Distance-view mode

3. Configuration
1) Power On/Off button
2) Image optimizer Wheel
(Adjusting a brightness)
3) Snap shot button
4) Zoom Wheel
5) Color mode button
6) Natural color button
7) Super Function Key
(A Jog Key)
8) LCD

3. Configuration
9) Camera
10) Conversion lens
11) DC jack

3. Configuration
12) LED lights
13) Camera location adjuster

3. Configuration
1) HDMI IN
2) HDMI OUT
3) External Key port
4) USB 2.0
5) USB Micro-B type (USB 3.0)

3. Configuration
①Power On/Off button
ㆍPower on : To turn on the unit, press the button for 2 seconds
or more.
ㆍPower off : To turn off the unit, press the button for 2 seconds
or more again with the power on state.
②Image optimizer wheel
Provide two functions according to the situation.
ㆍNatural color mode : Adjust brightness level of the display. (5 steps)
ㆍColor mode : Adjust the image quality optimizing settings.
Press it to return to the default setting.

3. Configuration
③Snap shot button
Briefly press the button and the image on the screen will be freezed.
ㆍYou can then zoom in/out on the still image and adjust
color and screen brightness.
ㆍPress the button again, back to the live image mode.
ㆍSuper Function Key(⑦) scrolls the freezed image.
④Zoom Wheel
To adjust the magnification, turn the knob.
ㆍMagnification ratio :
- Live image mode : x 1.8 ~ x 30
- Snap shot mode : ~ x 150
- Adjustable magnification : x 1.2 ~ x 250

3. Configuration
⑤Color mode button
The image on the screen can be viewed in eight(8) color modes
ㆍNatural color mode
ㆍWhite text on black background mode
ㆍBlack text on white background mode
ㆍYellow text on black background mode
ㆍBlack text on yellow background mode
ㆍGreen text on black background mode
ㆍBlue text on yellow background mode
ㆍYellow text on blue background mode
Up to 35 color modes can be set using the menu.
⑥Natural color button
ㆍPress the button to view pictures or documents in natural color.
ㆍPress and hold the button to use the ‘Find function’.
⑦Super Function Key
Used to various operations on each modes.
ㆍScrolling the freezed image.
ㆍSelecting/Using the kind of line/mask and functions.

3. Configuration
⑧LCD screen
⑨Camera
ㆍBe careful not to allow foreign material to adhere to camera lens.
ㆍIf any foreign material is on the lens, wipe it off with the provided
microfiber cloth.
⑩Conversion lens
Open the conversion lens for the distance view mode.
⑪DC jack
You can insert the power adapter here to charge the battery.
⑫LED lights
⑬Camera location adjuster
Adjust the direction of the camera by using the handle.
Table of contents
Other C&P Magnifier manuals

