manuals.online logo
Brands
  1. Home
  2. •
  3. Brands
  4. •
  5. Canon
  6. •
  7. Printer
  8. •
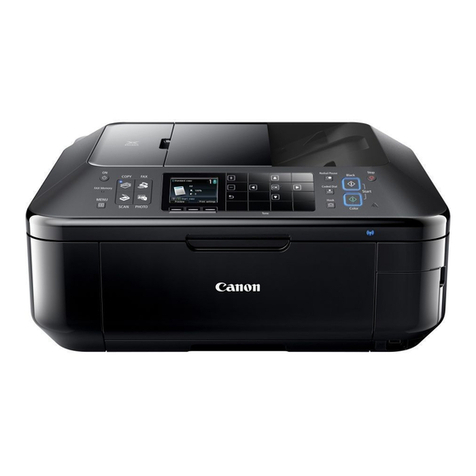
  9. Canon MX530 series User instructions

Canon MX530 series User instructions

Other manuals for MX530 series

5

This manual suits for next models

1

Other Canon Printer manuals

Canon imagePROGRAF W2200S User manual

Canon

Canon imagePROGRAF W2200S User manual

Canon PIXMA G7000 Series User manual

Canon

Canon PIXMA G7000 Series User manual

Canon PIXMA PRO-100 Series Manual

Canon

Canon PIXMA PRO-100 Series Manual

Canon PIXMA mini320 Series User manual

Canon

Canon PIXMA mini320 Series User manual

Canon LBP-800 User manual

Canon

Canon LBP-800 User manual

Canon iR1200 Series User manual

Canon

Canon iR1200 Series User manual

Canon Color Bubble Jet BJC-3000 Series User manual

Canon

Canon Color Bubble Jet BJC-3000 Series User manual

Canon TB-206 User manual

Canon

Canon TB-206 User manual

Canon PIXMA MP620 series User manual

Canon

Canon PIXMA MP620 series User manual

Canon Pixma MG3500 Series User manual

Canon

Canon Pixma MG3500 Series User manual

Canon iP1500 - PIXMA Color Inkjet Printer User manual

Canon

Canon iP1500 - PIXMA Color Inkjet Printer User manual

Canon g3000 series Setup guide

Canon

Canon g3000 series Setup guide

Canon i475D Series User manual

Canon

Canon i475D Series User manual

Canon PIXMA TR7530 User manual

Canon

Canon PIXMA TR7530 User manual

Canon PIXMA TS8351 User manual

Canon

Canon PIXMA TS8351 User manual

Canon iP4000 - PIXMA Photo Printer User manual

Canon

Canon iP4000 - PIXMA Photo Printer User manual

Canon i-SENSYS LBP5300 Series User manual

Canon

Canon i-SENSYS LBP5300 Series User manual

Canon 2160B002 User manual

Canon

Canon 2160B002 User manual

Canon Pixma iP5200 Series User manual

Canon

Canon Pixma iP5200 Series User manual

Canon iPF700 User manual

Canon

Canon iPF700 User manual

Canon PIXMA MP610 Series User manual

Canon

Canon PIXMA MP610 Series User manual

Canon imagePRESS C1+ User manual

Canon

Canon imagePRESS C1+ User manual

Canon G2010 Series Setup guide

Canon

Canon G2010 Series Setup guide

Canon LBP654C Series User manual

Canon

Canon LBP654C Series User manual

Popular Printer manuals by other brands

Evolis Elypso user guide

Evolis

Evolis Elypso user guide

Lexmark 522n - C Color Laser Printer Service manual

Lexmark

Lexmark 522n - C Color Laser Printer Service manual

Panduit COUGAR LS9Q Operator's manual

Panduit

Panduit COUGAR LS9Q Operator's manual

Olivetti PG L2140 Operation guide

Olivetti

Olivetti PG L2140 Operation guide

Samsung SL-M2820DW user manual

Samsung

Samsung SL-M2820DW user manual

Kyocera FS-9530DN specification

Kyocera

Kyocera FS-9530DN specification

Lexmark Infoprint 1332 user manual

Lexmark

Lexmark Infoprint 1332 user manual

Epson M1120 user guide

Epson

Epson M1120 user guide

TransAct POSJET 1500 Spare parts

TransAct

TransAct POSJET 1500 Spare parts

Telpar MTP-1500 user manual

Telpar

Telpar MTP-1500 user manual

Star DP8340 SERIES user manual

Star

Star DP8340 SERIES user manual

MGI JETVARNISH 3DS user manual

MGI

MGI JETVARNISH 3DS user manual

Kyocera TASKalfa PA4500ci Operation guide

Kyocera

Kyocera TASKalfa PA4500ci Operation guide

Emaar EP-360 user manual

Emaar

Emaar EP-360 user manual

Fujitsu DL7400 user manual

Fujitsu

Fujitsu DL7400 user manual

Centronics 101A Technical manual

Centronics

Centronics 101A Technical manual

Logic Controls LR1100 user manual

Logic Controls

Logic Controls LR1100 user manual

Epson ActionLaser Plus user manual

Epson

Epson ActionLaser Plus user manual

manuals.online logo
manuals.online logoBrands
  • About & Mission
  • Contact us
  • Privacy Policy
  • Terms and Conditions

Copyright 2025 Manuals.Online. All Rights Reserved.

XXXXXXXX © CANON INC. 2014
繁體中文ENGLISH
Setting Up the FAX
Press the button to display the Setup menu.
Use the [] button to select Fax settings, then press the OK button.
Use the [] button to select Easy setup, then press the OK button.
Use the [] button to select Start setup, then press the OK button.
Easy setup starts up.
Follow the on-screen instruction to complete the settings in accordance with the
operating environment.
11
22
33
44
Starting Easy setup
When "Connect your TEL line system to the device's LINE jack" is displayed
When a message to prompt connection of a telephone or an answering machine is displayed
When "Select line type" is displayed
Read this manual after finishing the operation of Getting Started.
To use the fax features of the machine, you can enter the fax settings through the Easy setup.
When "Telephone line type" is displayed
Connect the machine to a telephone jack with the supplied telephone line cable,
then press the OK button.
A basic connection method is shown in this figure. For other connection
methods, refer to the Online Manual.
Users in Europe: If you prepare your own telephone line cable, be sure it is a
6-wire telephone line cable.
•
•
When "Ans. machine on tel." is displayed (in case fax and telephone are on the same line)
If you want to connect a telephone or an answering machine, remove the Cap,
connect a telephone or an answering machine with a telephone line cable and
press the OK button.
If you do not want to connect a telephone or an answering machine, just press
the OK button.
Do not use a telephone jack line duplexer.
Users in the UK: Use a B.T. adapter for connection as required.
•
•
If you want to connect to:
the telephone jack on the wall directly
a PBX extension line or an xDSL splitter
Use the [] button to select Telephone line, then press the OK button.
•
•
If you want to connect to:
an internet telephone
an xDSL modem
an ISDN line
Use the [] button to select IP telephone line, then press the OK button.
•
•
•
About the Receive Mode
You can select Touch tone or Rotary pulse.
Use the [] button to select your Telephone line type, then press the OK button.
Connecting the Telephone Line
If you want to use an answering machine,
Use the [] button to select Use, then press the OK button.
If you do not want to use an answering machine,
Use the [] button to select Do not use, then press the OK button.
After finishing Easy setup, enter the Setup menu again and make other settings.
Entering the FAX User Settings
Press the button to display the Setup menu.
Use the [] button to select Fax settings, then press the OK button.
Use the [] button to select FAX user settings, then press the OK button.
Use the [] button to select Unit TEL no. registr., then press the OK button.
Use the Numeric buttons to enter the sender fax number, then press the OK button.
Use the [] button to select Unit name registr., then press the OK button.
Use the Numeric buttons to enter the sender name, then press the OK button.
11
22
33
44
55
66
77
Selecting the Receive Mode
You can select the receive mode suitable for your fax use conditions.
DRPD is available only in the US and Canada.
Network switch may not be available depending on the region or country.
The telephone may not ring when a call incomes depending on the type or settings of the external telephone.
•
•
•
Press the button.
Press the Menu button.
Use the [] button to select Receive mode set., then press the OK button.
Use the [] button to select the receive mode you want to set, then press the OK button.
The confirmation screen asking whether to make advanced settings is displayed.
If you select Yes and press the OK button, you can specify the advanced settings of each receive mode.
Advanced setting in TEL priority mode
Manual/auto switch
The machine automatically receives faxes after the external device rings a specified length of time. You can specify the length of time.
User-friendly RX
The machine switches fax reception automatically after the answering machine connected to the machine answers.
Advanced setting in DRPD
DRPD: FAX ring pat.
Specify the ring pattern to match the DRPD service pattern assigned by your telephone company.
Incoming ring
You can specify the number of times the external device rings when incoming.
Advanced setting in Network switch
Incoming ring
You can specify the number of times the external device rings when incoming.
Advanced setting in Fax only mode
Incoming ring
You can specify the number of times the external device rings when incoming.
•
•
•
•
•
•
11
22
33
44
Setting the Receive Mode
Receive mode Your fax use condition Receiving operation
TEL priority mode When using a telephone and a fax with the same
telephone number:
When a call incomes and the connected telephone rings, pick up the
handset.
If the call is a voice call, talk on the telephone.
If the call is a fax, hang up the handset after the machine starts receiving
the fax.
DRPD or Network switch When using a fax with the telephone number
subscribing to a ring pattern detection service:
When a call incomes, the machine detects whether the call is a fax call. If
the call is a fax, the machine will receive the fax automatically.
If the machine does not detect the fax ring pattern, the telephone will
continue ringing. Answer the telephone.
Fax only mode When using the machine for a telephone number for
fax only:
When a fax incomes, the machine will receive the fax automatically.
For details on the sender information and receive mode, and setting the date/time, refer to the Online Manual.
1
2
QT5-6697-V01 PRINTED IN XXXXXXXX
設定傳真
按 按鈕以顯示設定功能表(Setup menu)。
使用[]按鈕選擇傳真設定(Fax settings),然後按OK按鈕。
使用[]按鈕選擇簡易設定(Easy setup),然後按OK按鈕。
使用[]按鈕選擇開始設定(Start setup),然後按OK按鈕。
簡易設定(Easy setup)啟動。
根據操作環境遵循螢幕上的說明完成設定。
11
22
33
44
開始簡易設定(Easy setup)
顯示「連接電話線路系統至設備線路插座(Connect your TEL line system to the device's LINE jack)」時
顯示提示連接電話或答錄機的訊息時
顯示「連接到(Select line type)」時
完成入門指南操作後請閱讀本手冊。
要使用本機的傳真功能,可以透過簡易設定(Easy setup)輸入傳真設定。
顯示「電話線路類型(Telephone line type)」時
使用隨附的電話電纜線連接本機至電話線插座,然後按OK按鈕。
該圖示顯示基本的連接方法。關於其他連接方法,請參閱線上手冊。
歐洲使用者:如果自己準備電話電纜線,請務必準備6芯電話電纜線。
•
•
顯示「電話答錄機(Ans. machine on tel.)」時(傳真和電話在同一線路時)
如果想連接電話或答錄機,請取下蓋,使用電話電纜線連接電話或答錄機並按
OK按鈕。
如果不想連接電話或答錄機,僅按OK按鈕。
請勿使用電話線端子分線器。
英國使用者:根據需要使用B.T.轉接器進行連接。
•
•
如果想連接至:
牆上的電話線插座
PBX延長線或xDSL分離器
使用[]按鈕選擇電話線路(Telephone line),然後按OK按鈕。
•
•
如果想連接至:
網際網路電話
xDSL數據機
ISDN線路
使用[]按鈕選擇IP電話線路(IP telephone line),然後按OK按鈕。
•
•
•
關於接收模式
可以選擇音頻(Touch tone)或循環脈衝(Rotary pulse)。
使用[]按鈕選擇電話線路類型(Telephone line type),然後按OK按鈕。
連接電話線
如果要使用答錄機,
使用[]按鈕選擇使用(Use),然後按OK按鈕。
如果不使用答錄機,
使用[]按鈕選擇不使用(Do not use),然後按OK按鈕。
完成簡易設定(Easy setup)後,再次進入設定功能表(Setup menu)並進行其他設定。
輸入傳真使用者設定
按 按鈕以顯示設定功能表(Setup menu)。
使用[]按鈕選擇傳真設定(Fax settings),然後按OK按鈕。
使用[]按鈕選擇傳真使用者設定(FAX user settings),然後按OK按鈕。
使用[]按鈕選擇個體電話號碼註冊(Unit TEL no. registr.),然後按OK按鈕。
使用數字按鈕輸入傳送者傳真號碼,然後按OK按鈕。
使用[]按鈕選擇個體名字註冊(Unit name registr.),然後按OK按鈕。
使用數字按鈕輸入傳送者名稱,然後按OK按鈕。
11
22
33
44
55
66
77
選擇接收模式
可以選擇適合傳真使用情況的接收模式。
DRPD僅適用於美國和加拿大。
根據國家或地區的不同,網路轉換(Network switch)可能不可用。
根據外部電話的類型或設定不同,來電時電話可能不會響鈴。
•
•
•
按 按鈕。
按功能表 按鈕。
使用[]按鈕選擇接收模式設定(Receive mode set.),然後按OK按鈕。
使用[]按鈕選擇想設定的接收模式,然後按OK按鈕。
顯示詢問是否進行進階設定的確認螢幕。
如果選擇是(Yes)並按OK按鈕,可以指定各接收模式的進階設定。
電話優先模式(TEL priority mode)的進階設定
手動/自動切換(Manual/auto switch)
外部設備響鈴達到指定時長後,本機自動接收傳真。可以指定時長。
使用者友好接收(User-friendly RX)
連接至本機的答錄機應答後,本機自動轉換傳真接收。
DRPD的進階設定
DRPD: 傳真響鈴模式(DRPD: FAX ring pat.)
指定響鈴模式以匹配電話公司給定的DRPD服務模式。
來電響鈴(Incoming ring)
可以指定來電時外部設備響鈴的次數。
網路轉換(Network switch)的進階設定
來電響鈴(Incoming ring)
可以指定來電時外部設備響鈴的次數。
僅傳真模式(Fax only mode)的進階設定
來電響鈴(Incoming ring)
可以指定來電時外部設備響鈴的次數。
•
•
•
•
•
•
11
22
33
44
設定接收模式
接收模式 傳真使用情況 接收操作
電話優先模式(TEL priority
mode)
電話和傳真使用同一電話號碼時: 電話呼入且所連接的電話響鈴時,拿起聽筒。
如果呼叫是語音呼叫,請應答電話。
如果呼叫是傳真,請在本機開始接收傳真後掛斷電話。
DRPD或網路轉換(Network
switch)
所用傳真的電話號碼訂製響鈴模式偵測服務時: 電話呼入時,本機偵測本次呼叫是否為傳真。如果呼叫是傳真,本機將自
動接收傳真。
如果本機不偵測傳真響鈴模式,則電話將持續響鈴。請應答電話。
僅傳真模式(Fax only
mode)
本機所用的電話號碼僅為傳真號碼時: 傳真呼入時,本機將自動接收傳真。
有關傳送者訊息和接收模式以及設定日期/時間的詳細資訊,請參閱線上手冊。
1
2