manuals.online logo
Brands
  1. Home
  2. •
  3. Brands
  4. •
  5. Carrier
  6. •
  7. Accessories
  8. •
  9. Carrier 33CSHUMID-01 User manual

Carrier 33CSHUMID-01 User manual

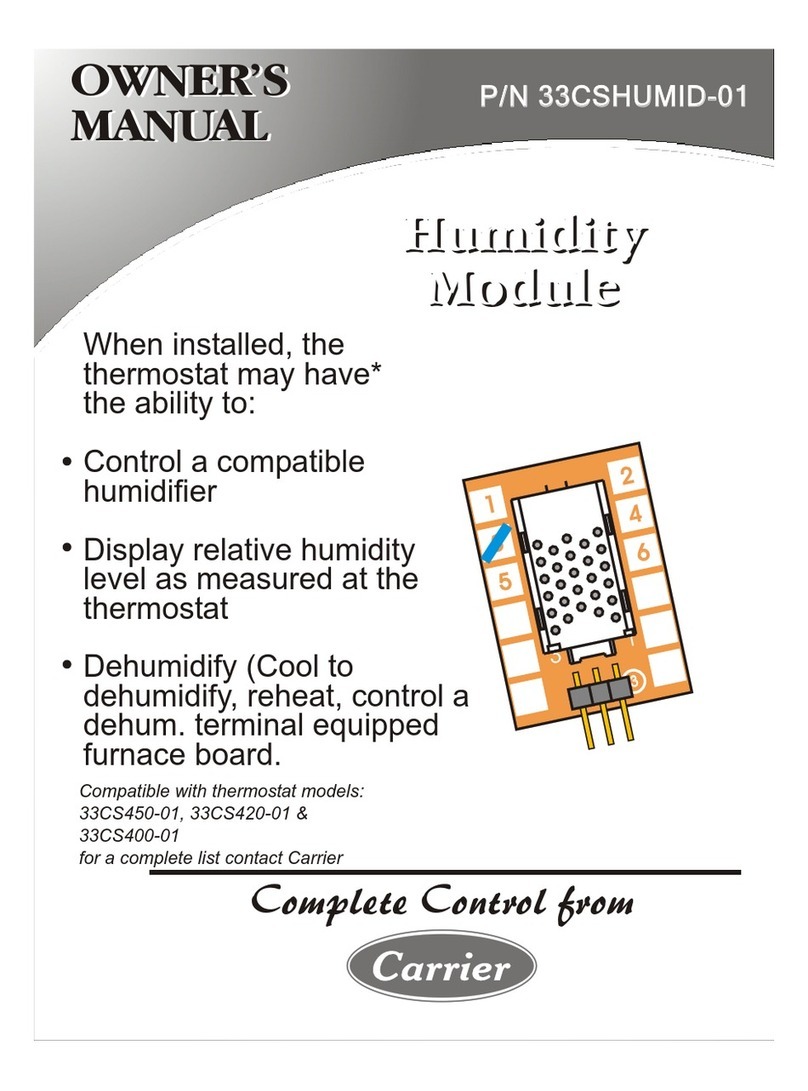
When installed, the
thermostat may have*
the ability to:
•Control a compatible
humidifier
• Display relative humidity
level as measured at the
thermostat
•Dehumidify (Cool to
dehumidify, reheat, control a
dehum, terminal equipped
furnace board.
Compatible with thern_ostat models."
33CS450_01, 33CS420_01 &
33CS400-01
for a complete list contact Carrier
4
o t
_e
8 °e
This unique accessory allows you to view and control
the humidity level using only your thermostat and
HVAC unit.
Depending on the model number of your thermostat
the humidification options are:
• View the ambient humidity at the thermostat
location
Control a humidifier with the HUM terminal on
the thermostat
Dehumidify using only the air conditioner
Dehumidify with Reheat using your HVAC's
second stage electric strip heater
Dehumidify using the DEHUM terminal on your
furnace's circuit board
Page 1
The humidity accessory is inserted into the
humidity plug on the back of the thermostat
and the Humidity Jumper is set for HUM
operation.
OHumidity Jumper
Set this jumper for
HUM.
BBBBB" L0 ,uM
0Humidity Module
Model 33CSHUMID-01
\\ Plug the module into the appropriate
"X connection terminal on the circuit
X board of the thermostat, as shown.
. . _ i Humidity Module
Hum,d,tyModu,q__ I p,ug,ocatedoo
/"_' . '/" , U I/thethermostat
/ ÷ f r-_ circuitb°ard"
/ _ /
Thermostat J
circuit board.
Page 2
To control a MISC output for humidification, place
the MISC1, MISC2, or MISC3 jumper on the term-
inal labeled HUM. This will supply 24VAC to the
selected MISC terminal on the backplate of the
thermostat when the humidity in the home falls
below the setpoint you have chosen. The value for
this setpoint ranges from 0% to 60%. Only one of
the three outputs (MISC1, MISC2, or MISC3) is
required to have this jumper. For more information
regarding the MlSCl, MISC2, and MlSC3 outputs
and regarding the Humidity setpoint, please consult
your Owner's Manual.
The Fan may also be programmed to automatically
energize any time there is a call for humidity. For
more information regarding energizing the Fan with
Humidification operation, please consult your
thermostat's Owner's Manual.
Page 3
Dehum Terminah To control a MISC output for
dehumidification, place the MISCl, MISC2, or
MISC3 jumper on the terminal labeled DEHUM.
This will supply 24VAC to the selected MISC
terminal when the humidity in the home is above the
setpoint you have chosen. Only one of the three
outputs (MISCl, MISC2, or MISC3) is req-
uired to have a jumper. For more information
regarding the MlSCl, MlSC2, and MlSC3 outputs,
please consult your thermostat Owner's Manual.
When the indoor humidity falls below the setpoint
you have selected, the MISC terminal will be de-
energized. The value for this setpoint ranges from
25% to 99%. To utilize this feature your HVAC unit
must be equipped with a DEHUM terminal. For
more information regarding dehumidification using
the DEHUM terminal, please consult your
thermostat's Owner's Manual.
*Dehumidifying with the DEHUM terminal may not be available
with your thermostat model number. Please consult your
Owner's Manual for details.
Page 4
Cool to Dehumidify: If Cool to Dehumidify is on
and the Humidity Module is installed, the thermo-
stat has the ability to initiate a cooling cycle for
advanced dehumidification operation. When the
thermostat detects the humidity percentage is
above the setpoint for dehumidification, and heating
or cooling is not on, the thermostat will force the
compressor to run with the fan, thus reducing
moisture in the air. The green LED will blink once
every eight seconds to indicate this is taking place.
This feature will also allow you to adjust the cooling
overshoot of the setpoint, from 0 ° to 5 °.
For Example: If the coofing overshoot is set for 3 °F and
the cooling setpoint is set for 74°F, then as long as the
room temperature reads between 71°F and 74°F this
feature will energize the compressor and fan to
dehumidify the air.
When the indoor humidity falls below the setpoint
you have selected, the Cool to Dehumidify function
will be de=energized. The value for this setpoint
ranges from 25% to 99%. For more information
regarding dehumidification using the air conditioner,
please consult your Owner's Manual.
*Cool to Dehumidify may not be available with your thermostat
model number. Please consult your Owner's Manual for details.
Page5
Reheat: This feature allows the thermostat to turn
on Electric Heating (W2) during Cool to Dehumidify
(see previous page) to maintain room temperature
until the dehumidification setpoint is reached. The
cooling cycle will allow for the dehumidification of
the air to occur while the Electric Heating will allow
for a constant room temperature. If Reheat is
enabled, the Aux icon will appear on the display
during Cool to Dehumidify operation. For more
information regarding Reheat operation, please
consult yourthermostat's Owner's Manual.
*Reheat with Cool to Dehumidify may not be available with your
thermostat model number. Please consult your Owner's Manual
for details.
Page 6
_Jl _i i_ ._j
The Humidity Module package includes two door
labels. Depending on which model thermostat
you have purchased, choose the correct label and
affix it to the thermostat as shown in the diagrams
below.
33CS450 & 420
33CS400
Page 7
_J
One Year Warraniy This P_oduct is warranted to be Bee Born defec% in material and workmanship If it
appears within one year from the date of original installation, whether or not actual use begins on that
date, that the ploduct does not meet this warra nh/, a new or lemanufac_led part, at the
manufacturer's sole opiion to replace any defective part, will be provided without charge for the part
iiself provided the defective part is i_i_Jrned to the distributor thlough a qualified servicing dealer
THiSWARRANIY DOES NOT INCLUDE LABOR OR OTHER COSTSlecuned for diagnosing, repairing,
lemoving, installing, shipping, servicing or handlieg of either defeciive parts or replacement parts Such
costs may be coveled by a separate warrant/pl_vided by the installer
THISWARRAN1YAPPLIESONLY TO PRODUCTS IN THEIRORIGINAL INSTALLATIONLOCATION AND BECOMES
VOID UPON REINSTALLATION
UMITATIONSOF WARRANTIES ALL IMPLIED WARRANTIES(INCLUDING IMPLIEDWARRANTIESOF FITNESSFOR
A PARTICULARPURPOSEAND MERCHANTABILITY)ARE HEREBYLIMITED IN DURATION TO THEPERIOD FOR
WHICH THE LIMITEDWARRANTY IS GIVEN SOME STATESDO NOT ALLOW LIMITATIONSON HOW LONG AN
IMPLIEDWARRAN1Y LASTS,SO THEABOVE MAY NOT APPLYTO YOU THE EXPRESSEDWARRANTIESMADE IN
THISWARRAN1YARE EXCLUSIVEAND MAY NOT BE ALTERED,ENLARGED, OR CHANGED BYANY DISTRIBUTOR,
DEALER,OR OTHERPERSON WHATSOEVER
ALL WORK UNDER THETERMS OF THISWARRANTY SHALL BEPERFORMED DURING NORMAL WORKING
HOURS ALL REPLACEMENTPARTS,WHETHERNEW OR REMANUFACTURED, ASSUMEAS THEIRWARRANTY
PERIOD ONLY THE REMAINING TIME PERIOD OF THISWARRAN_
THEMANUFACTURER WILLNOT BE RESPONSIBLEFOR:
1 Normal maintenance as outlined in the installaiion and servicing instructions or owner's
manual, including filter cleaning and/or leplacement and lubrication
2 Damage or lepalls required as aconsequence of faulh/lestallelJon, misapplicalJon, abuse,
improper servicing, unauthorized alteration or implober obelaBon
3 Failure b start due to voltage condilJons, bbwn fuses, open circuit bleakers or other
damages due b the inadequacy or interruplJon of electrical service,
4 Damage as a result of floods, winds, flies, lightning, accidents, corrosive environments or
other condilJons beyond the conilol of the Manufac_ler
5 Parts not supplied or designated by the Manufaclurel, or damages resuliing itom their use
6 Manufactuler ploducls installed outside the continental USA, Alaska, Hawaii, and
Canada
7 Electriclly or fuel cosls or increases in electrlcily or fuel costs for any i_ason whatsoever
including additional or unusual use of supplemental electric heaE
8 ANY SPECIAL INDIRECT OR CONSEQUENTIAL PROPERTYOR COMMERCIAL
DAMAGE OF ANY NATUREWHATSOEVER Some states do not allow the exclusbn of
incidental or consequential damages, so the above may not apply to you
This warranh/gives you specific legal righls and you may also have other rights which may vary from
state to state Humidity Mcdul_ 33CSHUM D 01
IFC...............
with FCCStandards
P/N 88-509 Rev,2 LFoR_............ us_
Page 8
Other manuals for 33CSHUMID-01

1

Other Carrier Accessories manuals

Carrier TSTATXXCNV10 User manual

Carrier

Carrier TSTATXXCNV10 User manual

Carrier Omnizone 50XCW06-24 Dimensions and installation guide

Carrier

Carrier Omnizone 50XCW06-24 Dimensions and installation guide

Carrier 50VP User manual

Carrier

Carrier 50VP User manual

Carrier 50DJ-901---331 User manual

Carrier

Carrier 50DJ-901---331 User manual

Carrier ZS Series User manual

Carrier

Carrier ZS Series User manual

Carrier HH99ZZ019 Operating instructions

Carrier

Carrier HH99ZZ019 Operating instructions

Carrier ZS User guide

Carrier

Carrier ZS User guide

Carrier SYSTXCCSMS01-A User manual

Carrier

Carrier SYSTXCCSMS01-A User manual

Carrier 33ZCT58SPT User manual

Carrier

Carrier 33ZCT58SPT User manual

Carrier 33CS Service manual

Carrier

Carrier 33CS Service manual

Carrier CARRIER 28GH User manual

Carrier

Carrier CARRIER 28GH User manual

Carrier NSB-ZPM-SR-ST-D Guide

Carrier

Carrier NSB-ZPM-SR-ST-D Guide

Carrier SYSTXZNSMS01 User manual

Carrier

Carrier SYSTXZNSMS01 User manual

Carrier 50BY Series User manual

Carrier

Carrier 50BY Series User manual

Carrier AQUASnap 30RB User manual

Carrier

Carrier AQUASnap 30RB User manual

Carrier WeatherMaker 48A020 User manual

Carrier

Carrier WeatherMaker 48A020 User manual

Carrier NSA-A/SCTE2-50 Owner's manual

Carrier

Carrier NSA-A/SCTE2-50 Owner's manual

Carrier 338106-754-CBP User manual

Carrier

Carrier 338106-754-CBP User manual

Carrier 30GTN User manual

Carrier

Carrier 30GTN User manual

Carrier 33CSHUMID-01 User manual

Carrier

Carrier 33CSHUMID-01 User manual

Carrier 09LF Series User manual

Carrier

Carrier 09LF Series User manual

Carrier Omnizone 50XCR06-24 Dimensions and installation guide

Carrier

Carrier Omnizone 50XCR06-24 Dimensions and installation guide

Carrier 50TJ016 User manual

Carrier

Carrier 50TJ016 User manual

Carrier ZS Standard User manual

Carrier

Carrier ZS Standard User manual

Popular Accessories manuals by other brands

Omron ZS-LD50 instruction sheet

Omron

Omron ZS-LD50 instruction sheet

Philips CRP587 brochure

Philips

Philips CRP587 brochure

Baumer OBDM 12P6940/S35A manual

Baumer

Baumer OBDM 12P6940/S35A manual

Osprey Rook Series owner's manual

Osprey

Osprey Rook Series owner's manual

ROSE DISPLAYS ANOQUICK ROUND WITH CABLE AND BALL manual

ROSE DISPLAYS

ROSE DISPLAYS ANOQUICK ROUND WITH CABLE AND BALL manual

Axor Massaud 42233000 Dimensions

Axor

Axor Massaud 42233000 Dimensions

SMC Networks D-MP Series instruction manual

SMC Networks

SMC Networks D-MP Series instruction manual

Omron E2E-Y - datasheet

Omron

Omron E2E-Y - datasheet

SONBEST KM2130B-O3 user manual

SONBEST

SONBEST KM2130B-O3 user manual

Radio Bridge RBS301-WAT-US user guide

Radio Bridge

Radio Bridge RBS301-WAT-US user guide

Oregon Scientific RGR122 user manual

Oregon Scientific

Oregon Scientific RGR122 user manual

Viking SO-24A Technical practice

Viking

Viking SO-24A Technical practice

SunSetter Oasis Replacement instructions

SunSetter

SunSetter Oasis Replacement instructions

Pepperl+Fuchs UC4000-L2-E4-V15 manual

Pepperl+Fuchs

Pepperl+Fuchs UC4000-L2-E4-V15 manual

X10 SC546A Installation and operating instructions

X10

X10 SC546A Installation and operating instructions

Taco D’MAND Installation and wiring instructions

Taco

Taco D’MAND Installation and wiring instructions

Sanyo MCO-5M instruction manual

Sanyo

Sanyo MCO-5M instruction manual

Goobay 53933 user manual

Goobay

Goobay 53933 user manual

manuals.online logo
manuals.online logoBrands
  • About & Mission
  • Contact us
  • Privacy Policy
  • Terms and Conditions

Copyright 2025 Manuals.Online. All Rights Reserved.