manuals.online logo
Brands
  1. Home
  2. •
  3. Brands
  4. •
  5. Casio
  6. •
  7. Cash Register
  8. •
  9. Casio QT-6100 User manual

Casio QT-6100 User manual

QT6100
OPERATION
MANUAL
2
A. Making Sales
B. Tables
C. Errors and Refunds
D. Reports
E. Keys
F. Troubleshooting + Misc
3
A. Making Sales
Ensure register is in REG mode. Sign on by pressing your Cashier button
MAKING A SALE:
1. To sell a food item, select the item directly on the first menu. To sell an item that is
on a different menu choose that menu on the screen and then choose the items you
wish to sell. Repeat as required.
2. Press SUBTOTAL for the total amount due
3. Enter amount of cash given by customer and press the CASH key. If the customer
is paying by cheque, credit card or eftpos then instead of pressing CASH press
CHEQUE, CREDIT CARD or EFTPOS
4. The amount of change to be given to the customer will display on the screen.
5. Sign in again and press REPRINT RECEIPT if the customer requires a receipt
MAKING MULTIPLE SALES OF SAME PRODUCT TO ONE CUSTOMER:
1. Enter the number of items you are selling (eg 4)
2. Press the X key
3. Press the key that corresponds to the items purchased.
4. Add more items or complete the sale as above.
MULTIPLE TENDER:
1. When your customer pays by more then one method (eg part cash, part eftpos),
first enter the amount to be paid by the first method
2. Press the key corresponding to the method of payment (eg CASH)
3. Enter the amount to be paid by the second method
4. Press the key corresponding to the second method of payment (eg EFTPOS)
EFTPOS CASH OUT:
1. Enter all items to be sold and press SUBTOTAL.
2. Add the amount the customer wants in Cash to the subtotal, type this in and press
EFTPOS
3. IE: If they spent $25 and want $20 cash, type in $45.00 and press EFTPOS
4. This will show the Cash Out as change on the screen
4
B. Tables
Charging Items to new or existing Tables
1. ENTER Table Number (1 to 9999)
2. PRESS OPEN TABLE button
OR
3. PRESS OPEN TABLE (This will show all current open tables)
4. ENTER Items to be charged
5. PRESS CLOSE TABLE
Printing Out Table Accounts
1. ENTER Table Number (1 to 9999)
2. PRESS REPRINT RECEIPT button
Cashing Table Off in full
1. ENTER Table Number (1 to 9999)
2. PRESS OPEN TABLE button
OR
3. PRESS OPEN TABLE (This will show all current open tables)
4. ENTER Amount being paid
5. PRESS Tender type –Cash, Eftpos, Credit Card etc.
6. PRESS RECEIPT button
Part-paying a table
Before doing this we suggest you print out the table account using the instructions above
so the customer can select the items they are paying.
1. ENTER Table Number (1 to 9999)
2. PRESS SEP TAB button
OR
3. PRESS SEP TAB (This will show all current open tables)
3. PRESS PAGE UP button
4. PRESS Touch each item to be paid on the screen
Once all items to be paid have been selected
5. PRESS OK to get a total of the items to be paid.
6. ENTER Amount being paid
7. PRESS Tender type –Cash, Eftpos, Credit Card etc.
8. PRESS RECEIPT button
When paying for the last items on a table use “Cashing Table Off” procedures otherwise
the table will remain open with a zero balance.
5
Transfer Table
This has two uses:
A. To transfer an existing check from one table to an open table or to a new table number:
1. ENTER Table Number (1 to 9999)
2. PRESS OPEN TABLE button
OR
4. PRESS OPEN TABLE (This will show all current open tables)
5. ENTER New Table Number to transfer details to
6. PRESS TABLE TRANS button
B. To transfer the items you have already rung on to a new table number.
1. ENTER Table Number (1 to 9999)
2. ENTER Table Number you wish to transfer items to
3. PRESS TABLE TRANSFER button
Reprinting part receipts
It is possible to go back and reprint receipts
1. PRESS FUNCT
2. PRESS E-JOURNAL
3. PRESS Page Up and Page Down to scroll through receipts
4. PRESS REPRINT RECIEPT
6
C. ERRORS AND REFUNDS
Making Corrections to a Transaction:
1. To clear the last item (before the subtotal key is entered), press the ITEM VOID
key.
2. To clear earlier items, use the arrow keys to highlight the item you wish to delete,
then press the ITEM VOID key.
Cancelling a Transaction:
1. Press FUNCT, then CANCEL and then YES to cancel entire transaction
To Clear the Screen:
1. To clear the screen at any time press the Clear key –note that this will not remove
any transactions that have been entered.
Refunds:
1. Press FUNCT
2. Press the REFUND key then the key for the corresponding item that is being
refunded
3. Press SUBTOTAL to give the total amount due/owned.
4. Press the Payment Type that you are refunding to the customer
7
D. Reports
A. End of Day Cash up
1. Press FUNCT to bring up the Function menu
2. Press REPORTS to bring up the report screen
3. Press DAILY Z to print your end of day totals
B. End of Week Totals
1. Press FUNCT to bring up the Function menu
2. Press REPORTS to bring up the report screen
3. Press WEEKLY Z to print your end of week totals
C. Open Check Report
1. Press FUNCT to bring up the Function menu
2. Press REPORTS to bring up the report screen
3. Press OPEN CHECK to print your current open checks
D. E Journal Clear –Do daily / weekly
1. Press MODE to bring up the Mode menu
2. Press X/Z to bring up the reports options
3. Press DAILY Z
4. Press 4. E-JOURNAL
5. Select 1. E-JOURNAL
6. Select RESET only
7. Press YES
8
D. Journal Reports
Print J-MEMO without resetting
1. PRESS MODE
2. PRESS X/Z button
3. PRESS Yes (option 1. Daily X)
4. ARROW Down to option 4. J-MEMO
5. PRESS Yes
6. SELECT 1. All
7. WAIT Until report finishes printing
8. PRESS ESC ESC
9. PRESS MODE
10. PRESS REG to return to register operation
Print J-MEMO and reset
1. PRESS MODE
2. PRESS X/Z button
3. ARROW Down to option 4. Daily Z
4. PRESS Yes
5. ARROW Down to option 4. E-JOURNAL
6. PRESS Yes
7. PRESS Yes to OPTION (1) ALL TO PRINT
8. WAIT Until report finishes printing
9. PRESS ESC ESC
10. PRESS MODE
11. PRESS REG to return to register operation
Reset J-MEMO without printing
1. PRESS X/Z button
2. ARROW Down to option 4. Daily Z
3. PRESS Yes
4. ARROW Down to option 4. E-JOURNAL
5. PRESS Yes
6. SELECT Option 2. RESET ONLY
7. WAIT Until machine finishes
8. PRESS ESC ESC
9. PRESS MODE
10. PRESS REG mode to return to register operation
9
E. Programming Keys
A. PLU Description Changes/Additions
This is the best way to make multiple changes or review your items as you
can change/add prices, descriptions and departments here
1. PRESS MODE Button
2 PRESS PGM1 button (PGM-1 menu on display)
3. PRESS Yes on 1. Unit Price/Qty
4. PRESS Arrow down to 11. PLU-DEPT-PGM
5. PRESS Yes
6. PRESS Arrow Down or Page Down to reach desired
PLU item (remember this number)
7. PRESS Yes to select PLU item
8. PRESS Arrow Down to “Descriptor”
9. PRESS Yes to select
10 TYPE in desired description
11. PRESS Yes to confirm
optional -Price
12. PRESS Arrow to “Price”
13. ENTER Price (no decimal point required)
optional –Department Link
14. PRESS Arrow to “Dept Link”
15. PRESS Yes to select Department Link
16. PRESS Arrow Down to select Department Link for PLU item
If the department is set to kitchen print this item will no print automatically
optional –Linking Item to a Pop-up or Kitchen Instruction
17. PRESS Arrow Down to “List Link #1”
18. PRESS Yes
19. PRESS Arrow Down to select the Pop-up you wish to use
20. PRESS Yes
21. PRESS ESC ESC ESC to return to PGM 3 screen
22. PRESS MODE then REG to return to register operation
10
B. Adding PLU’s to the keyboard
To add this item to the keyboard: (where you know the PLU number x)
1. PRESS Mode and then PGM4
2. PRESS Yes on 1. Keyboard
3. PRESS Yes on 1. Key Assign
4. ENTER x063 where x is the PLU number (ie. PLU 101 would be
101063)
5. PRESS The space where you want to add this key
6. PRESS ESC back to PGM4
7. PRESS the other menu buttons to check this button has not appeared
on other menus
8. IF it has choose 1. Keyboard and 4. Key Delete
9. PRESS the key to be deleted
10. REPEAT for all extra un-required keys
11. PRESS Mode and REG to return to normal operation
C. Changing a Clerk Name
1. PRESS PGM button
2. ENTER 3
3. PRESS PGM button (PGM-3 menu on display)
4. PRESS Arrow Down to No. 2 option –Clerk
5. PRESS Yes
6. PRESS Arrow Down to Clerk number to edit
7. PRESS Yes
8. PRESS Yes to confirm Clerk Descriptor
9. TYPE Desired clerk name
10. ENTER Sign On number (if required, or leave as
default)
11. PRESS ESC ESC ESC
12. PRESS REG mode to return to register operation
11
D. Adding Item to an existing Pulldown Group
Please Note: When we originally setup your terminal we programmed it in a logical fashion to assist
with your programming. The first 50 items correspond to menu 1 of your terminal. The second 50
correspond to the 2nd menu etc. You will find the items for a pulldown group further down your
PLU list from 750, with a heading that is has a leading asterix. For example, if you have a pulldown
called Tap Other, further down your PLU list is 750 *Tap Other. Listed below this are all the items
that will pop-up under the Tap Other key. We strongly recommend that you continue to follow this
logic, as it will make reprogramming much simpler.
When adding a new item to an existing pulldown group find the rest of the items in the pulldown
group and add the new item to the first free PLU under these items. Remember this PLU’s number
1. PRESS PGM button
2. ENTER 3
3. PRESS PGM button (PGM-3 menu on display)
4. PRESS Arrow Down to No. 3 option –Key Feature
5. PRESS Yes (3. Key Feature)
6. PRESS Yes (1. PLU)
7. PRESS Type in PLU number you recorded above
8. PRESS Yes
9. PRESS Arrow Down to “Descriptor”
10. PRESS Yes to select
13 TYPE Desired description
14. PRESS Enter to confirm
15. ENTER Price (no decimal point required)
16. PRESS Arrow Down to “Group Link”
17. PRESS Yes to select
18. PRESS Arrow Down to select Group Link for PLU
item
19. PRESS Yes to select
20. PRESS Yes to select Department Link
21. PRESS Arrow Down to select Department Link for
PLU item
optional –Enabling/Disabling Kitchen Printing
22. PRESS Arrow Down to “Order Print # 1”
23. PRESS Yes to turn on printing to kitchen
or No to turn off printing to kitchen
optional –Linking Item to a Cooking or Preparation Instruction
22. PRESS Arrow Down to “List Link # 1”
23. PRESS Yes
24. PRESS Arrow Down to select Cooking Instruction Link
25. PRESS Yes
26. REPEAT Steps 21-24 as required (List Link # 2, 3, 4)
12
26. WRITE Down PLU number added to the Pulldown List
27. PRESS ESC ESC
28. PRESS Yes (1.Machine Feature)
29. PRESS Yes (1. Pulldown Group)
30. PRESS Arrow Down to desired Pulldown Group
31. PRESS Yes
32. PRESS Arrow Down to “YES”
33. PRESS Yes
34. PRESS Arrow Down to next available blank number
35. PRESS YES
36. PRESS YES (1.PLU)
37. PRESS Arrow Down to desired PLU to add to list
(number written down in step 26)
38. PRESS YES
39. PRESS ESC ESC ESC
40. PRESS Reg Mode to return to register operation
E. Creating Pulldown Groups (pop-up lists)
Please Note: When we originally setup your terminal we programmed it in a logical fashion to assist
with your programming. The first 50 items correspond to menu 1 of your terminal. The second 50
correspond to the 2nd menu etc. You will find the items for a pulldown group further down your
PLU list from 750, with a heading that is has a leading asterix. For example, if you have a pulldown
called Tap Other, further down your PLU list is 750 *Tap Other. Listed below this are all the items
that will pop-up under the Tap Other key. We strongly recommend that you continue to follow this
logic, as it will make reprogramming much simpler.
Step 1: Assigning the Pulldown Group to the Keyboard
1) PRESS PGM Mode
2) PRESS 6
3) PRESS PGM Mode
4) PRESS Yes
5) ARROW Down to Option 6. Key Feature
6) PRESS Yes
7) ARROW Down to Option 5. Function Key Feature
8) PRESS Yes (Report will print)
9) WRITE Down next available blank number on report
10) PRESS ESC ESC
13
11) PRESS 4
12) PRESS PGM Mode
13) PRESS Yes (1. Keyboard)
14) PRESS Yes (1. Key Assign)
15) ENTER Number written down in step 10
16) ENTER 1 3 6 (e.g. 91136 for steps 16 and 17 where 91
is number written down in step 10 )
17) PRESS Button on screen to be assigned
18) PRESS ESC ESC
Step 2: Creating the PLU items to pop up under the Pulldown
Group (Remember to set a *heading as your first PLU)
When adding a new item to an existing pulldown group find the rest of the items in the pulldown
group and add the new item to the first free PLU under these items. Remember this PLU’s number
18. ENTER 3
19. PRESS PGM button (PGM-3 menu on display)
20. PRESS Arrow Down to No. 3 option –Key Feature
21. PRESS Yes (3. Key Feature)
22. PRESS Yes (1. PLU)
23. PRESS Type in PLU number you recorded above
24. PRESS Yes
25. PRESS Arrow Down to “Descriptor”
26. PRESS Yes to select
27 TYPE Desired description
28. PRESS Enter to confirm
29. ENTER Price (no decimal point required)
Check/Change Department and Group Link
Please note that these may already be set, so you will need to confirm they are
correct. If they are not follow the procedure below, otherwise go to step 37.
30. PRESS Arrow Down to “Group Link”
31. PRESS Yes to select
32. PRESS Arrow Down to select Group Link for PLU
item
33. PRESS Yes to select
34. PRESS Yes to select Department Link
35. PRESS Arrow Down to select Department Link for
PLU item
optional –Enabling/Disabling Kitchen Printing
36. PRESS Arrow Down to “Order Print # 1”
37. PRESS Yes to turn on printing to kitchen
14
or No to turn off printing to kitchen
optional –Linking Item to a Cooking or Preparation Instruction
38. PRESS Arrow Down to “List Link # 1”
39. PRESS Yes
40. PRESS Arrow Down to select Cooking Instruction Link
41. PRESS Yes
42. REPEAT Steps 39-42 as required (List Link # 2, 3, 4)
43. PRESS ESC
44. PRESS Arrow Down to access next available blank
PLU number
45. REPEAT Steps 23-44 as required to add additional PLU’s
to this new pulldown
46. WRITE Down the PLU numbers used for the Pulldown
List (if not already recorded)
47. PRESS ESC ESC ESC
Step 3: Creating the Pulldown List
48. ARROW to 1.Machine Feature and press Yes
49. PRESS Yes (1. Pulldown Group)
50. PRESS Arrow Down to next available blank number
51. PRESS Yes
52. PRESS Yes to enter Pulldown Group description
53. TYPE Description using alphabetical keysheet
54. PRESS Yes
55. ARROW Down to “YES” (bottom right of screen)
56. PRESS Yes
57. PRESS Yes
58. PRESS Yes (option 1. PLU)
59. ARROW Enter first PLU Number recorded in step 47
60. PRESS Yes
61. ARROW Down to next List number
62. REPEAT Steps 58-62 as required
63. PRESS ESC
64. PRESS Yes to map Pulldown Group to the keyboard
65. PRESS Designated button on keyboard for the
Pulldown Group (button assigned in step 16)
66. PRESS ESC ESC ESC
67. PRESS REG mode to return to register operation
15
At any time you can print an up to date PLU list as below:
1) PRESS PGM Mode
2) PRESS 6
3) PRESS PGM Mode
4) PRESS Yes
5) PRESS Yes
6) PRESS Yes
7) ENTER 1
8) PRESS Yes
9) ENTER 1400
10) PRESS Yes
F. Changing the text on a Key
1. SIGN IN as a Manager
2. PRESS Mode
3. PRESS PGM4
4. PRESS Yes to 1. Keyboard
5. CHOOSE the menu screen you wish to program too ie. Dinner
6. PRESS Key attribute
7. PRESS Key Text
8. TYPE in the text
9. PRESS Enter
10. PRESS the key to be reprogrammed
11. PRESS Esc
12. REPEAT as required
13. PRESS Esc and Mode REG to finish
G. Changing the time
1. SIGN IN as manager
2. PRESS Mode
3. PRESS PGM 1
4. TYPE in the time in 24 hour format
5. PRESS the X button
6. PRESS Mode
7. PRESS REG
The time is now set and you are back in normal operation mode
16
H. Making changes to existing Pulldown groups
1. SIGN IN as manager
2. PRESS Mode
3. PRESS PGM3
4. PRESS Yes to 1. Machine Features
5. PRESS Yes to 1. Pulldown Group
6. CHOOSE the pulldown group you wish to change
7. PRESS Yes
8. ARROW DOWN to Yes and press Yes
To change the Shape of a key
9. CHOOSE 3. Key Shape
10. PRESS the shape you wish to use
11. PRESS ESC to finish
To change the Colour of a key
12. CHOOSE 4. Key Colour
13. PRESS the key colour you wish to use
14. PRESS all the keys you wish to change
15. PRESS Esc/Skip to choose another colour
16. PRESS ESC to finish
To change the Text of a Key
17. CHOOSE 5. Key Text
18. PRESS YES
19. TYPE in the new description for the key
20. PRESS Enter
21. PRESS the key you wish to change
22. PRESS Esc/Skip to finish
17
F. Troubleshooting
Before calling for service please check the following points.
A. No power
Check the light on the lower right hand front of the screen if it is off press the button above.
The main power switch is located left hand side of the terminal behind a small flap check that it is
on.
Power adaptors, check that all adaptors and plugged in both at the machine, adaptor and socket,
remember that plugs can work lose but still look like they are plugged in.
B. System network down
Machines will have exclamation mark in left hand corner of transaction screen and machine will
pop up the following or similar message
C. “ E107 / E108 Master and backup Master down table tracking not available”
This is because the machines cannot see each other which will mean you may have trouble opening
tabs, doing Z reports and ordering printing in the kitchen.
There are a several main causes of this.
One of the terminals is switched off
If you have more than two terminals check the power on the hub, this is where all the
machines are connected together.
Check the connection of the network cables into the machine and into the wall socket if
applicable.
Once you think have found the problem do the following
Go around all terminals and clear any error messages on the screens, you can normally do this by
pressing esc key.
Go to one of the terminals and do the following
1. Sign In
2. Press the Mode key
3. Press Manager Mode
4. Press Page down and select no 10 System Reconfiguration and Press Yes
5. Press Yes twice
6. Screen will flash up “System Reconfiguration” and if successful “System Reconfiguration
end” will be displayed and the exclamation mark will disappear.
7. Press Esc
8. Press Mode then press Reg
If problem still persists please call 03 366-1090 for service
18
D. Kitchen Printing
If you system has a kitchen printer then it will also have a backup printer which will normally be
your main receipt printer.
In the event of your kitchen printer losing power, running out of paper or malfunctioning the
dockets will print to your receipt printer, you will also be notified via a error message on the
terminal.
Once your kitchen printer is back online orders will print as normal
E. Busy Tables
After a power outage or system down some tabs may come up with
“E052 Check/Table is busy”
This can be remedied by
1. Sign In
2. Press the Mode key
3. Press Manager Mode
4. Arrow down to no 4 Busy Reset and press Yes
5. Enter check no to reset and press Yes twice
6. Press Esc
7. Press Mode then press Reg
Then try opening the Tab again.
A. Changing Time + Date
To change time
Press Mode
Select PGM 1
Enter time in format HHMM
Press X
To change date
Press Mode
Select PGM 1
Enter date in format YYMMDD
Press X
B. Clearing the Electronic Journal
-Press ‘Mode’
-Select ‘X/Z’ from the menu that pops up on the right hand side
-Press ‘4’ on the keypad or tap ‘Daily Z’
-Press ‘4’ again or tap ‘E-Journal’
-Press ‘1’ or tap ‘E-Journal’ again
-Finally press ‘2’ or tap ‘Reset only’

Other manuals for QT-6100

4

Other Casio Cash Register manuals

Casio PCR-T500 User manual

Casio

Casio PCR-T500 User manual

Casio CE-285 Assembly instructions

Casio

Casio CE-285 Assembly instructions

Casio SE-G1 User manual

Casio

Casio SE-G1 User manual

Casio TE-4000F Series User manual

Casio

Casio TE-4000F Series User manual

Casio PCRT275 - Cash Register w/ 15 Depts User manual

Casio

Casio PCRT275 - Cash Register w/ 15 Depts User manual

Casio 130CR User manual

Casio

Casio 130CR User manual

Casio 120ER Assembly instructions

Casio

Casio 120ER Assembly instructions

Casio PCR 272 - Cabinet Design Cash Register User manual

Casio

Casio PCR 272 - Cabinet Design Cash Register User manual

Casio PCR-204 Assembly instructions

Casio

Casio PCR-204 Assembly instructions

Casio SE-S3000 User manual

Casio

Casio SE-S3000 User manual

Casio SE-C300 User manual

Casio

Casio SE-C300 User manual

Casio PCR-T540 User manual

Casio

Casio PCR-T540 User manual

Casio TE-100 User manual

Casio

Casio TE-100 User manual

Casio SE-G1 User manual

Casio

Casio SE-G1 User manual

Casio PCR-450 Assembly instructions

Casio

Casio PCR-450 Assembly instructions

Casio PCR T265 - Electronic Cash Register User manual
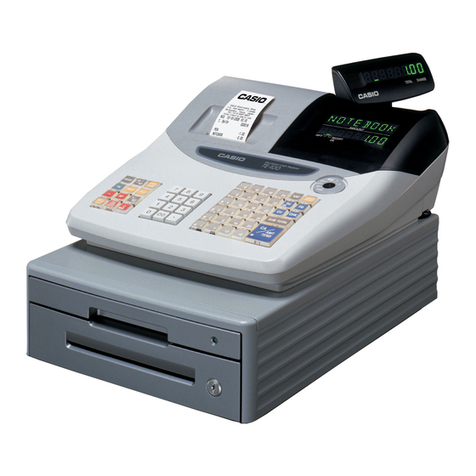
Casio

Casio PCR T265 - Electronic Cash Register User manual

Casio MP-2000 User manual

Casio

Casio MP-2000 User manual

Casio SE-S100 User manual

Casio

Casio SE-S100 User manual

Casio EX-843 User manual

Casio

Casio EX-843 User manual
Casio TE-8000F Series User manual

Casio

Casio TE-8000F Series User manual

Casio SE-S300 User manual

Casio

Casio SE-S300 User manual

Casio 200cR User manual

Casio

Casio 200cR User manual

Casio CE-2400 Assembly instructions

Casio

Casio CE-2400 Assembly instructions

Casio PCR-208 Assembly instructions

Casio

Casio PCR-208 Assembly instructions

Popular Cash Register manuals by other brands
Sam4s SPS-2000 Operator's manual

Sam4s

Sam4s SPS-2000 Operator's manual

POSIFLEX CR-3100 user guide

POSIFLEX

POSIFLEX CR-3100 user guide

Royal 482NT operating manual

Royal

Royal 482NT operating manual

ELCOM Euro-1000M user manual

ELCOM

ELCOM Euro-1000M user manual

Sharp XE-A303 instruction manual

Sharp

Sharp XE-A303 instruction manual

CRS Sam4s SPS-300 Series Operator's and programming manual

CRS

CRS Sam4s SPS-300 Series Operator's and programming manual

Olivetti ECR 6900 user guide

Olivetti

Olivetti ECR 6900 user guide

NCR 7448 Workstation Site preparation guide

NCR

NCR 7448 Workstation Site preparation guide

Toshiba MA-600 Programming manual

Toshiba

Toshiba MA-600 Programming manual

IBM SurePOS 700 Series Operating system installation guide

IBM

IBM SurePOS 700 Series Operating system installation guide

Royal 580 operating manual

Royal

Royal 580 operating manual

Sharp ER-A347 instruction manual

Sharp

Sharp ER-A347 instruction manual

Sam4s ER-180T Operation and programming manual

Sam4s

Sam4s ER-180T Operation and programming manual

TEC MA-1535-2 series owner's manual

TEC

TEC MA-1535-2 series owner's manual

Sam4s ER-920 Operator's and programming manual

Sam4s

Sam4s ER-920 Operator's and programming manual

Sharp ER-A490 instruction manual

Sharp

Sharp ER-A490 instruction manual

Japan Cach Machine J3500E owner's manual

Japan Cach Machine

Japan Cach Machine J3500E owner's manual

Sam4s SER-7000 manual

Sam4s

Sam4s SER-7000 manual

manuals.online logo
manuals.online logoBrands
  • About & Mission
  • Contact us
  • Privacy Policy
  • Terms and Conditions

Copyright 2025 Manuals.Online. All Rights Reserved.