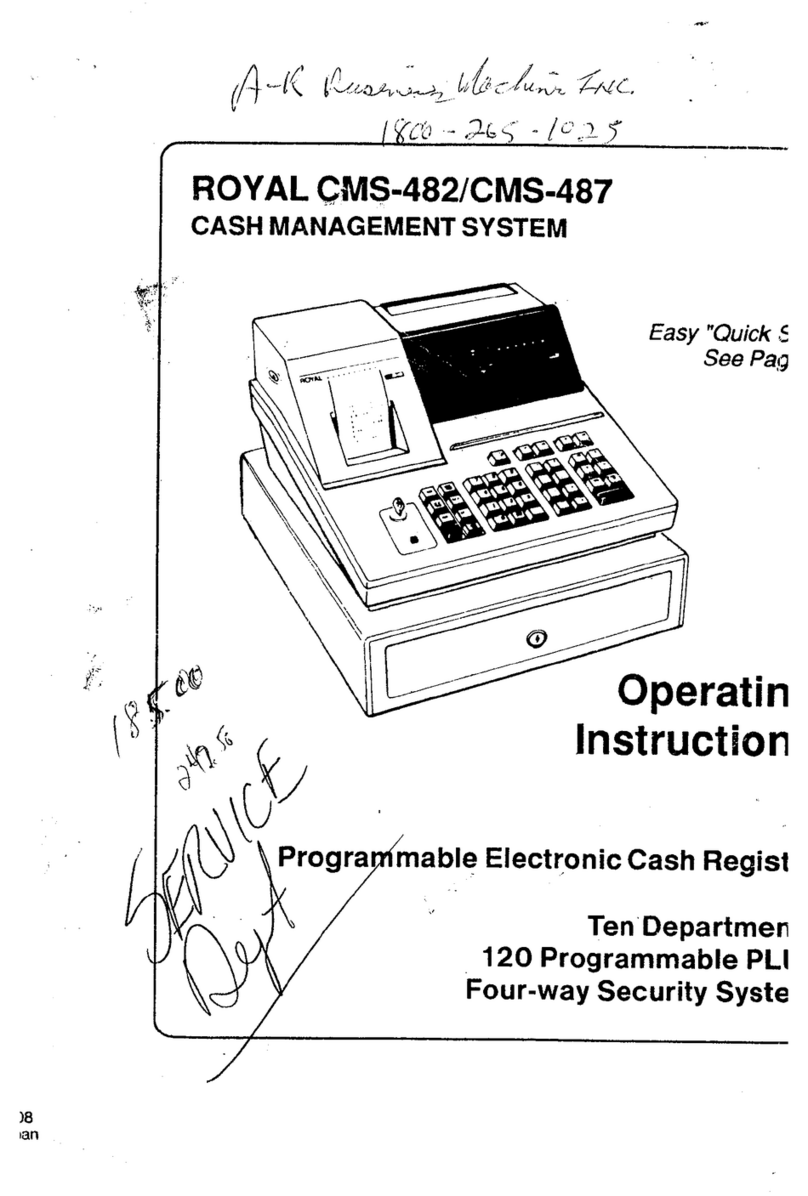
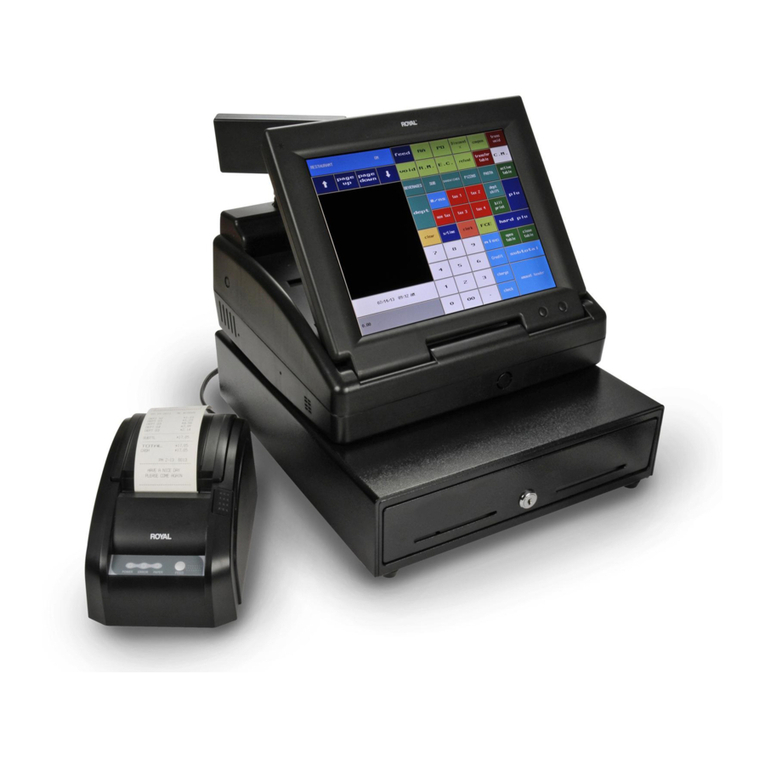
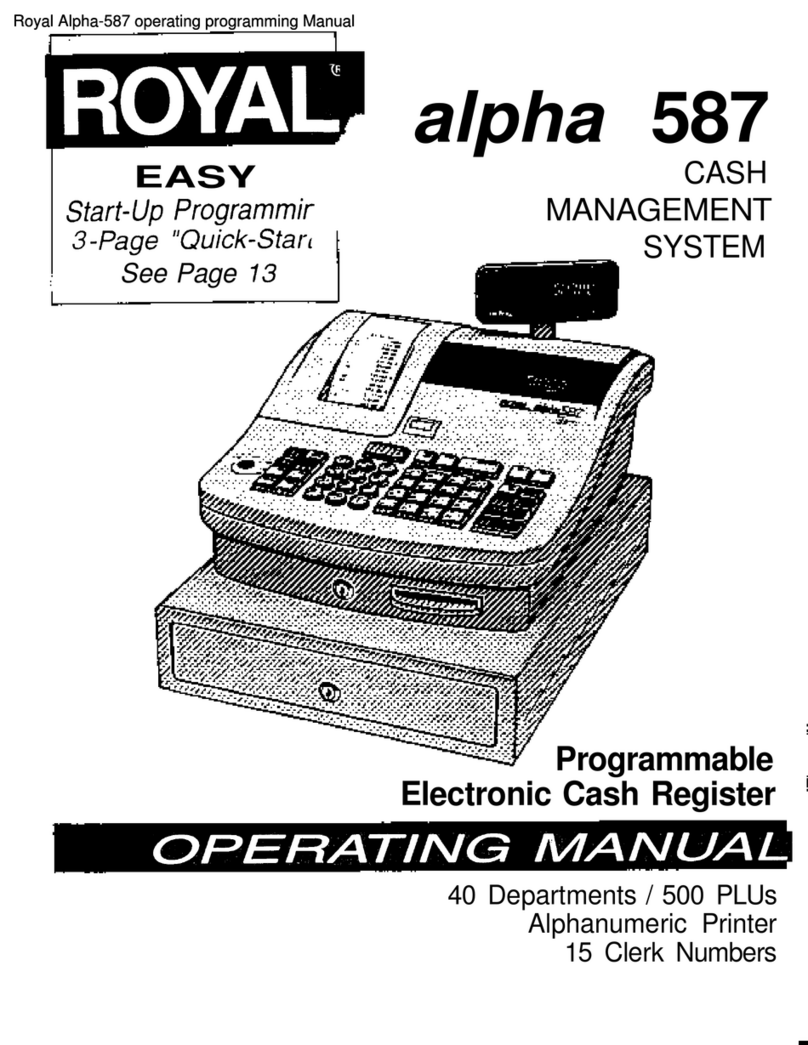
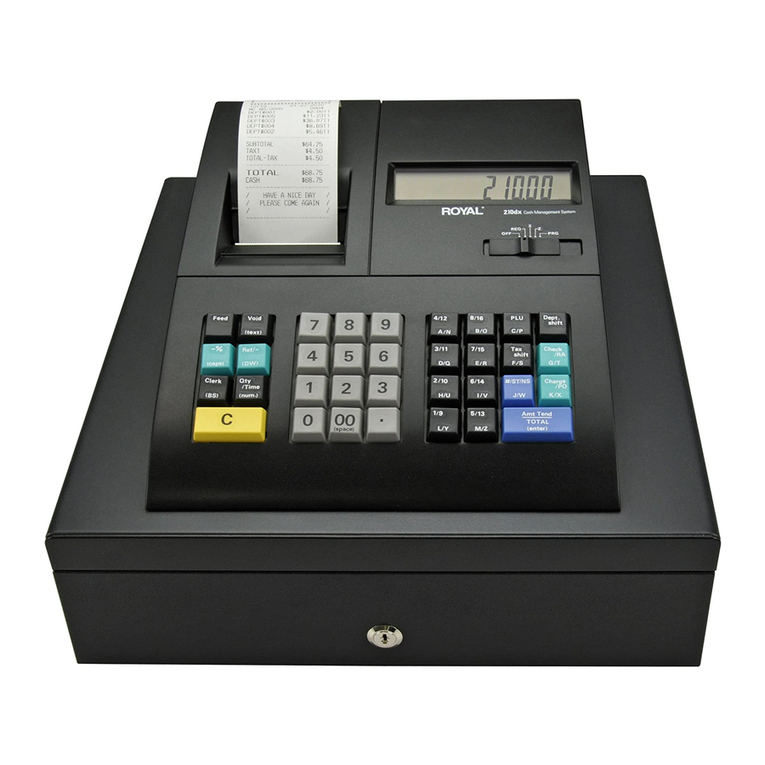
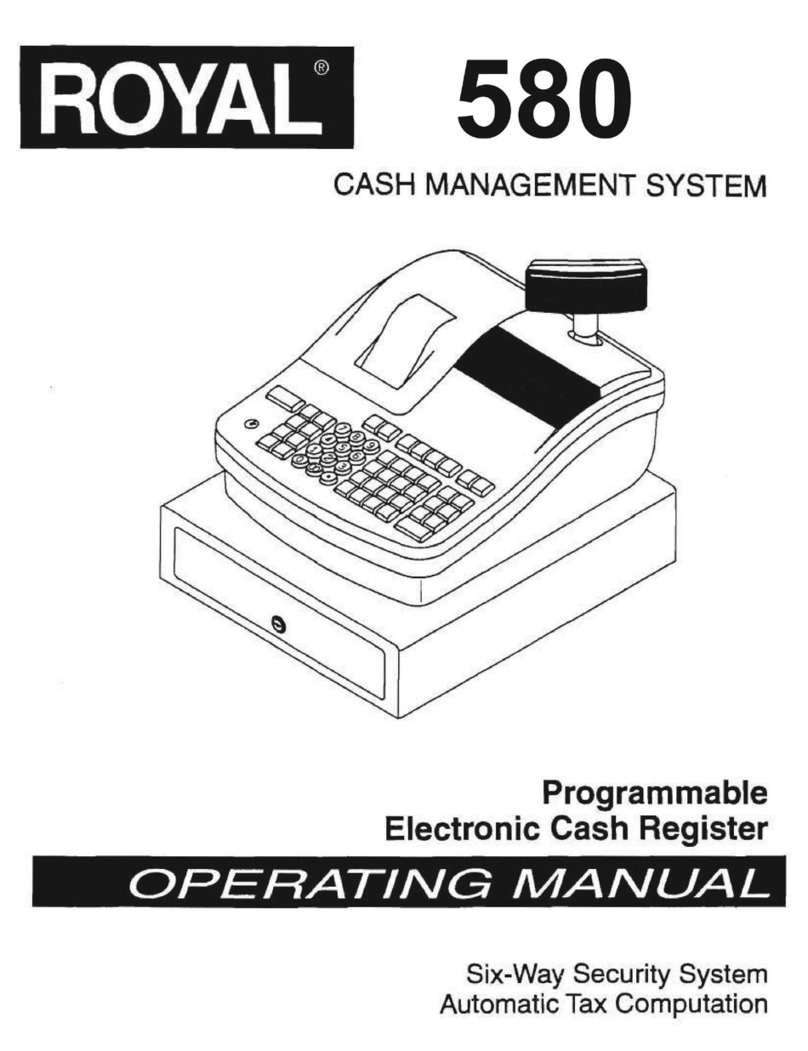
Royal 482NT User manual

482nt
See Page
13
CASH
EASY
Start-Up
Programming
MANAGEMENT
1-Page "Quick-Start"
SYSTEM
Programmable
Electronic Cash Register
. . .
OPERATING
MANUAL
4.0
Departments / 500 PLUs
Six-Way Security System
. AutomaticTax Computation
15 Clerk Numbers

TABLE OF CONTENTS
UNPACKING
YOUR
CASH
REGISJ"ER and
SET
UP
............................................................
1
Preparation
................•••..••.
'
...••...•....•.•
,
.•.•.........•.•.................•............
1 '
,=---'
-~ard·/l;cceSSOfies"';--":-:-'-';'-'-·.':"'.-7'i
'.-
••
~
..................................................
~
......••....
-;--1---'"---
&way
Security System
••.•••••••.•••••.•••••.•.••.••••••••.•••.....•.•......••......•.••.••...•••••.
3'
Operator Display . • . . . . • . . • • . . . • . . . • • • • • . . • • . • • . • • • • • . • • . • • • • . . . . • . . . • . . . . • . • . • • • • • • • • • • . . • . . • . . • •
..
B
To Use Clerk
Numbers
.......•........•.............•.................•........•...................
'9
TAX RATES
••••..••..••.•••••..•.••••••••.•••••••••••••••••••••••••••••••••••••••••••••••••••••
,.
23·25
DEPARTMENT
LAYOUT
CONVERSiON
•••••••••••••••••••••••••
_
••.••••••.•••••••••••••••••••••••••••••
27.28
Initial Set
Up
•.•..••••...•••••••••••••••••••••••••••.•....••.••••••••••••
: • • • • • • . • • • • • . • • . • • • • . • •
•.
1
Maintenance
of
your Register
.•.••••••.•..
~
• • • • . • . • . . . • . . • • . . . • . . . . . . . . . • . . .
..
. . . . . . . . . . . • . . . . . . . . . .
..
1
GETTING
TO
KNOW
YOUR
CASH
REGISTER
••••••••••••••••••••••••••••••••••••••••••••••••••••••••••••
,
••
2
Using the
Manual
.••.••••••••••••••••••••••••••••••.••••••.•...•••••••....•...••..•••.••••••.••••.•
2
How to
Get
Started
.......•..••••••.••••••••••.••.•...••.•••.......•.••....................•........
2
SECURITY
SYSTEM
and
ERROR
CONOmONS
••••••••••••••••••••••••••••••••••••••••••••••••••••••••••••••
3
Error
Condition
Explanation • • • . . . • • . • • . • . . • • . • • • • . . . • • . • . . . • • . • . • . . • . • . . . . • . . • . • . • . . • . • . . • . . . • • • • • • • • • 3
Register Tone
••••••••••
;
••••••••••••••••••.••••••••••••••••••••••••••••••••••••••••••••.••••••••••
3
Entry Error
Alarm
•••••••••••••••••••••••••••••••••••••••••••••••••••••.•..•••••••••••••••••••••••••
3
Maximum
Entry Lpck-Out
•••••.••••••.••••••••.••••••••••••••••..•••••••••..•••••••••.••••••••••••••••
3
Clear
Key·
..•..••••.••••.....••.•••..•••.
,
••.•••.•.•.......
'"
...•...•.•....••••..••••....••••••••
3
PE-Printer Error
...••..•••.•.....••.••..•..••...•
'
...••••...........••.••.....•.
-:
••••••••
_. • • . • • • • •
•.
3
System
Clear Information
.........••..•.•••.....•....••••.•.......••...••••...............•••.•••.•••
3
CONTROL
LOCK
SYSTEM
•••••••••••••••••••••••••••••••••••••••••••••••••••••••••••••••••••••••••••••
.'
4
Control Keys
.....................................................
-
...•......•••.•.•.......•....•.•..
4
Removable Cash Drawer
.••••
'"
•••••••••••••...••••••...•.••.••..•••••.•.•••.•.
,
•.
,
•..
.",.
.••••••.••••••
4
ADDITIONAL
SAFETY DEPOSIT DRAWER
••••••••••••••••••••••••••••••••••••••••••••••••••••••••••••••••••
4
KEYBOARD
FUNCTIONS
.,...........................................................................
5-7
DISPLAY
WINDOWS
....................................................................................
8
Customer
Display
...••.....•.••.•.•••..•.••..••••••..••..•••....•.••.•••••.•.•.•••••...•..••.•..•...
8
BATTERY
SYSTEM
••••••••••••••••••••••••••••••••••••••••••••••••••••••••••••••••••••••••••••••••••.•
9
Installing
or
Replacing the Back·Up Batteries
..•.....
,
••••....•...
, ,
..••..
,
.•
,
•.
,
...•..............••......
9
Extending Usage
of
the Back-Up Batteries
..
"
•.•...•..•...........••.........
,
.........
,
................
9
INSTALLING
THE PAPER ROLL
...•
_
••.••••••.•••••••••••••••••••••••••••••...•••..•..•••.•••.••••••..•.
10
INSTALLING
THE
RIBBON
•••.
_
•••••••••••••••••••••••••••••••.••••.•.
'
•••••.•.•••••••••••
;
•••••.•••.••.
11
RE·INKING
THE
THANK
YOU
STAMP
••••••••••••••••••••••••.••••.••..••••••.
"
•••.••.••••••••••••.•..••
:
12
QUICK
START
........••...•
_
......••.......
'.'
..
_
........•..............
_
..
13-14
AFTER
QUICK
START
••••.•••••
_'"
.'
••••••••••••••••••.••.••.•.•..•.•.•••.....•.••.•••••••...•.••..•••
15
Quick
Start
Program Confirmation Report
.........................................•....
;
.....•..........
15
BEFORE
GOING
TO
REGISTER
MODE
•••••••.•••••••••..•.••••••••.••.•.•••••••••••.••••••••••••••••••••
16
ADVANCED
PROGRAMMING
•..•••••••••••••••••••.•••••••••.•••.•••.•.••.•••...•.••••••••••.••••••.•.•
18
CLERK
NUMBERS
•••••••••••••.••••
_
•••••••••••••••.••••••••..•••••••••••.••.•••.•••.••••••••••••
,
•••
19
To Program Clerk
Numbers
.•.......•........•.................•......•......•....•.........•....•...
19
PASSIt/ORDS
•••..••••••.••••.•••••••••••.•••.••..••••••.•.••.....•...••.•.••.••••••••••••••••••••••
20
X
and
PRG/Z
Manager
Passwords
......................................................•..............
20
To Program Manager Passwords
.............................•.....
:
•........•...•...........•..•.
20
To
Use
Manager
Passwords.
. . . . . • . . • . . . . . . . . .
..
.
.•.................•....................•....•.
20
DATE
••.......•...•..•.••
:
••••••.•••••••••••••.••••.••••••••••••.•.••••••••••••••••••••••••••••••••
21
TIME
CLOCK
..••••..•.•••
_
••.•••••••••••.•••••••••..••••••••..••.•.•
,
••••••••••.•••••••••••••••••
'
••
21
MACHINE'NUMBER
.•.•...•••••••••••••••••••••••.•••••••.••••••••••.••••••••••••••••••••••••••••••••
21
DECIMAL
POINT
...••••..•.••••••••••••••••••••••••••••••••••••••••••••••••••••••••••••••••••••••••••
22
ROUNDING
•....•.....•••••••
_
•.•••••••••••••••••••••••••••.••••••••••••••••••••••••••••••••••••
:
•••
22
Fixed Tax Rate
.....................••...............•.....
.'
......•....•..•.••..•..•••••.•.•.••••.
23
Tax Table Rate
..............•...•..........•..•.....•.....•...........
~
.•..•......••.•...••..••..
24
VAT Tax Rate
........•.............•...•........••..•..............•............•...........••••.
25
DEPARTMENT
STATUS
.•••••••••••••••••••••••••••••••.•••••••••••••.••••••.••••••••••••••••••••••
29-31
COUPON
DISCOUNT
•
~
• • • • • • • • • • • • • • • • • • • • • • • • • • • • • • • • • • • • • • . . • • • • . • • • . • • • • • • • • • • • • • • • • • • • • • • • • •
••
32-34
MINUS
PERCENTAGE
DISCOUNT
(-'%/RA)
•••••••••••...•••••••••••.•••••..•.•.•.....•.•..•••••.•••••.••••
35
PLUS
PERCENTAGE
(+'%/PO)
.•
_
•••..•••••.•.••.•••••.•...••.••.•..•.•..••..•.•••••••••.•••••••••.••.•••
36
PRICE
LOOK·UP
(PLU)
.••••.••••••••••••••••••••••••••••••••••••••••••••••••••••••.•••••••••••••••••••
37
TRAINING
MODE
••••.•..•••••••••••••••••••••••••••••••••••••••••••••••..•.•••••••••••••••••••••••••
38
GRAND
TOTAL
PRESET
•••••••••••••••••••••••
_
••••.•••••••••••••••••••••••••••••••••••••••••••••••••••
39
TRANSACTION
NUMBER
PRESET
.•••••••••••••••••••••••••••••••••••••••.••••••••••••••••••••••••••••••
40
Z1
and
Z2
COUNTER
PRESET
•••••••••••••••••••••
,
••••••••.•••••••••••••••.•••••••••••••••••••••••••••
41
FLAG
OPTIONS
•••••••••.•••••••
-
••••••••••••••••••.••••••••••••••••••••••.•••••••••••••••••••••••
,
42-43
PROGRAM
CONFIRMATION
REPORT
•••••.••••••••.•••••..••••••.•...•••••••••••••••••••••••••••••••••••
44
PLU
CONFIRMATION
REPORT
•.••••••••••••••••.•.•.•••••••••••••••••.•••••••••••••••••••••••••••••••••
45

:'\0:.
(Continued) TABLE OF CONTENTS
TRANSACTION EXAIt.;PLES FOR OPERATlNG
TIiE
CASH'REGISTER
.........................................
46-62
Sample Receipt
••••
'
.••••...•••..•
'
..•••..•••..••.•.••••
,
.•
: • • • • • • • . • . . • • . • • • • • . . . . . . . • . • . • • • • • . • • .
••
46
Transac:l:ion Symbols . • • • . • • • . • • • • • • . • • • • • • . • . • • • : • • • • • • • • • . • ; • • • • • . • • • • . . . • • • • • • . . • • • . . • • • . . • • • • •
..
46
Example 1:
Cash
.Sale Without Tendering Change
••••••••••••••••••••••.••••••••••.••••••.•••••••.•••
" 47
Example 2: Cash Sale With Tendering Change
•••.•...••••••••••••.••••••••••••••••••.••••••••••••••••..
47
Example 3: Using the Dept
Shift
Key
•.••••••••.•••••••••••••••••••••.••..•••••.••••..•..•••••.•••••
'-..
47
Example
4:
Charge Sale
••••••.•••••••••••.••••••••••...••••.•••••••••..•••••••..••.••••••••••.••.
4B
Example 5: Check Sale
•••••••••••••••••••••••••..•••.••••••••••.•••••••••••••••••.•••...•••••••.
4B
Example 6:
Spfrt
Tendering Sale
•••••••••••••••••••••••.•••••••••••••••••.••••.•••••••.•••••.••••••
4B
Example 7: No-Sale Function
••••.••••••••••••••.•••••••.•.•••••••••••••.••••••••••.•.••••.•
.-. • • •
••
49
Example 8: Registering a Reference
Number
• • • • • • • • • • • • • • • . . • • • • . • • • • • • • • . • . • •
••
• • • • • • . . • • • • • • • • . • •
••
49
Example 9:. Multiplying
by
a Fraction
•••••••••••••••••••
• • • • • • • • • . • • • • • • • • • • • • • • • • • • • • • • • • . • •
•.•
• • • .
..
49
Example 10: Multiplication Sale " • • • • • • • • • • • • • • • • • • • • • • . . • • • • . • . • • • • • • . • • • • • •
..
• • • • • • • . • . . • • • • • • • • •
••
50
Example 11: RegislBring a DepartJnent Unit Price
••...•••••••••••••••••••.••..•••••••••.•••••••••••
,....
50
Example 12:
Mu~plication
of
a OepartJnent Unit Price
••••••••••••••••••••••.•••••
':
• • • • • • . • • • • • • • • • • • • • •
.•
50
Example 13: Exempting
Tax
on
an
IIBm
••••••••••••••••••..••••••..•••••••••••••••••••••••••••••.•.••
Sl
Example 14: Exempting Tax
on
the Entire Sale •
.-
•••••••••.•••..•••••••••••••••••••••••.•••••••.••••••
;.
S~
Example 15: Adding Tax to a Non-Taxable Department
•.••••••••
"
••.••••••••.•••••••••••••..••••.••••.
"
51
Example 16: Received..Qn..Account
l;)aIe
••••••.••••••••••••••.••••••••••••••••••.••••
F
•••••••••••••
,
•••
52
Example 17: Paid-Out Sale
••••..••••••••••••••••••••••.•••••••••••••••••••••••••••.••.••••••..••..
52
Example 18: Retum Sale
•••••.
' • • • • . • • • • • • • • • • • • • • • • • • • . • • • • • • • . • • • • • • • • • • • • • • . • • • • • • • • . • • • • • • . • .
..
52
Example 19: . Coupon Discount Sale
.•
:
•..•
.-
.••••••
','
••••••••••••••••••••••••.•••••••••.••.•.•.•.••••
" 53
Example 20: Minus Percentage Discount Sale
•..••••••••••••••••••.••••••••.•••.•.•..•••••..•.•..••.
,..
54
Example 21: Plus Percentage Sale
••••••.•••.•••.•••..•..••••..••••.••..•
:
••.
','
• . • • . • • . . • . . . . • . . • • .
•.
55
Example 22: Use
of
Error-Correct (VOID) Key
•••••••••.•••.•.•••••••...•.•••...••••••••..•.....••..•••
" 56
Example 23: Voiding a Sale
•.••.•.••••..•••.•••
'
•.••.•.•....•••.
" • • . . . . . • • . • . • • . • . • • • • . • • . . • • • • • • • .
56
Example 24: Voiding a Multiplication Sale
.•..•••...•••.......
..•...•.•....•......•.......•.•.•..••••.
56
Example 25: Voiding a Coupon Sale
.•.••••.•••.••••.••••.•...•••..••••..•.•..••......•.......•.•....
57
Example 26: Voiding a Minus Percentage Discount Sale
.......••...•.•.
.
....••....••••...
;
.....•...•••.
,
57
Example 27: Voiding a Plus Percentage Sale
•....•.•
;
•.•
:
..
;
•.•....
,
.,
••.•....••..•..•.•..•....•....
,.
57
Example 28: Voiding a Department Preset Price
.....••...•..•..•.•..............
,......................
58
Example
.29;
Voiding a Multiplication
of
a Department Preset Price
••...•..
,
................................
, , . . . .
58
Example 30: Voiding a Department Preset with a Minus Percentage
Discount,
. ,
..•....••.•..•......
, . . . . . . . . . . .
59
Example 31: Voiding a Department Preset with a
Coupon
Discount
.••••
,
•.•..••..••..•.......••.•.........
,.
59
Example 32: PLU Sale
•••••••••.....•.•....•••••••..•....•.•.
, • . • . • . . . . • . • . • • . . . • • . . • • . . . . . . . . . .
..
60
Example 33: Voiding a
PW
Sale
•••••.•••.•••..••••..•••.•••..•••..•.•..••.•••.••••..••••.••.•..•.
. .
60
.Exampie 34: Voiding a
PW
Multiplication Sale
.•••••.•.•••.....•••..•••.•.••.•••••.•...•••...•.•••...•.
60
Example 35: Voiding a PLU Sale with a
Coupon
Discount
•..••••.•••.••••..•••.•••.•••...•....•.....•.....
61
Example 36: Voiding a PLU Sale with a Minus·Pen:entage Discount
...........................................
61
Example 37: Voiding a PLU Sale with a Plus Percentage Rate
•.....................•.•......•..............
61
Example 38: Cancer Operation
..•...••..•.•.••••.•.••.......•...•.•.
,
•••...•..••..•..•..•...
,......
62
Example 39: Gallonage Sales Transaction
•••..••••••••••••.•....•..•..••••.•••.•••...••.••••••••.••...
62
XfZ
MANAGEMENT
REPORTS
•••••••••••••••••••••••••••••••••••••••••••••••••••••••••••.••••••••••••..
63
Cash-In-Drawer Report
•••.....•••..••••...•.••••.•••••••••••••...••••••••••••••..••••.•.•.••.......
64'
Hourly R!:lport
.••...••.•..•.••...•••..
,
•••.••...••••.••••.•
~
• • • . . . . . . • • • • • • • • • • • . . . . . . • • • . . . • • • . . .
64
Oerk
Report :
....•••••
:
•.••••...•••••.....•.•.•••.••••.••••......••••.•••••..•.•••••.••.•..
: • : . . . 65
PW
Report and. Weekly/Monthly Report
.••••.......•..•.•..•.•..•••...•••.••••....••••..•.•...•..•.•...
66
Cash Declaration Report
....••
.-
....................................................................
~.
67
Full Z/End-of-Oay Report and
Weekly/Monthly
Report
•••
; . . . . . • • • . . • • • . . • . • • • • • • • • • • • . • • • • • • • • • • • • • • . • • . . • .
68
Full Report Ulustration
•..•..•.•
'.'
. • • • • . • . • • . • • . . • • • • . . • • • . • • • • • • • . • • • • . • • • • • • • • • • • • • • . • • • • • . • • . • • • • •
69
Balancing
X/Z
Reports
.....•••••..••••••••••••.•...••••.••..••••.••.•..•••••••••..•••.••••••••.••••
70
TROUBL.ESHOOTlNG
••••••••••••.••••••••••••••••••••••••••••••••••••••••••••••••••••••••••••••••••••
71
In Case of
an
Error Tone
.•••••••••.••••••••••••.•.••••••....••••••••...••.••••••.•••••••••••••.•.••.
71
In
Case PE-Printar Error Displays
•..•••••••••....•••••••••••••••.••••.•••••••
; . • • • • • • • • . • • • • • • • • • • • ...
.•
71
H
Cash
Register
is
Malfunctioning
•.•••••••••••••.•••••••••••••••••.••••••••••••••••••••••••••••.•.••••
71
Half System
Oear
.....................................
'.'
•••.•••••.••..•••••••.••••.••••••••.••••••••
71
Full System
Oear
•..•...••••••..•••••••.•••••.•••.••.•..•••..••••••••..••••..•••••••.•••••
;
•••••••
71
Service Center Information
••.•••.•••••.•••.•••••••••••••.••
'
••••.•..••••.•••••.••••••••••••••••.•••.•
71
SPECIFICATlONS Bnd SAFETY
•••••••••••••••••••••••••••••••••••••••••••••••••••••••••••••
~
••••••••••••
72
UMITED
WARRANTY
•••••••••••••••••••••••••••••••••••••••••••••••••••••••••••••••••••••••••••••••••
73
APPENDIX I - STATE TAX
TABLE
CODES
••••••••••.•••••••••••••••••••••.•••••••••••••••••••••••••••••••••
la-If
APPENDIX
11-
CALCULATlNG STATE
TAX
TABLE
CODES.
• • •
••••
• • • •
••
•
••
• •
••
• • • • •
••
••
• • • • • • • • • •
••
• • •
•••
••
lie-lie
APPENDIX III -
GST
/PST
SYSTEM FOR CANADA • • • • • • • • • • • • • • • • • • • • • • • • •
..
••
...
• • • • • • • • •
..
• • • •
..
• • • • •
••
lIIa-lIIb
ii
UNPACKING YOUR CASH REGISTER
and
SET~UP
PREPARATION
When your cash register is new in its factory packaging, you will find the various
ite~s
forthe register packaged
separately. Look for and unwrapthe following: 1 paper roll, black journal winder spindle and duplicate key sets
for
the Control Lock and Cash Drawer/Journal Lock.
,STANDARD ACCESSORIES
.
The following are included in the box with
your
cash register:
• Instruction manual.
• 1 black plastic journal winder spindle.
• 1 starter roll of standard paper tape, Royal Reorder Number 013129 (57mmj for single ply; 013130
(57mm)
for
2-ply. '
• 1 purple ribbon (already installed), Royal Reorder Number013090. The ribbon is also available in the
color
black. Royal Reorder Number 013094. '
• 4 standard •
M"
batteries
for
battery back-up system.
• Keys:
(2)
Cash Drawer/Journal
Lock
keys
'(515).
(2)
Program keys
(PRG.
58-090004).
(2)
Register keys
(REG.
58-090001).
INITIAL
SET
UP
IT
IS IMPORTANT THAT YOU READ THE INITIAL SET-UP AND
MAiNlENANCE
INSTRUCTIONS BEFORE
ATTEMPTING TO
OPERAlE
THE CASH REGISTER.
1.
Locate on level surface -Before operating,the cash register, be sure it is placed on a level
surface
to
permit smooth operation of the register cash drawer.
.
2.
IMPORTANT: THE
C~SH
REGISTER MUST BE PLUGGED IN BEFORE INSTALLING THE
BACK-UP BATTERIES. This cash register operates on anystandard three-hole electrical outlet
(115-120 volt, 60 hertz). It is recommended thatthe
Cash
register be connected
to
an electrical
circuitwhere no other electrical device
or
appliance is connected which mayoverfoad the circuit
or
cause electrical interference with the cash register. It is best that a single circuit be provided
'for
register operations.
3.
Be sure the cash register is plugged in and install the 4 standard
OM"
batteries provided. Refer
to
Page 9 for battery installation instructions.
4.
Install paper -Refer
to
Page 10 for paper installation instructions.
MAINTENANCE
OF YOUR REGISTER
Your register must remain uncovered when turned on; this will allow proper
COOling
of electronic
components.
Use a dust cover when the register is
not
in operation
to
protect mechanical components from
dust
Take care
to
keel'
beverages and otherliquids awayfrom the machine
to
avoid spillswhich may
damage electronic components (use optional protective keytop cover
to
prevent damage
to
machine).
To clean. use a soft dry cloth. Do not use harsh solutions containing alcohol.
Your machine should be kept in areas free from dust. dampness or extreme temperatures (hot
or
cold).
After storage in extreme temperatures (below 32 degrees fahrenheit or above 104 degrees
fahrenheit). allow the temperature inside the machine enough time
to
reach room temperature
before switching on.
Never pull the papertape through the printhead. To prevent damage, always use the electronic
paper feed keys.
Should electronic service be needed. a
Royal
authorized service center is recommended.

GEroNG
TO
KNOW YOUR CASH REGISTER
USING THIS MANUAL
Your cash register manual
is
organized for easy reference. The front portion contains general information
on
all
features and functions
of
the cash register. Instructions for setting the programs are
next
TransaCtion
examples for operating the register are at the back of the manual, along
with
information on troubleshooting.
Use
the
TABLE
OF
CONTENTS
to
locate a particular section you are interested in.
• Throughout this manual references
to
the Keypad are shown in bold and in parenthesis. References
to
the
Numeric Keypad are preceded by the word "1YPE-; for example: TYPE the number (1). References to the
Operational
Keys
are preceded
by
the word ·PRESS-; for example: PRESS the (AMT TENDfTOTAL)
Key.
HOW TO GET STARTED ,
Before you begin
to
program
or
use your new
Royal
Cash Register, you should spend some time becoming
familiar with the Control Lock System, Keyboard Functions and the Display. Reviewsetting
up
and basic
maintenance information. Then proceed
by
installing the paper roll. Follow the easy Quick Start program.
Finish by practicing the transaction examples
previd.ed.
PROGRAMMING THE CASH REGISTER
Simple
step-by~step
instructions are provided
to
help you quicklyprogram yourregisterfor standard
operations; Please refer
to
the Quick Start programming on Pages
13
and
14.
OPERATING THE CASH REGISTER
Transaction examples are provided for registering various operations. such as a cash, check.
or
charge
sale;
tendering change; multiple item sale;
PLU
sale; split tendering; voiding; refunding;
discounting; coupon reduction and more. For details see Pages 4&{)2.
PROBLEMS WITH USAGE OF THE CASH REGISTER
If
you are having technical difficulties or if your cash register
is
malfunctioning. refer to the
Troubleshooting section
on
Page
71.
2

..
'
SECURllY
SYSTEM
and
~RROR
CONDITIONS
SEVEN-WAYSECURITYSYSTEM: YourRoy.!l cash registeris protected byan efficient security system
that incorporates the following,
• A Control Lock that cannot be activated without the Register
or
Program
Key.
The Register Key
accesses the
·OFP
mode and "REG· modes only, thus limiting access
to
other modes
to
individuals
who are authorized
to
use the Manager Key.
• A Journal/Receipt Compartment that can be locked
to
prevent journal tampering
and
unauthorized
'"
receipt manipulations.
• A securely locked cash drawer.
• High digit lockout option which inhibits excessively high register over rings.
• Availability of 15 clerk numbers
to
monitor access and sales of individual operators.
• 2-way Password system
to
prevent unauthorized programming
or
printing of management reports. A
,password can be programmed
to
limitaccess
to
"PRG· and "Z' positions onlyahd a separate password
to.limit access
to
the T position only.
• A broad range of management reports
to
provide detailed data on virtually all cash register operations
,performed on the machine; monitors use of the "No Sale· key. number of voids.
r~nds,
etc.
ERROR CONDITIONS
REGISTER TONE -This cash register emits a brief audible
tOO9
that sounds
to
confirm registration each
time a key
is
pressed. '
ENTRY ERROR ALARM -When using the register,
all
operations must be performed
in
the proper
sequence. If
an
erroroccurS, the register will sound a continuous tone alarm'
(an
"E"
appears in the display
and the Keyboard locks). To clear tne error/lock condition, the operator simply presses the (CLEAR) Key
and continues
to
operate in the proper sequence. IMPORTANT -When
an
operation
is
begun but not
completed in the
"REG"
position, turning the control lock
to
another position will result
in
an
alarm/error
condition. When a transaction is begun in the
"REG"
position,
it
must be completed by use of one of the
totalizer keys
(Le.,
the (AMT TENDfTOTAL)
Key)
before changing
to
anotber position.
MAXIMUM ENTRY LOCK-OUT -To prevent the operator from making an entry into the register of
an
erroneously high price. the register can be programmed
to
limit the number of digits that can be entered
in
the transaction.
rhe
register can
be
programmed
to
"Lock-Out" after an entry of one (.09)
to
seven
(99,999.99) digits, '
CLEAR KEY (CLEAR)
'~
As
described above. the Clear (CLEAR) Key will erase an alarm condition
caused by an operational error (usually pressing a key which was not proper for that operation). The
(CLEAR)
Key will not erase a transaction which has been registered by an operating key and printed
on the register tape. To erase entries made in error after pressing the Department Key or any other
operating key causing the entry
to
be
printed on the tape, use the Void (VOID) Key function
to
correct
the error.
PE-PRINTER ERROR -If a ·PE" is displayed. first check if you are out of paper. Second, check for a
paper jam. Follow the directions
in
the Troubleshooting sectio[l of this manual on Page
71.
HALF SYSTEM CLEAR -If
an
error tone still persists, perform a Half System Clear. For details on a
Half System Clear see Page
71.
FULL SYSTEM CLEAR -
If
the operator cannot correct an error lock condition.
as
a last resort a
Full
System Clear should be done. For details on the Full System Clear see Page
71.
3

CONTROL LOCK SYSTEM
THE
CONTROL
lOCK:
Located at the left of the operating area. the Control Lock is a switch that places
the cash register into
its
several operating modes. These modes are:
Program
Mode
(PRG): The position is used
to
set
and
change
your
individualized
programming for register operations.
Locked
Mode
(OFF): This position is used
when· the cash register is not in use. The
register is inoperable and the cash drawer stays
closed.
Register
Mode
(REG):
You
will perfonn normal
register operations in the
REG
Position.
Report
Mode
(X): Pennits reading
of
all
transaction totals at any time without clearing
the register (nonnaJly known as a
"mid...cJay"
reading). This cash register is capable
of
producing numerous management reports.
a=F
PR3
•.
-~
..•
REG
(I»);'
....
.~~
Reset
Mode
(Z): Permits reading of all
transaction totals and clears all transaction
.totals
to
zero. except the running grand total
(normally known as the "end-of-day"
or
"daily
close-out" reading). This cash register is
capable of producing numerous management
reports such as weekly/monthly readings.
CONTROL
KEYS: Two pairs
of
keys are provided forthe Control Lock and the Cash Drawer/Journal Lock.
Register Key (REG): Provides movement
to
the OFF.
REG
and .X" modes only. (Note: A Manager
Password is available exclusively for the "X· position,
for
details see Page 20).
Program
Key
(PRG): Provides access
to
all
of.
the operating modes. This system effectively limits
accesS
to
the
PRG,
X,
and Z modes
to
individuals who are authorized
to
use the
PRG
key
c::mly.
(Note: A separate Manager Password is available
for
each ·X· and "PRG/Z" positiOns. for details see
Page 20).
Journal
LocklCash
Drawer
Key
(515): Used
to
lock both the cash drawerand journal compartment
for additional security.
REMOVABLE. CASH DRAWER WITH lOCK.: The cash drawer
will
automatically open after
completing a transaction,
by
pressing the
(#
1STINS) Key.
or
by
the hidden emergency lever underneath the
register.
The cash drawer is electronically locked when the Control
Lock
is in the
"Otr
position. In addition, the cash
drawer is designed with a security lock and when used with the Cash Drawer Key. manually locks the cash
drawer and prevents electronically opening it
by
the
(#
1STINS) Key
or
by
the hidden emergency lever
underneath the register.
The
Bill
Tray
and
Coin
Tray
can
easily
be
removed
from
the
register
by
lifting
Up
on
the
open
drawer
and
pulling
toward you. .
4

KEYBOARD FUNCTIONS
FIGURE 1: Control Lock and Keyboard Functions
.:....,.
....
--
.~-
--:-
-
..:
crr
~TeNl
TOTAL
KEYBOARD
FUNCTIONS
The following key functions are primarily for
Cash
register entries
in
REG
mode. Several keys also have other
functions in the
PRG,
X and Z modes which are explained further in the manual.
. (1) Paper Feea Key (/\ ) advances the paper one line. Hold down
to
advanCe paper continuoljsly.
(2)
Minus/Coupon
Key ( - ) is used
to
subtract a specific amount from an individual item.
(3)
Quantity and Time Key (QTY
[TIME)
-double function -is used
to
multiply a number of items entered
atone
price and
to
display the current time.
(4)
Minus
Percentage
Oiscount/Received-On-Account
Key
(-%/RA) -Double Function: (-%) is used
to
subtract a percentage rate such
as
an employee discount from an individual item. The rate can be pre-
programmed
or
manually entered. Received
On
Account
(RA) is used
to
register dollaramounts placed
in the cash drawer that are not part of a sales transaction. Also used
to
register payments made
to
a
customer's charge account
or
to
declare the starting amount of cash in the drawerfor the day.
(5)
Plus Percentage/Paid-Out Key
(+%/PO)
-Double
Function:
(+%)
is
used
to
add a percentage rate
such as a service charge or gratuity to an individual item. The percentage rate can
be
pre-programmed
or manually entered. Paid
Out
(PO) is used
to
register dollaramounts taken out
of
the cash drawer;
i.e.,
petty cash.
(6)
Clear Key (CLEAR) clears the display
to
correct
an
entry before it is processed. Also stops error alarm
when incorrect entries are made.

KEYBOARD FUNCTIONS
(7)
Void/Error
Correction
Key
(VOID) -double
fun~ion
-yoid)s
u~ed
for
.9gn:~tQ9
~.par:ticula~el)try
after
it is processed
andpiihtedcif'-as
the Error
Q)iTeCt
runctlo-n,-itls-
used
lo;'-deieting the
h:ist
Item entered.
(8)
Clerk
Key
(CLERK) is used
for
entering clerk numbers.
(9)
PLU
/Release
Key
(PW
AL
1)
is used
to
temporarily override a pricewhich was preset
to
a PLU'number.-
(10) PLU
Key
(PLU) allowsthe numbersfrom 1
to
430
to
beused as codes
for
pre-programming merchandise
prices,
to
maintain a tally
of
cost and quantity
of
the
merchandise sold.
(11) Tax 1 Key (TAX 1) adds a
tax
amount
to
the sales figure according
to
the tax rate programmed for this
key. -Tax 1 Key is normally used
to
program a single tax rate required
by
a particular area
or
state. It
can also be used
to
override
the
pre-programmed
tax
on
a I;!epartment key.
(12) Tax 2
Key
(TAX 2) adds a
tax
amount
to
the sales figure
according
to
the
tax
rate programmed for this
key. Tax 2 key is normally used
to
program a second tax rate required
by
a particular area
or
state. It
can also be used
to
overripe the pre-programmed
tax
on a department key.
(13)
Numeric
Input
Keys
(0-9/00/.)
are used
to
input dollar amounts
of
merchandise sold,
to
indicate
how
manytimes a particularitem repeats,
to
add and subtractpercentages in conjunction with the -% and -+%
keys,
to
input department code numbers,
to
handle figures
that
require a decimal point and
for
other·
numericvalue-related entries. DoubleZero
(00)
allows forquick entry
of
numberswith
two
or
more zeros.
Decimal Point
(.)
is used
to
enterfractional quantity
of
items being sold.
In
all modes, the Decimal Point
is
not
to
be used when entering a price.
(14)
Department
Keys
(1-20)/{21-40*)
are used
to
specffy which department the transaction is for. Each
department can represent a category of merchandise sold and can be programmed as taxable
or
non-
taxable.
'*
If the qepartment Conversion
Kit
is
used, the department keys are labeled (1-12) (13-24). -
(15)
Department
Shift
Key
(DEPT SHIFl1 is used
to
make entries
for
departments 21-40 (with
Kit,
Departments 13-24). Press Shift before each department entry
for
departments 21-40. The register goes
back
to
the non-shift mode after each department entry.
(16)
Non
Tax
Key
(NON TAX)
is
used when
no
tax is
to
be registered for a department that
is
programmed
for tax.
(17)
Check
Key (CHECK) is used
to
finalize a transaction paid
by
a check.
(18) Return Key (RETURN) is used
for
issuing refunds
for
retumed merchandise.
(19)
Charge
Key (CHARGE) is used
to
finalize a transaction paid by a credit card
or
can be used
to
denote
an in-house charge.
6

KEYBOARD FUNCTIONS
(20)
,
Subtotal
With Tax Key {SUBTOTALfWfTAX> displays the total sales amount. including sales
tax
It is
not
printed on
the
register
receipt
until the sale is finalized
by
pressing either the (CHECK),
(CHAR.GE)
,
or
(AMT TEND/TOTAL) Key. .
,(21)
Subtotal,
No-Sale
and
Non-Add
Key
(#/ST/NS)
-triple function -As the No-Sale key, it opens
the
drawerwithout registering any amourd:s; for example,
to
give change. The Non-Add Key function allows
entering, up
to
10
digits. a reference number which prints on sales receipts. As the Subtotal Key, It .
displays and prints the subtotal
of
a sale without sales tax.
(22)
Amount
Tender
Total
Key
(AMT
TENDfTOTAL)
is used
to
finalize a transaction paid
by
cash and
calculates the amount
of
change required from the cash received.
Time
Display: Press the (QTY
/TIME)
Key
in
theregister mode
to
showthe time. The1ime display does
not need
to
be canceled because It is automatically replaced by a figure when the next transaction
is
performed. The (QTY/TIME) Key
is
a double function key where, during a transaction, it is used
to
perform multiplication where an Item is repeated.
LEAVING THE REGISTER PLUGGED IN: Keep the register plugged in and at the
·OFP'{Locked)
piosition when not in use. The keyboard is then inoperable and the cash drawer
is
electronically locked,
but a minimum amount of power maintains the programs and transaction data totals.
7

DISPlAY
WINDOWS
OPERATOR DISPLAY
.....
Your cash
r~..r
provides
two
displays which feature large. easy
to
read
fluorescent digits for easy operator
and customer viewing. The operator display is located at the
top
front
of
the machine and
is
your visual guide
with the inner workings
of
the cash register. The display shows entry amounts and related transaction
infonnation
by
the use of numbers and special symbols. The display capacity is
10
digits; 1 digit for Repeat,
2 digits for Departments and an amount display with a 7 digit capacity for numerical entry:
CUSTOMER
DISPLAY
To position
the'
rear customer display, simply pull upand rotate forviewing from anydirection. To dose, simply
press down on the raised display
untH
it lies flat against the
top
of
the register. '
Following
is
a graphic repfesentation
of
the Items shown on the cash register Operator Display:
,
-,
I
1-'1-'
:::.
Ie
,
LILt
'DEPT
orr
AMOUNT
CLERK
•
TM
The display indicators read
from
left
to
right
as follows:
(Clerks): - 2 digits displays the clerk number in use.
TM (Training Mode): .. A
dot
displays when training mode is in use.
DEPT (Department): 2 digits, displays the department number entered.
QTY (Quantity): 1 digit. displays the number of items entered at one price.
AMOUNT:
,7
digits
for
entry and 10 digits for printing
(8
numeric, 2 symbols).
Symbols
which
appear on
the
display:
SIGN: Displays special symbols:
CR (Charge): - A line displays when the
(CHARGE)
Key is operated.
CH
(Check): - A line displays when the
(CHECK)
Key is operated.
CA (Cash): - A line displays when the
(AMT
TEND{rOTAL) Key is operated.
C:
Displays the change due.
E:
Displays if an error is detected.
PRESS
the (CLEAR) Key to reset
PE:..
Displays if an error is detected in the printer.
P:
Displays onty when you are in the middle of a programming step.
S:
Displays when the (SUBTOTAL) Key
is
operated.
-.
Displays at the end
of
a cash sale when change has not
been.
tendered.
Displays when total is a negative figure.
by
the use
of
the
(-).
(-%/RA),
(RETURN)
or
(VOID)
Key,
or
at
the end of a transaction.
8

BATTERY SYSTEM
BACK-UP BATTERY SYSTEM"
IMPORTANT:
The
cash
register
must
be
plugged
in
before
installing
or
replacing
the
back-up
batteries•
.
The
memory
Is
protected
by
four
"M." batteries that come
With
the cash register. During cash register
operations. all transaction data
for
the management report
Is
stored in
the
register's memory. The memoryalso
holds all
the
optional program Information. The memory back-up system keeps this information stored In
memory whenthe register
Is
turned off.
The
back-up battery
power
system maintains programming in the event
of
a powerfailure
or
if the register is accidentallydisconnected
for
up
to
approximately
700
hours if necesSary.
Important:
In
order
to
aasure
continuous
battery
back-up
protection,
H
is
important
that
the
batteries
be
changed
8
minimum
of
once
every year.
INSTALLING OR REPLACING
THE
BACK;'UP BATTERIES:
NOTE: Four
OM"
batteries are required.
1. Make sure the register is plugged in and
tum
the key
to
the ·OFF" position.
2.
Open the journal compartment cover. Grip the left side
of
the journal cover and gently pull back. The cover will
remain open in an upright position.
3. Remove the battery cover, located
to
the rear left section
of
the compartment.
4. Position batteries" making sure that the positive and
negative poles are aligned correctly.
"
5.
Replace the battery cover
by
sliding
down
into position.
6.
Close the journal compartment cover and use the Cash
Drawer/Journal Lock Key
~515
to
lock
it, if desired.
EXTENDING
THE
USAGE
OF
THE
BACK-UP
BATTERIES
If the cash register will not be used
for
an
extended period
of
time, you may want to remove the batteries to
prolong their life. IMPORTANT:
All
transaction
data and
programming
will
be
erased..
9

DISPLAY WINDOWS
OPERATOR DISPLAY -S.
..
.Your cash
r~!
provides
two
displays which feature large. easy
to
read fluorescent digits for easy operator
and customer viewing. The operalordisplay is located at the
top
front of the machine
and
is yourvisual guide
with the inner workings of the cash register. The display shows entry amounts
and
related transaction
infonnation
by
the use of numbers and special symbols. The display capacity
is
10
digits; 1 digit for
Re~t.
2 digits for Departments and an amount display with a 7 digit capacity for numerical entry:
CUSTOMER DISPLAY
To position therear customer display, simply pull up and rotate forviewIng from any direction. To close, simply
press down on the raised display until It lies flat against the
top
of
the register. "
Following
is
a graphic representation
of
the Items shown on the cash register Operator Display:
I
-,
I
1-'1-'
Ie
,
LtLt
"DEPT OTr
AMOUNT
CLERK
•
TM
The display indicators read
from
left
to
right
as follows:
(Clerks): - 2 digits displays the
derk
number in
use.
TM
(Training
Mode):-
A
dot
displays when training mode
is
in
use.
DEPT (Department): 2 digits, displays the department number entered.
CTY (Quantity): 1 digit. displays the number of items entered at one price.
AMOUNT: '7 digits for entry and
10
digits for printing
(8
numeric. 2 symbols).
Symbols
which
appear
on
the display:
SIGN: Displays special symbols:
CR
(Charge): - A line displays when the
(CHARGE)
Key is operated.
CH
(Check): - A line displays when the
(CHECK)
Key is operated.
CA (Cash): - A line displays when the
(AMT
TENDfTOTAl) Key is operated.
C:
Displays the change due.
E:
Displays if an error is detected.
PRESS
the
(CLEAR)
Key to reset
PE:..
Displays if
an
error is detected in the -printer.
P:
Displays only when you are in the middle of a programming step.
S:
Displays when the
(SUBTOTAL)
Key is operated.
=: Displays at the end of a cash
sale
when change has not
been
tendered.
Displays when total
is
a negative figure,
by
the use of the
(-).
(-%/RA).
(RETURN)
or
(VOID)
Key.
or
at the end
of
a transaction.
8

---
INSTALLING THE PAPER ROLL
Your cash register features a heavy-duty printer"which uses· one roll
of
2-ply, 57mm (2lt) carbonless cash
register paper, one forthe customer receipt (outside) and the OthsriorthE!jdTIin8! reeorti'(inside). The register
will also accept standard
2%"
calculator paper for a single tape record. If a customer receipt is not required,
an extra option
is
offered
to
reduce the number of spaces between each transaction, forfurther details see Rag
14,
Option
1,
on
Pages
38
and
39.
INSTALUNG THE PAPER ROLL
•
1.
Plug in your cash register and set the
Control Lock
In
the
"REG"
(Register) mode.
2.
Open the journal compartment cover, first
be sure thatthe lock
Oocated
on the leftside
of the journal compartment cover) is
unlocked using the Cash Drawer/Journal
Lock
Key
#515. Grip the left side of the
joumal cover and gently pull back. The
cover will remain open in an upright
position.
3. Cut the end
of
the paper roll evenly for a
straight even edge for proper feeding
through the printhead.
4. Place the paper roll in the little "nest" at the
back of the compartment so that
the
paper
feeds out from the bottom of the roll (see
illustration).
5. Insert both ends (if using 2-plypaper)
or
the
end of a single ply paper into the paper slot.
Depress the
Feed
(A
)
Key
until the paper
catches and advances through the printer.
6.
If the paper does not feed through the
printerpropeny, inspectthe end of the paper
tape
and
repeat step3 through
5.
7.
Next. place the black plastic Journal Winder
Spindle on its grooves (the spindle rests
above the paper
r~II).
Advance the paper
approximately 10-12 inches by using the
Feed
(A'
)
Key
and ease thejoufna.l"
(inside) paper through one of the narrow
openings in the center
of
the spindle.
Advance the paper using the Feed
(A
)
Key until the journal paper begins
to
wind
securely around the spindle.
8. Pass the customer (outside) paper through
the receipt window of the journal
compartment cover.
9. After installing
the
paper roll, close the
journal compartment cover and use the
Cash DrawerjJournal Lock Key #515
to
lock
it, if desired.
NOTE:
It
is
recommended to use Royal brand
2~·
(57mm) "bond quality" paper which will help prevent dust
deposits on the printer mechanism found when using inexpensive paper rolls. Replace with
Royal
brand carbonless
2-p1y
paper. Royal Reorder #013130
or
standard bond quality calculator single ply
paper.
Royal
Reorder #013129.
Paper
setting
direction
INCORRECT
CORRECT
-\
\
10

INSTALUNG
THE RIBBON
Your cash register comes with the ribbon already installed. The ribQon releases special ink
to
the printhead
__
which produces the printout After a period of time, depending upon the amount of use, the ink in the ribbon .
.
--.
'will'beuied
up:- When Printout becomes faint, the ribbon needs-to be replaced. i'
'-';-.-.-'.-''-'-~~~~=-:~'=C'T''''-
---~='-'"-.~
•••
-
-.-
CAUTION: The
ribbon
is
not designed
to
be
re-inked. Under no
circumstances
should
this
be
done
or
.permanent
damage
to
your
cash register
printer
may resutt. Such
damage
will
not
be covered
under
Royal's warranty.
INSTALLING
THE
RIBBON
1.
Open the journal compartment cover, first
be sure
that
the lock
Oocated
onthe left side
of the cover) is unlocked using the Cash
Drawer/Journal Lock Key #515. Grip
the
left side
of
the journal cover and gently pull
back. The. cover will remain open in an
upright position.
2.
Remove
the
used ribbon spools. Grasp
each spool and pull upward (the ribbon
spools are located directlybehind the printer
and just before the paper roll area).
3.
Remove the new ribbon from its cellophane
package. Be careful not
to
touch the wet
inked portion of the ribbon.
4.
Install
the.
new ribbon. Place the full spool
of ribbon on the left post and unwind
approximately three inches
of
the ribbon.
5.
Place the ribbon along the outside of the left
metal bracket, then through the printer
mechanism and along the outside of the
right metal bracket.
6.
Place the take-up (empty) spool
on
the right
post and turn the ribbon spool
to
take up
any slack
in
the ribbon.
7.
After installing the ribbon, close the journal
compartment cover and use the Cash
Drawer/Journal Lock
Key
#515
to
lock it, if
desired.
NOTE:
It
is
recommended
to
use Royal brand replacement ribbon (color-purple), Royal Reorder #013090. The
ribbon
is
also available in the color black, Royal Reorder #013094.
11

RE-INKING THE THANK YOU STAMP
THANK YOU STAMP
Your cash register is equipped with a pre-Inked rubber stamp that automatically prints
"YOUR
RECEIPT THANK
YOU· on every customer receipt at the completion
of
a transaction. If the print becomes unclear or
faint.:
re-
inking the stamp
wDl
be necessary.
Follow this procedure for refilling the stamp pad:
1.
Open the journal compartment cover, first be sure
that the lock
~ocated
on the left side
of
the journal
compartment cover) is unlocked using the Cash
Drawer/Journal LockKey #515. Gripthe left side
of
the journal cover and gently pull back. The cover
will remain open in
an
upright position. .
2.
The Thank You Stamp is located directly
in
tront
of
the printer. It is a small black plastic rectangular
piece. Using your thumb and index finger, finnly
grasp the.stamppad on both ends
and
pull upward.
3.
On the reverse side ofthe stamp
pad
is a small hole.
Feed 1 drop
of
ink into the hole.
Be
sure
to
use
ink
that
is
specified for such
use.
otherwise a chemical
reaction may damage the stamp pad. The stamp
pad ink forthis purpose can be ordered directlyfrom
ROYAL by using the enclosed Accessories Order
Form.
4.
Replace the stamp pad. Be sure that it snaps into
place securely.
Ink
refill
hole
5.
After re-inking the stamp, close the journal
compartment
cover
and use
the
Cash
Drawer/Journal Lock Key#S1S to lock it. if desired.
12

QUICK
START
The Quick Start program is designed
to
help you quickly
·get
started" with the basics you need
to
run your cash
register
..
It covers progr;amming.the Qecimal Point, Rounding, Date, Time, Tax Rate
anc;!
Department Status fpr
taxing
or
non-taxing. The "Thank You· stamp is a feature accompanying your cash register which will
automatically print
on
all
sales
receipts. Followthe Quick Start straight through. however. skip any steps which
are not required
by
your business needs. Quick Start is done in a non-print mode and will not print any step
.performed during programming. Oncethe QuickStartis completed. a program confirmation report can betaken
to
review your results.
As
you go through the Quick Start. if an error tone sounds, PRESS the (CLEAR) Key
af'ld
continue
by
repeating the step you are attempting
to
program.
NOTE:
It
is
not
necessary
to
repeatthe entire
Quick
Start program
if
you
wish
to
update
or
change a step
at any time. Therefore, maintain your
owner's
manual
in
a safe place
for
all future programming.
The word --rYPE- refers
to
the numeric keypad (the numbers 0 through
9)
The word ·PRESS· refers
to
the operational keys on the machine.
IMPORTANT: Read Unpacking Your Cash Register and Set Up (Page 1). Getting
To
Know Your Cash Register
(Page 2), Control Lock System (Page 4). Keyboard Functions (Pages 5-7), Display Windows (Page 8), Installing
the Battery System (Page
9)
and Paper Roll (Page 10).
FOLLOW THE QUICK
START
ON THE NEXT
PAGE.
13

QUICK
START
QUICK
START: ROYAL
482nt--·
..
1.
Insert
the
Program Key (PRG, 58-090004)
in
the
Control
Lock
and
tum
to
the
·PRG" program
position.
2.
To
set the DECIMAL POINT
to
two
places -U.S. standard:
TYPE (2) then PRESS (-%/RA) Key.
Important: In the
"REG"
(REGISTER) mode, It
·is
not
necessary
to
press the decimal point when
ringing
up_
a price. .
3.
To set the ROUNDING
to
the nearest whole number -U.s. standard:
TYPE,
(50) then PRESS (CHARGE)
Key.
4.
To set the
DATE,
use month-<tay-year
format
Example: For January 24, 1994:
TYPE (012494) then PRESS
(#/ST/NS)
Key.
5.
To
set the CURRENT TIME, use military time. Example:
To
set 10:15 A.M.:
TYPE (1015) then PRESS (QTYJTIME) Key.
* Reminder:
To
convert
to
military time, add .the number 12
to
every
hour
after 12:00 noon.
For example,
to
set 1:15
P.M.
TYPE (1315). Although the time is programmed using the
24
hour time format, the time can print in the 12
hour
format (see
Rag
22,
Page 39).
6.
To set a single
fIXed
TAX
RATE:
a)
TYPE (1), PRESS (TAX 1), TYPE the (BASE
TAX
AMOUNT follOWed
by
the
number
4), then
PRESS (TAX 2).
Example: If Base Tax is .10 cents: TYPE (104), then PRESS the (TAX 2)
Key.
* To determine the Base Tax amount you will need
to
obtain a
copy
of
your
state's Retail Tax
Chart. The BASE TAX amount is the maximum point where no
tax
is charged. For example,
if no
tax
is charged from
.0
cents
to
~
10
cents. then .10 cents is
the
Base Tax.
b) TYPE the (TAX RATE as a4
digit
number). then PRESS (TAX 2).
Example: If your state
tax
rate is
6%,
TYPE (6000), then PRESS the (TAX 2)
Key.
* Note: A
tax
rate of 6.5% will program as (6500). If you wish
to
program a second
or
third
tax
rate
see
Pages 23 and 24
for
details.
7.
To set DEPARTMENT STATUS
for
taxing'
or
non-taxing: (Please note that the factory default setting
of all departments is non-taxable)
a)
To progrartl Department 1 as taxable:
TYPE (000001), PRESS (STfWJTAX). then PRESS the (DEPARTMENT
1)
Key.
* Repeat
typing
(000001) and
press
the (STfWJTAX) Key before each Department Key you wish
to
charge tax.
b)
To program Department 2 as non-taxable:
TYPE
(OOOOOO),
PRESS (STfWfTAX.). then PRESS the (DEPARTMENT 2)
Key.
* Repeat
typing
(OOOOOO)
and
press
the
(STfWfTAX)
Key before each Department Key you wish
to
charge no tax. .
l~

AFTER
QUICK
START
PROGRAM CONFIRMATION REPORT
Now that Quick Start programming is complete, check your results by maintaining the key in the ·PRG" mode:
1YPE (999999), then
PRESS
the (AMT TENDfTOTAL)
Key_
Your tape should look similar
to
the Program Confirmation Report shown below. Note: The Date, Time, Tax
Rate
and Department Status will reflect the information based upon your
input
If
an
error
is
made during
programming, repeat only the step
in
question. For more details
of
the symbols printed
in
the Program
Confirmation Report
see
Page
44.
YOUR
RECEIPT
THANK
YOU
STARP
DATE
MOUHE
!DEER
PRESET
PRICE
of
zero
in
Department
1 _
TI
represents
a
taxable
status
programmed
with
a
single
tax
rate
DEPARntarr STAlUS shows a
single
tax
rate
associated
in
Department
1
PRESET
PRICE
of
zero
in
Department
2
DEPARTPIENT
STAlUS
shows
no
tax
associated
in
Department
2
(all
40
departments
will
always
print
showing
taxable
or
non-taxable
status)
c.rtJPON
DISaufT
(-)STAlUS
(not
programmed)
TAX
1
RATE
(prograllUlled)
TAX
2
RATE
(not
programmed)
TAX
3
RATE
(not
progralllllled)
TAX
.4
RATE
(not
progrslllllled)
PERCEHT
DISCOUNT
(not
programmed)
PlUS
PERCEHTAGE
(not
programmed)
ROUKDlH6
STATUS
(programmed)
. .
FLAG
OPTIONS
STATUS
(a
total
of
26
flag
options
will
print)
TlUlHSACTIOH
HUflBER
(Continue
to
the
next
page)
1
2
DEPARntarr
,
I
I
I
40
01-24-94
0000
o-oon
000001
0-00
00000o
•
I
0-00
a a 0
a 0 e
'-04Tl
6O-00TI
OUI
OUX
.OUIZ
OO·ocr"e
00-00%
50 C
,-
-·0
v
2·_·0
VD
3·-·0
VD
26·
-
-0
v
10-07
001
TlI'lE

BEFORE GOING TO THE REGISTER MODE
Your Royal cash register offers many additional features not covered in the Quick Start programming. Please
notethat
all
programming optionsare"covered
inthe
A-dvanc~'Programming
section of this manual, even those
singled out for use
in
the Quick
Start..
Please review a few
of
the additional programming options available on
this register described below which you may choose
to
add
to
your basic Quick Start set up.
For
quick
reference, the page numbers are noted
by
each feature presented:
DEPARTMENT CONVERSION KIT (Pages 27-28): A kit is included with your register which gives you
the option of using larger size department keys
to
help speed up sales transactions.
TRAINING MODE (Page 38): Designed
to
help you get acquainted with the register mode and allows
a place for practiCing transaction exampies without affecting machine totals. Since the Training Mode
does not record any transactions performed while in the register mode, it is ideal for beginners. Once
activated, no activity can be performed in the ·PRG", ·X· or"Z" modes unless you exitthetraining mode.
.TRANSACTION EXAMPLES (Pages 4EH)2): Simple transaction examples are provided
for
use in the
register mode. This section will cover a cash sale, check sale, charge sale, tendering change. multiple
items,
PLU
sale, split tendering. voiding. as well as otherfrequently used functions.
Be
sure
to
have the
key
in
the
"REG"
(register) mode
WhEm
following the transaction examples. Suggestion: Practice the.
transaction examples
after
activating
the
Training
Mode
described
above.
CLERK NUMBERS (Page 19): Clerk numbers can be used
to
monitor sales
of
15 individual
employees. ;
MANAGER PASSWORDS (Page 20): A password can be assigned for the
"PRG"
and
"Z"
modes; and
a.different password can be assigned for
the
·X· mode.
FLAG OPTIONS (Pages
42-43):
A total of
26
system programming options are offered on this cash
register. They are preset
by
the factory
to
accommodate many ofthe most commonly used selections.
These options can
be
changed
to
meet your individual needs.
16
Table of contents
Other Royal Cash Register manuals

Royal
Royal Alpha 9180sc User manual

Royal
Royal Alpha5000ML User manual

Royal
Royal 220DX User manual

Royal
Royal 580 User manual

Royal
Royal 120cx User manual

Royal
Royal ts1200mw User manual

Royal
Royal 601sc User manual

Royal
Royal alpha 6000ML User manual

Royal
Royal CMS-8160 User manual

Royal
Royal 89214G User manual

Royal
Royal alpha 587 User manual

Royal
Royal 110cx Manual

Royal
Royal CMS-482 Plus User manual

Royal
Royal CMS-487 Plus User manual

Royal
Royal CMS-482 Plus Owner's manual

Royal
Royal 410DX User manual

Royal
Royal 480nt User manual

Royal
Royal ALPHA lOOOML User manual

Royal
Royal 140DX User manual

Royal
Royal 120dx User manual