Operation Guide 2825
8
•Wearing the watch inside the sleeve of clothing can cause it to enter the
sleep state.
•The watch will not enter the sleep state while the digital time is between
6:00 AM and 9:59 PM. If the watch is already in the sleep state when the
digital time reaches 6:00 AM, however, it will remain in the sleep state.
•The watch will not enter the sleep state while it is in the Digital Compass,
Barometer/Thermometer, Depth Gauge, Countdown Timer, or Stopwatch
Mode. When the watch is left in any mode besides the Countdown Timer
and Stopwatch Mode, the watch will return to the Timekeeping Mode
automatically after a specific amount of time. Then if left in the dark for the
elapsed time indicated in the table above, the watch will enter the sleep
state.
Elapsed Time in
Dark
60 to 70 minutes
6 or 7 days
Display
Blank, with
P. SAVE flashing
Blank, with
P. SAVE not
flashing
Operation
Display is off, but all functions are
enabled.
All functions are disabled, but
timekeeping is maintained.
To recover from the sleep state
Perform any one of the following operations.
•Move the watch to a well-lit area. It can take up to two seconds for the
display to turn on.
•Press any button.
•Angle the watch towards your face for reading.
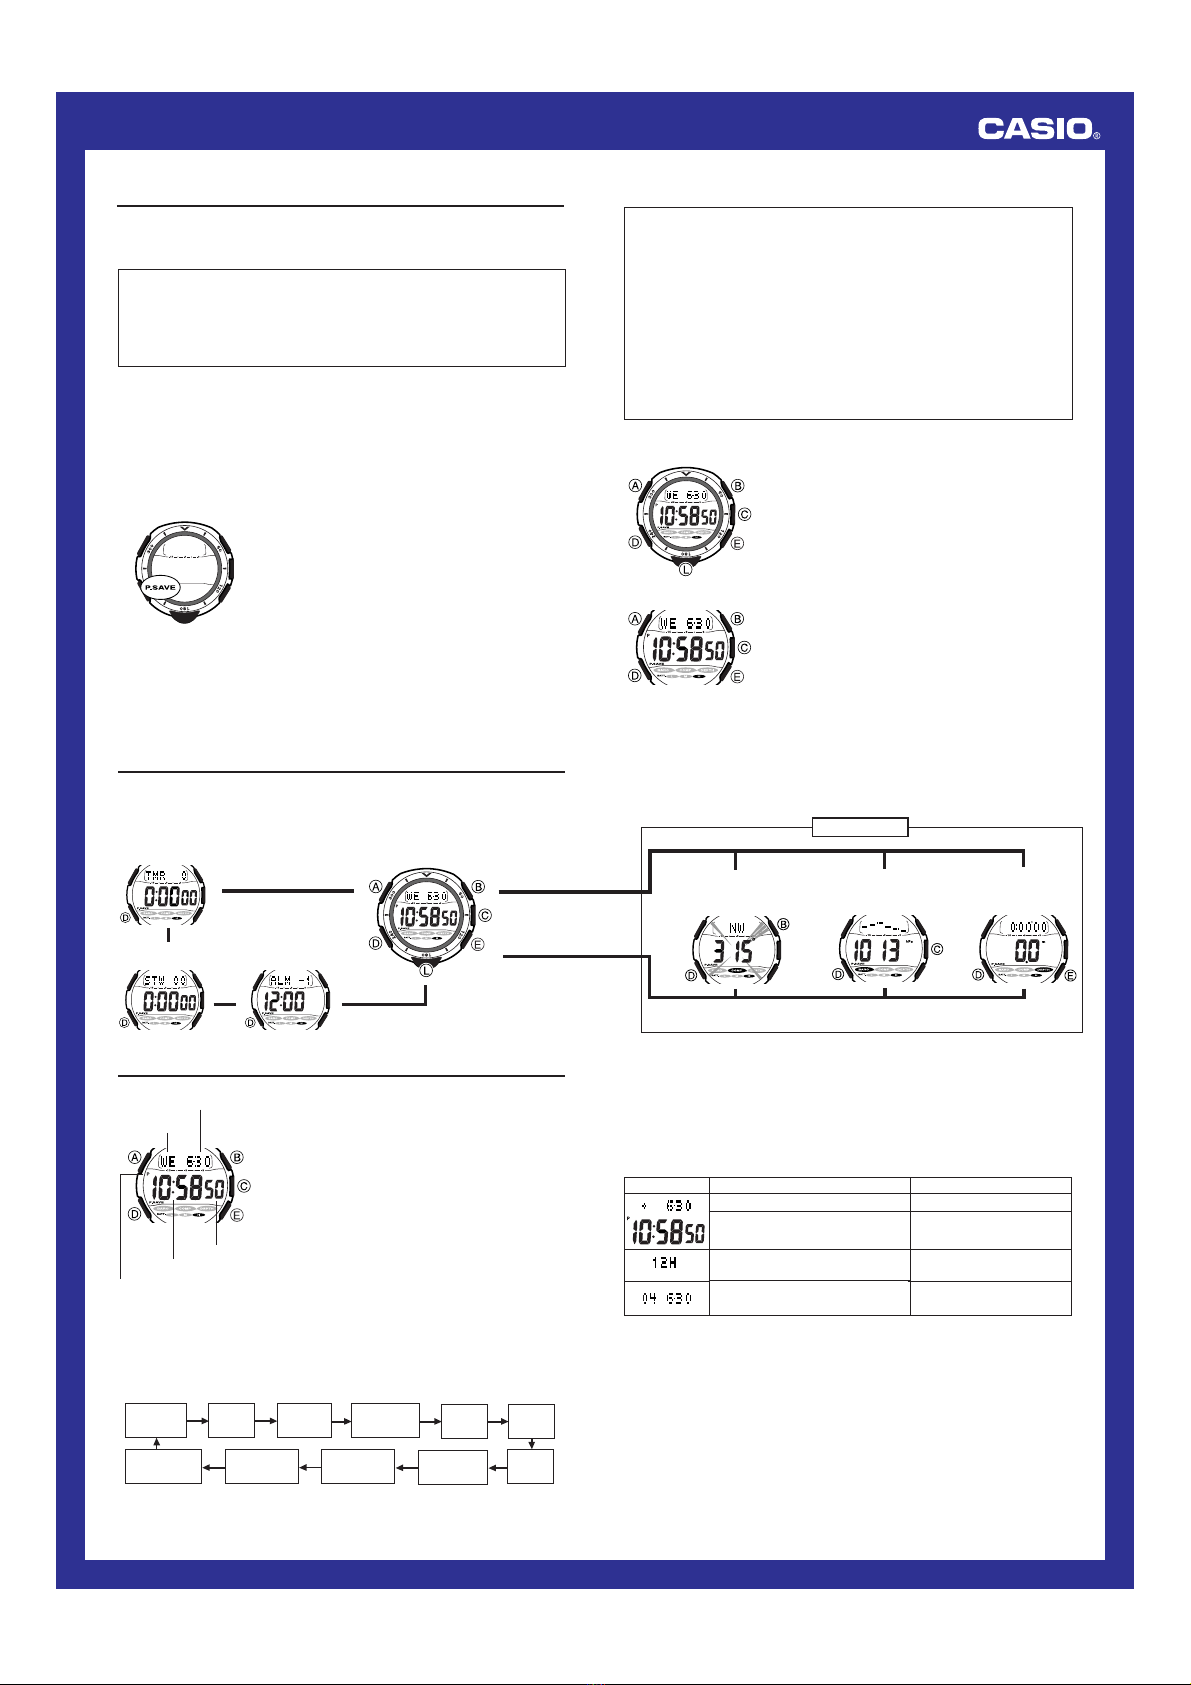
To turn Power Saving on and off
1. In the Timekeeping Mode, hold down Auntil
the seconds start to flash, which indicates the
setting screen.
2. Press Dseven times until the Power Saving
on/off screen appears.
3. Press Eto toggle Power Saving on (ON) and
off (OFF).
4. Press A to exit the setting screen.
•The Power Saving on indicator (P. SAVE) is on
the display in all modes while the Power Saving
is turned on.
l
l
l
l
l
l
l
l
l
l
l
l
l
l
l
l
l
l
Backlight Precautions
•The electro-luminescent panel that provides illumination loses power after
very long use.
•The illumination provided by the backlight may be hard to see when viewed
under direct sunlight.
•The backlight automatically turns off whenever an alarm sounds.
•The watch may emit an audible sound whenever the display is illuminated.
This is due to vibration of the EL panel used for illumination, and does not
indicate malfunction.
•Frequent use of the backlight runs down the battery.
•The backlight is disabled while the watch is taking a depth reading (every
three seconds).
Auto light switch precautions
•Wearing the watch on the inside of your wrist, movement of your arm, or
vibration of your arm can cause frequent activation of the auto light switch
and illumination of the display. To avoid running down the battery, turn off
the auto light switch whenever engaging in activities that might cause
frequent illumination of the display.
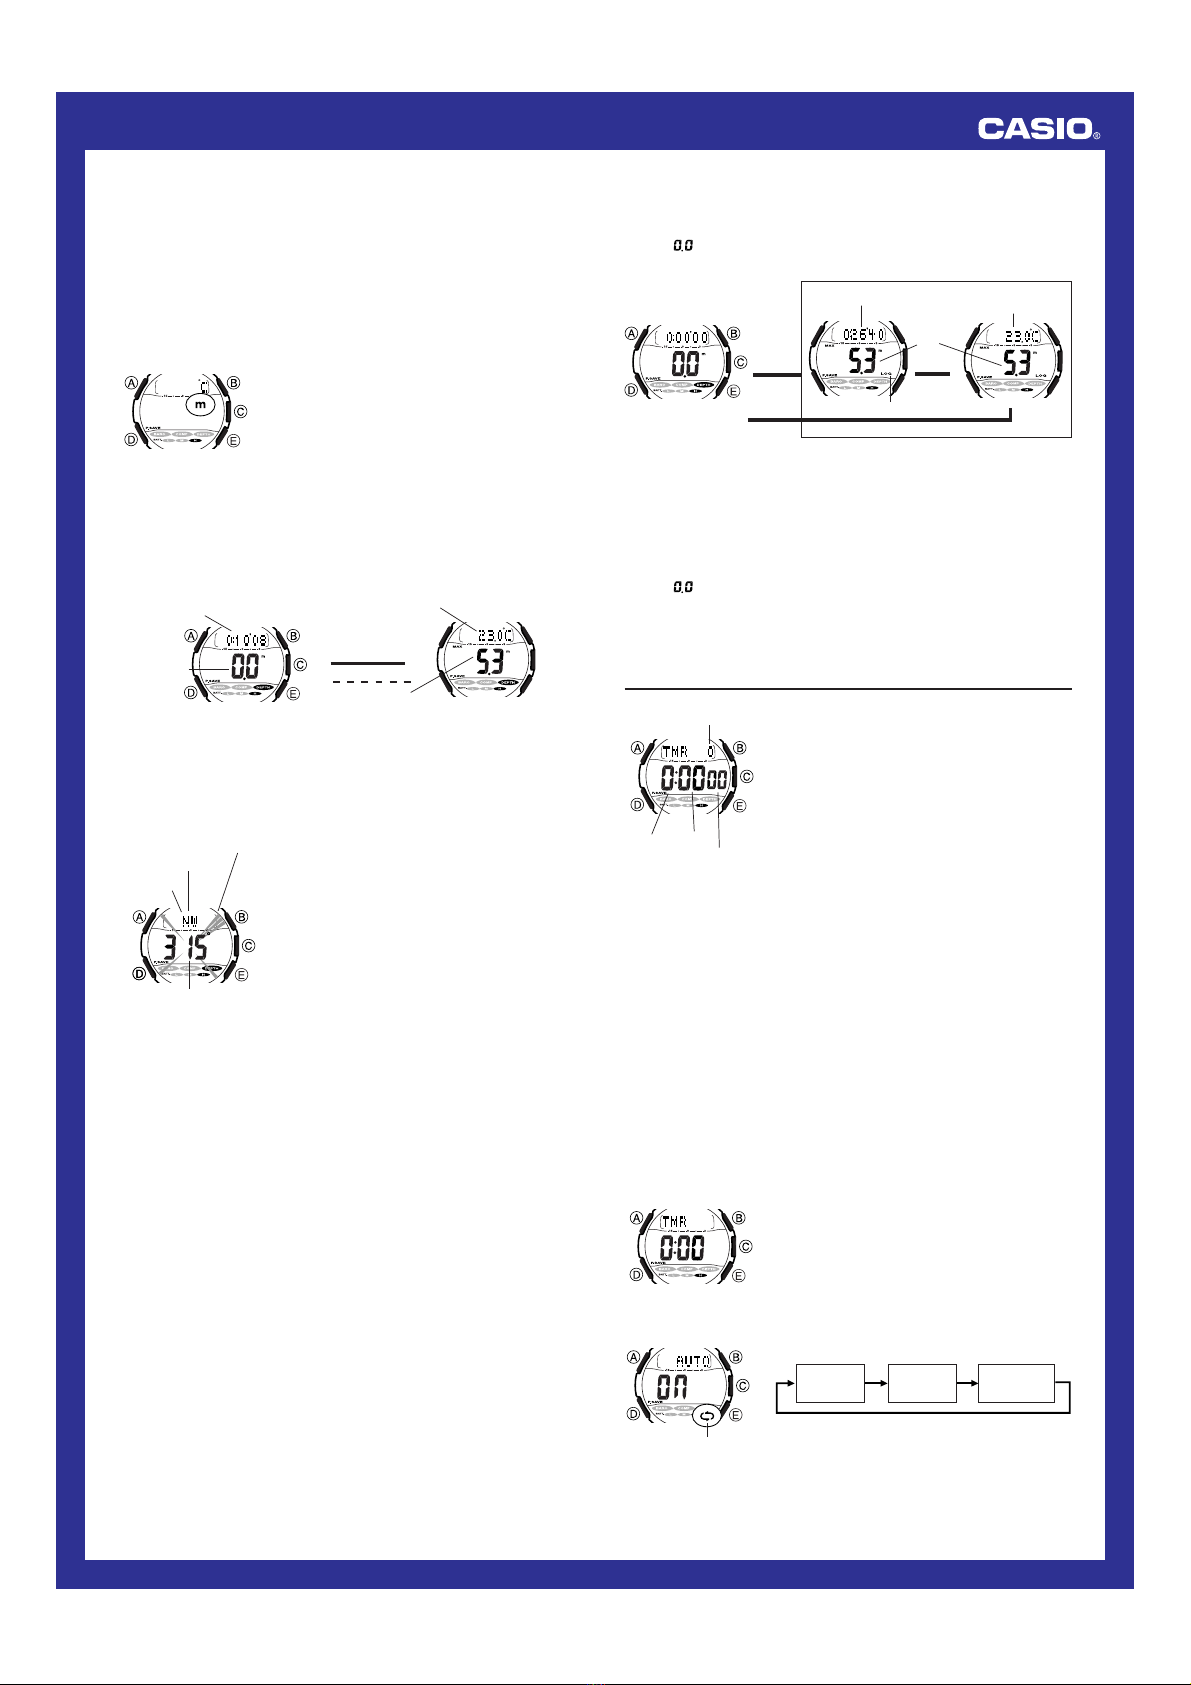
•The backlight may not light if the face of the
watch is more than 15 degrees above or below
parallel. Make sure that the back of your hand
is parallel to the ground.
•The backlight turns off after the preset display
illumination duration (see “To specify the
illumination duration” ), even if you keep the
watch pointed towards your face.
•Static electricity or magnetic force can interfere with proper operation of the
auto light switch. If the backlight does not light, try moving the watch back to
the starting position (parallel with the ground) and then tilt it back toward
you again. If this does not work, drop your arm all the way down so it hangs
at your side, and then bring it back up again.
•Under certain conditions, the backlight may not light until about one second
after you turn the face of the watch towards you. This does not necessarily
indicate malfunction of the backlight.
•You may notice a very faint clicking sound coming from the watch when it is
shaken back and forth. This sound is caused by mechanical operation of
the auto light switch, and does not indicate a problem with the watch.
More than 15 degrees
too high
Digital Compass Precautions
This watch features a built-in magnetic bearing sensor that detects terrestrial
magnetism. This means that north indicated by this watch is magnetic north,
which is somewhat different from true polar north. The magnetic north pole is
located in northern Canada, while the magnetic south pole is in southern
Australia. Note that the difference between magnetic north and true north as
measured with all magnetic compasses tends to be greater as one gets closer
to either of the magnetic poles.You should also remember that some maps
indicate true north (instead of magnetic north), and so you should make
allowances when using such maps with this watch.
Location
•Taking a direction reading when you are near a source of strong magnetism
can cause large errors in readings. Because of this, you should avoid taking
direction readings while in the vicinity of the following types of objects:
permanent magnets (magnetic necklaces, etc.), concentrations of metal
(metal doors, lockers, etc.), high tension wires, aerial wires, household
appliances (TVs, personal computers, washing machines, freezers, etc.)
•Accurate direction readings are impossible while in a train, boat, air plane,
etc.
•Accurate readings are also impossible indoors, especially inside ferro-
concrete structures. This is because the metal framework of such structures
picks up magnetism from appliances, etc.
Storage
•The precision of the bearing sensor may deteriorate if the watch becomes
magnetized. Because of this, you should be sure to store the watch away
from magnets or any other sources of strong magnetism, including:
permanent magnets (magnetic necklaces, etc.) and household appliances
(TVs, personal computers, washing machines, freezers, etc.)
•Whenever you suspect that the watch may have become magnetized,
perform one of the calibration procedures under “Calibrating the Bearing
Sensor”.
Calibrating the Bearing Sensor
Whenever you suspect that direction readings produced by the watch are
wrong, you should calibrate it.You can use either one of two calibration
procedures:
bidirectional calibration
or
northerly calibration
.
Use bidirectional calibration when you want to take readings within an area
exposed to magnetic force. This type of calibration should be used if the
watch becomes magnetized for any reason.
With northerly calibration, you “teach” the watch which way is north (which
you have to determine with another compass or some other means). You
could use this calibration procedure, for example, to set the watch to indicate
true north instead of magnetic north.
Important!
•If you want to perform both bidirectional and northerly calibration, be sure
to perform bidirectional calibration first, and then perform northerly
calibration. This is necessary because bidirectional calibration cancels any
previously set northerly calibration setting.
•The more correctly you perform bidirectional calibration, the better the
accuracy of the bearing sensor readouts.You should perform bidirectional
calibration whenever you change environments where you use the bearing
sensor, and whenever you feel that the bearing sensor is producing
incorrect readings.
Precautions about bidirectional calibration
•You can use any two opposing directions for bidirectional calibration. You
must, however, make sure that they are 180 degrees opposite each other.
Remember that if you perform the procedure incorrectly, you will get wrong
bearing sensor readings.
•Make sure that you do not move the watch while calibration of either
direction is in progress.
•You should perform bidirectional calibration in an environment that is the
same as that where you plan to be taking direction readings. If you plan to
take direction readings in an open field, for example, calibrate in an open
field.
l
l
l
l
l
l
l
l
l
l
l
l
l
l
l
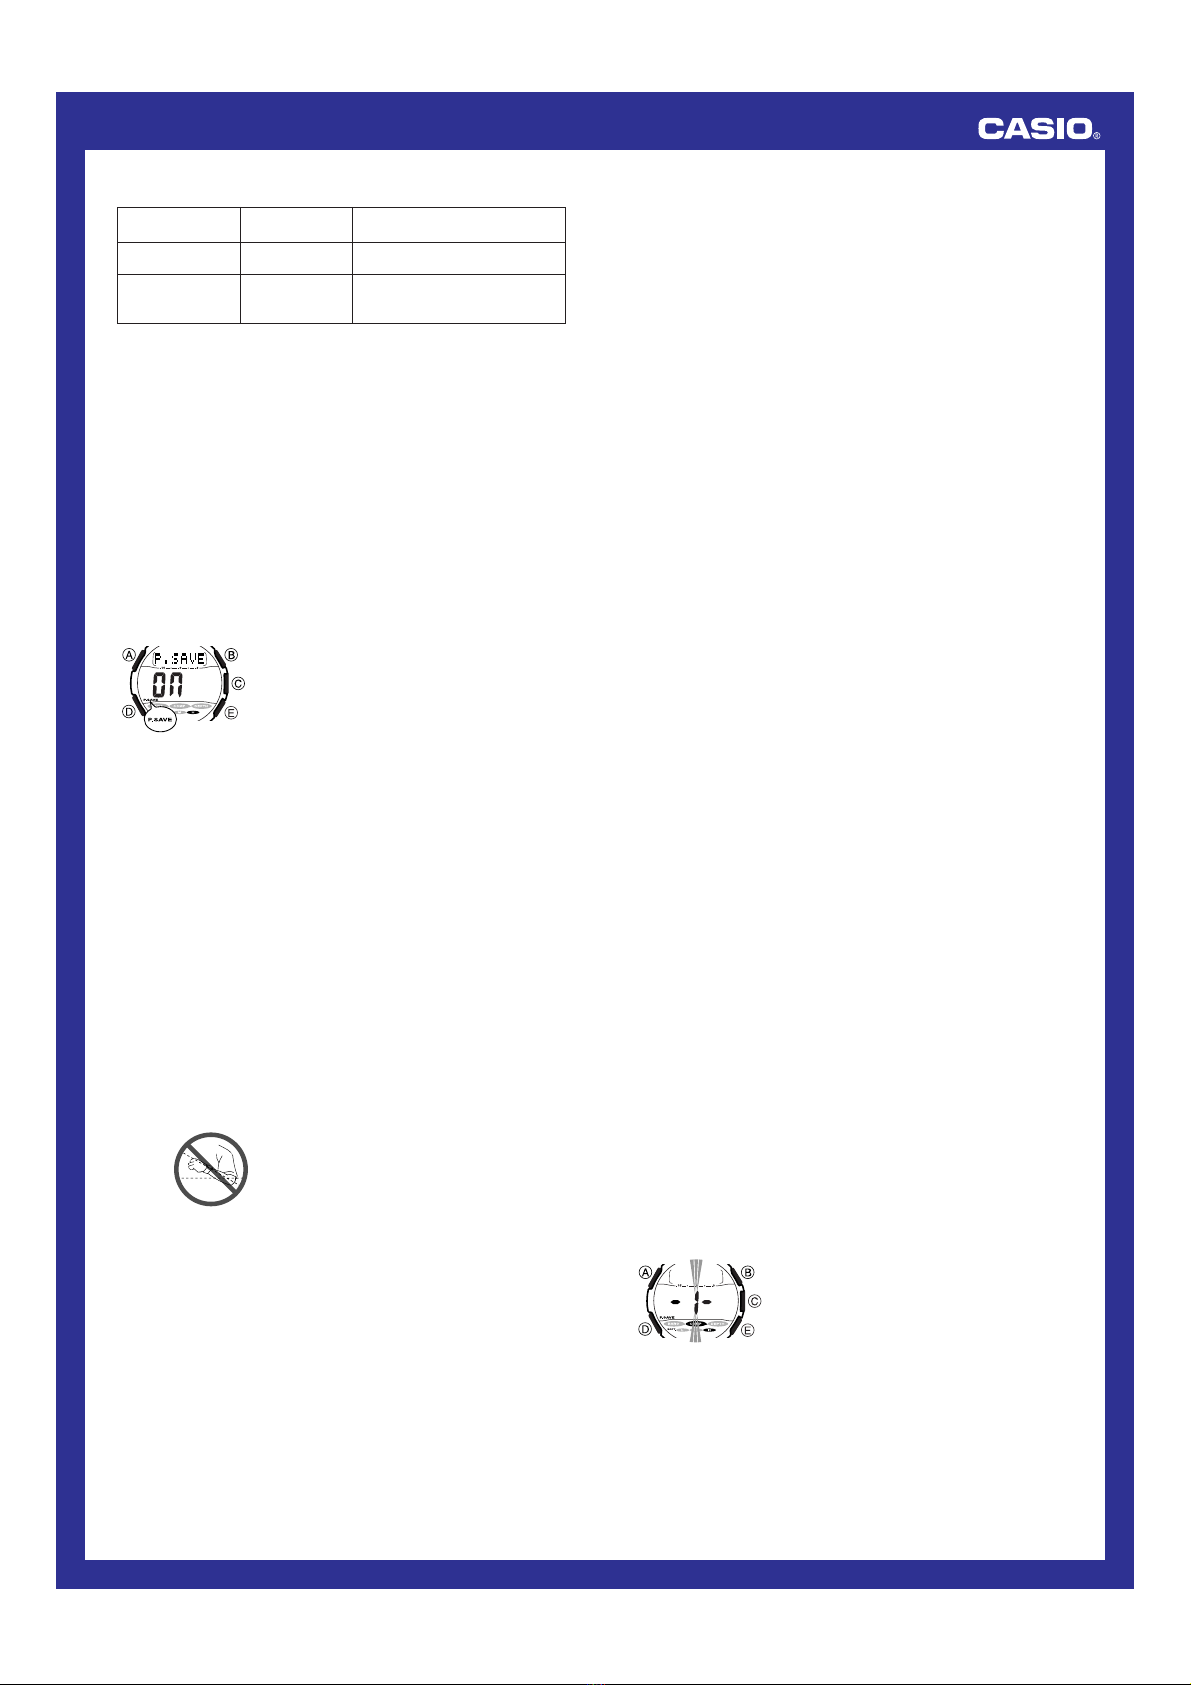
To perform bidirectional calibration
1. Enter the Digital Compass Mode.
2. Hold down Afor about one second until x1x
appears on the display, which indicates the
setting screen.
•At this time, the magnetic north pointer
flashes at the 12 o’clock position to indicate
that the watch is ready to calibrate the first
direction.
3. Place the watch on a level surface facing any direction you want, and
press Bto calibrate the first direction.
•xxx is shown on the display while calibration is being performed. OK
appears in the upper part of the display, x2x appears in the center part
of the display, and the magnetic north pointer flashes at the 6 o’clock
position when calibration of the first direction is complete. This means
that the watch is ready for calibration of the second direction.
4. Rotate the watch 180 degrees.
5. Press Bagain to calibrate the second direction.